Cart

    Sorry, we could not find any results for your search querry.

    Enabling Varnish for a WordPress website

    With our Web Hosting packages you have the option to use different caching options. To use Varnish on your WordPress website, a few simple steps are required. In this article we explain these steps.

    Do note that Varnish is only available on Pro and Max hosting plans. Varnish is not available on Core web hosting packages.

    Do you use a Managed WordPress package? The correct caching methods are automatically configured for you. In this case, you do not have to perform these steps.


    Activate Varnish

    Step 1

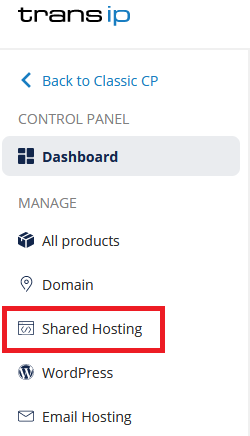
    Log in to the control panel and click 'Shared Hosting' in the menu. Next, select your domain below 'Products'.

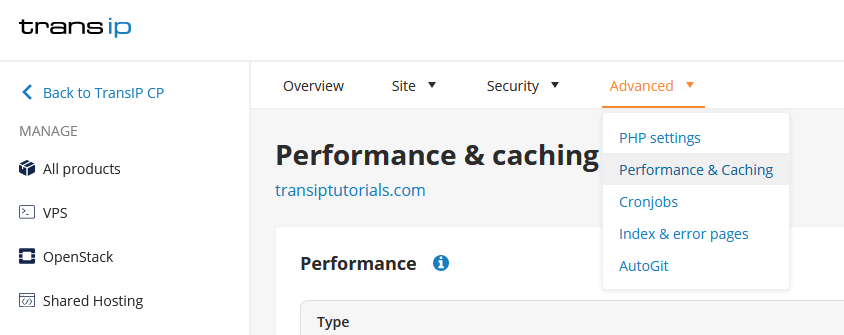
    Next, click 'Advanced' at the top, followed by 'Performance & caching'.

    performance & caching

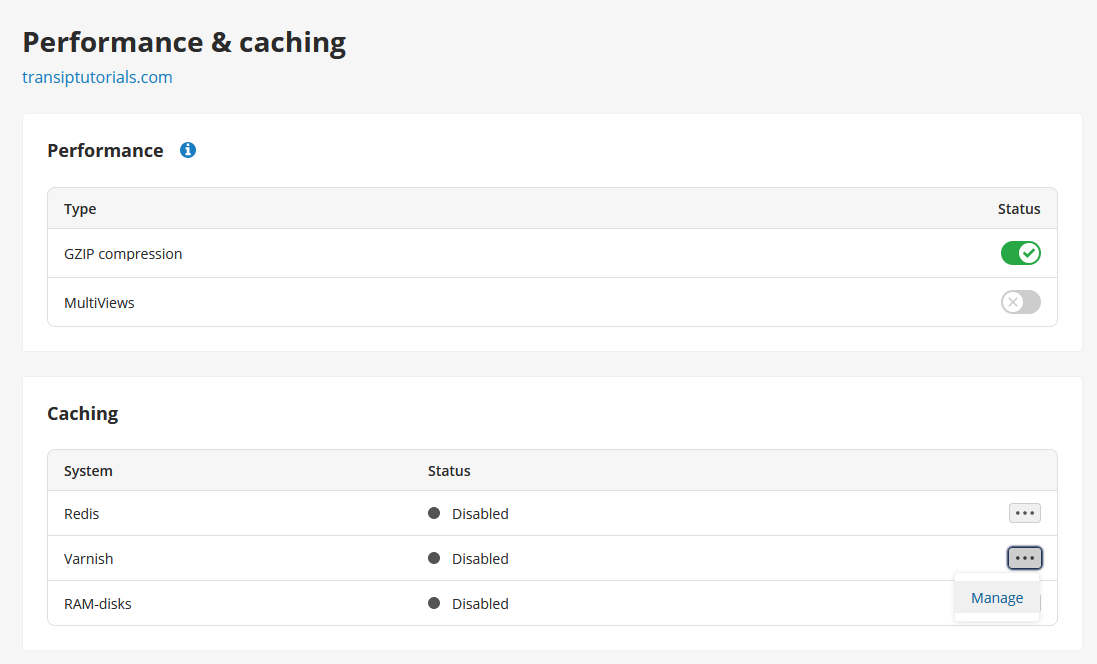
    In the 'Performance & caching' overview, click the three dots next to 'Varnish', followed by 'Manage'.

    click the three dots next to varnish, followed by manage.


    Step 2

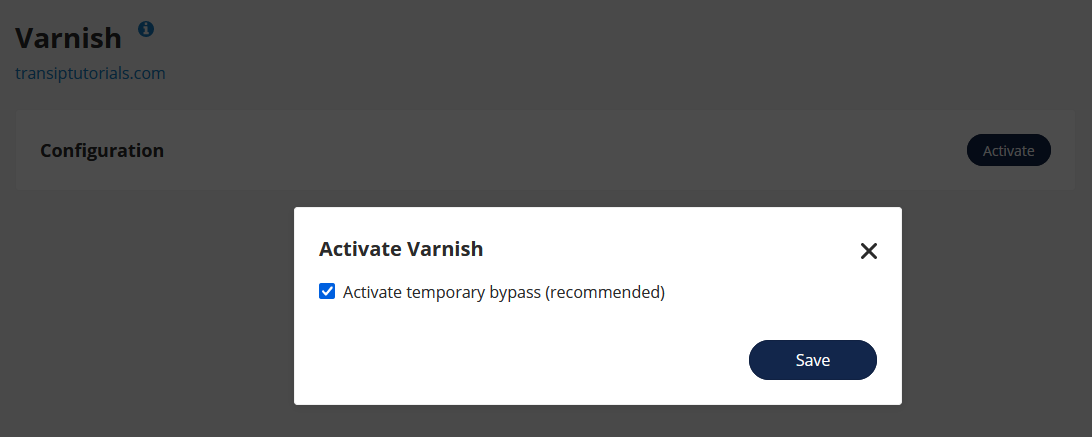
    To activate Varnish, click 'Activate'. A pop-up will appear asking to activate the temporary cache bypass. By enabling the bypass, the caching is not yet active which allows you to configure varnish first. Click 'Save'.

    activate Varnish

    Make sure to disable the bypass after configuration. Varnish is only active when the bypass is disabled.

    As soon as Varnish is activated you will find the configuration settings in the overview.

    the varnish options


    Install a varnish caching plugin

    Log in to your WordPress dashboard and install a varnish caching plugin of your choice. We use Purge Varnish in this example. After installing, don't forget to activate the plugin.

    Once your plugin and Varnish are up and running you can connect the two together by entering the appropriate information from your control panel into the plugin's settings.

    enter the correct settings from your control panel

    The settings will look slightly different depending on the plugin, but come down to entering the Varnish host, Admin port, and the Secret key.

    In the image above you can see what this looks like in Purge Varnish:

    Varnish Control Terminal: Enter <Varnish host>:<Admin port> from your control panel. In our example, this is transi.httpcache.transip.me:10007

    Varnish Control Key: This is the secret key which can be found in the control panel below Secret.

    After entering these two fields, click 'Save configurations'. You will immediately see if Varnish is configured correctly next to 'Status:'.

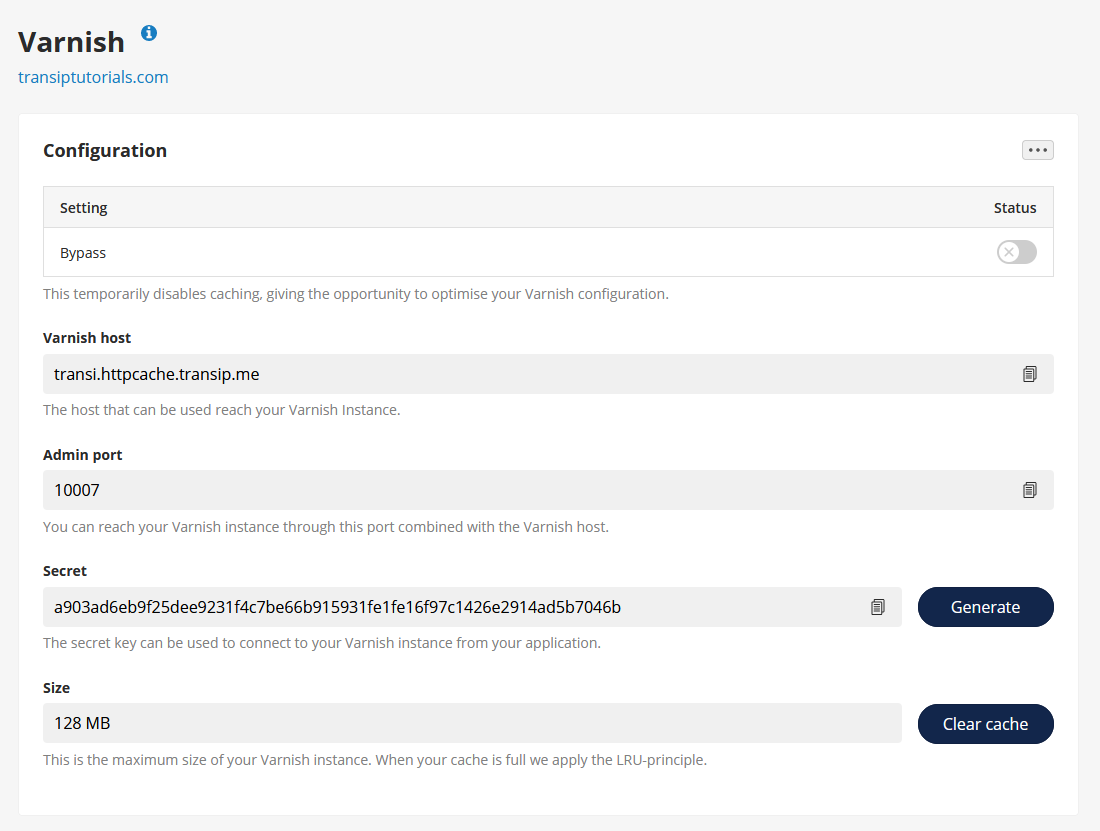
    Make sure to check that you have disabled the cache bypass in your control panel.


    In this article we explained how to enable Varnish on a WordPress website.
     

    Should you have any questions left regarding this article, do not hesitate to contact our support department. You can reach them via the ‘Contact us’ button at the bottom of this page.

    Need help?

    Receive personal support from our supporters

    Contact us