


Securing communication and data is increasingly important. After all, you do not want the communication between visitors and your website(s) to be viewed by malicious parties. Therefore, it is extremely important to encrypt sensitive information such as customer data and payment details via 'https' traffic. To do this, you will need to install an SSL certificate on your VPS.
In this article, we cover the following parts:
- Installing a Let's Encrypt SSL certificate in Nginx (Centos Stream, AlmaLinux, Rocky Linux)
- Installing a Let's Encrypt SSL certificate in Nginx (Ubuntu / Debian)
- Downloading the Sectigo SSL certificate
- Installing the Sectigo SSL certificate in Nginx
- Perform the steps in this article as root-user, or user with sudo rights, unless stated otherwise.
Requirements:
- A domain name of which at least the A-record points to your VPS, replace 'Example.com' in the examples with your own domain name.
- Nginx installed using the following tutorial: CentOS Stream, AlmaLinux & Rocky Linux / Ubuntu & Debian
Installing a Let's Encrypt SSL certificate in Nginx (CentOS Stream, AlmaLinux, Rocky Linux)
Step 1
Connect to your VPS via SSH or the VPS console.
Step 2
Install the EPEL (Extra packages for Enterprise Linux) repository:
dnf -y install epel-release
Step 3
Now install 'Let's Encrypt' with the following command:
dnf -y install certbot python3-certbot-nginx
Step 4
Generate a Let's Encrypt certificate with the command:
certbot --nginx -d example.com -d www.example.com
This command generates a Let's Encrypt certificate. Where -d is used to specify the domain names for which you want to generate the certificate.
If this is the first time you run certbot, you will be asked for an email address and to agree to the Terms of Service. Afterwards, Certbot checks if your domain points to the server from which the certificate is requested.
If successful, certbot asks how you want the HTTPS settings:
Please choose whether or not to redirect HTTP traffic to HTTPS, removing HTTP access.
- - - - - - - - - - - - - - - - - - - - - - - - - - - - - - - - - - - - - - - -
1: No redirect - Make no further changes to the webserver configuration.
2: Redirect - Make all requests redirect to secure HTTPS access. Choose this for
new sites, or if you're confident your site works on HTTPS. You can undo this
change by editing your web server's configuration.
- - - - - - - - - - - - - - - - - - - - - - - - - - - - - - - - - - - - - - - -
Select the appropriate number [1-2] then [enter] (press 'c' to cancel):
No redirect: This allows your website to be reachable via both http:// and https://.
Redirect: This adds a permanent redirect from http:// to https://, so all visitors will end up at https://example.com (we recommend this option as it secures your website better).
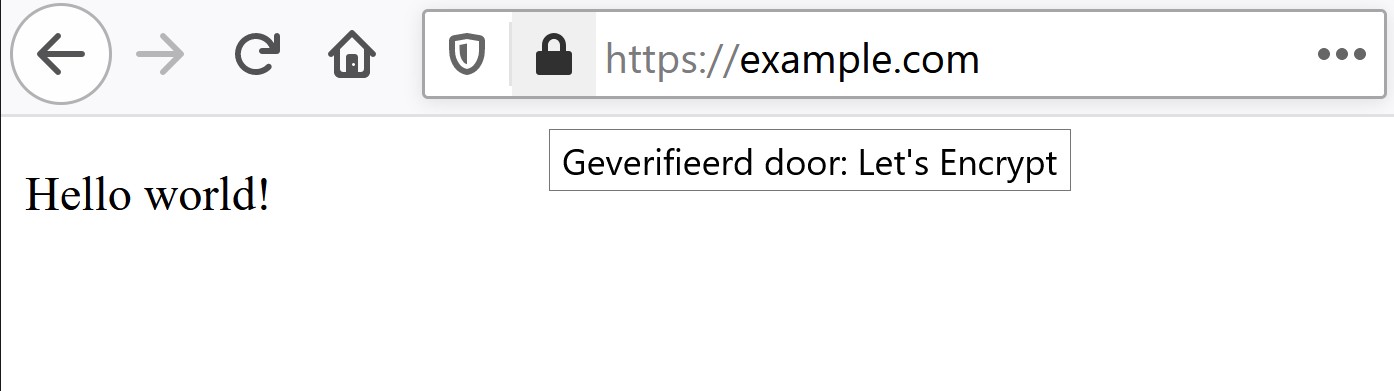
Once you have made this choice and clicked on Enter, you will receive a notification that the SSL certificate has been successfully installed. When you now go to https://example.com, you will see your website fully secured.
Step 5
A Let's Encrypt SSL certificate is valid for 3 months by default, and you will need to renew it every 3 months. However, you can automate this with a cron job. Open the 'crontab' of your user via:
crontab -eThen add the following to the crontab:
0 0 1 * * certbot renew >> /var/log/letsencrypt-renew.log
Save these changes and close the file (Esc > : > WQ > Enter). From this point on, the Let's Encrypt certificates are renewed every month (a certificate can only be renewed when it expires within 30 days, but the cron job will ensure that this happens on time).
Installing a Let's Encrypt SSL certificate in Nginx (Ubuntu, Debian)
Step 1
Before you can install Let's Encrypt, it's important that we have the correct repository (only for Ubuntu):
add-apt-repository ppa:certbot/certbot
Step 2
Install Certbot with the Nginx plugin:
apt-get -y install certbot python3-certbot-nginx
Step 3
Generate a Let's Encrypt certificate with the command:
certbot --nginx -d example.com -d www.example.comThis command generates a Let's Encrypt certificate. Where -d is used to specify the domain names for which we want the certificate to be valid.
If this is the first time you run certbot, you will be asked for an email address and to agree to the Terms of Service. Afterwards, Certbot checks if your domain points to the server from which the certificate is requested.
If successful, certbot asks how you want the HTTPS settings:
Please choose whether or not to redirect HTTP traffic to HTTPS, removing HTTP access.
- - - - - - - - - - - - - - - - - - - - - - - - - - - - - - - - - - - - - - - -
1: No redirect - Make no further changes to the webserver configuration.
2: Redirect - Make all requests redirect to secure HTTPS access. Choose this for
new sites, or if you're confident your site works on HTTPS. You can undo this
change by editing your web server's configuration.
- - - - - - - - - - - - - - - - - - - - - - - - - - - - - - - - - - - - - - - -
Select the appropriate number [1-2] then [enter] (press 'c' to cancel):
No redirect: This allows your website to be reachable via both http:// and https://.
Redirect: This adds a permanent redirect from http:// to https://, so all visitors will end up at https://example.com (we recommend this option as it secures your website better).
Once you have made this choice and clicked on 'Enter' you will receive a notification that the SSL certificate has been successfully installed. When you now go to https://example.com, you will see your website fully secured.
Step 4
A Let's Encrypt SSL certificate is valid for three months by default, and you will need to renew it every three months. The installed Certbot package ensures that the SSL certificate is automatically renewed 30 days before it needs to be renewed.
You can see the current status of the timer by:
systemctl status certbot.timer
Downloading the Sectigo SSL certificate
If you already have your own SSL certificate on your VPS, you can skip straight to installing the SSL certificate. The following steps are performed in the TransIP control panel:
Step 1
Go to 'Domain & Hosting' in the control panel and click on the domain name (do not select) which has the SSL certificate.
Step 2
Scroll to the right to the section 'SSL Certificates' and click on 'Manage' behind the name of the SSL certificate.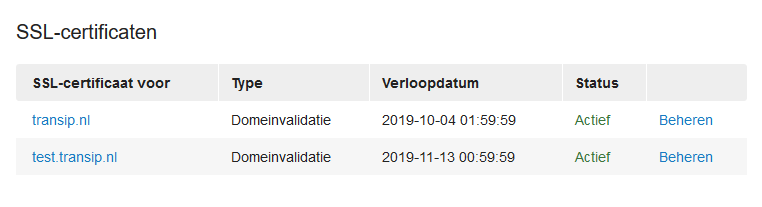
Step 3
Click on 'Download' in the overview.

Step 4
Enter the passphrase of your SSL certificate and click on 'Decrypt'.
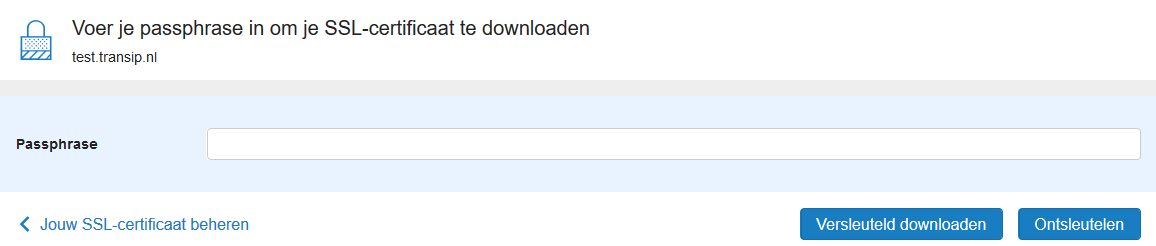
If you choose 'Encrypt download', then the private key is still encrypted. You can decrypt it yourself using 'OpenSSL'. You might find here a guide on decrypting a private key via OpenSSL.
Step 5
Open the zip file you just downloaded. Here you will see four files:
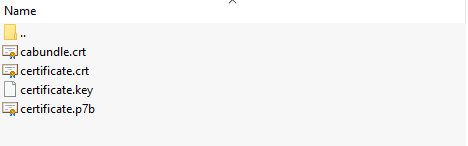
- cabundle.crt (the root and intermediate certificates)
- certificate.crt (the SSL certificate itself)
- certificate.key (the private key of the certificate)
- certificate.p7b (the SSL certificate in PKCS#7 format, you will most likely not need this)
Step 6
The first three files from step 5 are required for the installation of the SSL certificate. Extract these files into a folder of your choice (as long as you remember where). Most operating systems can already unpack a .zip file by default, but you can also use a separate program such as 7zip, Winrar, or Winzip.
Installing the Sectigo SSL certificate in Nginx
First, it is important that you upload the files of the SSL certificate (see previous paragraph) to your VPS. You can use SFTP with FileZilla for this: most modern operating systems with SSH enabled support this out of the box. Alternatively, you could create the .crt files manually on your sever, open the original files on your computer/laptop and simply copy over the contents.
Step 1
Create a folder for the SSL certificates in a location of your choice, for example:
mkdir -p /etc/pki/nginx/example.comThe Root-user automatically becomes the owner of this directory, so you cannot place the SSL certificates here as a random user.
Step 2
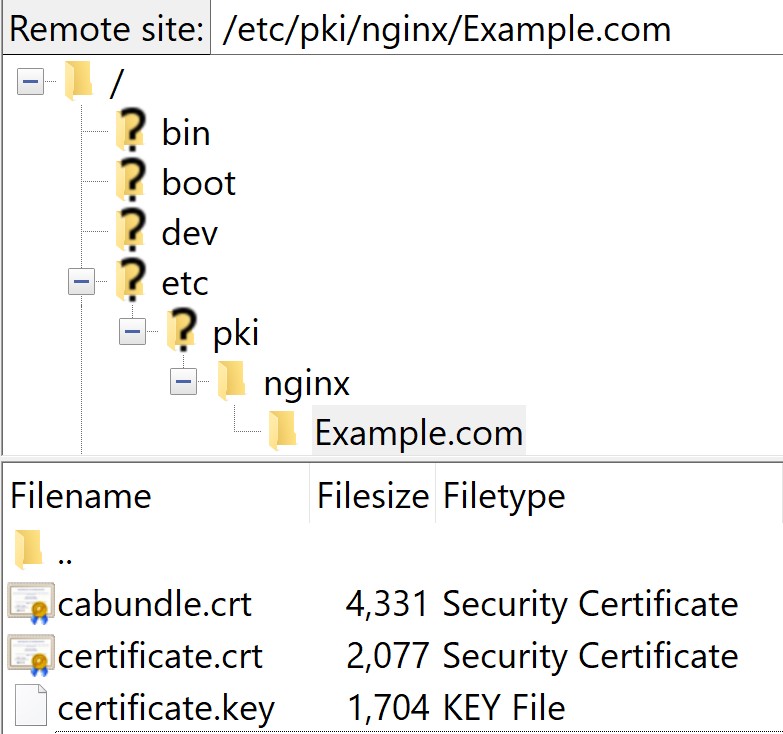
Connect to the FTP server and go to the newly created directory:
/etc/pki/nginx/example.com
Upload the three relevant files to the directory for the SSL certificates that you created in the previous step. These are certificate.key, certificate.crt and cabundle.crt.
Close your FTP program and return to your VPS.
Step 3
Did you use a different user to upload the certificate files then the one you're performing this step with? Then first take ownership of the /etc/pki/nginx/example.com folder with the current user:
sudo chown <username>:<username>Merge the cabundle.crt and the certificate.crt file:
cd /etc/pki/nginx/example.com
(cat certificate.crt; echo ""; cat cabundle.crt) >> ssl-bundle.crt
Step 4
To make the SSL certificate work correctly, adjust the Nginx server block.
Open the .conf file:
nano /etc/nginx/conf.d/example.com.confAdjust the file to the example:
server {

root /var/www/example.com/html;
index index.php index.html index.htm index.nginx-debian.html;

server_name example.com www.example.com;

location ~ \.php$ {
try_files $uri =404;
fastcgi_split_path_info ^(.+\.php)(/.+)$;
fastcgi_pass unix:/run/php-fpm/www.sock;
fastcgi_index index.php;
fastcgi_param SCRIPT_FILENAME $document_root$fastcgi_script_name;
include fastcgi_params;
}

    listen [::]:443 ssl ipv6only=on;
    listen 443 ssl;
    ssl_certificate  /etc/pki/nginx/example.com/ssl-bundle.crt; #$
    ssl_certificate_key /etc/pki/nginx/example.com/certificate.key;$
    ssl_prefer_server_ciphers on;

}
## OCSP Stapling
   resolver 127.0.0.1;
   ssl_stapling on;
   ssl_ssl_stapling_verify on;
   ssl_trusted_certificate /etc/pki/nginx/example.com/ssl-bundle.crt;

server {
    if ($host = example.com) {
        return 301 https://$host$request_uri;
    }


listen 80;
listen [::]:80;

server_name example.com www.example.com;
    return 404;


}
Save your change and close nano (ctrl + x > y > enter).
Step 5
Finally, restart Nginx:
systemctl restart nginxYou can check the status with one of the following commands:
systemctl status nginx
nginx -t
Step 6
An SSL certificate is valid for up to three months, you will receive a reminder by email before the certificate expires. When you have ordered and received a new certificate, go through steps 2, 3 & 5 in this paragraph again to use your new certificate.
This concludes our guide on installing an SSL certificate in Nginx.
Should you have any questions based on this article, do not hesitate to contact our support department. You can reach them via the 'Contact us' button at the bottom of this page.