


To secure your VPS, you can use the VPS Firewall in the control panel for free.
The most used ports are automatically opened based on the operating system of your VPS. You are of course free to close these default ports if you do not use them.
In this article, we explain in more detail how the VPS Firewall works, and which ports are automatically opened per operating system.
- The VPS Firewall uses Iptables on the underlying hypervisor which hosts your VPS.
- A maximum of 50 rules can be added.
- Rules may overlap. If you create a general rule that affects all TCP ports you can still create an additional rule for a specific port.
- The firewall blocks all traffic as long as no rules are configured (no rules = deny all). If at least one rule exists, all other ports are blocked.
- When cloning a VPS, the cloned VPS automatically takes over all VPS Firewall settings from the original VPS.
- When restoring a back-up, or snapshot of your VPS, your VPS Firewall settings as they are remain intact. The settings at the time of the back-up or snapshot was made, remain intact.
- When restoring a snapshot on another VPS, the current configuration of that other VPS remains intact.
- TCP / UDP traffic is blocked, ICMP is allowed.
- When transferring a VPS to another TransIP account (handover) the VPS Firewall settings are automatically transferred.
Enabling the VPS Firewall
The VPS Firewall is disabled by default, but from the control panel, you can easily enable it for one VPS and / or all your future VPSs (i.e. new VPSs and reinstallations of existing VPSs).
Step 1
Log in to your control panel and navigate to the relevant VPS.
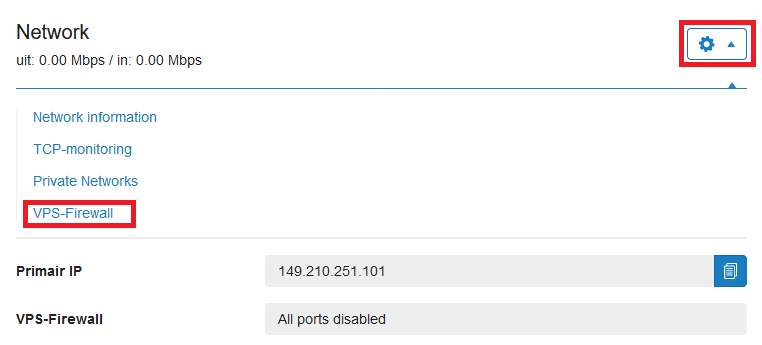
Step 2
Click the cogwheel behind 'Network' (directly under the VPS console) and click 'VPS Firewall'.
Step 3
Enable the firewall by setting the switch to 'On' behind 'Enable VPS Firewall for this VPS'.

The most commonly used ports are then automatically opened (within a minute) and the status will say 'On'.

You can also enable the VPS Firewall for all future VPSs here, by enabling the switch behind 'Enable VPS Firewall for all future VPSs'. The most used ports are therefore automatically opened for your future and reinstalled VPSs.
Opening ports
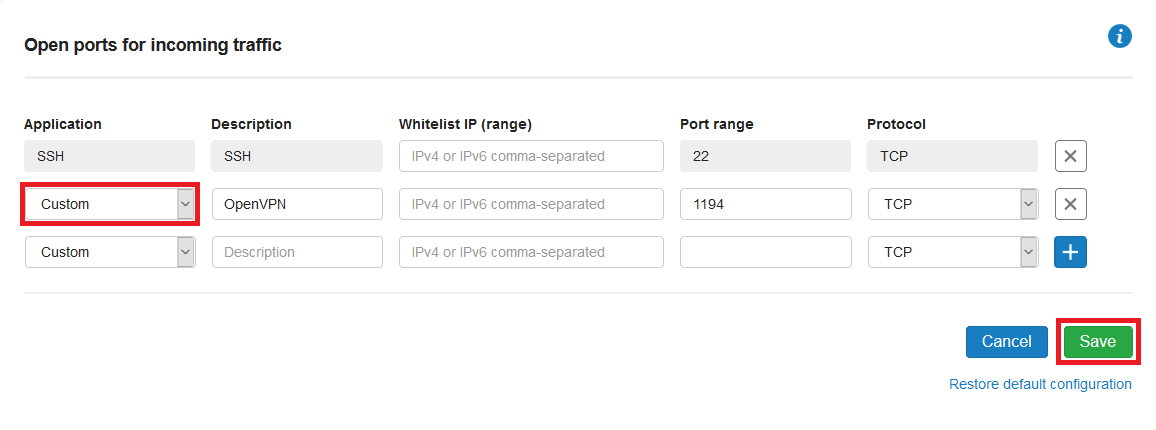
You have the freedom to open or close ports yourself and can create a maximum of 50 firewall rules per VPS.
You have two options for opening ports: use a pre-configured rule or create a custom rule.
- Do you want to use a pre-configured rule? Then click the 'Custom' drop-down menu and select the desired rule.
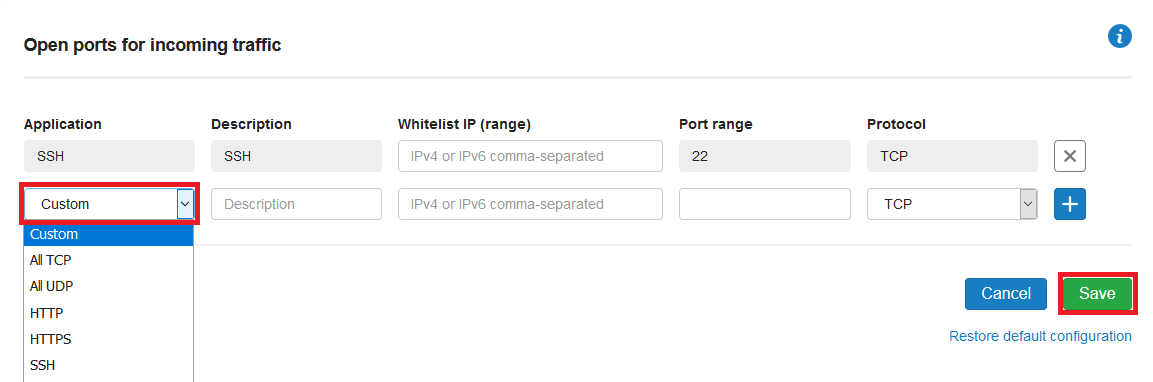
- Do you want to create your own firewall rule? Under 'Description', enter the name / description, under 'Whitelist IP (range)' optionally the IP's for which you want the rule to apply, under 'Port range', the port(s) you want to open and under 'Protocol', whether you want to make the port accessible via TCP, UDP, or TCP & UDP.
Please note: the custom rules also list the DirectAdmin, Plesk and cPanel default ports. This option only enables the ports required by these control panels to show the webinterface. It does not include the mail, http(s), etc. ports which should be enabled seperately.
Closing ports
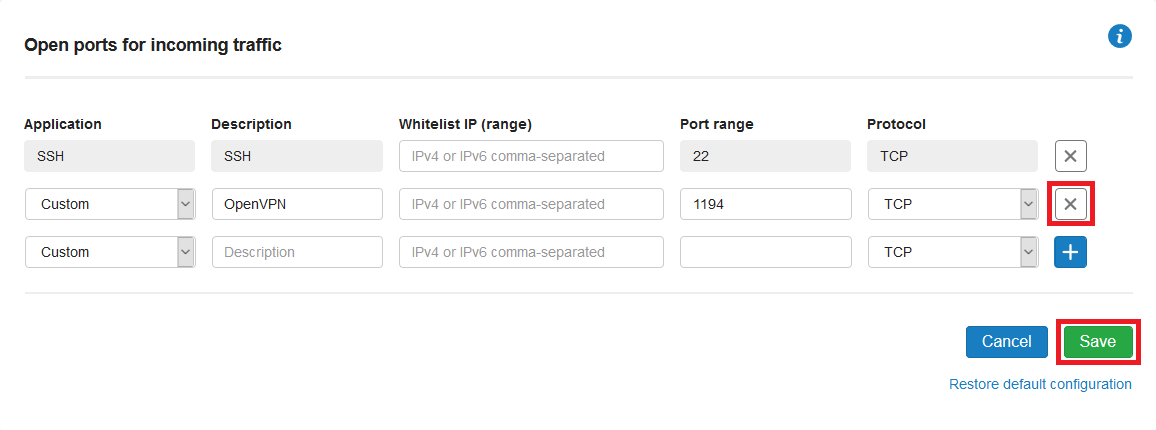
You can close ports easily by clicking the cross behind a rule, followed by 'Save'.
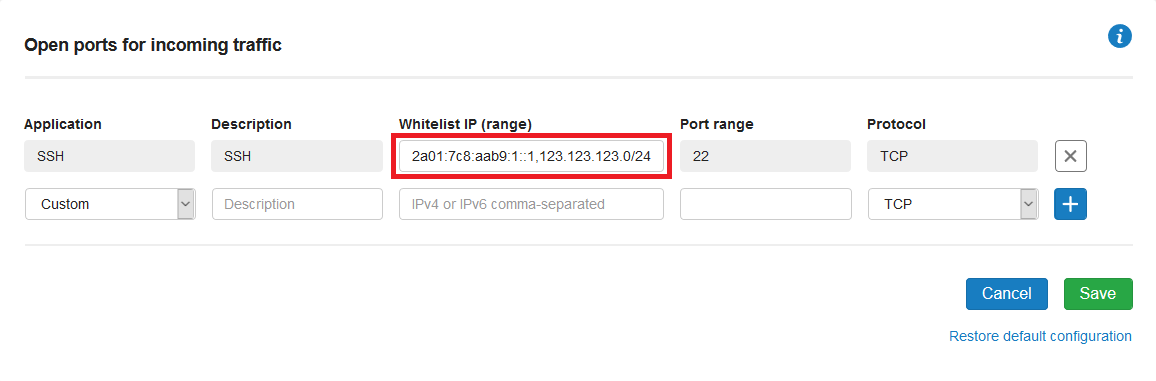
IP whitelisting
You can use IP whitelisting with the VPS firewall. This allows you to open a port(range) only for specific IP addresses.
IP addresses are whitelisted by adding the desired IP address and / or ranges under 'Whitelist IP (range)' at the desired firewall rule. In a single rule you can whitelist a maximum combination of 20 IPv4 and/or IPv6 addresses by seperating them using commas (e.g. 123.123.123.9, 123.123.123.234.0/24)
Default ports per OS / control panel
After enabling the VPS Firewall, the most used ports are automatically opened based on your operating system.
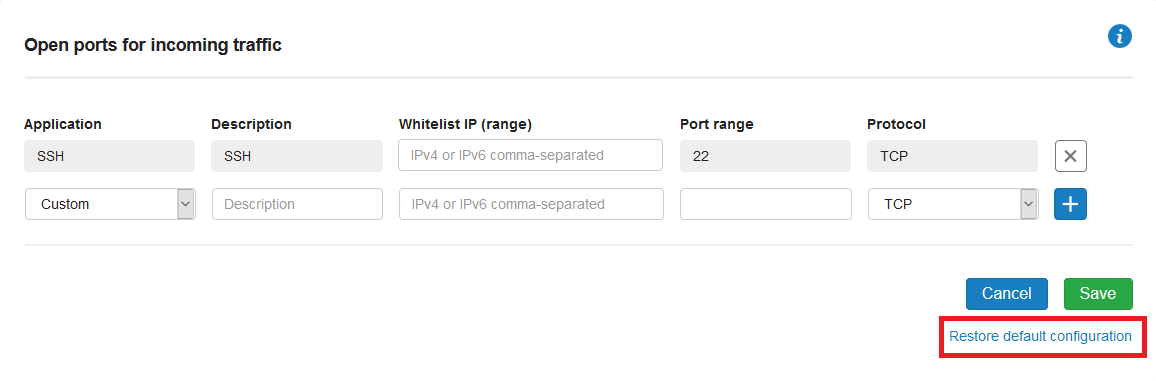
At any time you can restore the default configuration for your OS by clicking 'Restore default configuration'.
In the overview below, you will find an overview of the ports which are automatically opened when the VPS Firewall is enabled per OS / control panel. Unless otherwise stated, these are TCP ports in all cases.