In OpenStack, you can create virtual servers called OpenStack 'instances'. An instance is essentially a virtual server where you can install an operating system, such as Windows or Ubuntu.
It's very easy to adjust the 'resources' of the instance by modifying the instance's 'flavor'. The flavor you choose determines the amount of memory (RAM), processor cores (CPU), and disk size the server will have. Note that it's not possible to downgrade the disk of an instance.
In this tutorial, we'll show you how to 'up' or 'down' grade an OpenStack instance by adjusting the instance's 'flavor'.
Step 1
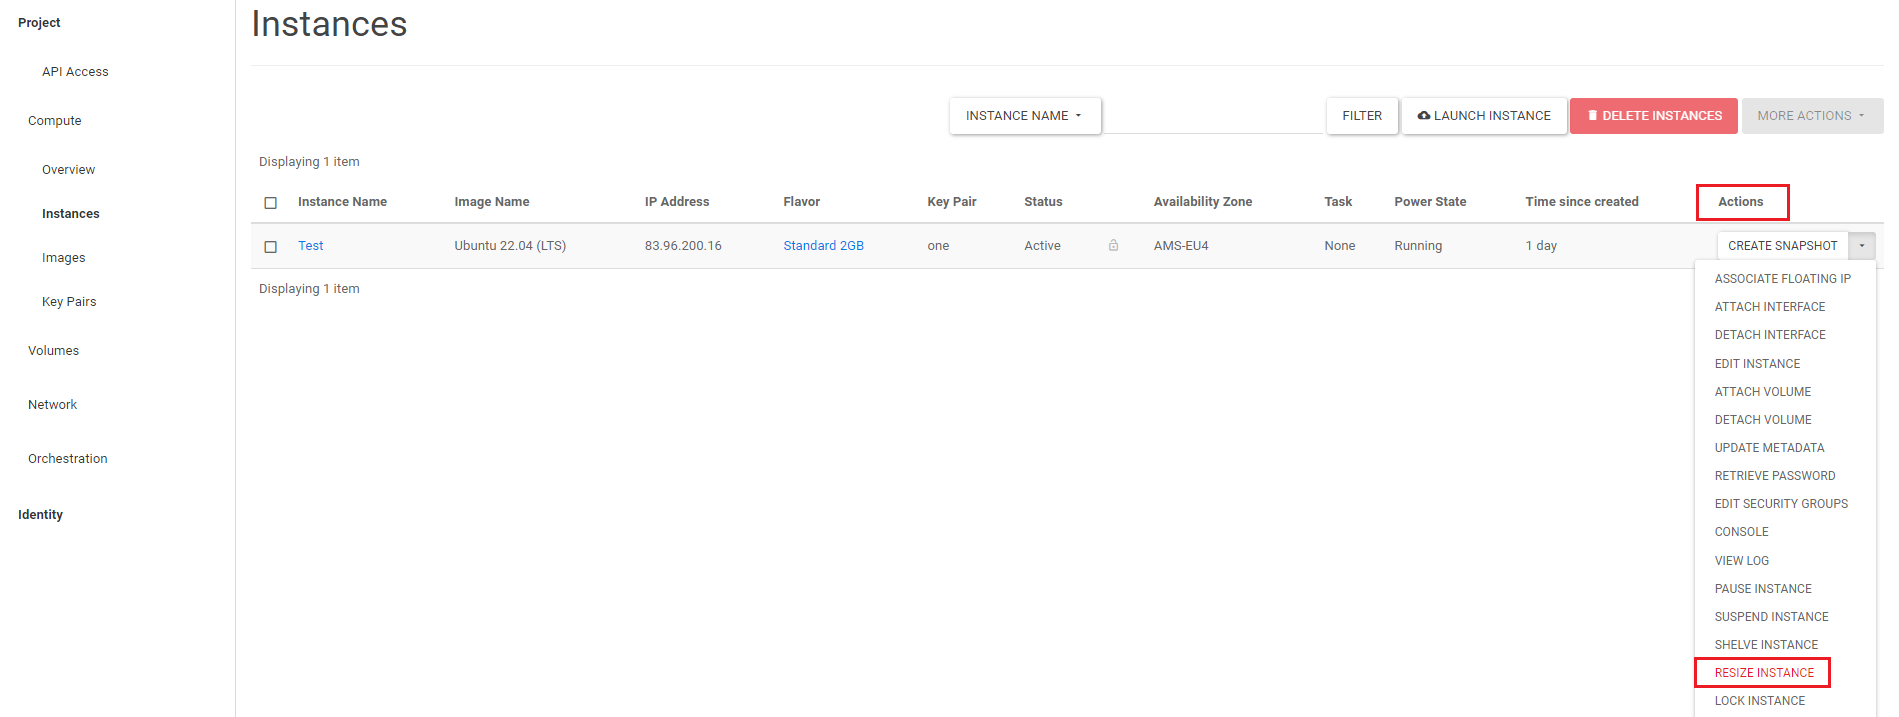
Log in to the OpenStack environment. Click the down arrow to the right of the instance under 'Actions', then click 'Resize Instance' in the drop-down menu.

Step 2
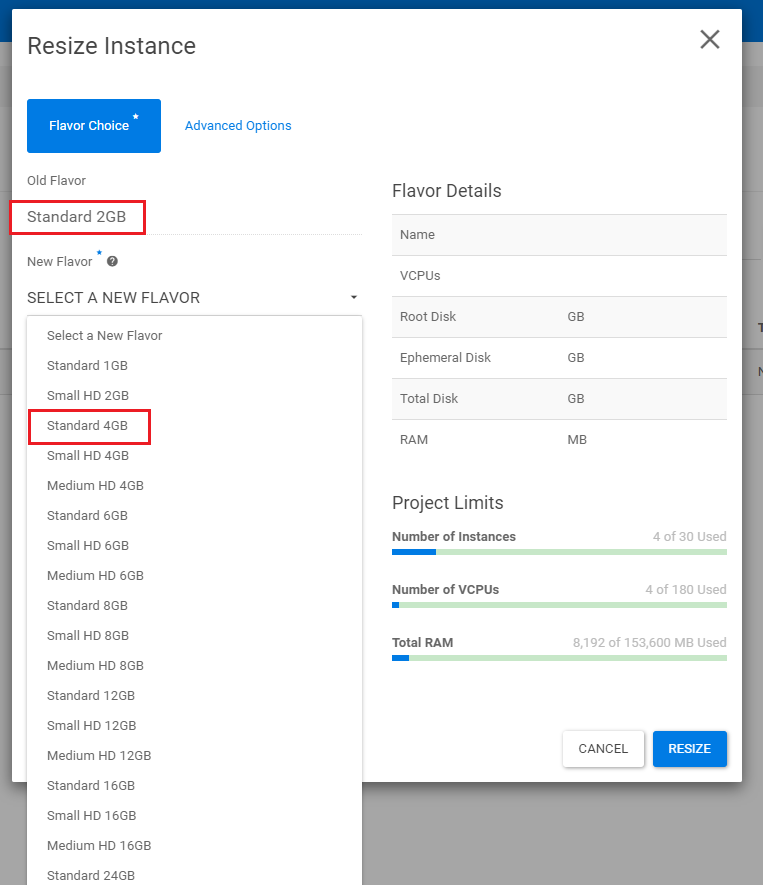
Click the down arrow to the right of 'Select A New Flavor'. In the drop-down menu, click the flavor of your choice to select your new 'Flavor'. In our example, we choose Standard 4GB.
Under 'Old Flavor', you'll see the current flavor. You can review the price overview to find the most suitable Flavor for your instance usage.
- If you choose a flavor that increases the disk size, you won't be able to revert to a flavor with a smaller disk. In our article 'Why can't I reduce the size of my OpenStack disk?', we delve deeper into this topic.
- If you expect to switch between smaller and larger Flavors frequently, we recommend using a flavor other than 'Standard'. This keeps the disk size unchanged when you 'resize' the Instance. For an overview of different flavors, see our price overview.

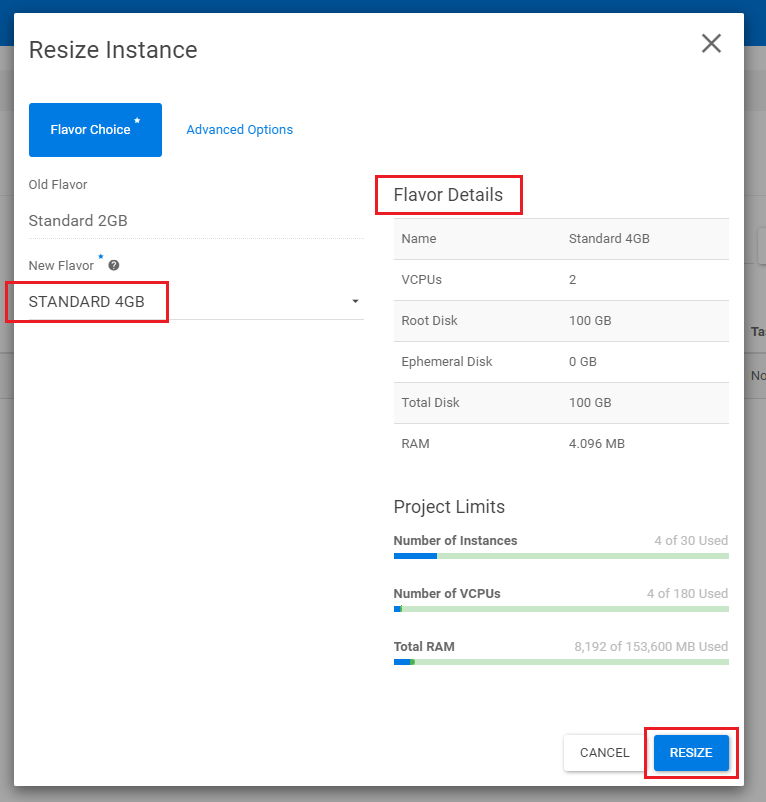
Now under 'New Flavor', you'll see the selected flavor. Under 'Flavor Details', you'll find the amount of disk space, CPU, and RAM for the new Flavor. Click 'Resize' to change the size of your instance.

Step 3
Under 'Status', a moving bar with the text 'Confirm or Revert Resize/Migrate' will appear. If you're sure that the selected flavor is correct, click 'Confirm Resize/Migrate'.

If you want to cancel the choice of the flavor you've selected, you can do so now. Click the down arrow under 'Actions' next to 'Confirm Resize/Migrate'. In the drop-down menu, click 'Revert Resize/Migrate' to cancel the change to your instance.

To choose a different flavor, start again at step 1 of this guide.
If you clicked the 'Confirm Resize/Migrate' button, you'll see your new flavor under 'Flavor' after a few seconds.

Congratulations! You've successfully changed the flavor of your instance.


