TL;DR: Exchange updates are installed through Windows Updates. We recommend switching these to 'automatic' and to schedule active hours for pending restarts.
Malicious parties are always looking for ways to exploit servers. As such, it's important to keep all your software up-to-date to patch known vulnerabilities. In this tutorial we show you how you can update your Microsoft Exchange Server manually or automatically.
An example of a very serious zero-day vulnerability in Exchange Server from March 2021 can be found here. In this specific case updating a server that hasn't been targeted yet was sufficient to secure the server.
- Reboot your Exchange server both before and after installing the update.
- A short restart will not prevent mail from arriving in your hosted mailboxes. There will however be a daily in delivering them. Mail clients will automatically try to deliver an e-mail again later if your server isn't available at the specific moment.
Manually updating Exchange server
Updates for Exchange Server are downloaded through Windows Updates. Additonally, Microsoft publishes a comulative update ever quarter which bundles updates published within that quarter. An overview of comulative updates for various Exchange versions can be found here. Please note that updates after the last comulative update are not added in that specific commulative update and as such you should use Windows Updates to update Exchange Server.
Step 1
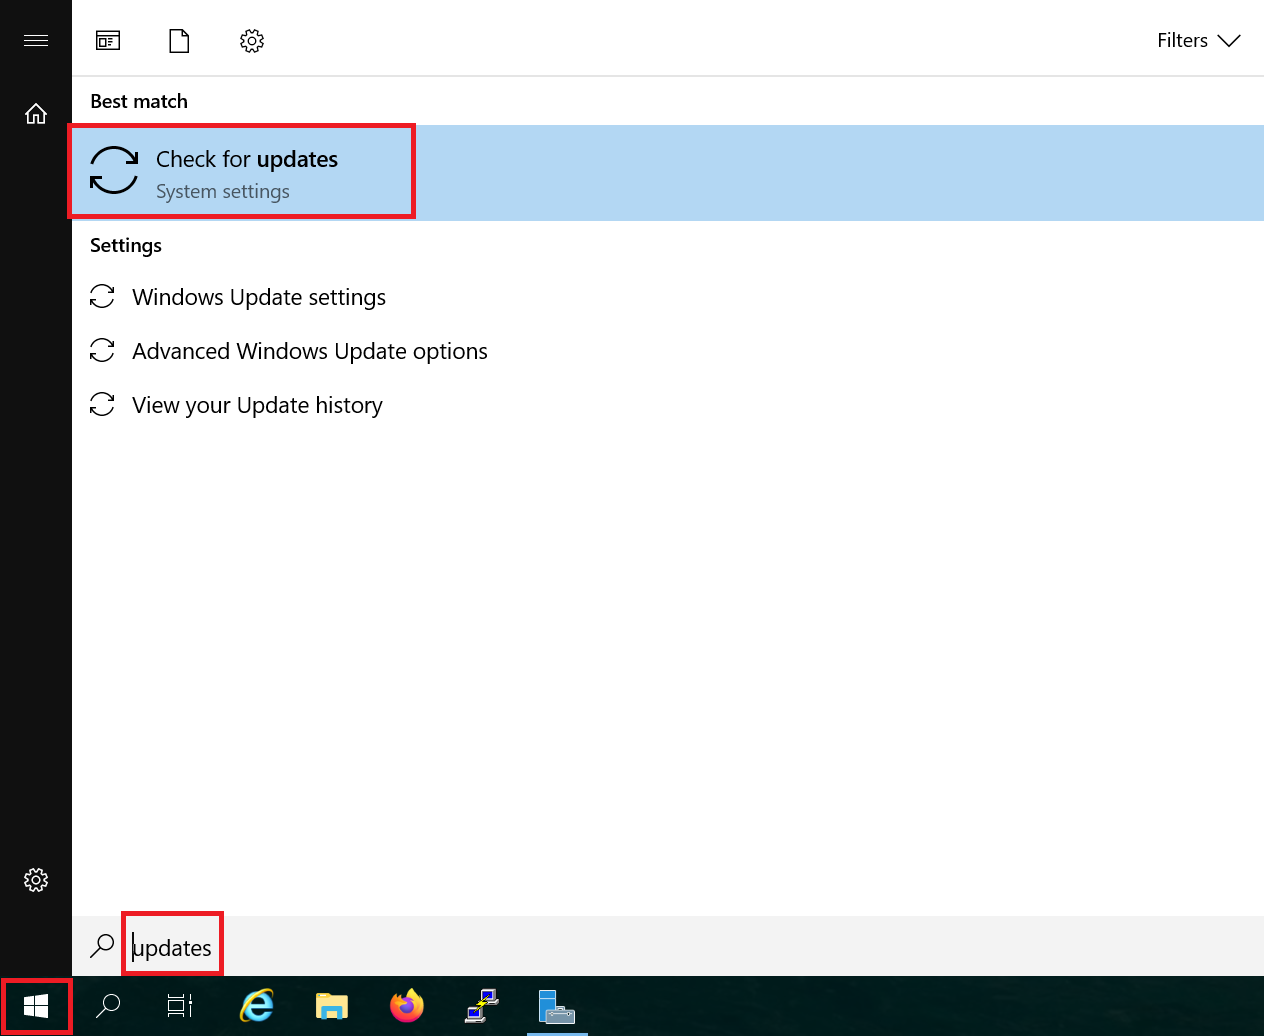
Click on the Windows Start button and search for 'Updates'. In the results, click on 'Check for updates'.
Step 2
Click on 'Install now' to immediately download and install all available updates.
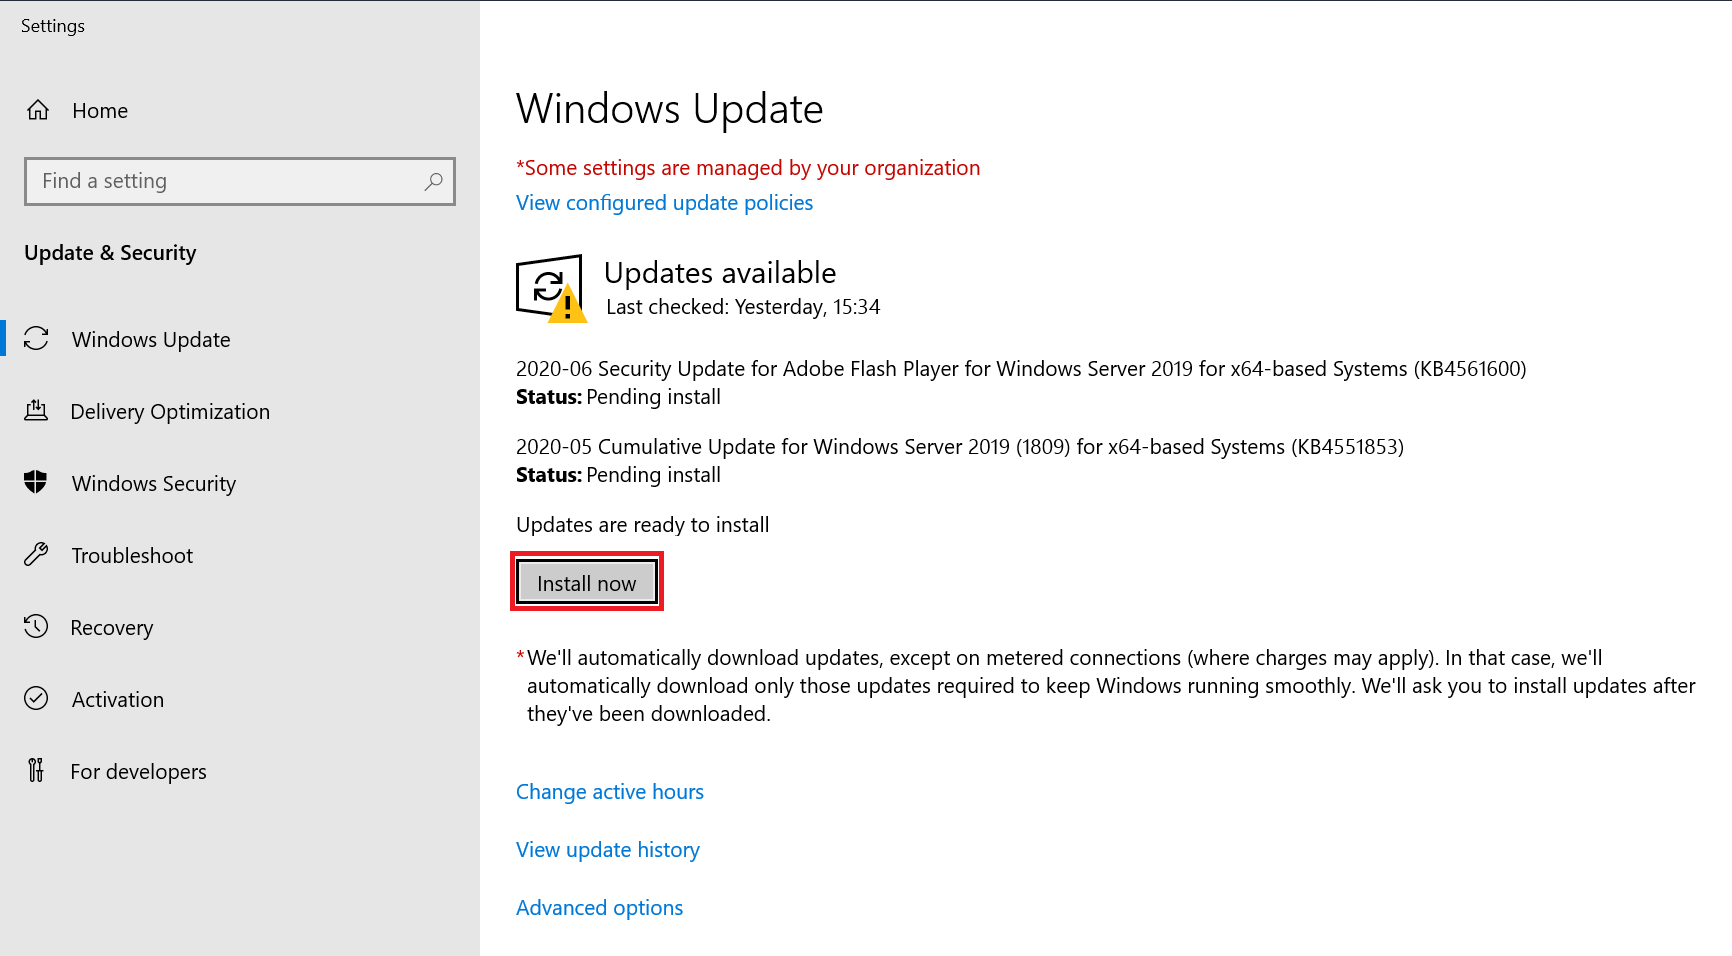
Depending on the number of updates this process may take a while. Please note that you'll be required to restart your server after installing the updates.
Enabling automatic updates
Besides from manually updating Exchange Server, you can also make use of automated updates. The disadvantage thereof is that some updates require a restart of your VPS and that this restart will be done automatically. In order to prevent this restart from taking place at an undersired time, it's important to change the times at which these may take place.
Step 1
Click on the Windows Start button and search for 'Updates'. In the results, click on 'Check for updates'.

Step 2
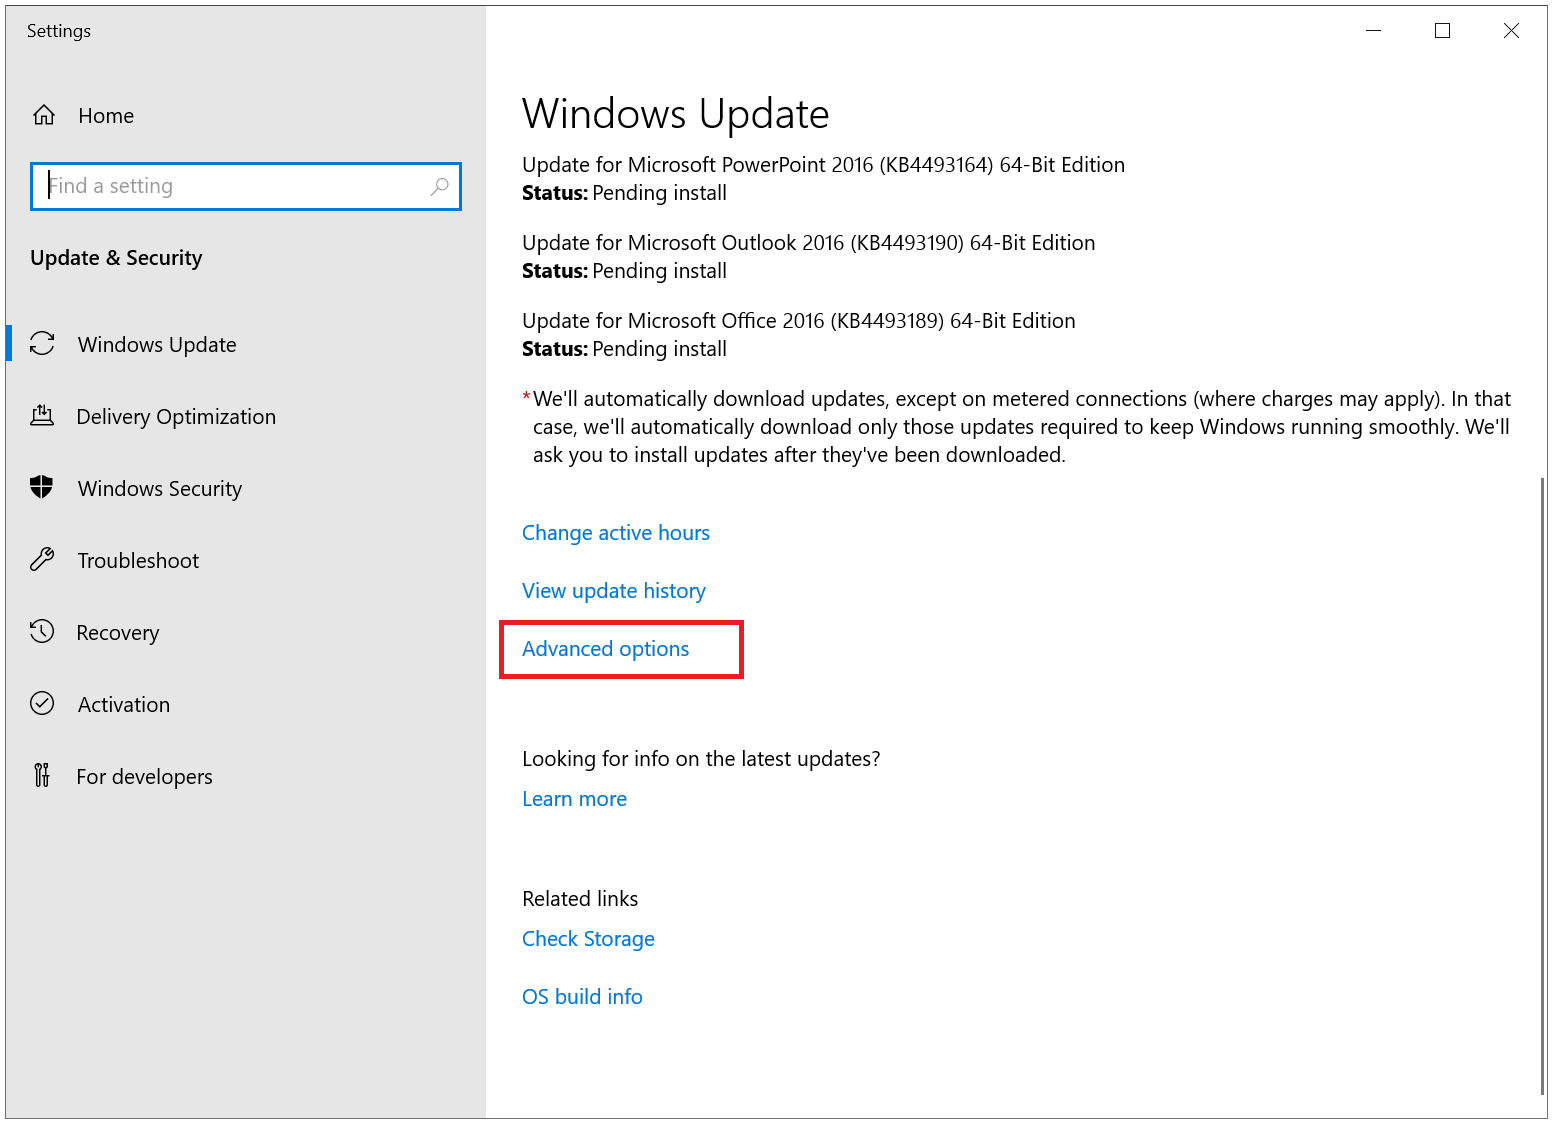
Click on 'Advanced Options'.
Step 3
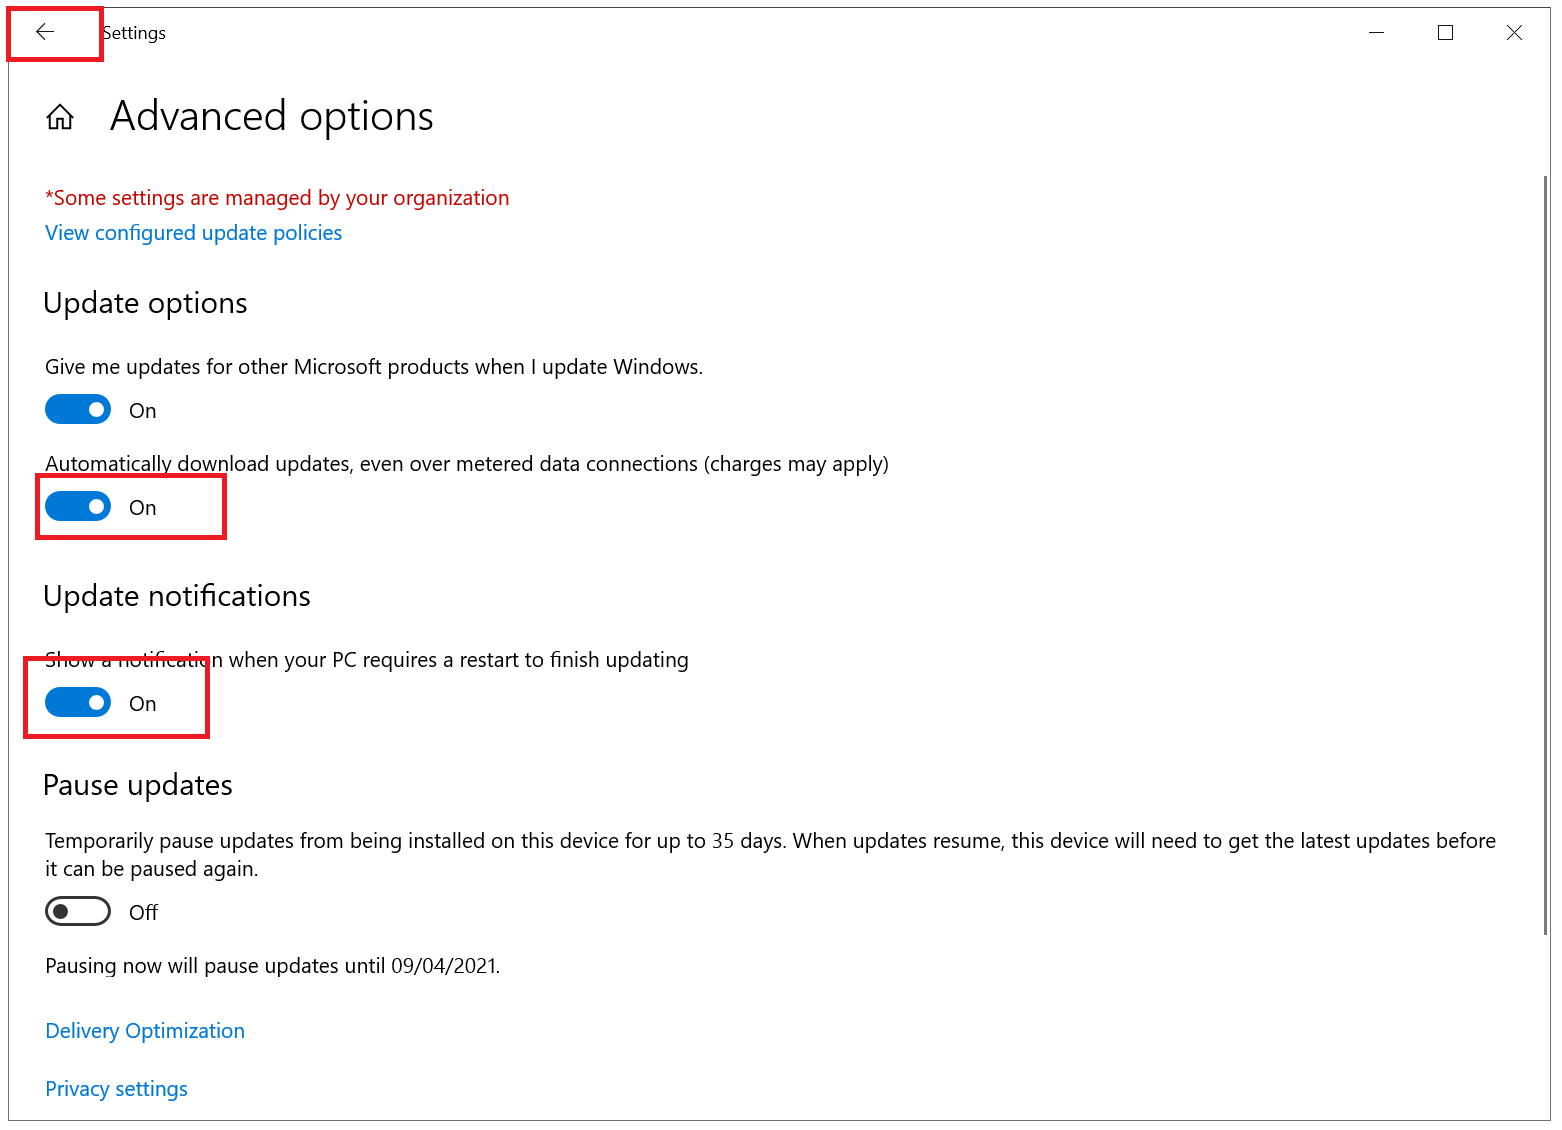
Enable the option for 'Automatically download updates' and 'Update notifications'. Next, click the arrow in the top left to return to the previous page.
Step 4
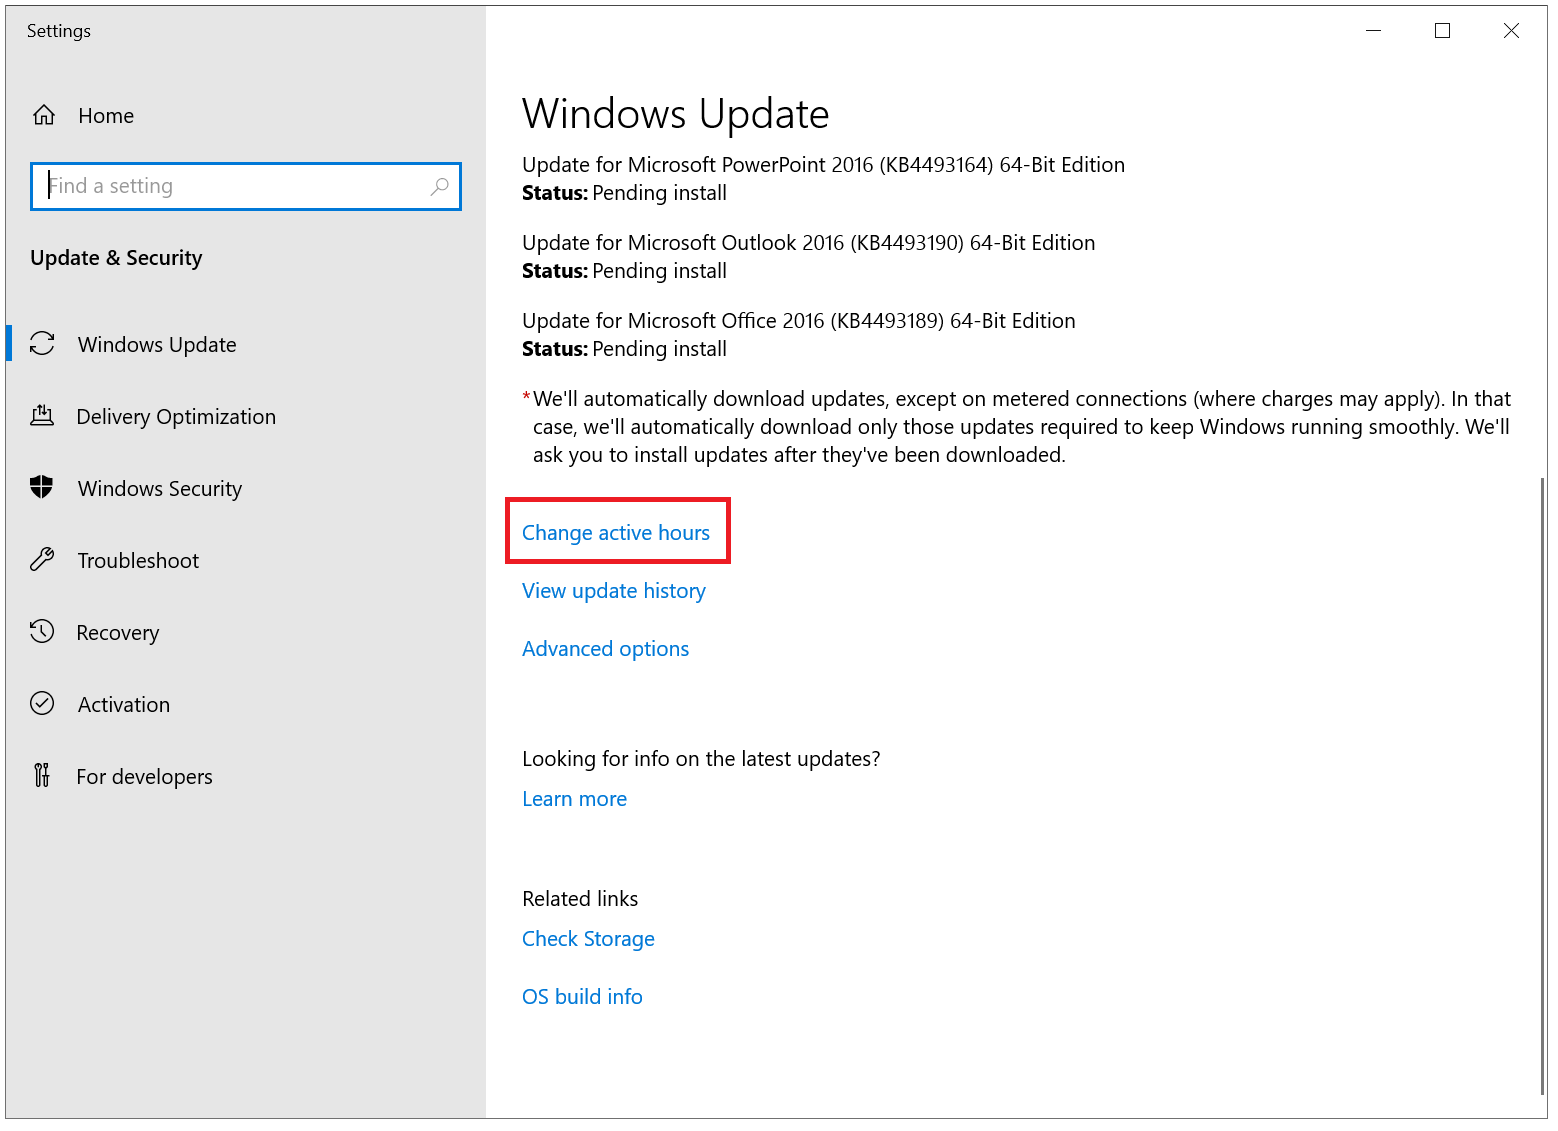
Click on 'Change active hours'.
Step 5
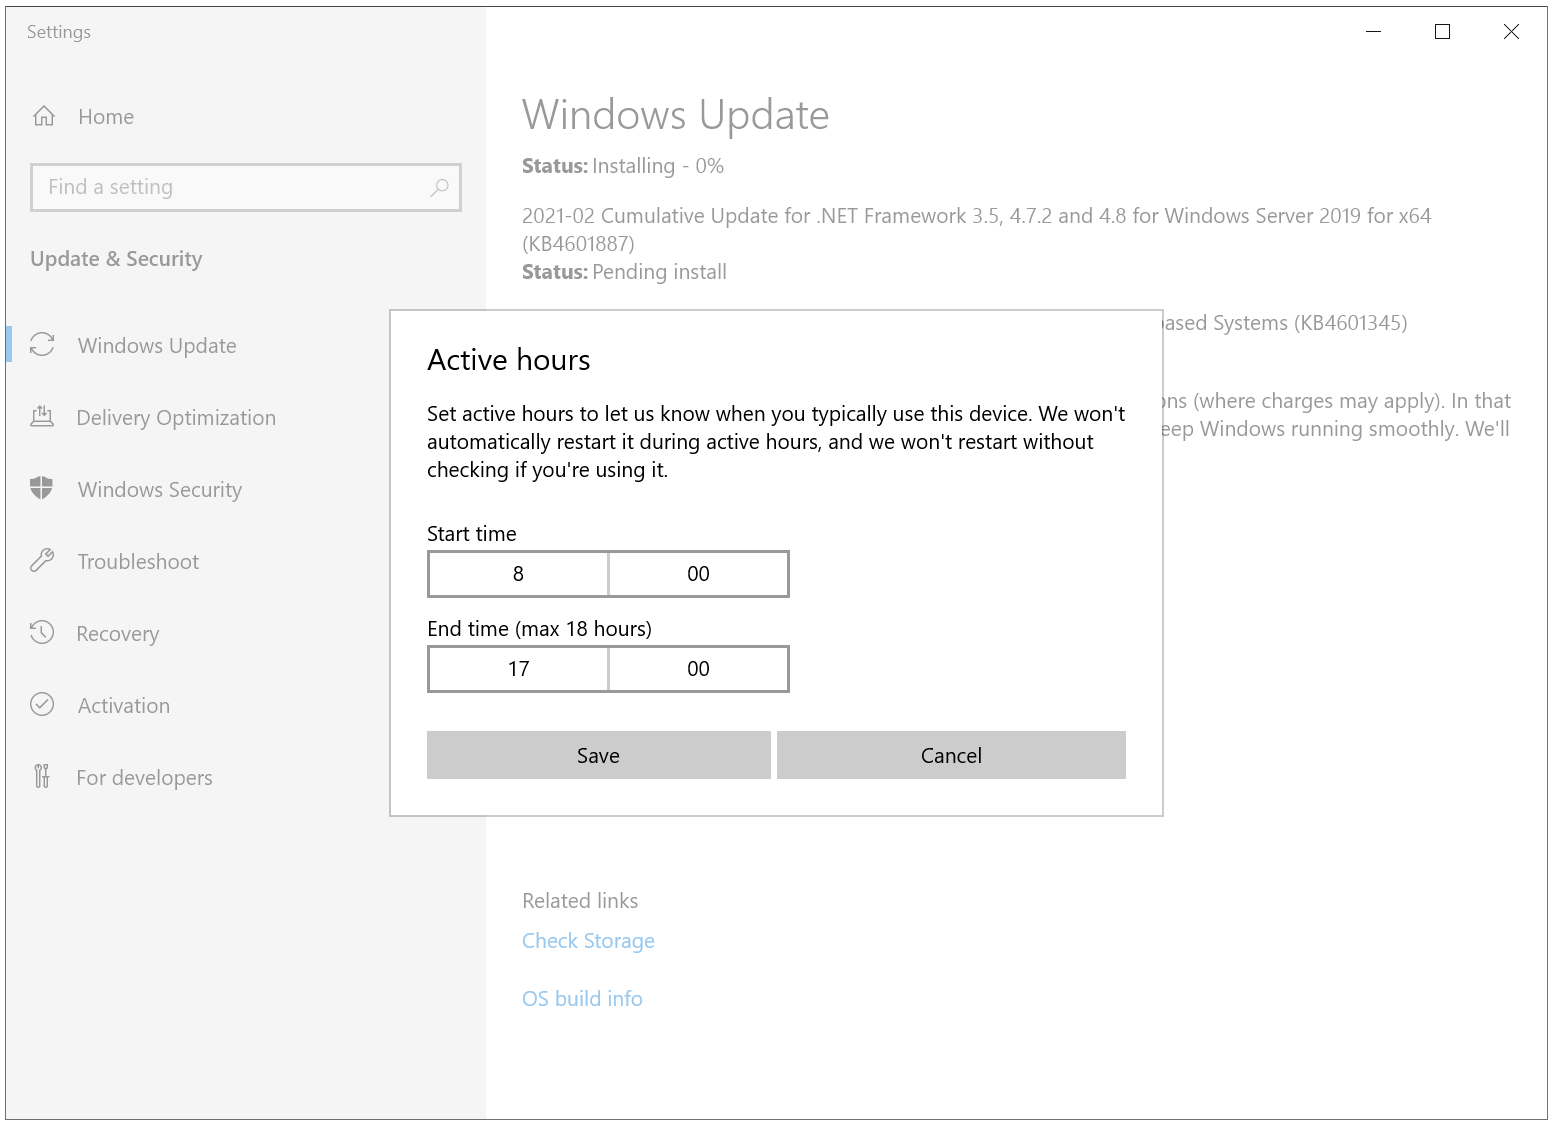
Set the start- and end-time during which no restart may be performed to install Windows updates.
Outside the active hours Windows will also check to see if the server is being actively used. If yes, the restart will be postponed until the server is not in use.
This concludes our tutorial on updating Exchange Server.
Should you have any questions left regarding this article, do not hesitate to contact our support department. You can reach them via the ‘Contact Us’ button at the bottom of this page.


