


In some cases, it is desirable to disable IPv6 on your network adapter in Windows. This can be necessary, for example, for Windows Servers in an Active Directory environment where using IPv6 on the primary network adapter can cause you to lose your connection to the Active Directory domain.
In this guide, we will show you how to disable IPv6 on a network adapter within Windows or Windows Server.
The screenshots in this article are from Windows Server 2019. The steps are relatively identical (apart from the exact looks) for other versions of Windows & Windows Server.
Step 1
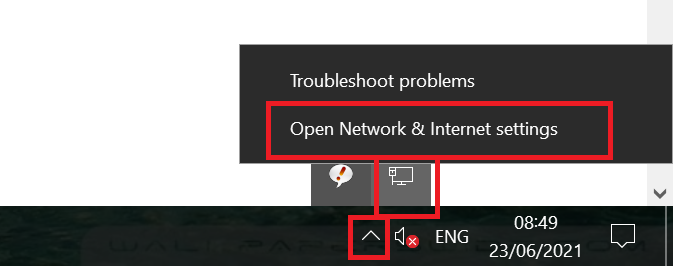
Right-click on the network icon at the bottom right of your screen and select 'Open Network & Internet settings'. You may need to click the up arrow (see screenshot) to make the icon visible.
Step 2
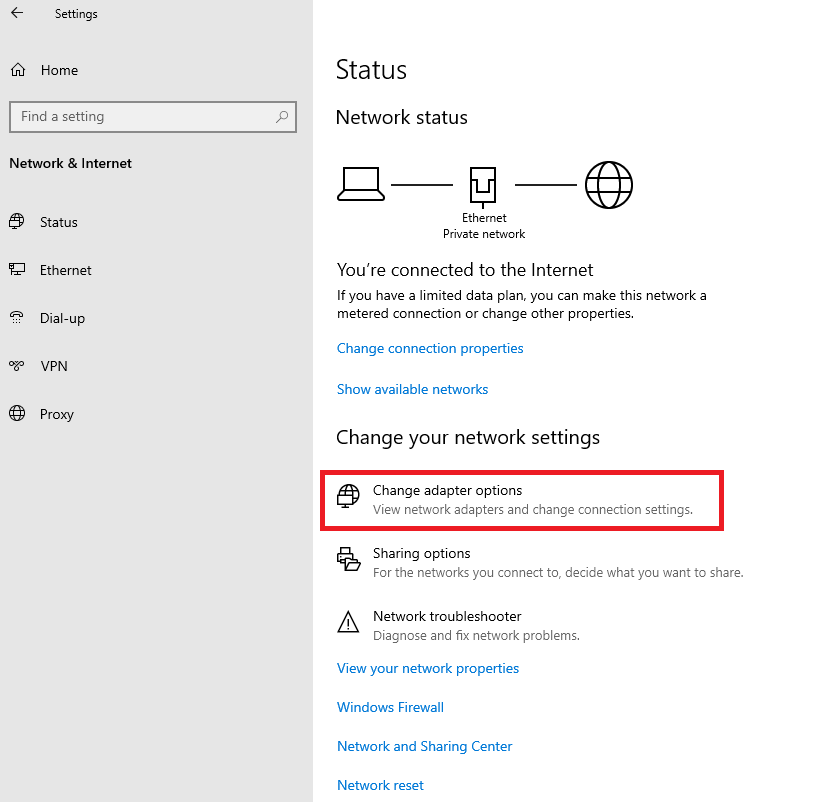
Click on 'Change Adapter Options'.
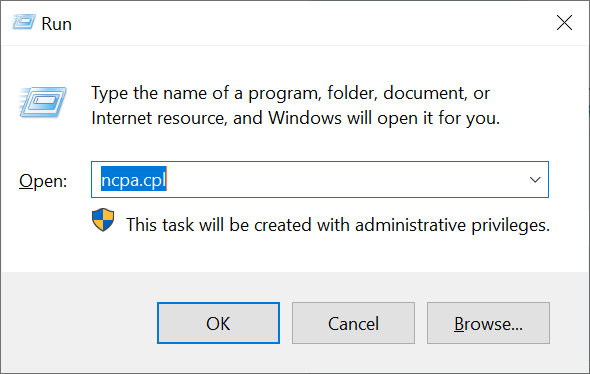
If this option is missing in your version of Windows/Windows Server, press the Windows Start button + r simultaneously and type 'ncpa.cpl' in the window that appears and click 'OK'.
Step 3
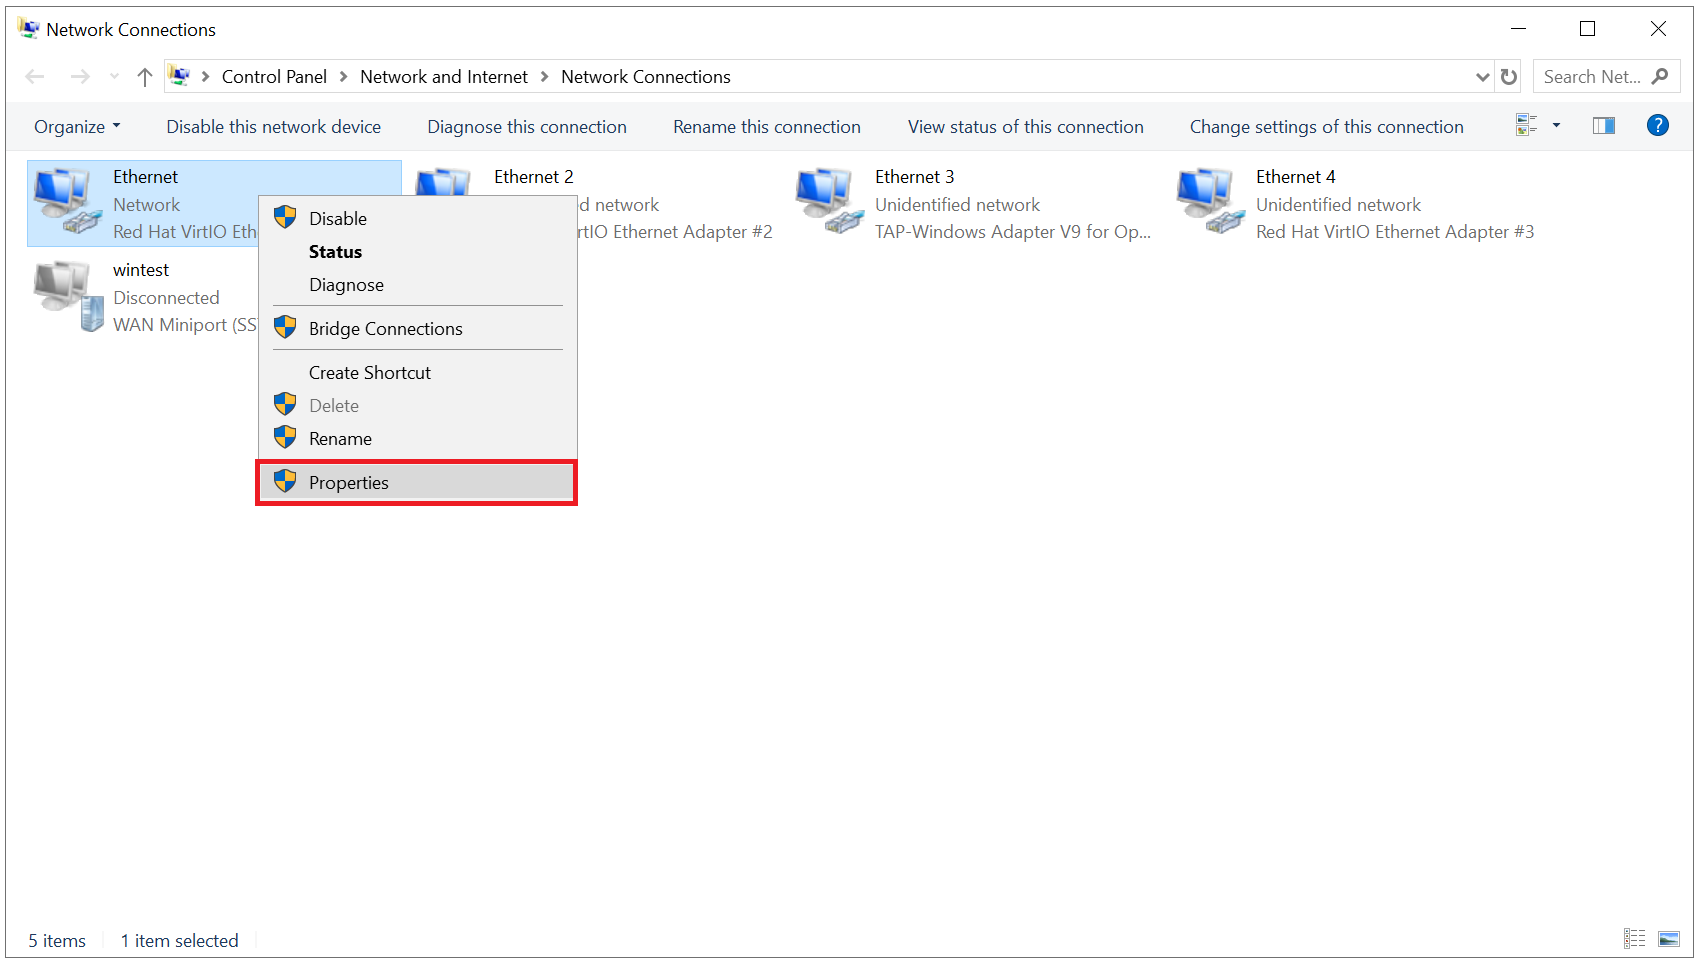
Right-click on your primary network adapter (usually named 'Ethernet') and select 'Properties'.
Step 4
Uncheck 'Internet Protocol Version 6 (TCP/IPv6)' and click 'OK'.
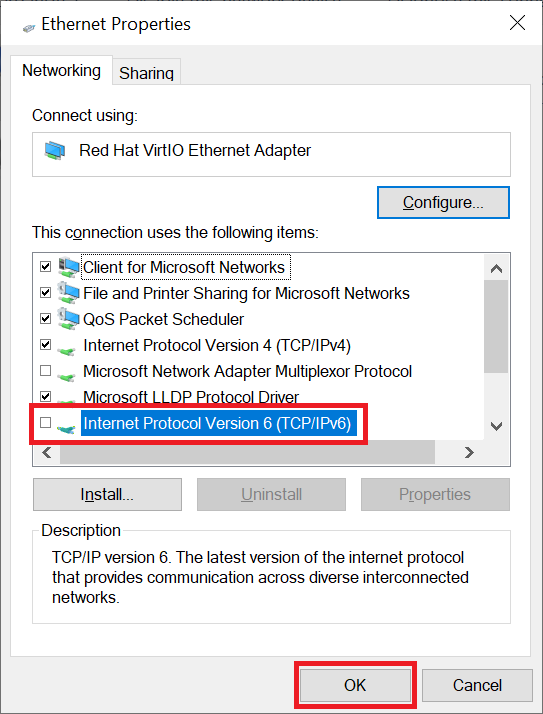
You are now done and can close the control panel screens.
This concludes our guide on disabling IPv6 on your network adapter in Windows/Windows Server.
Should you have any questions based on this article, please do not hesitate to contact our support department. You can reach them via the 'Contact us' button at the bottom of this page.