


On Linux mail servers, Exim or Postfix (MTA) is usually used in combination with Dovecot (MDA). Exim and Postfix handle sending mail from one mail server to another. Dovecot ensures that mail delivered to your VPS actually reaches the correct email address.
In this tutorial, we will show you how to install Postfix and Dovecot on a Linux VPS with AlmaLinux 9, CentOS Stream 9, Rocky Linux 9, Ubuntu 22.04+, or Debian 12+. In this tutorial, we will show you how to use a list of 'virtual domains and mailboxes' to process mail. For this, we use a database managed via MariaDB. Additionally, we will show you how to use Let's Encrypt SSL (TLS) to secure the connection and configure your firewall for your mail server.
- For the steps in this guide, you will need:
- A VPS with Ubuntu, Debian, CentOS, AlmaLinux or Rocky Linux, on which (for CentOS, Alma, and Rocky) the EPEL repository has been added.
- Correctly configured reverse DNS.
- A domain whose DNS points to your VPS, for example via mail.example.com. In this tutorial (under mail) we give an example of how to point the DNS of your VPS for email to your VPS.
- Execute the steps in this article with sudo, or as a root user.
- MariaDB must be installed on your VPS. How to install and configure MariaDB is explained in these guides for CentOS Stream, AlmaLinux, Rocky Linux, Ubuntu or Debian.
Creating a database
For virtual email addresses, we recommend using a database. This makes it easier to add domains and email addresses than from the Postfix configuration itself, for example, if you offer a control panel from which people can do this themselves. You can then easily use SQL statements.
Step 1
Connect to your VPS via SSH or the VPS console in the TransIP control panel.
Step 2
Update your VPS so that you have the latest software available:
Ubuntu & Debian:
apt -y update && apt -y upgradeCentOS, AlmaLinux & Rocky Linux:
dnf -y updateWe recommend restarting your VPS after an update. Many updates are only fully applied after a reboot. This way, any problems in your server configuration will come to light faster, and you can possibly restore a backup.
Step 3
First, start an SQL shell. A detailed explanation of SQL commands can be found in our article on Managing MariaDB via the command line.
mysql -u root -p
Then generate the SQL user, database, and tables for your mail server. First, create the database with the following command. You are free to adjust the name 'mailserver'.
CREATE DATABASE mailserver;
Create the user with the command (replace 'user' and 'password' as desired):
GRANT SELECT ON mailserver.* TO 'user'@'127.0.0.1' IDENTIFIED BY 'password';Apply this change with the command:
FLUSH PRIVILEGES;
Step 6
Switch to the 'mailserver' database you just created with the command:
USE mailserver;
Step 7
Then create a table for the virtual domains, email addresses (including password), and aliases. The code below can be copied and pasted into Putty.
CREATE TABLE virtual_domains (
 DomainId INT NOT NULL AUTO_INCREMENT PRIMARY KEY,
 DomainName VARCHAR(50) NOT NULL
);

CREATE TABLE virtual_mailboxes (
 MailId INT NOT NULL AUTO_INCREMENT PRIMARY KEY,
 DomainId INT NOT NULL,
 password VARCHAR(255) NOT NULL,
 Email VARCHAR(100) UNIQUE KEY NOT NULL,
 FOREIGN KEY (DomainId) REFERENCES virtual_domains(DomainId) ON DELETE CASCADE
);

CREATE TABLE virtual_aliases (
 AliasId INT NOT NULL AUTO_INCREMENT PRIMARY KEY,
 DomainId INT NOT NULL,
 Source VARCHAR(100) NOT NULL,
 Destination VARCHAR(100) NOT NULL,
 FOREIGN KEY (DomainId) REFERENCES virtual_domains(DomainId) ON DELETE CASCADE
);
Step 8
For now, close the SQL shell with:
exit
Installing and configuring Postfix
Step 1
Install Postfix with the command:
Ubuntu & Debian:
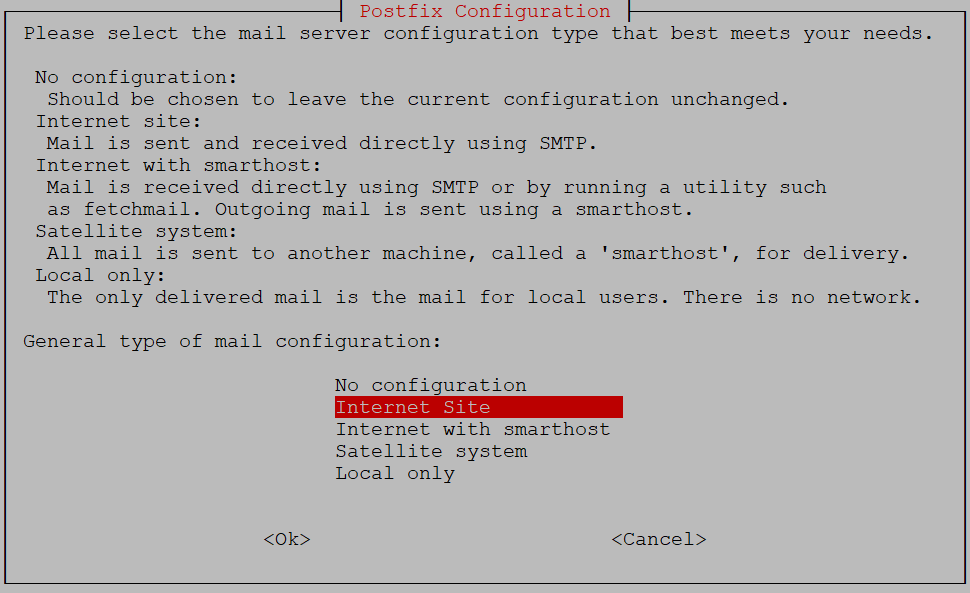
dnf -y install postfix postfix-mysql After the installation, you will automatically see a short installation wizard. You will be asked for your hostname, which will be pre-filled.
Then you need to select a mail server configuration type. Choose 'internet site'.
CentOS, AlmaLinux & Rocky Linux :
dnf -y install postfix postfix-mysql Postfix may already be present on your VPS. This was the case with a minimal install of older CentOS versions.
Step 2
The configuration of Postfix is managed via /etc/postfix/main.cf. Open this file, for example with:
nano /etc/postfix/main.cf
Step 3
Adjust the following values/add them to the opened file. Some of these options are optional. In the explanation below the code, we explain the function of these options and which values you can use.
An overview of all available configuration options for Postfix can be found here.
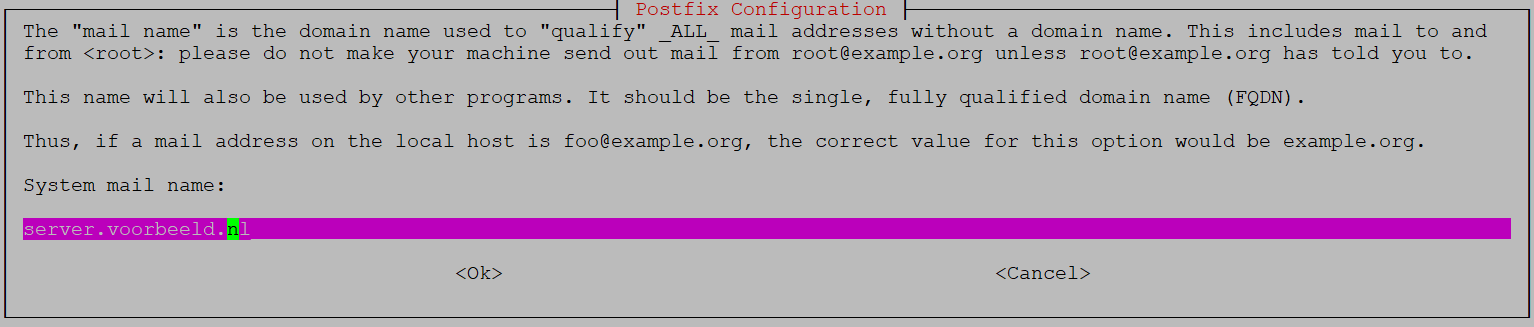
Did you use an SSH, one-time password, or Cloud-Init installation for your VPS? Then set your hostname correctly for the proper functioning of mydestination. See these guides for Ubuntu and CentOS.
myhostname = mail.example.com
mydomain = example.com
myorigin = $mydomain
smtp_bind_address = 123.123.123.123
smtp_bind_address6 = 2a01:7c8:d001:2::1
inet_interfaces = all
inet_protocols = allinet_protocols=ipv4
Step 4
The Postfix configuration has (almost) no default or commented-out code for SSL/TLS. Scroll to the end of the file and add the following code/adjust the existing values. In the explanation, we elaborate on the code.
Note:In the December 2021 version of Postfix, there is a section 'TLS parameters'. Add the following code there or adjust the existing code as needed.
#TLS configuration options
append_dot_mydomain = no
biff = no
config_directory = /etc/postfix
dovecot_destination_recipient_limit = 1
smtp_tls_security_level = may
smtp_tls_session_cache_database = btree:${data_directory}/smtp_scache
smtpd_tls_cert_file=/etc/letsencrypt/live/mail.example.com/fullchain.pem
smtpd_tls_key_file=/etc/letsencrypt/live/mail.example.com/privkey.pem
smtpd_sasl_auth_enable = yes
smtpd_sasl_security_options = noanonymous, noplaintext
smtpd_sasl_tls_security_options = noanonymous
smtpd_tls_auth_only = yes
smtpd_tls_security_level = may
smtpd_tls_session_cache_database = btree:${data_directory}/smtpd_scache
smtpd_use_tls=yes
Step 5
In this step, you add the necessary code to use virtual mailboxes. Add the following code at the end of the file. In the explanation, we elaborate on virtual mailboxes and the code.
# Virtual mail settings
virtual_transport = dovecot
smtpd_sasl_type = dovecot
smtpd_sasl_path = private/auth
virtual_mailbox_domains = mysql:/etc/postfix/virtual-mailbox-domains.conf
virtual_mailbox_maps = mysql:/etc/postfix/virtual-mailbox-users.conf
virtual_alias_maps = mysql:/etc/postfix/virtual-alias-maps.confThen save the changes and close the file (ctrl + x > y > enter).
Step 6
In the previous step, you specified the location of the virtual_mailbox_domains, virtual_mailbox_maps, and virtual_alias_maps configuration files. With the code below, you create these files and configure them.
Replace the values 'user', 'password', and 'mailserver' with the respective names and password of the database user and the database name you set in step 5 and step 4 of the first part.
Tip:You can, for example, copy and paste the code into a text editor, adjust the information where needed, and then paste it into Putty.
CREATE TABLE virtual_domains (
 DomainId INT NOT NULL AUTO_INCREMENT PRIMARY KEY,
 DomainName VARCHAR(50) NOT NULL
);

CREATE TABLE virtual_mailboxes (
 MailId INT NOT NULL AUTO_INCREMENT PRIMARY KEY,
 DomainId INT NOT NULL,
 password VARCHAR(255) NOT NULL,
 Email VARCHAR(100) UNIQUE KEY NOT NULL,
 FOREIGN KEY (DomainId) REFERENCES virtual_domains(DomainId) ON DELETE CASCADE
);

CREATE TABLE virtual_aliases (
 AliasId INT NOT NULL AUTO_INCREMENT PRIMARY KEY,
 DomainId INT NOT NULL,
 Source VARCHAR(100) NOT NULL,
 Destination VARCHAR(100) NOT NULL,
 FOREIGN KEY (DomainId) REFERENCES virtual_domains(DomainId) ON DELETE CASCADE
);
Step 7
Adjust the permissions of the files so that the root user can read and write them, and the group can read them:
chmod 640 /etc/postfix/virtual-mailbox-domains.conf
chmod 640 /etc/postfix/virtual-mailbox-users.conf
chmod 640 /etc/postfix/virtual-alias-maps.conf
Step 8
Open /etc/postfix/master.cf:
nano /etc/postfix/master.cf
Step 9
The configuration in this file controls all processes started by Postfix. Adjust the configuration so that the first part looks like the example below.
#
# Postfix master process configuration file.  For details on the format
# of the file, see the master(5) manual page (command: "man 5 master" or
# on-line: http://www.postfix.org/master.5.html).
#
# Do not forget to execute "postfix reload" after editing this file.
#
# ==========================================================================
# service type  private unpriv  chroot  wakeup  maxproc command + args
#               (yes)   (yes)   (no)    (never) (100)
# ==========================================================================
smtp      inet  n       -       n       -       -       smtpd
#smtp      inet  n       -       n       -       1       postscreen
#smtpd     pass  -       -       n       -       -       smtpd
#dnsblog   unix  -       -       n       -       0       dnsblog
#tlsproxy  unix  -       -       n       -       0       tlsproxy
submission inet n       -       n       -       -       smtpd
  -o syslog_name=postfix/submission
  -o smtpd_tls_security_level=encrypt
  -o smtpd_sasl_auth_enable=yes
  -o smtpd_tls_auth_only=yes
  -o smtpd_reject_unlisted_recipient=no
#  -o smtpd_client_restrictions=$mua_client_restrictions
#  -o smtpd_helo_restrictions=$mua_helo_restrictions
#  -o smtpd_sender_restrictions=$mua_sender_restrictions
  -o smtpd_recipient_restrictions=permit_sasl_authenticated,reject
#  -o smtpd_relay_restrictions=permit_sasl_authenticated,reject
  -o milter_macro_daemon_name=ORIGINATING
#smtps     inet  n       -       n       -       -       smtpd
#  -o syslog_name=postfix/smtps
#  -o smtpd_tls_wrappermode=yes
#  -o smtpd_sasl_auth_enable=yes
#  -o smtpd_reject_unlisted_recipient=no
#  -o smtpd_client_restrictions=$mua_client_restrictions
#  -o smtpd_helo_restrictions=$mua_helo_restrictions
#  -o smtpd_sender_restrictions=$mua_sender_restrictions
#  -o smtpd_recipient_restrictions=
#  -o smtpd_relay_restrictions=permit_sasl_authenticated,reject
#  -o milter_macro_daemon_name=ORIGINATING
#628       inet  n       -       n       -       -       qmqpd
pickup    unix  n       -       n       60      1       pickup
cleanup   unix  n       -       n       -       0       cleanup
qmgr      unix  n       -       n       300     1       qmgr
#qmgr     unix  n       -       n       300     1       oqmgr
tlsmgr    unix  -       -       n       1000?   1       tlsmgr
rewrite   unix  -       -       n       -       -       trivial-rewrite
bounce    unix  -       -       n       -       0       bounce
defer     unix  -       -       n       -       0       bounce
trace     unix  -       -       n       -       0       bounce
verify    unix  -       -       n       -       1       verify
flush     unix  n       -       n       1000?   0       flush
proxymap  unix  -       -       n       -       -       proxymap
proxywrite unix -       -       n       -       1       proxymap
smtp      unix  -       -       n       -       -       smtp
relay     unix  -       -       n       -       -       smtp
        -o syslog_name=postfix/$service_name
#       -o smtp_helo_timeout=5 -o smtp_connect_timeout=5
showq     unix  n       -       n       -       -       showq
error     unix  -       -       n       -       -       error
retry     unix  -       -       n       -       -       error
discard   unix  -       -       n       -       -       discard
local     unix  -       n       n       -       -       local
virtual   unix  -       n       n       -       -       virtual
lmtp      unix  -       -       n       -       -       lmtp
anvil     unix  -       -       n       -       1       anvil
scache    unix  -       -       n       -       1       scache
Go to the end of the file and add the following lines:
Ubuntu & Debian:
dovecot   unix  -       n       n       -       -       pipe
flags=DRhu user=vmail:vmail argv=/usr/lib/dovecot/deliver -f ${sender} -d ${recipient}
CentOS, AlmaLinux & Rocky Linux:
dovecot   unix  -       n       n       -       -       pipe
flags=DRhu user=vmail:vmail argv=/usr/libexec/dovecot/deliver -f ${sender} -d ${recipient}
Finally, save your changes and close the file (ctrl + x > y > enter).
Installing and configuring Dovecot
Step 1
Install Dovecot with the command:
Ubuntu & Debian:
apt -y install dovecot-core dovecot-imapd dovecot-pop3d dovecot-lmtpd dovecot-mysqlCentOS, AlmaLinux & Rocky Linux:
dnf -y install dovecot dovecot-mysql
Step 2
The configuration of Dovecot is spread over several specific files. First, adjust the general configuration in /etc/dovecot/dovecot.conf.
nano /etc/dovecot/dovecot.conf
Step 3
Adjust the values of the following options in the file to match this example.
Ubuntu & Debian:
!include_try /usr/share/dovecot/protocols.d/*.protocol
listen = *, ::
!include conf.d/*.conf
!include_try local.conf
CentOS, AlmaLinux & Rocky Linux:
protocols = imap pop3 lmtp
listen = *, ::
!include conf.d/*.conf
!include_try local.conf
Save the changes and finally close the file (ctrl + x > y > enter).
Optional:
Optionally, in the same file, you can write the log output of Dovecot to a different file than where Postfix writes to. This keeps your log files more organized in case of problems.
log_path = /var/log/dovecot.log
Create the specified log file and adjust the permissions so that Dovecot can write data to it.
touch /var/log/dovecot.log
chmod 666 /var/log/dovecot.log
Save the changes and finally close the file (ctrl + x > y > enter).
Step 4
Open the SSL configuration in the file 10-ssl.conf:
nano /etc/dovecot/conf.d/10-ssl.conf
Step 5
Add the following content to the file/adjust the existing value:
ssl_cert = </etc/letsencrypt/live/mail.voorbeeld.nl/fullchain.pem
ssl_key = </etc/letsencrypt/live/mail.voorbeeld.nl/privkey.pem
Save your changes and close the file (ctrl + x > y > enter).
Step 6
Then open the mail configuration. Here you specify where the mailbox is located on your server.
nano /etc/dovecot/conf.d/10-mail.conf
Step 7
Adjust the following variables in the file as needed:
mail_location = maildir:/home/vmail/%d/%n/Maildir
namespace inbox {
  inbox = yes
}
mail_privileged_group = mail
mbox_write_locks = fcntl
Save your changes and close the file (ctrl + x > y > enter).
Step 8
You give Postfix permission to use Dovecot's authentication system in 10-master.conf. Open this file with:
nano /etc/dovecot/conf.d/10-master.conf
Step 9
Adjust the content so that the services listed below match your configuration. We have omitted the commented-out parts, recognizable by the lines starting with #, for readability.
service imap-login {
  inet_listener imap {
    port = 143
  }
  inet_listener imaps {
  port = 993
  ssl = yes
  }
}

service pop3-login {
  inet_listener pop3 {
    port = 110
  }
  inet_listener pop3s {
  port = 995
  ssl = yes
  }
}


service lmtp {
 unix_listener /var/spool/postfix/private/dovecot-lmtp {
   mode = 0600
   user = postfix
   group = postfix
 }
}

service auth {

  unix_listener auth-userdb {
    mode = 0600
    user = vmail
  }

  unix_listener /var/spool/postfix/private/auth {
    mode = 0666
    user = postfix
    group = postfix
  }

  user = dovecot
}

service auth-worker {
  user = vmail
}

service dict {
  unix_listener dict {
  }
}
Step 10
Open the file where the authentication is managed:
nano /etc/dovecot/conf.d/10-auth.conf
Step 11
Adjust the following values in this file to look like this:
disable_plaintext_auth = yes
auth_mechanisms = plain login
#!include auth-system.conf.ext
!include auth-sql.conf.ext
Save your changes and close the file (ctrl + x > y > enter).
Step 12
Then open the file auth-sql.conf.ext:
nano /etc/dovecot/conf.d/auth-sql.conf.ext
Step 13
Adjust the passdb and userdb driver as follows:
passdb {
  driver = sql
  args = /etc/dovecot/dovecot-sql.conf.ext
}

userdb {
  driver = static
  args = uid=vmail gid=vmail home=/home/vmail/%d/%n/Maildir
}
Save your changes and close the file (ctrl + x > y > enter).
Step 14
In auth-sql.conf.ext, you may have already seen that passdb refers to /etc/dovecot/dovecot-sql.conf.ext. This file does not yet exist, but it must contain the details for the MySQL connection. Create it with the commands below, replacing the values 'mailserver', 'user', and 'password' on the 2nd line with the details as set in step 4 and 5 of the first part of this guide.
echo 'driver = mysql' > /etc/dovecot/dovecot-sql.conf.ext
echo 'connect = "host=127.0.0.1 dbname=mailserver user=user password=password"' >> /etc/dovecot/dovecot-sql.conf.ext
echo 'default_pass_scheme = SHA512-CRYPT' >> /etc/dovecot/dovecot-sql.conf.ext
echo "password_query = SELECT Email as User, password FROM virtual_mailboxes WHERE Email='%u';" >> /etc/dovecot/dovecot-sql.conf.ext
Creating the Vmail user
In the steps above, you have set 'vmail' as the user a few times. In the steps below, you create this user and adjust permissions to directories, etc., where needed.
Step 1
Create the vmail user, group, and associated home directory with:
useradd -u 5000 vmail -d /home/vmail/
usermod -a -G vmail vmail
groupmod -g 5000 vmail
The mkdir command is normally not necessary, but it has been added as a precaution if your OS does not correctly create the home directory with the -d argument in useradd.
Step 2
Adjust the permissions of the vmail user for /home/vmail and /etc/dovecot as follows:
chown -R vmail:vmail /home/vmail
chown -R vmail:dovecot /etc/dovecot
chmod -R o-rwx /etc/dovecot
Firewall and related settings
To ensure proper functioning of your mail and generating Let's Encrypt certificates, it is necessary to open some ports. You do this with the commands:
Ubuntu & Debian:
ufw allow 80
ufw allow 443
ufw allow 25
ufw allow 465
ufw allow 587
ufw allow 993
ufw allow 995
CentOS Stream, AlmaLinux & Rocky Linux:
firewall-cmd --zone=public --permanent --add-port=80/tcp
firewall-cmd --zone=public --permanent --add-port=443/tcp
firewall-cmd --zone=public --permanent --add-port=25/tcp
firewall-cmd --zone=public --permanent --add-port=465/tcp
firewall-cmd --zone=public --permanent --add-port=587/tcp
firewall-cmd --zone=public --permanent --add-port=993/tcp
firewall-cmd --zone=public --permanent --add-port=995/tcp
firewall-cmd --reload- Port 80 and 443 are needed for the Let's Encrypt validation (the acme-challenge).
- Port 993 and 995 are the respective IMAP and POP3 ports that Dovecot uses for TLS connections.
- Port 25, 465, and 587 are the ports that Postfix uses for sending and receiving email.
Selinux
Do you use Selinux (check with 'sestatus')? Then add the necessary ports here as well with:
semanage port --add -t ssh_port_t -p tcp 80
semanage port --add -t ssh_port_t -p tcp 443
semanage port --add -t ssh_port_t -p tcp 25
semanage port --add -t ssh_port_t -p tcp 465
semanage port --add -t ssh_port_t -p tcp 587
semanage port --add -t ssh_port_t -p tcp 993
semanage port --add -t ssh_port_t -p tcp 995
Opening outgoing mail ports
On new VPSs, the mail ports are closed in the TransIP control panel for security reasons. In this article, we show you how to open them.
VPS firewall
Do you use the VPS firewall in the TransIP control panel? Then also open ports 80, 443, 993, 995, and 587 there.
Fail2ban
Do you use Fail2Ban? The logpathfor the Postfix jail is /var/log/maillog
SSL
In this section, you will create an SSL certificate with Let's Encrypt and automate its renewal.
Step 1
Install Let's Encrypt with the command:
Ubuntu & Debian:
apt -y install certbotCentOS Stream, AlmaLinux & Rocky Linux:
yum -y install certbot
Step 2
In this step, you will generate a standalone certificate with the command below. Replace mail.example.com with the subdomain you want to use to set as the server for incoming and outgoing traffic in your mail client.
You will be asked for an email address and permission to accept the terms of service, and to share your email address with the Electronic Frontier Foundation (optional).
certbot certonly --standalone -d mail.example.com
Step 3
Your Let's Encrypt certificate and key file are stored in /etc/letsencrypt/live/<hostname>/ (the exact location is in the output of the command in step 2).
The advantage of Let's Encrypt is that you can automate the renewal of the certificates. You do this with a cron job that you create with:
crontab -e
Step 4
The first time you start crontab, you will be asked which type of editor you want to use. Here we use a href="https://www.transip.nl/knowledgebase/artikel/1854-wat-is-vi/" target="_blank">vi, where Crontab opens in command mode, and you switch to insert mode with the 'i' key. Then add the content below.
SHELL=/bin/bash
HOME=/
@monthly certbot -q renew >> /var/log/le.log- The cron job runs every month at 0:00.
- -q ensures that no output is generated except for errors.
- renew renews all Let's Encrypt certificates that expire within 30 days. Let's Encrypt certificates are valid for 90 days, so a new certificate is generated every two months.
- >> /var/log/le.log sends the output to the le.log file. Create this with the command: touch /var/log/le.log (or use the existing /var/log/letsencrypt/letsencrypt.log)
By typing esc > :wq!, you close the crontab and save your changes. If everything goes well, you will see the following confirmation:
crontab: installing new crontab
Step 6
Postfix and Dovecot do not have permissions to the folders where the certificates are stored and to the privkey1.pem file. Adjust the permissions so that both can use them:
chmod 755 /etc/letsencrypt/archive
chmod 755 /etc/letsencrypt/archive/mail.example.com
chmod 644 /etc/letsencrypt/archive/mail.example.com/privkey1.pem
chmod 755 /mail.example.com
Creating an email address
Step 1
First, create a directory in /home/vmail/ for the domain on behalf of which you will send mail and adjust the owner of that directory, for example:
mkdir -p /home/vmail/example.com/
Step 2
Create a directory for the user's mail and adjust the owner of this and the underlying directory:
mkdir /home/vmail/example.com/user
chown -R vmail:vmail /home/vmail/example.com/
Step 3
Then start an SQL shell:
mysql -u root -p
Step 4
If you want to add an email address for a domain that is not yet in your database (such as when you go through this guide for the first time), first add the domain.
Check the current domains in your database with the command:
SELECT * FROM mailserver.virtual_domains; Add a new domain with:
INSERT INTO mailserver.virtual_domains (DomainName) VALUES ('example.com');Replace 'example.com' with the name of the domain you want to add
Step 5
Then add an email address with the code below.
- Replace 1 (the DomainId) with the id of the domain in the virtual_domains table, to be checked with:
SELECT * FROM mailserver.virtual_domains;- Replace transip@example.com and password with the desired email address and password.
INSERT INTO mailserver.virtual_mailboxes
  (DomainId, Email, Password)
VALUES
  ('1', 'transip@voorbeeld.nl', ENCRYPT('password', CONCAT('$6$', SUBSTRING(SHA(RAND()), -16))));
or in one line:
INSERT INTO mailserver.virtual_mailboxes (DomainId, Email, Password) VALUES ('1', 'transip@voorbeeld.nl', ENCRYPT('password', CONCAT('$6$', SUBSTRING(SHA(RAND()), -16))));
Step 6
Then close the SQL shell with:
exitWhen you create a new email address for an existing domain in the future, repeat steps 2, 3, 5, and 6 of this section.
Turning everything on
Congratulations! You have now finished configuring your mail server. The only thing left is to turn on your mail server and add your email address to your email clients. First, turn on your mail server with:
systemctl enable postfix
systemctl enable dovecot
systemctl restart postfix
systemctl restart dovecot
Setting up email in mail software and apps
For this guide, we used a domain with the MX record value 10 mail and the subdomain mail pointing to the VPS. We assume you follow the same structure; if not, adjust the following to your own scenario.
For setting up your email address in your mail software, use the following information:
- Email address:the desired email address you want to use for emailing.
- Username:the same email address as above
- Password:the associated (unencrypted) password
- Account name:again, the same email address
-
Send message using the name:The name you want to appear on your emails.
- Incoming server:mail.example.com (the subdomain pointing to your VPS)
- Account type:imap or pop3. The differences are explained here.
- Incoming port:993 (IMAP) or 995 (POP3)
-
Require SSL: yes, or SSL/TLS
- Outgoing (smtp) server:mail.example.com (the subdomain pointing to your VPS)
- Outgoing port:465 or 587
- Require SSL: yes, or SSL/TLS
- Outgoing server requires authentication:yes
- Use the same user name and password for sending mail: yes
This brings us to the end of this guide. In it, we covered the basics of setting up a mail server with Postfix and Dovecot with TLS security via Let's Encrypt. For securing your mail server, we also recommend reviewing the following documentation: