With Let's Encrypt, we offer you a free SSL Certificate with your Web Hosting package product. An SSL Certificate ensures a secured connection between your website and its visitors. This means that data that is transmitted from and to your website will be encrypted.
Due to restrictions from Let's Encrypt there is a maximum length for the domain name when using Let's Encrypt SSL on your Web Hosting. Therefore it is important that the domain name including the point and the extension is at most 42 characters long, otherwise it's not possible to use SSL from Let's Encrypt.
How do I enable Let's Encrypt?
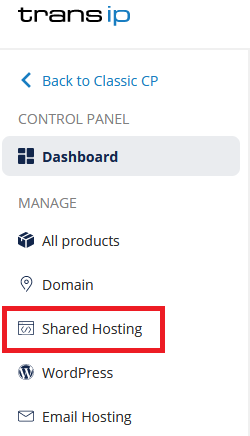
When ordering a New Webhosting product, Let's Encrypt will be automatically enabled for you. You can check this by logging in to the control panel and clicking 'Shared Hosting' in the menu. Next, select your domain below 'Products'.

Click the 'Site' tab at the top, followed by 'Domains & SSL'. Select your website by clicking ‘Manage’ to the right of it.

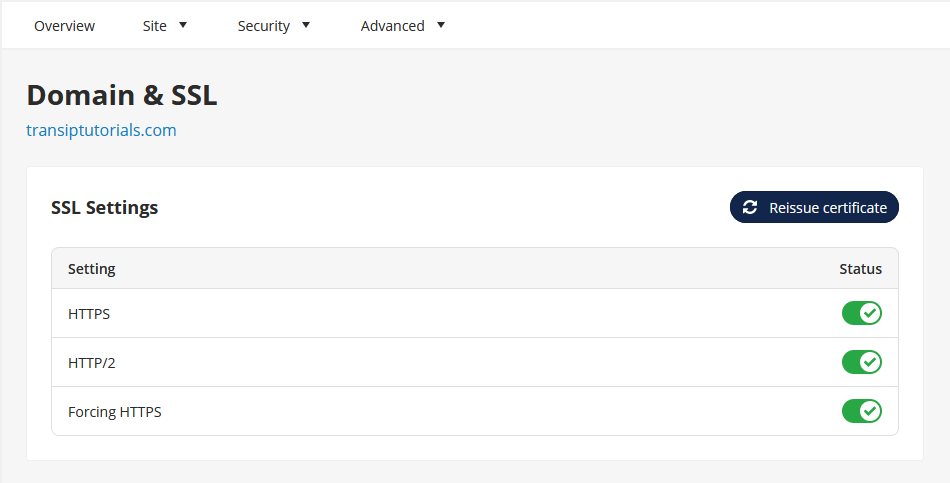
Scroll to ‘SSL settings'. The status of Let's Encrypt is show next to 'HTTPS'. You can switch Let's Encrypt on or off by using the sliding button below 'Status'.

- HTTPS - Enables Let's Encrypt on your website.
- HTTP/2 - Enables the HTTP/2 protocol, which improves the speed of your website.
- Forcing HTTPS - Visitors of your website will always be foreced to https:// with this option enabled. This requires 'HTTPS' to be enabled.
Does Let's Encrypt work for subdomains?
When Let's Encrypt is activated, every subdomain you've created on your Web Hosting will be secured by Let's Encrypt as well. You can check whether Let's Encrypt is enabled for your subdomain the same way as described above.
Keep in mind that you will have to add DNS records for these subdomains as well. Specifically, point the subdomain to the IP address of your Web Hosting using an A and AAAA record. Read the article 'Setting an A record' and 'Setting an AAAA record' to learn how to add an A record for a subdomain.
Let's Encrypt isn't active yet
In that case you should check if your domain name uses the DNS settings of your Web Hosting. Make sure your A and AAAA records point towards the IP address of your Web Hosting. Afterwards, disable and enable Let's Encrypt by using the button next to 'HTTPS'.
Also, check if you have an active CAA record in your DNS settings and whether it allows Let's Encrypt to issue certificates for your domain. If no CAA record is present on your domain, Let's Encrypt is automatically allowed.
Additionally, it is necessary for DNSSEC to be active on your domain name. Are you using the TransIP name servers? Then DNSSEC is automatically active. For custom name servers, you can use the help in the article ‘How can I secure domains that use custom nameservers with DNSSEC?’.
Let's Encrypt will be automatically activated on your Web Hosting. If this isn't the case after 30 minutes, please contact our support team. They will be able to assist you with activating Let's Encrypt for your specific case.


