


Plesk allows you to migrate all data from one Plesk server (or another control panel) to another Plesk server using an extension that is installed by default on a VPS with Plesk. In this guide, we will show you how to perform a migration from an existing to a new Plesk server using this extension.
- The steps in this guide require two VPSs with Plesk. For optimal compatibility, ensure that both the current and new Plesk servers are fully up-to-date.
- These steps also work between different operating systems, for example, to migrate a Plesk installation from CentOS to AlmaLinux.
- The steps in this article are shown in the 'Power User view'.
- It is not possible to transfer IP addresses from the old server to the new one.
Step 1
To perform the migration, a root user with SSH access is required. SSH access is disabled by default for the root user in our control panel installations. Therefore, first temporarily enable SSH access for the root user. Connect as the root user via the console in the control panel to your original VPS.
Step 2
Grant the root user access via SSH and reload your SSH configuration with the commands:
sed -i 's/PermitRootLogin no/PermitRootLogin yes/g' /etc/ssh/sshd_config
systemctl reload sshd
The sed command allows you to change the content of a file from the command line without actually opening the file. The syntax is sed -i 's/<original value>/<new value>/g' /<directory>/<file>
Step 3
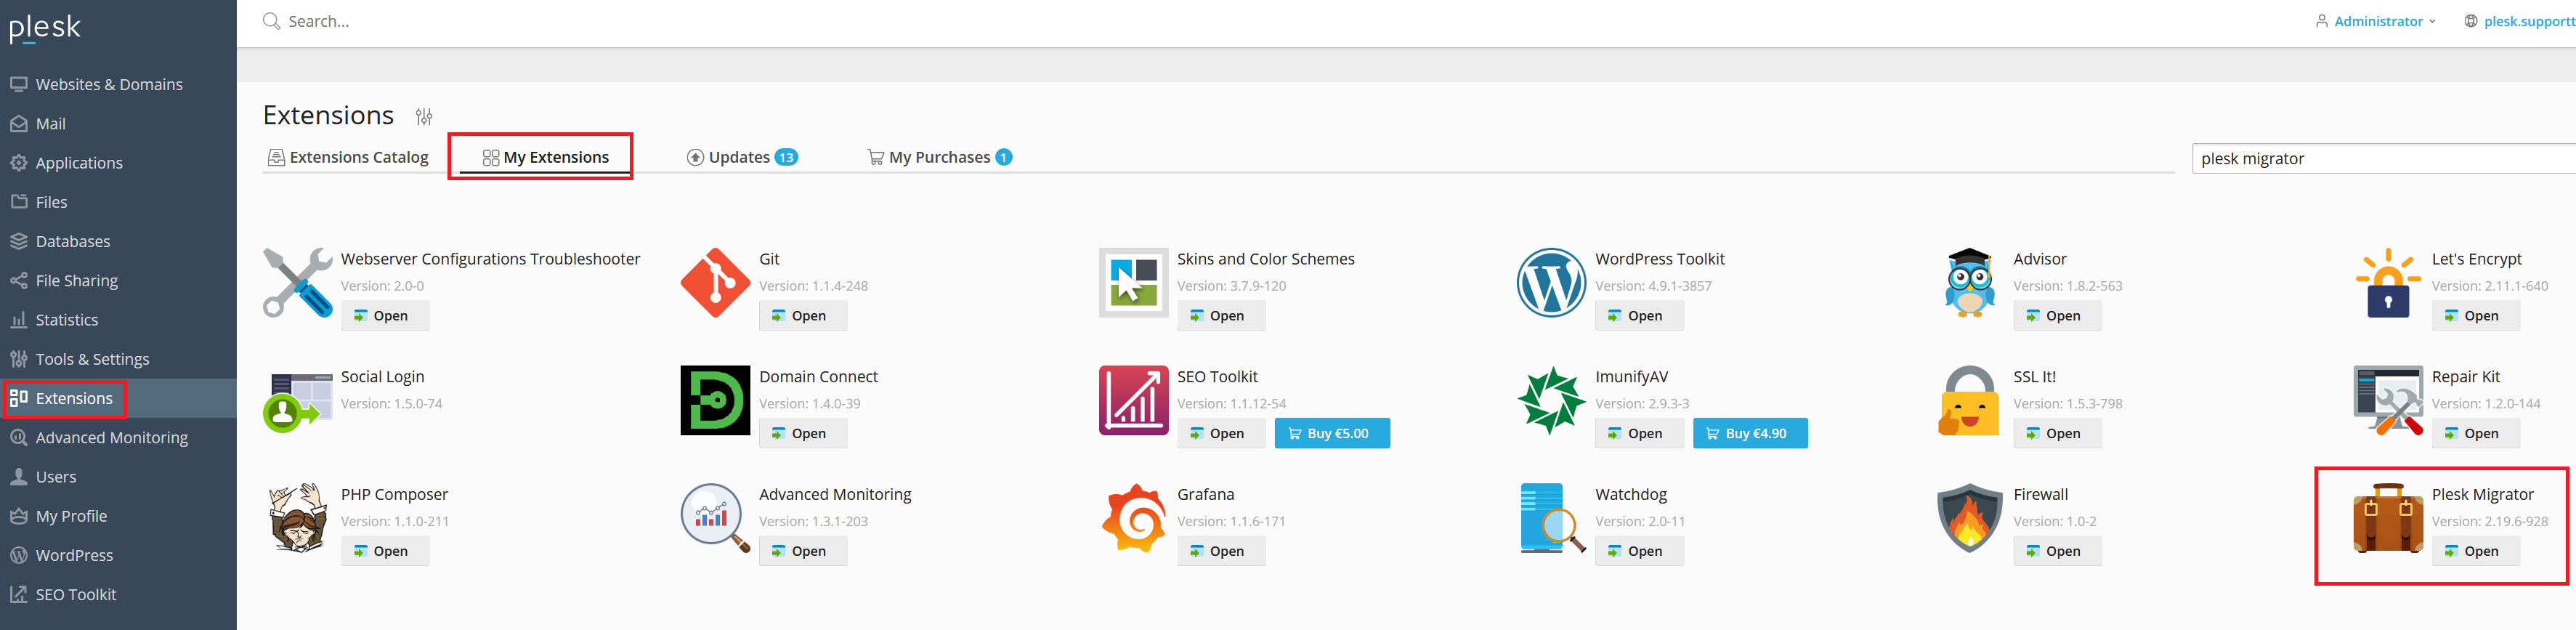
Log in to the Plesk interface (<ip-address>:8443) of the new Plesk server as root and go to 'Extensions' > 'My Extensions' > 'Plesk Migrator' > 'Open'.
Step 4
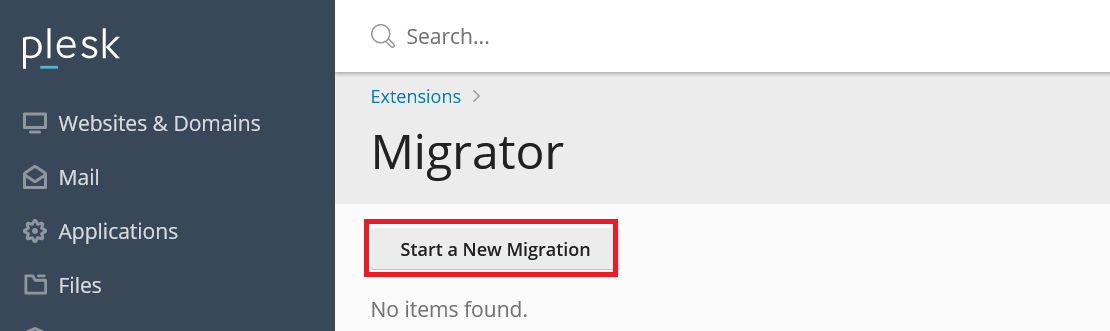
Click on 'Start a new migration'.
Step 5
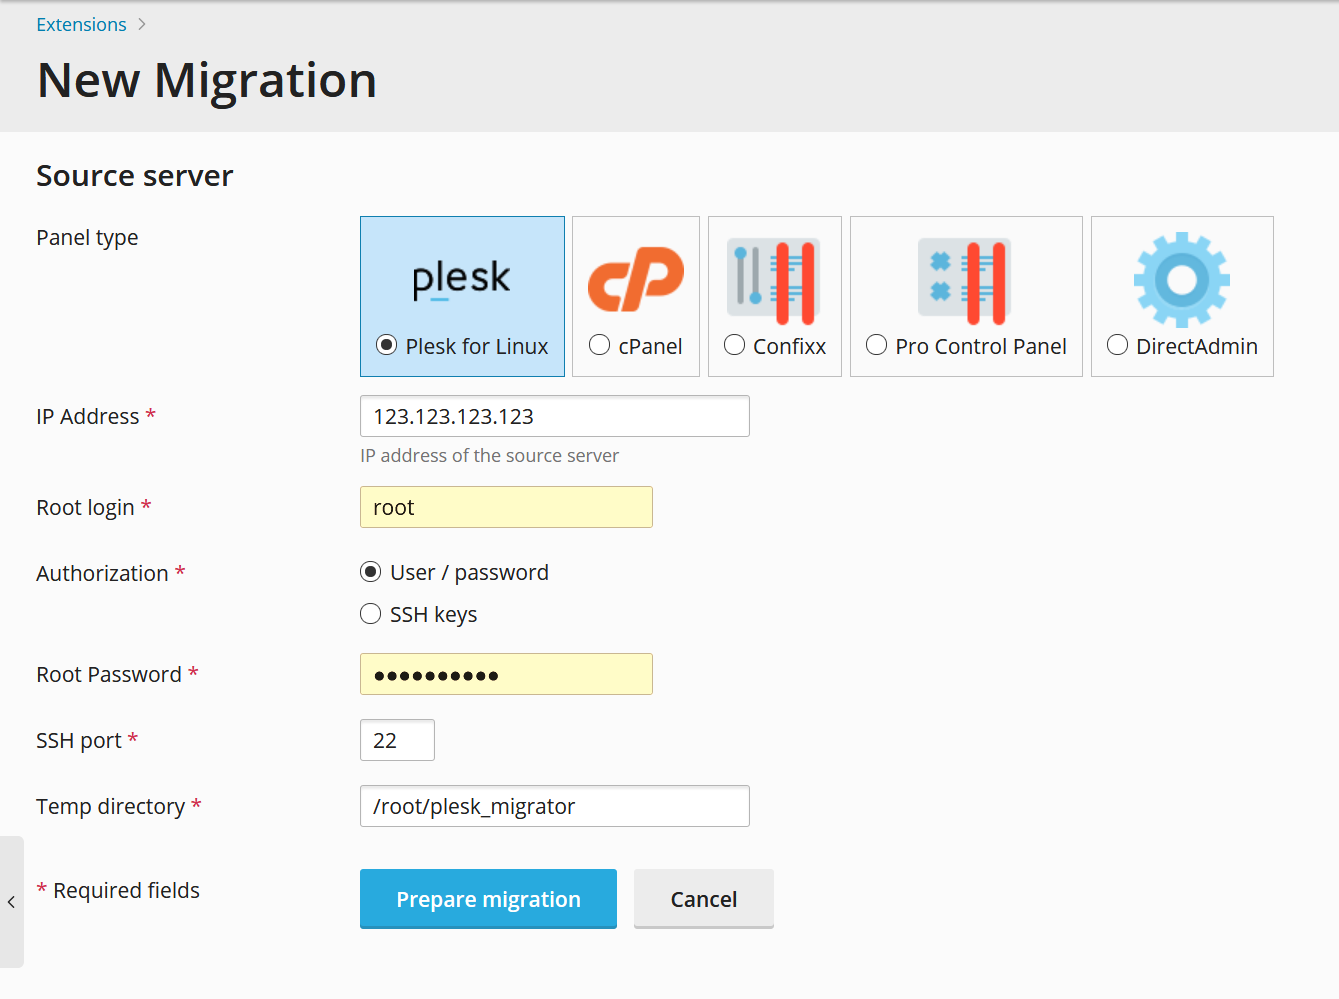
Select the desired panel type, for existing Plesk VPSs at TransIP this is 'Plesk for Linux', and enter the following information of the original Plesk server from which you want to migrate the data (not the information of the server on which you are performing these steps).
- IP address: the IPv4 address of the original server
- Root login: the account name of the root user (almost always the name 'root')
- Authorization: use user/password unless you specifically use SSH keys
- Root password: the password of the root user
-
SSH port: the SSH port number; the default is 22. You can check this via the command line with the command:
cat /etc/ssh/sshd_config | grep Port - Temp directory: where temporary files needed for the migration are stored. You do not need to change this.
Then click on 'Prepare migration'.
Step 6
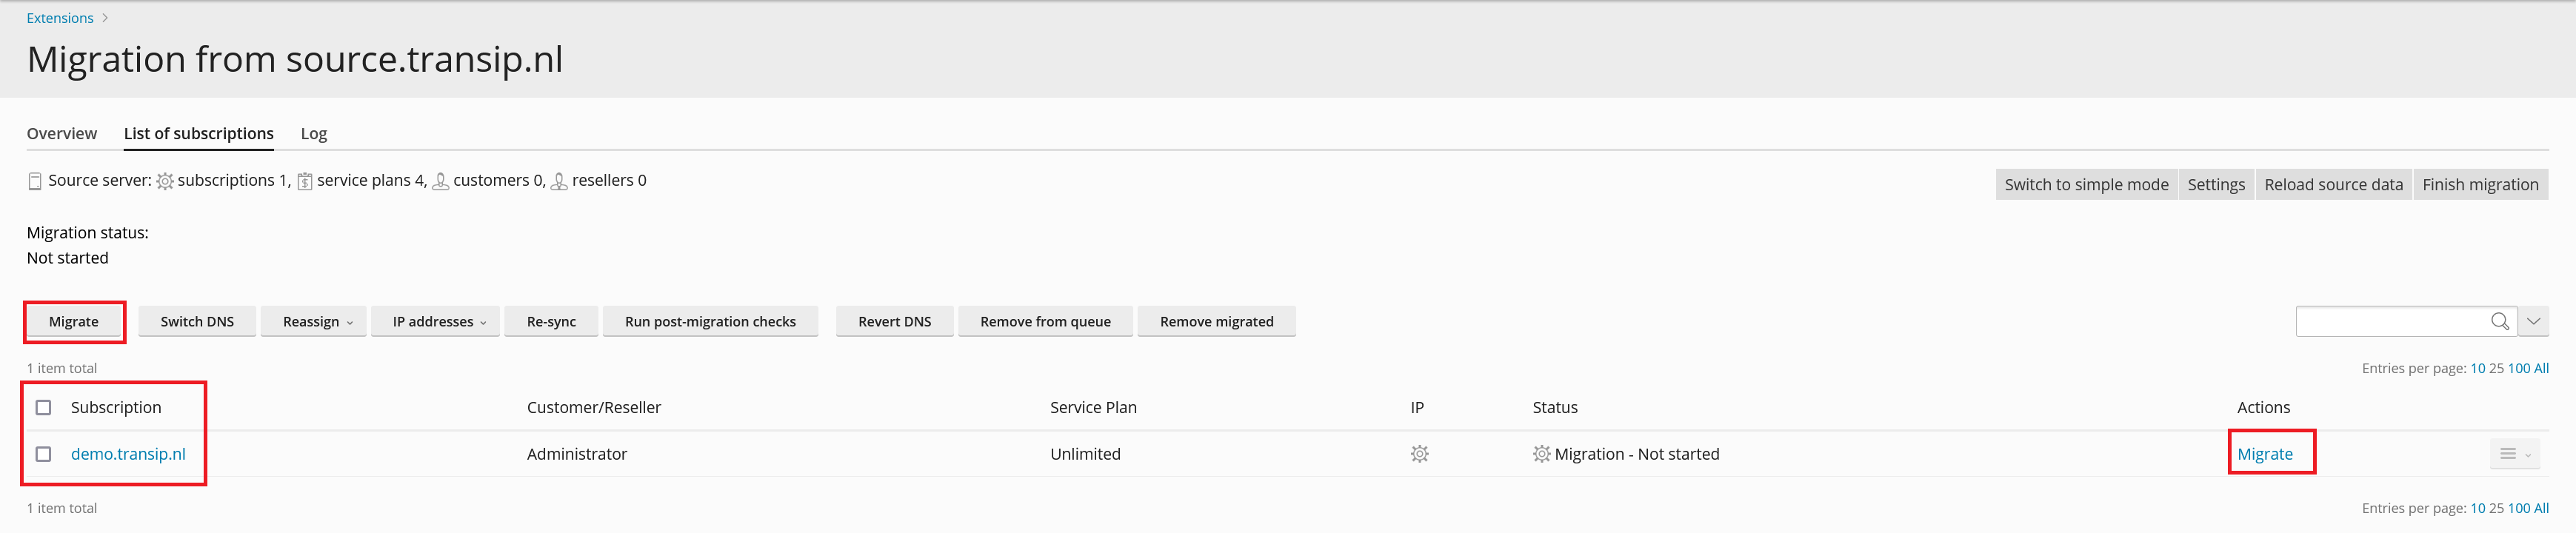
Plesk will automatically detect all available subscriptions. Check all available subscriptions and click on 'Migrate', or migrate subscriptions individually by clicking 'Migrate' next to a subscription.
If the customer/reseller associated with the subscription does not yet exist on the new server, it will be created automatically.
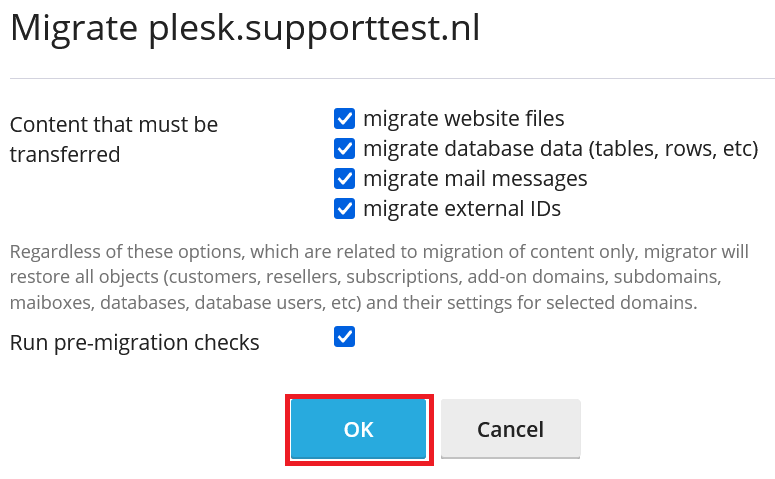
Step 7
You have the option to customize what you want to migrate. Leave all options checked and click on 'OK'.
Step 8
You will likely see a message about missing Apache modules. This can even happen if you have two newly installed servers and can be safely ignored. Click on 'Start migration'.

Step 9
Depending on the size, the migration may take a while. When it is complete, you will see a green notification. Click on 'Finish migration' and click on 'Yes' in the pop-up screen to confirm that all settings can be cleared and the migration can be completed.

Step 10
Finally, update the DNS records of the domains you host on your Plesk server. Suppose your old server had the IPv4 and IPv6 addresses 123.123.123.123 and 2a01:7ca:aaab:123::1, and the new one has 185.10.50.51 and 2a01:7c8:aaaf:333::1, then after the adjustment the DNS records of a domain would look like this:

The 'server' record is added in this example because the domain is also used as the hostname for the new VPS. This will not apply to every domain on your VPS.
For more detailed information on setting up DNS records, see our article on setting up DNS records.
This concludes our guide on migrating Plesk servers.
Should you have any questions based on this article, please do not hesitate to contact our support department. You can reach them via the 'Contact us' button at the bottom of this page.