Cart

    Sorry, we could not find any results for your search querry.

    Plesk Tutorial Series 3: updating your VPS

    This is the third part of our Plesk Tutorial Series. If you're configuring a new VPS we recommend starting with part 1.

    Plesk automatically installs updates for software such as MariaDB and is delivered completely up-to-date. Software which no longer receives security updates (e.g. older PHP versions) is not present in Plesk by default. This means that (at the time of the latest update) PHP 7.3.18 and 7.4.6 have already been pre-installed on your VPS for example. You manage these software (packages) from Plesk.

    No further action is required for the update process on your part and we therefore focus on the following things in this part:

    • Adjusting the PHP version & settings
    • Plesk's automatic updates
    • Manually checking for updates

    Perform all steps that involve code as root user, or user with sudo rights, unless indicated otherwise.

    Changing the PHP version and settings

    The PHP version defaults to 7.4.6 and is adjusted per domain as follows:


    Step 1

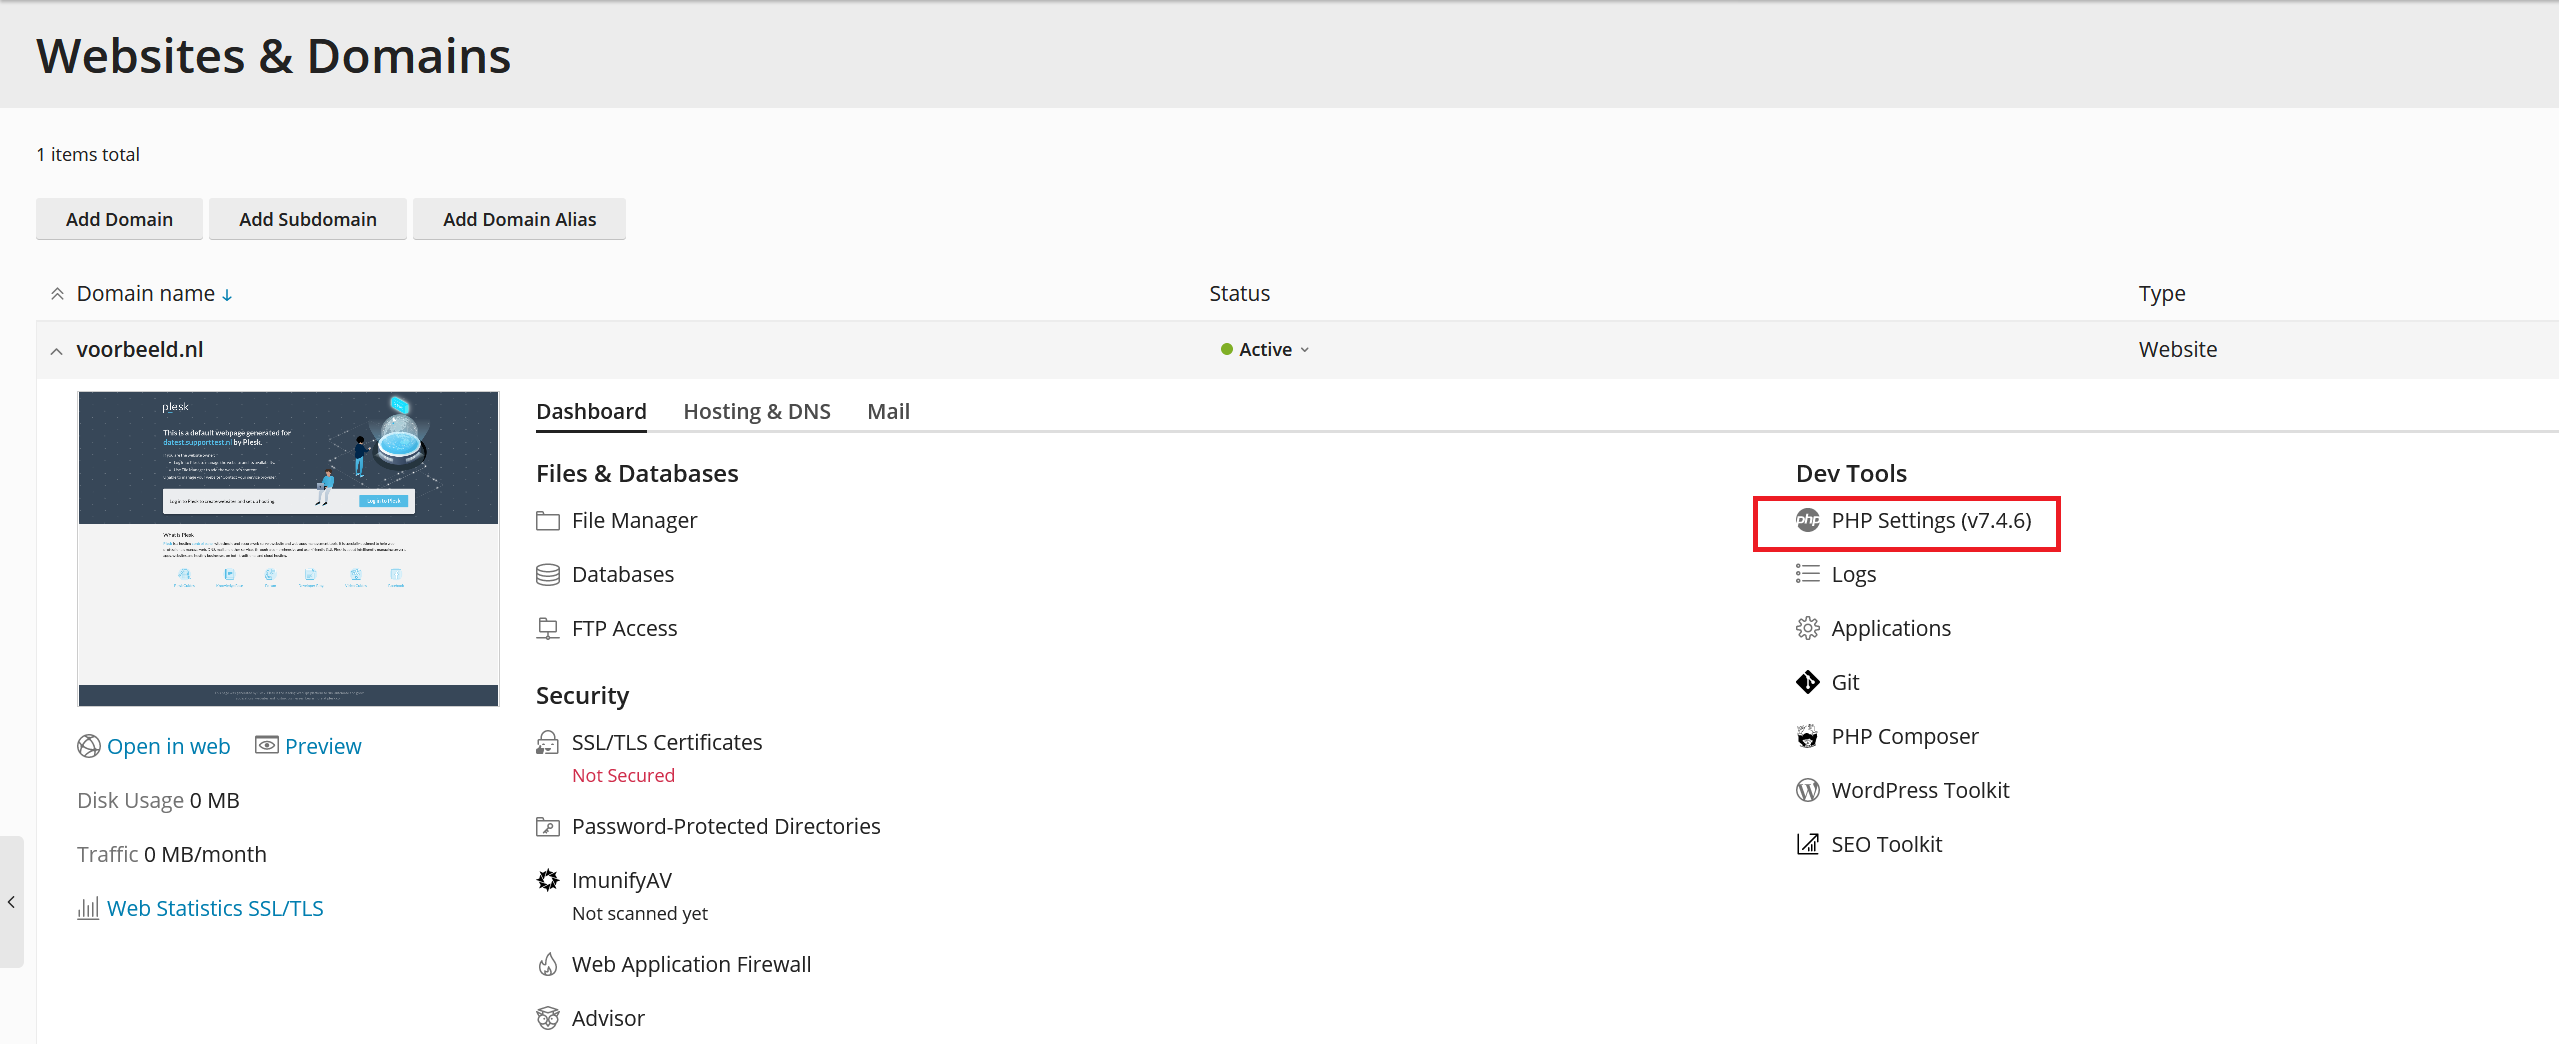
    Log in to Plesk and navigate to 'Websites & Domains' > 'PHP Settings'.

    plesk websites and domains php settings


    Step 2

    Change the PHP version to a version of your choice and at the bottom of the page click on 'Apply'> 'Ok'.

    plesk domain php settings

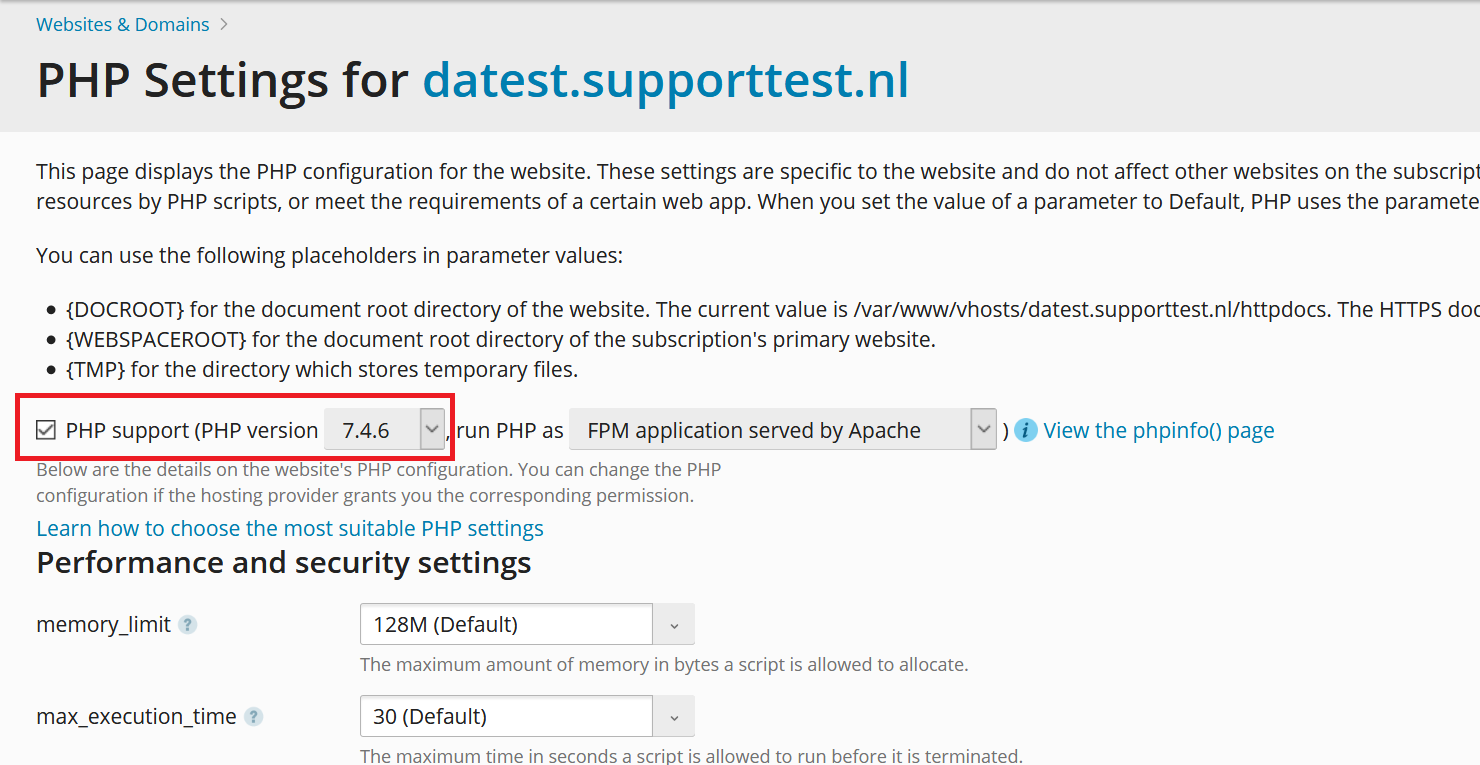
    You are free to adjust the PHP settings on this page. However, we recommend that you leave / turn PHP-FPM via  Nginx and not use FastCGI as FPM is faster. Additionally, as of Plesk 17.8 PHP-FPM with Nginx new caching mechanics are introduced. These mechanics will provide a significant performance gain for the loading of your websites' static objects and reduce CPU usage.


    Step 3

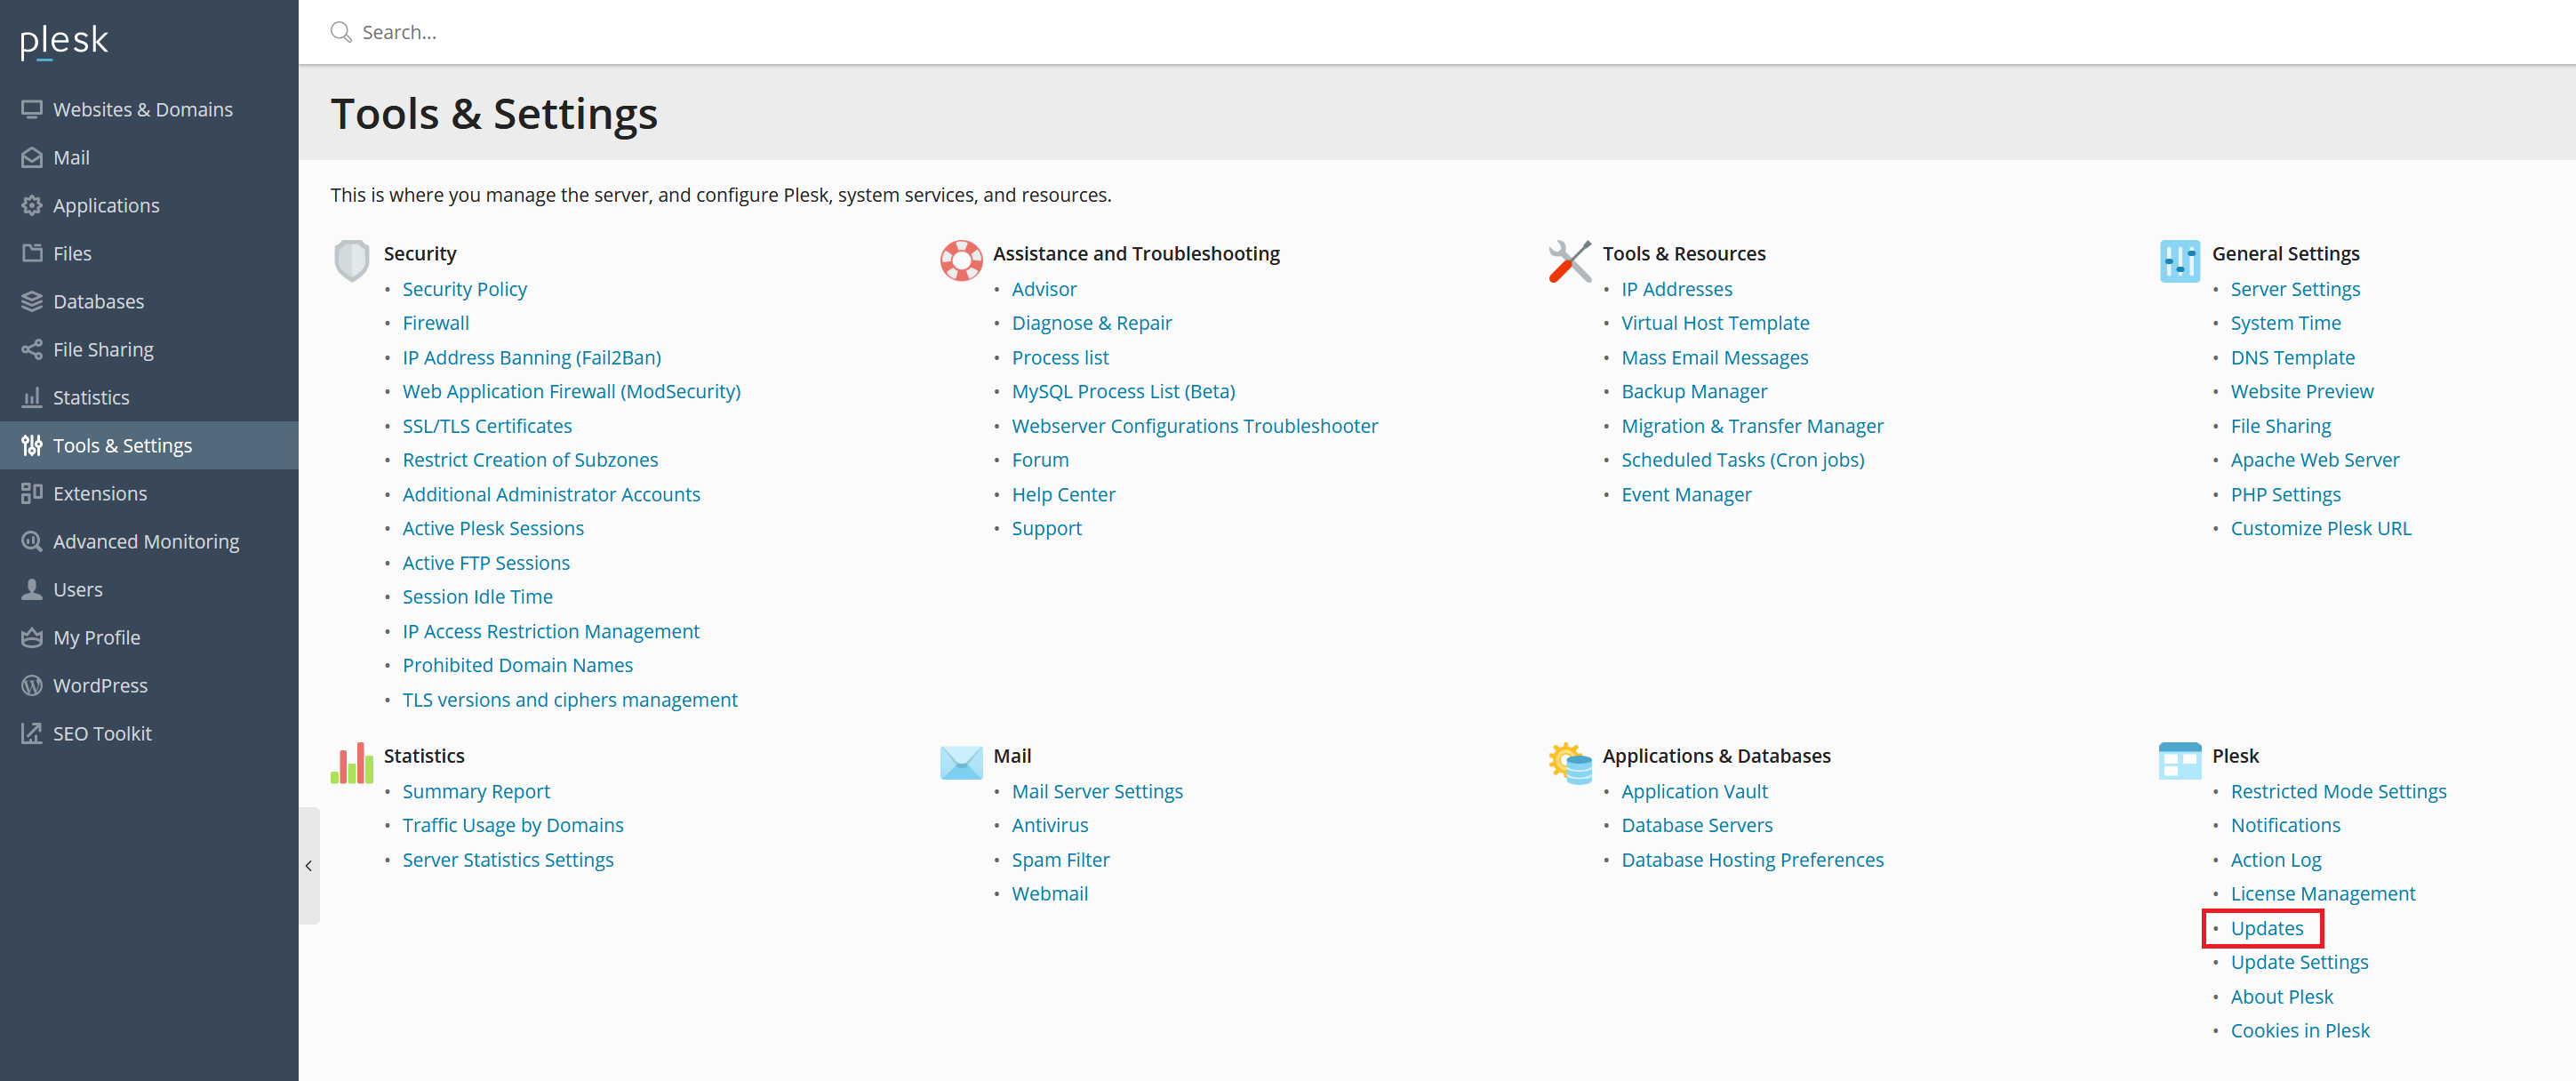
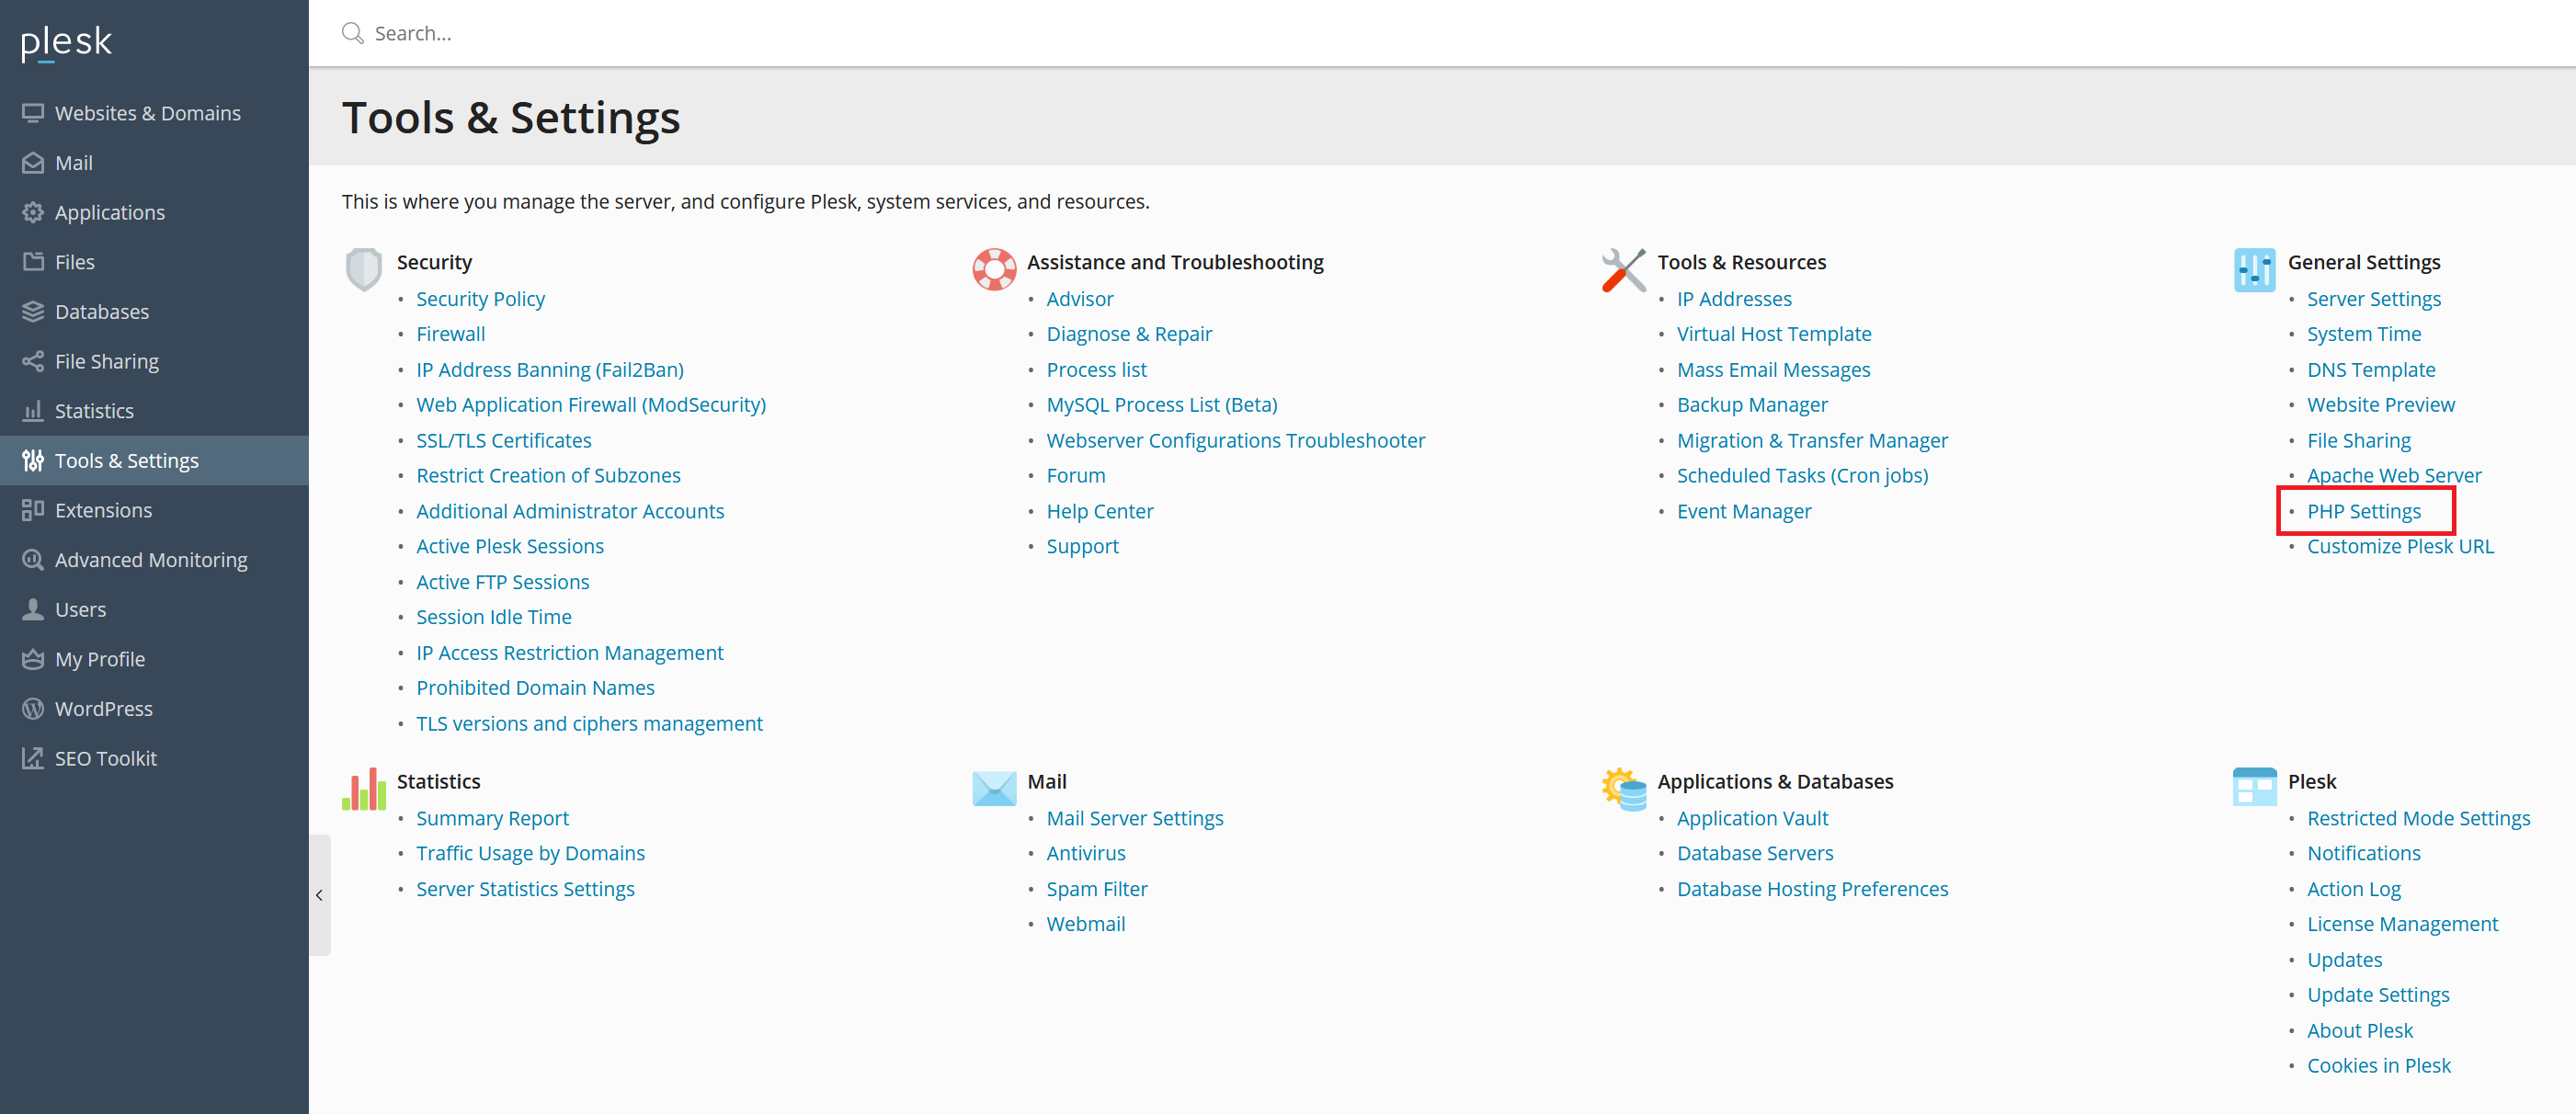
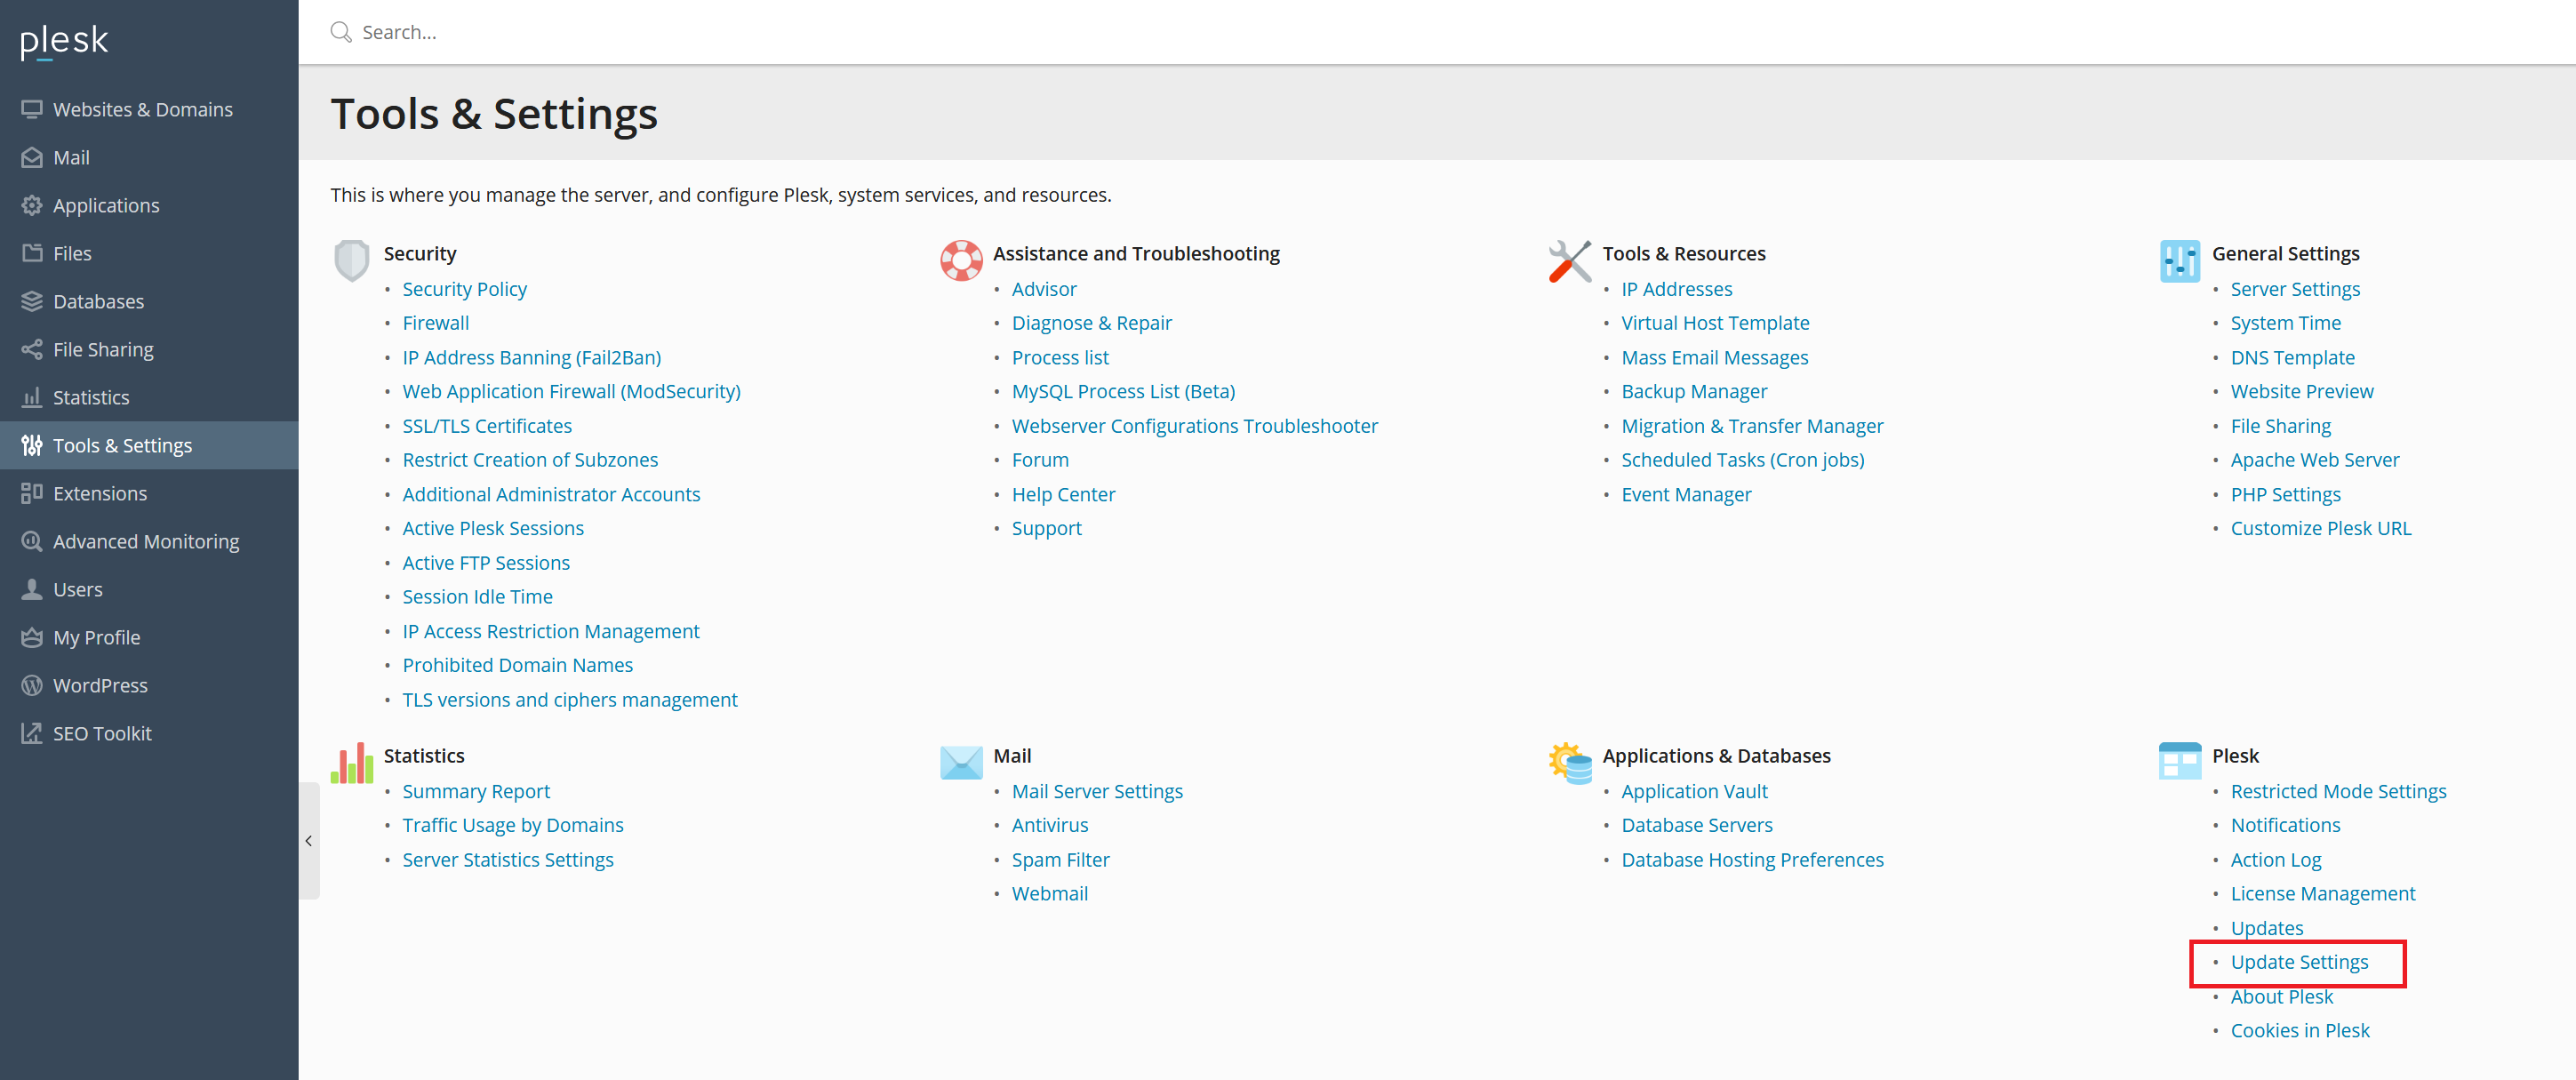
    You may have noticed that some hard limits have been set, such as a Memory Limit of 128MB. Many CMS systems need more memory. To adjust this, go to 'Tools & Settings'> 'PHP Settings'.

    plesk tools and settings php settings


    Step 4

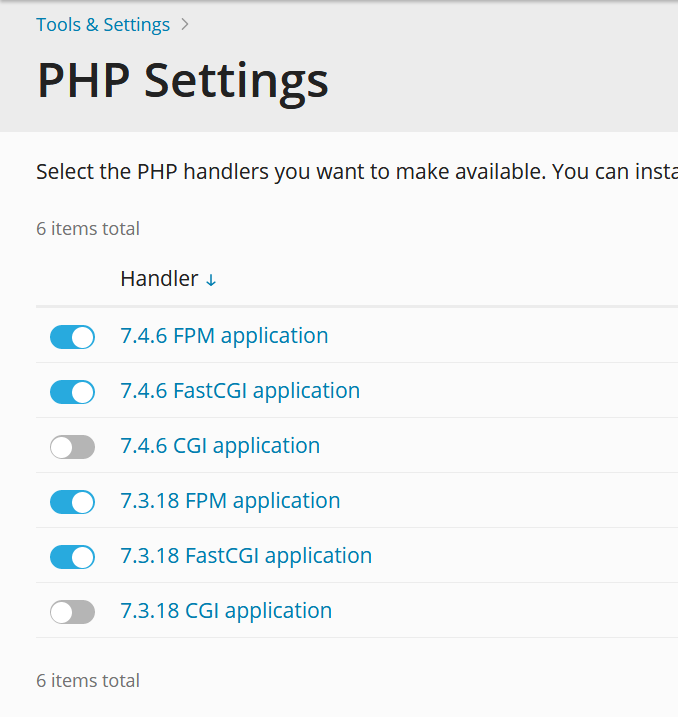
    You will see an overview of the PHP handlers (a handler is a function that performs a specific task). Click on the number that you set under step 2.

    plesk php settings and handlers


    Step 5

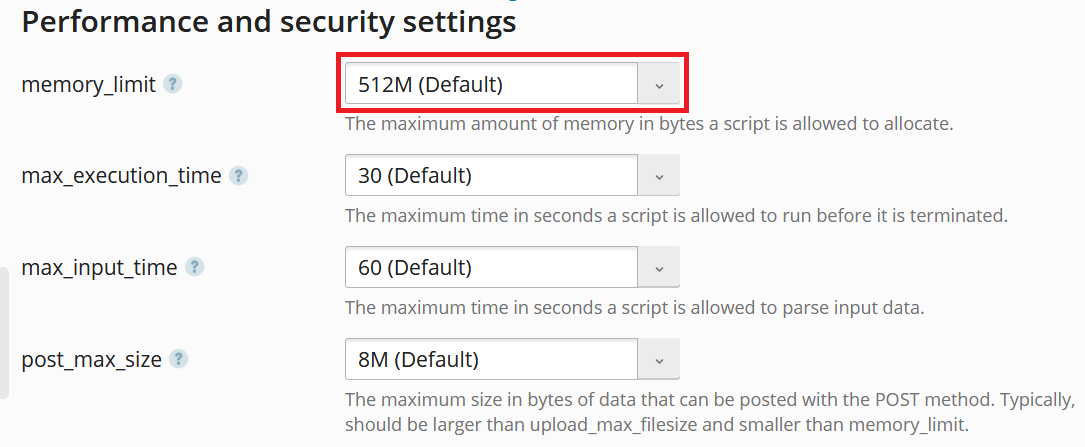
    Click on the 'php.ini' tab. You will now see an overview of PHP settings for your selected PHP handler. Look for the hardcoded limit you want to look up (for example ctrl + f > memory_limit = 128M) and adjust the limit to the desired value. Then click on 'Ok'

    plesk php performance settings

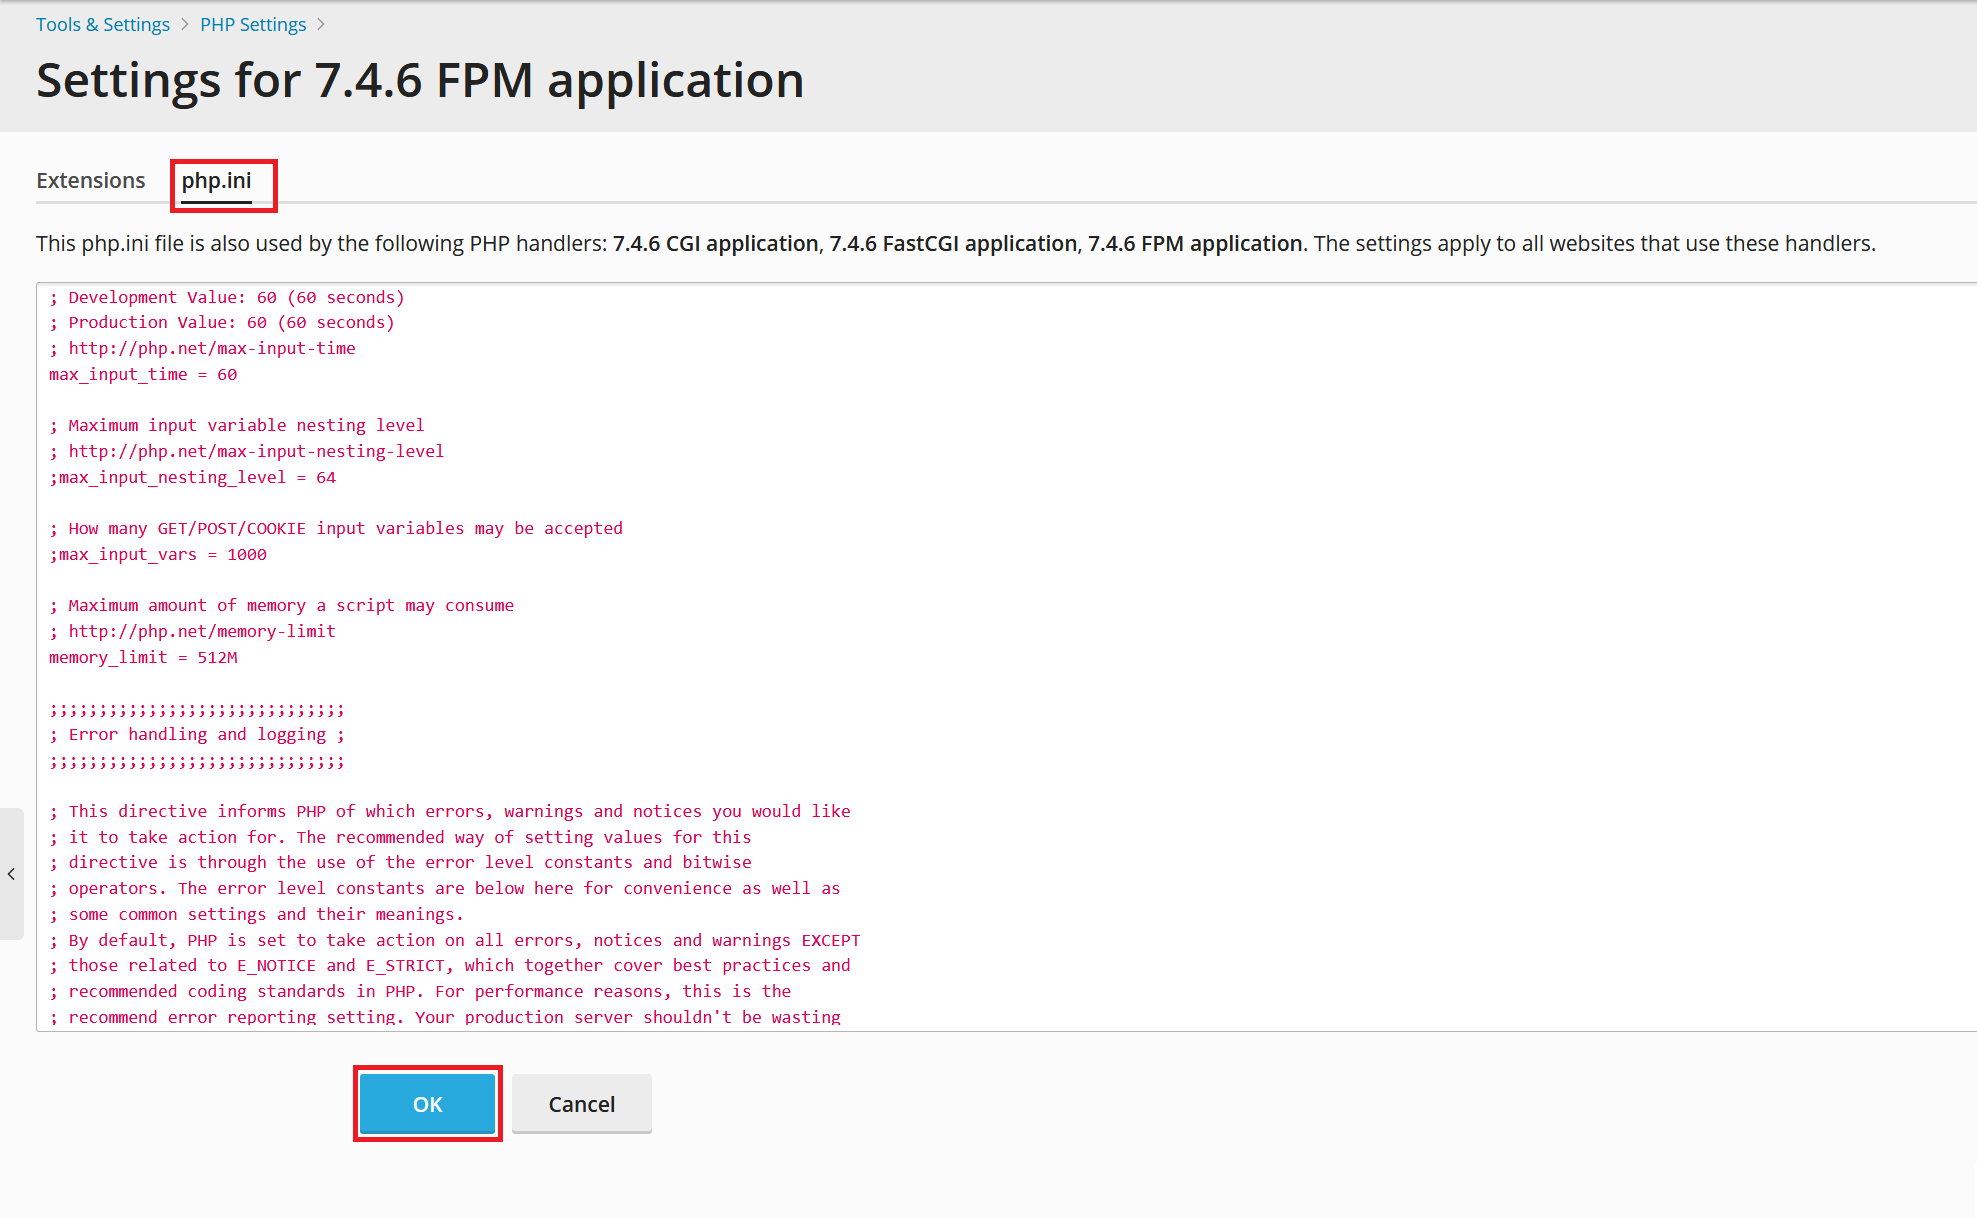
    If you now return to 'Websites & Domains' > 'PHP Settings' you can adjust the value of the customized option. Note that you have to enter this manually (in this example the memory_limit to 512M, though for most websites 128MB or 256MB is sufficient). Then click on 'Apply' to process the changes.

    plesk php performance settings

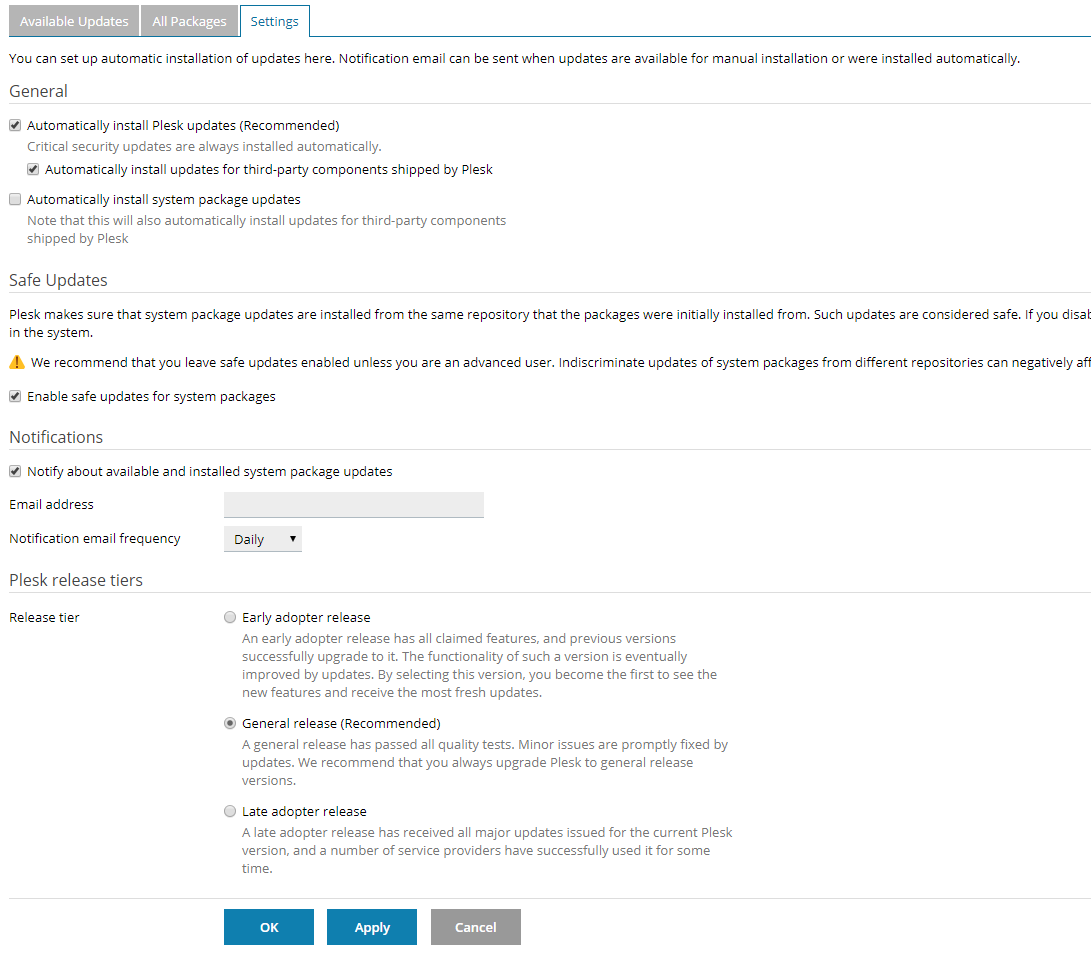
    Plesk automatic updates

    Updates are meant to give your VPS more stability, better functionality and security. Plesk updates are performed automatically (usually during the evening) and include the following components by default:

    • Plesk packages and services developed by Plesk (e.g. Plesk Health Monitor and Plesk extensions).
    • Packages of your operating system
    • Third-party components such as MySQL, PHP, etc.

    The settings of the automatic updates can be found under 'Tools & Settings'> 'Update & Upgrade Settings'.

    plesk update and upgrade settings

    You will then see the overview below of the update settings. A complete overview of all packages that are automatically updated can be found under the 'All Packages' tab. There are + - 900 packages at the time of writing.

    plesk system updates and settings

    You may have noticed that under 'General' the option 'Automatically install system package updates' is turned off and may wonder what the differences are between the Plesk updates and the system package updates.

    • The Plesk updates include Plesk packages and services developed by Plesk (e.g. Plesk Health Monitor and Plesk extensions). Optionally you can also install third-party components such as PHP, Apache and Dovecot along. This option is on by default.
    • The system package updates include all packages for your operating system, but also the above mentioned third-party components.

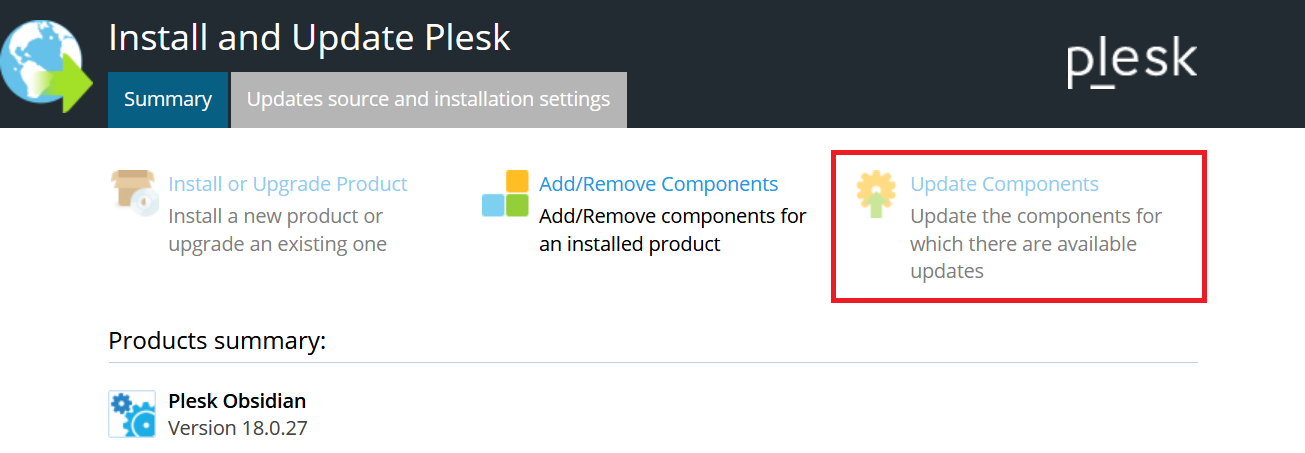
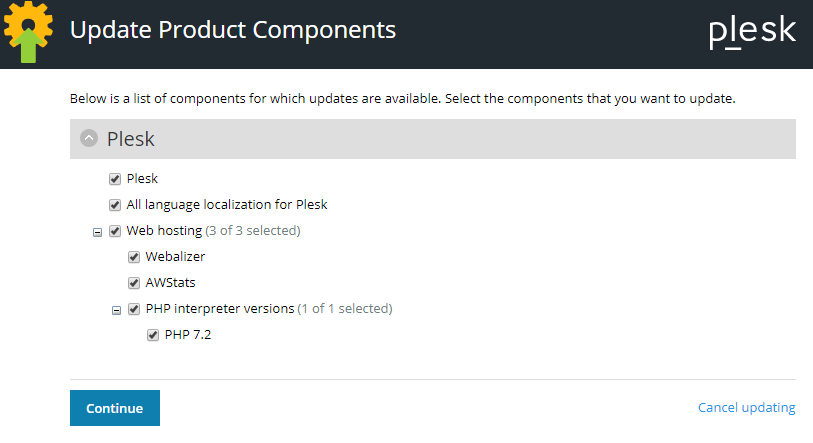
    Updating Plesk manually

    Plesk itself and components that do not fall under automatic updates (e.g., new PHP interpreter versions, Webalizer, etc.) can only be manually updated from Plesk using the steps below. We advise you to check this with some regularity and to keep your VPS up-to-date as much as possible.

    Step 1

    In Plesk go to 'Tools & Settings'> 'Updates and Upgrades'.

    plesk updates and upgrades


    Step 2

    If there are updates available, you will see an orange exclamation mark 'Component updates are available'. Click on 'Update Components' at the top right.

    plesk update components


    Step 3

    Select the components you want to update (usually all) and click on 'Continue'.

    plesk update products and components

    Please note that the components you see may differ from those in the example above.


    Your VPS is now not only safe, but also completely up-to-date and you're ready to link a domain! Click here to continue to Part 4: Linking Domains and Subdomains.


    Should you have any questions left regarding this tutorial, do not hesitate to contact our support department. You can reach them via the ‘Contact Us’ button at the bottom of this page.


    Need help?

    Receive personal support from our supporters

    Contact us