


In these special times, there is less opportunity to see friends, family and colleagues in person. Maybe that's why you're looking for an online alternative that allows you to have a video call with an unlimited number of people from your computer, laptop, or mobile.
Jitsi is a free collection of open-source projects that makes this possible. With Jitsi you can easily set up a secure video conference server on a VPS.
Using Jitsi, you can set up a video conference not only for private, but also for business purposes. To facilitate this, Jitsi comes with familiar business features such as sharing your desktop or presentations with other participants. Jitsi also distinguishes itself from competitors thanks to:
- Low latency
- High Quality
- Privacy guarantee
- Easy to install and use
In this guide, we show you how to set up a Jitsi server on a VPS with Ubuntu or Debian.
Installing Jitsi
Step 1
Connect to your VPS via the VPS console or SSH.
Step 2
Add the package repository key and sources.list.d file (i.e. with the download location) for Jitsi to your VPS using the commands:
echo 'deb https://download.jitsi.org stable/' >> /etc/apt/sources.list.d/jitsi-stable.list
wget -qO -  https://download.jitsi.org/jitsi-key.gpg.key | apt-key add -
By adding the package repository, your VPS knows where it can download Jitsi from.
Step 3
When you add a new package repository, it will only be available after updating your package list. Updating your package list is done with the command:
apt -y update
Step 4
During installation, Jitsi checks whether there is an Apache or Nginx web server on your VPS (in that order). If so, Jitsi will set up a virtual host within your webserver to host Jitsi Meet. If both are not present, Jitsi uses Nginx.
Depending on what is present on your VPS, start the installation of Jitsi with:
Nginx present on port 443:
apt -y install --no-install-recommends jitsi-meet
All other cases:
apt -y install apt-transport-https
apt -y install jitsi-meet
Jitsi consists of several components that are automatically installed using the commands above. Some of these components are mentioned later in this article, namely:
- Jitsi Meet: Jitsi Meet is an open-source WebRTC JavaScript application that uses the Jitsi Video bridge to deliver video conferences.
- Jitsi VideoBridge: Jitsi Video bridge is an XMPP server component designed to handle thousands of video streams simultaneously on a single server.
- Jicofo: Jitsi COnference FOcus is a server-side focus component that Jitsi Meet uses in conferences to manage media sessions between participants and Jitsi VideoBridge.
- Prosody: Jitsi uses Jabber for chat messages. Prosody is the server software that Jitsi uses for Jabber.
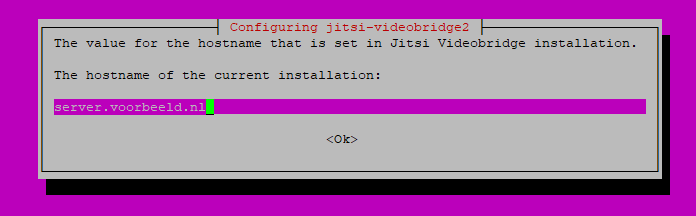
The installation wizard starts automatically and first asks for the hostname of your VPS. For the correct steps of this article to work correctly, your hostname must be a subdomain that is linked to your VPS via DNS.
Step 6
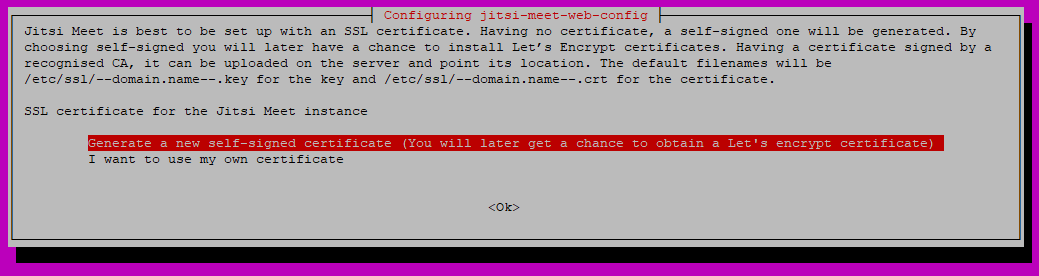
Then you get the option to install a self-signed or own SSL certificate. Both options are fine and you are free to choose. An advantage of Let's Encrypt compared to a paid certificate is that it is free and automatically renewed. Do you choose a certificate from Let's Encrypt here? Then proceed to Step 7. Do you use your own certificate? Then proceed to step 8.
Jitsi comes with a script with which you can very easily install a Let's Encrypt certificate. You only need to execute the following command:
/usr/share/jitsi-meet/scripts/install-letsencrypt-cert.sh
- When prompted, provide a valid email address. Any important security notifications will be sent to this address.
- Let's Encrypt checks whether your hostname (from step 5) is linked to your VPS via DNS. How to connect a domain to a VPS is explained in this tutorial.
That's it! Your Jitsi server is now available and ready for use immediately. We provide more information about setting up meetings in the next section.
Jitsi automatically starts the Jitsi-meet-web-config where you can indicate where your SSL certificate is located on your server.
Adjust the location to where the .key file is located, for example as in the screenshot below.
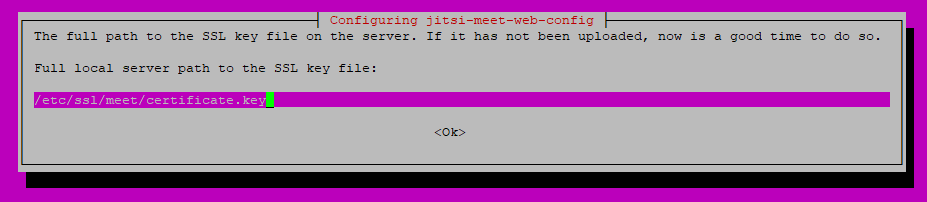
Then specify the location of the associated .crt file.

That's it! Your Jitsi server is now available and immediately ready for use. We provide more information about setting up meetings in the next section.
Using jitsi
You can use Jitsi through a browser (Chrome and Firefox), desktop application, or mobile app. In our view, the browser version and mobile apps work the simplest.
Browser
To use Jitsi in your browser, navigate in your browser to the hostname you set in step 5 of the installation, for example, server.example.com, jitsi.example.com or meet.example.com.
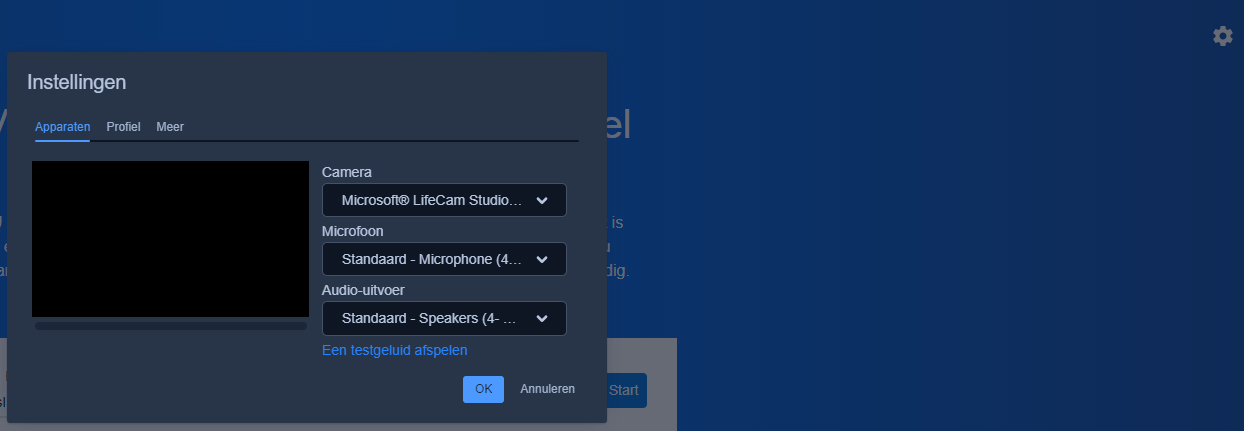
Click on the gear icon at the top right and then adjust the Camera, Microphone and Audio output to the devices you want to use.
Give your meeting a name and click 'Start' to start your meeting.

Mobile
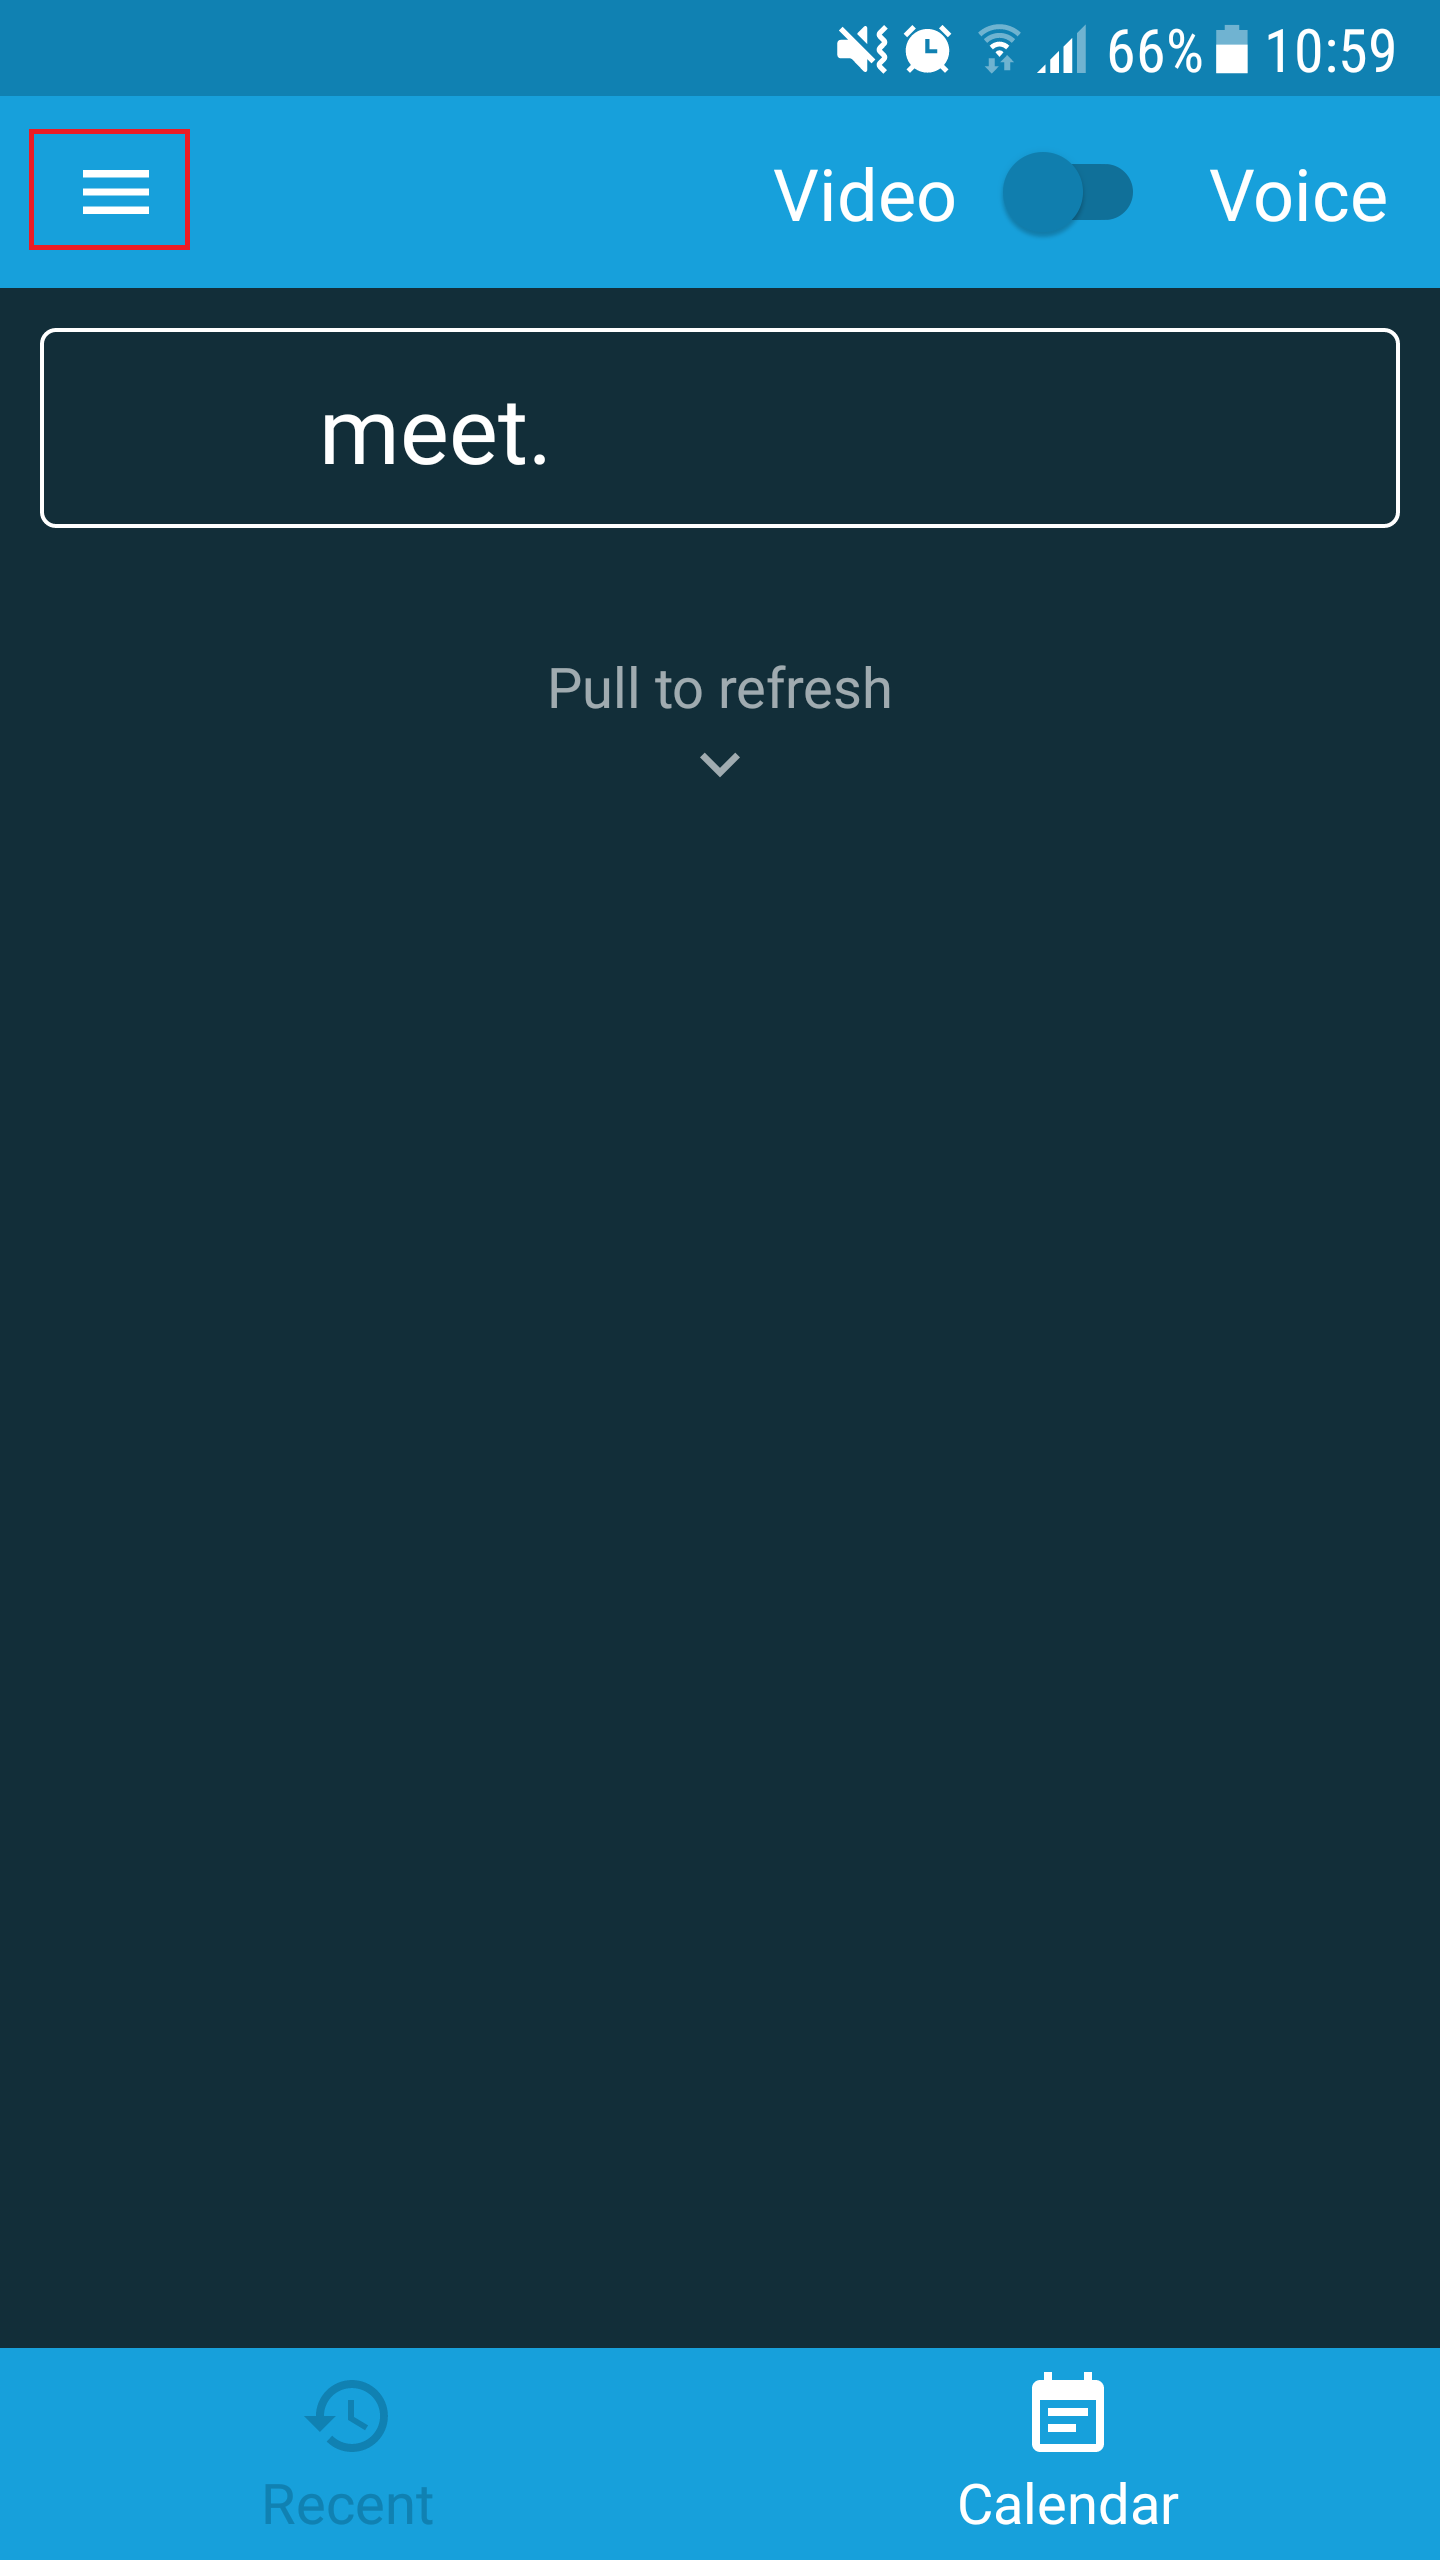
Install and launch the Jitsi mobile app for Android or iOS.
We recommend that you first set up your user account and possibly the server you want to connect to. Click on the menu icon at the top left.
Next, click on 'Settings'.
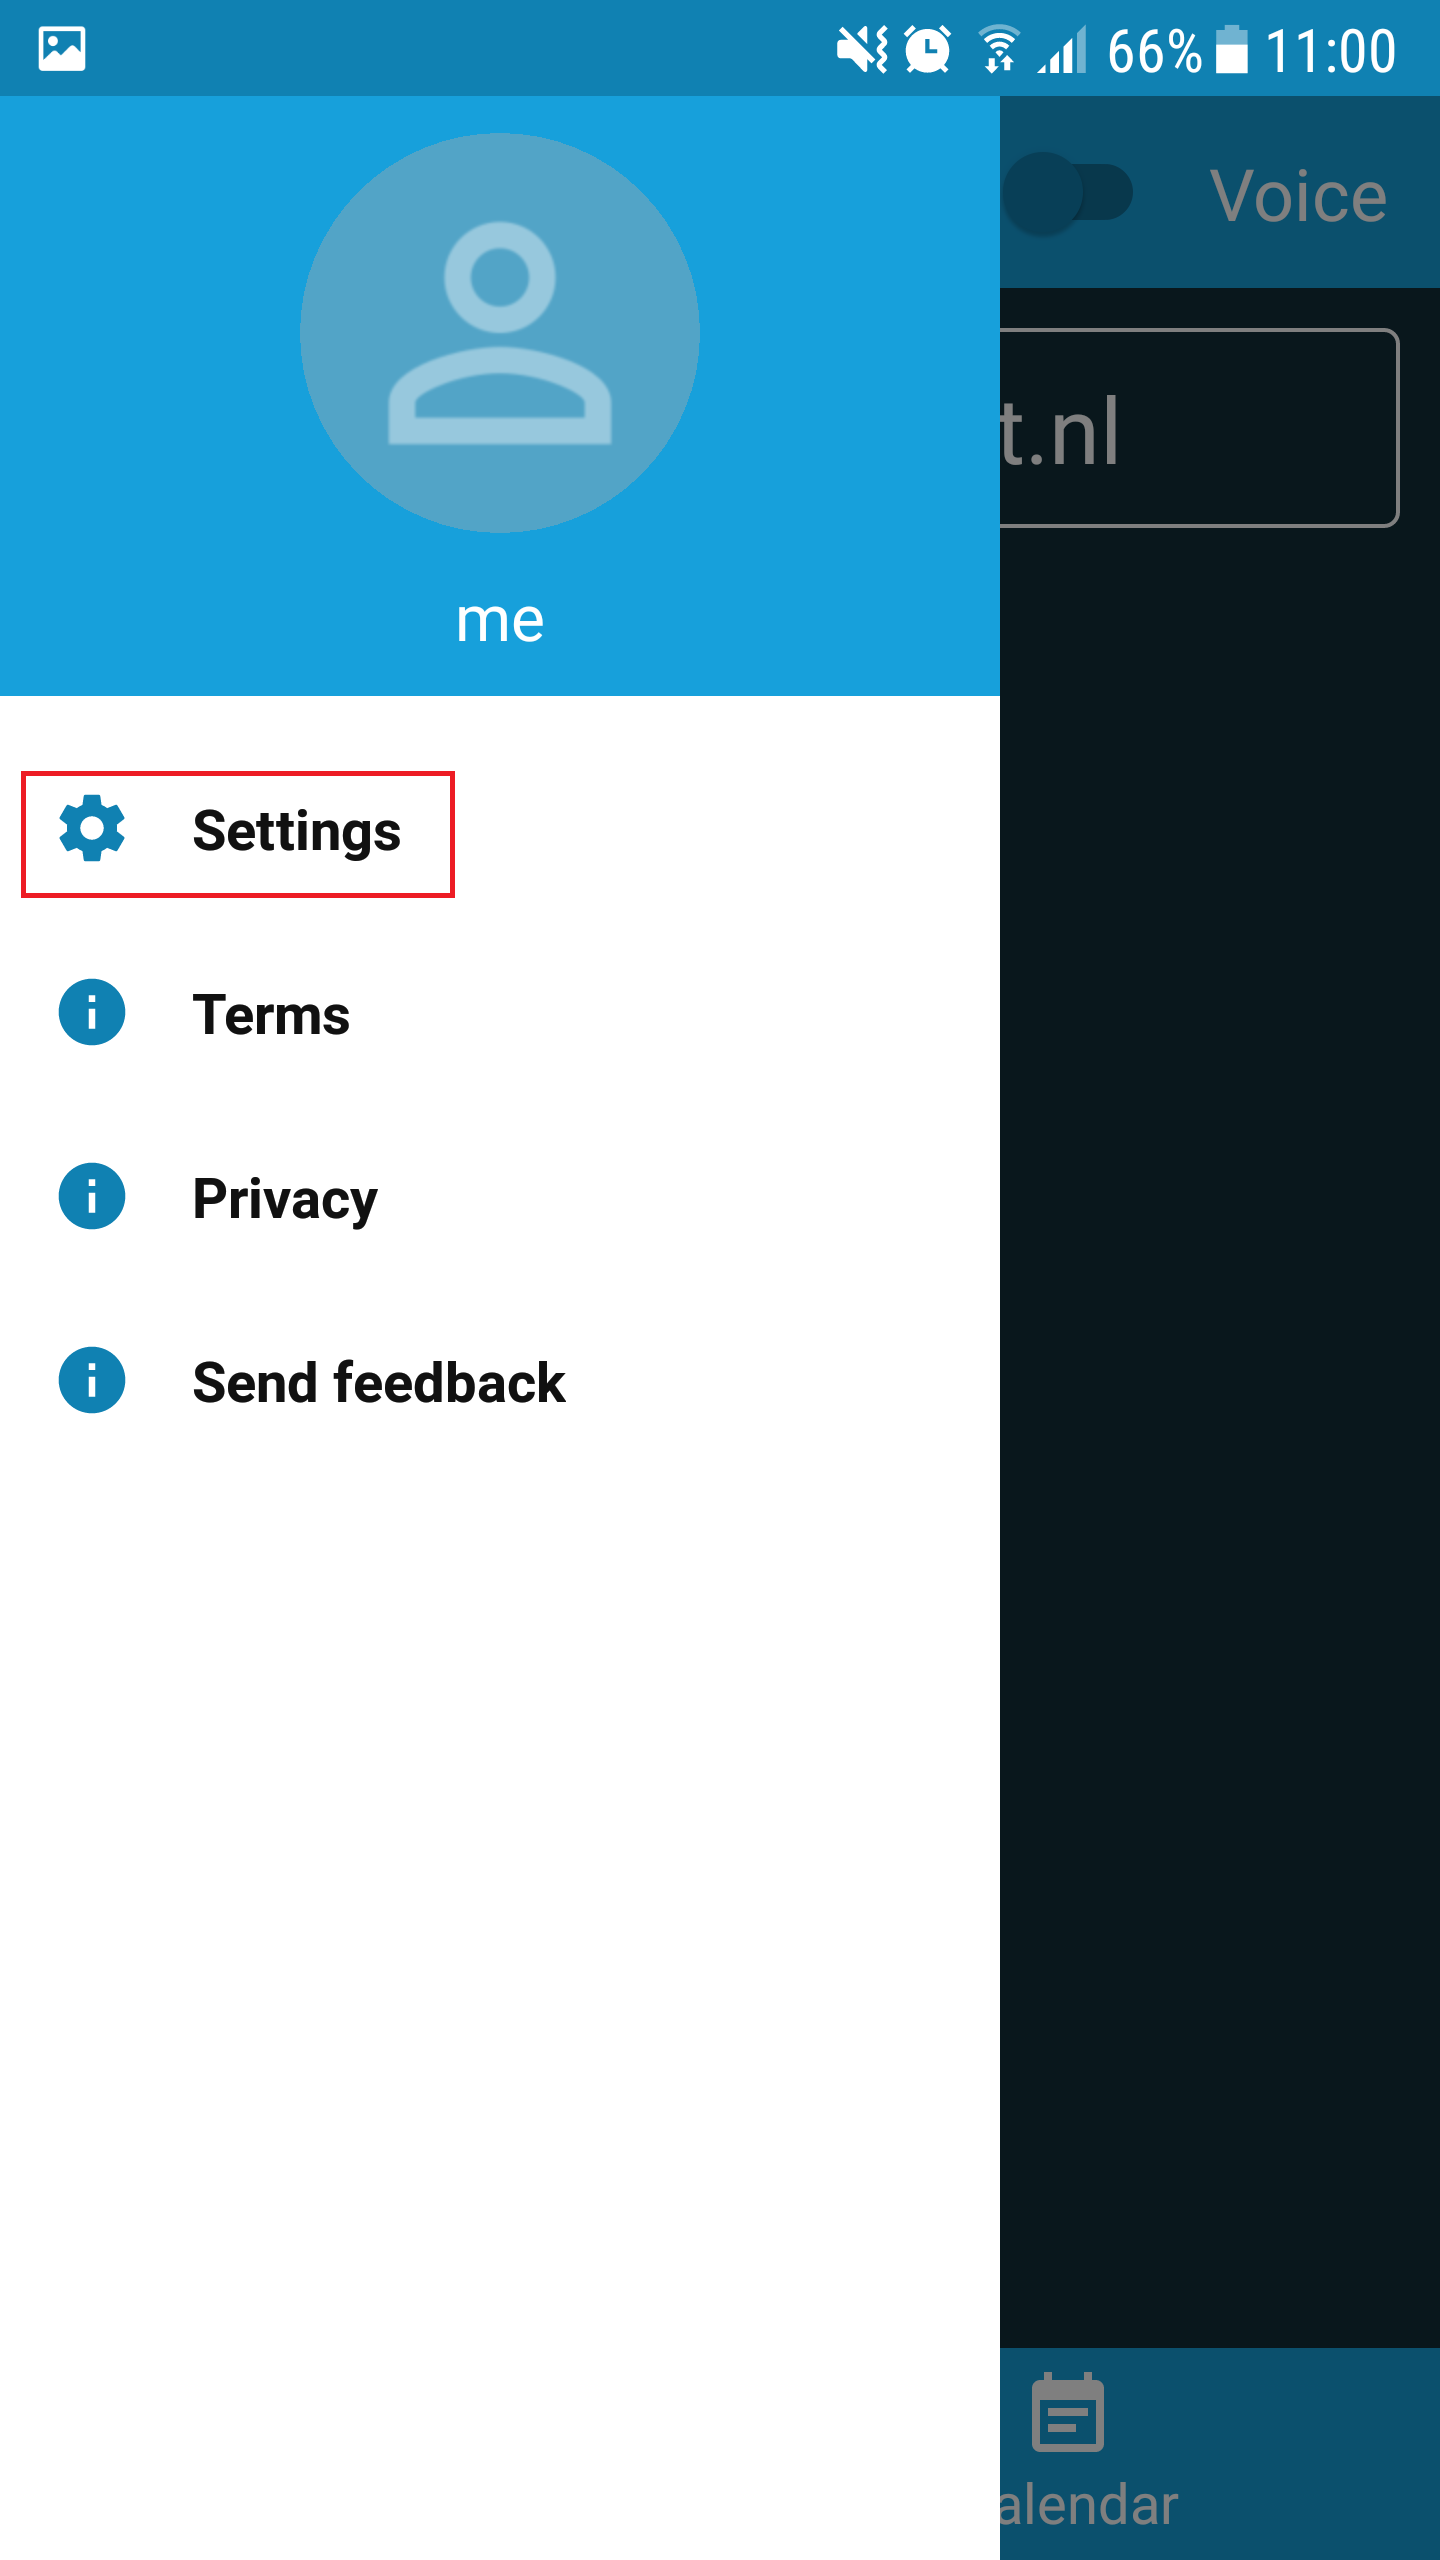
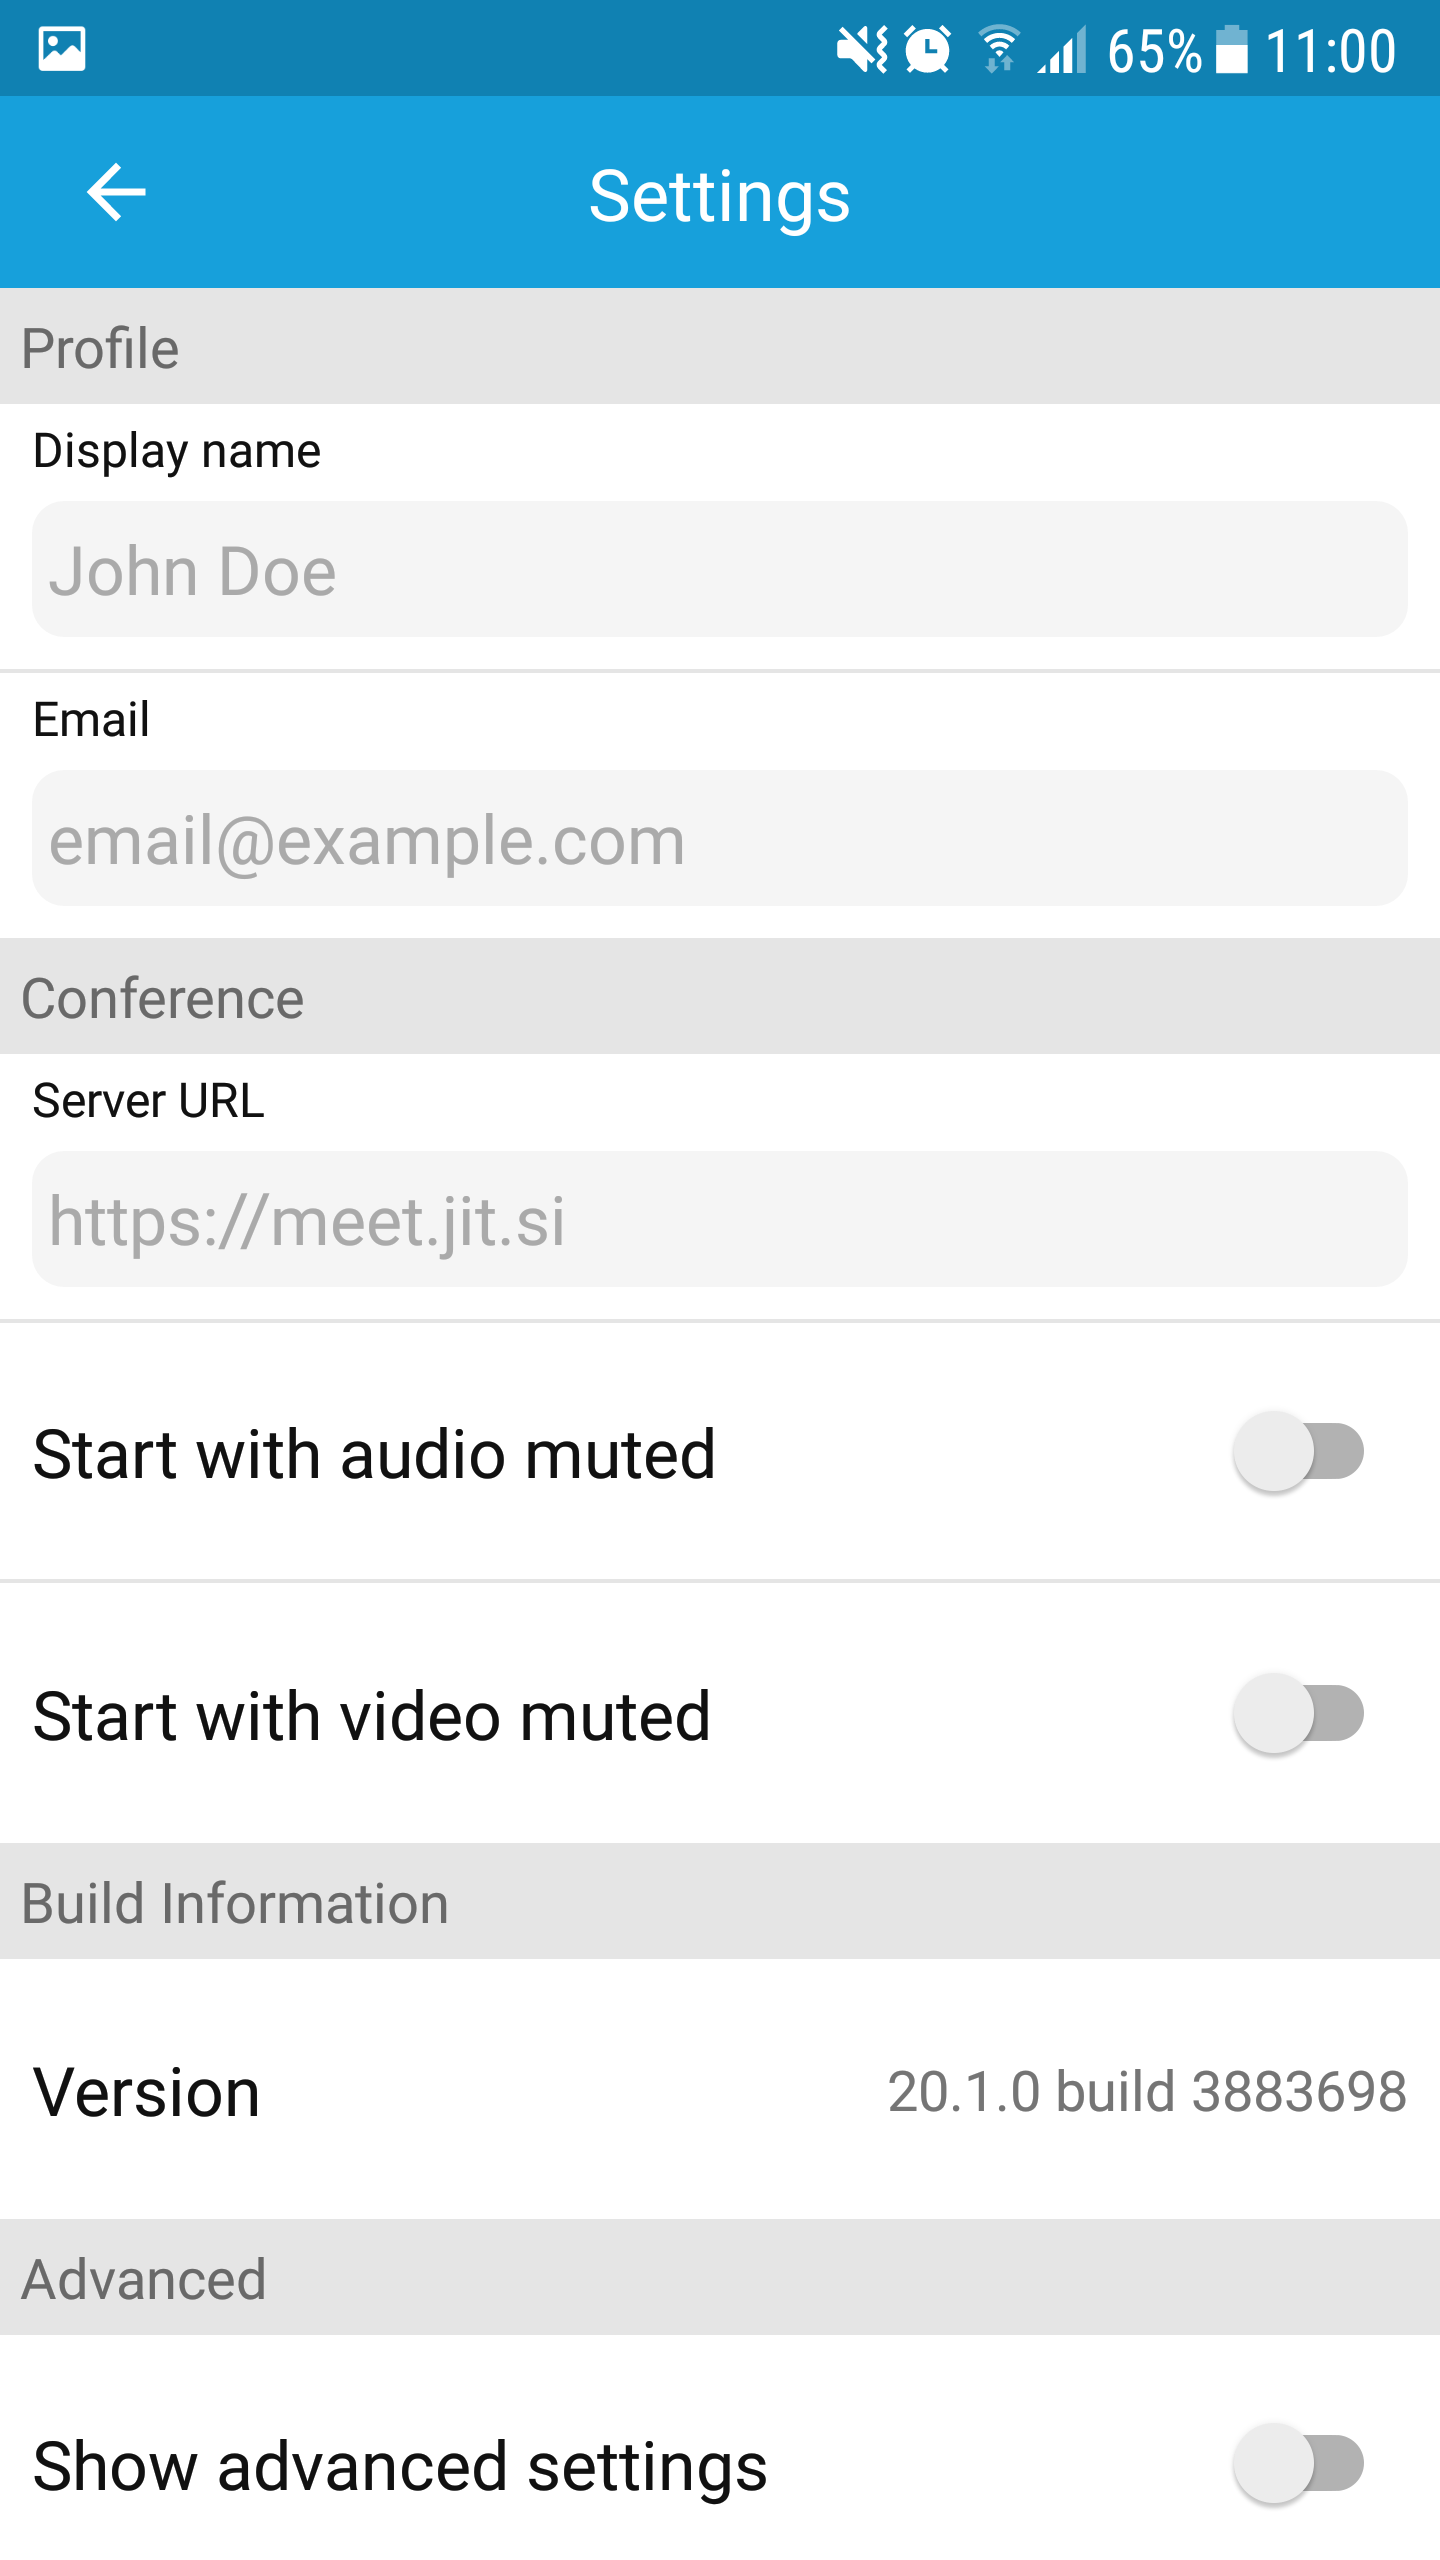
Enter your name, email address, and optionally the hostname of your Jitsi server as set in step 5 of the Jitsi installation.
You can now directly use the app by entering the address of your Jitsi meeting on the home screen. Suppose your hostname is meet.example.com and you started a meeting called 'test' from your browser, then you would enter https://meet.example.com/test in the app under 'Enter room name' only 'test' if you have already entered https://meet.example.com in the settings as 'Server URL').
Password protection - optional
After the installation of Jitsi, everyone who knows your hostname from step 5 of the installation process, can use your Jitsi server.
For privacy and security reasons, it is recommended that you secure your Jitsi server so that only authorized users with a password can create a Jitsi 'room' and not any grateful user. To achieve this, make the following changes to your Jitsi configuration:
In the steps below, replace meet.example.com (indicated in bold) with the hostname you set in step 5 of the Jitsi installation.
Step 1
Open /etc/jitsi/meet/meet.example.nl-config.js, for example with:
nano /etc/jitsi/meet/meet.example.com-config.js
Step 2
At the beginning of the file, you will see a section called 'hosts:'. Remove the slashes from the domain, anonymousdomain, authdomain and focusUserJid here so that your file looks like the example below:
hosts: {
// XMPP domain.
domain: 'meet.example.com',
// When using authentication, domain for guest users.
anonymousdomain: 'guest.meet.example.com',
// Domain for authenticated users. Defaults to .
authdomain: ' meet.example.com',
// Jirecon recording component domain.
// jirecon: 'jirecon. meet.example.com',
// Call control component (Jigasi).
// call_control: 'callcontrol. meet.example.com',
// Focus component domain. Defaults to focus..
// focus: 'focus. meet.example.com',
// XMPP MUC domain. FIXME: use XEP-0030 to discover it.
muc: 'conference. '
},
// BOSH URL. FIXME: use XEP-0156 to discover it.
bosh: '// /http-bind',
// Websocket URL
// websocket: 'wss:// /xmpp-websocket',
// The name of client node advertised in XEP-0115 'c' stanza
clientNode: 'http://jitsi.org/jitsimeet',
// The real JID of focus participant - can be overridden here
focusUserJid: 'focus@auth. ',
Save your changes and close the file (ctrl + x > y > enter).
Step 3
Next, open the prosody configuration:
nano /etc/prosody/conf.avail/meet.example.com.cfg.lua
Step 4
At the top of the file under VirtualHost "meet.example.com", adjust the value of authentication to internal_plain:
VirtualHost "meet.example.com"
        -- enabled = false -- Remove this line to enable this host
        authentication = "internal_plain"
Then scroll to the end of the file and add a guest virtual host:
VirtualHost "guest.meet.example.com"
        authentication = "anonymous"
        c2s_require_encryption = false
Save your changes and close the file (ctrl + x > y > enter).
Step 5
Finally, add a line to the sip-communicator properties with the code below to add XMPP (Extensible Messaging and Presence Protocol) authentication; Jitsi uses XMPP to authenticate your users.
echo "org.jitsi.jicofo.auth.URL=XMPP:meet.example.com" >> /etc/jitsi/jicofo/sip-communicator.properties
Step 6
Restart Nginx and the different Jitsi components to process your changes:
systemctl restart jicofo
systemctl restart jitsi-videobridge2
systemctl restart prosody
systemctl restart nginx
You can now create authorized users with the command below. Unfortunately, it is not possible to let users register themselves.
sudo prosodyctl register user meet.example.com userpassword
Replace user and userpassword with the new user's name and password, respectively.
After creating a user, process the changes with:
systemctl restart jicofo
systemctl restart jitsi-videobridge2
systemctl restart prosody
Resolving problems
Jitsi works very easily after installation, especially from your browser or mobile app. If you do run into issues, you will find below an overview of common problems and the corresponding solutions:
-
I see an Nginx page: Does your browser have a gray lock with a red cross in front of your web address (e.g. meet.example.com)? Then Nginx cannot use your SSL certificate. Check that your SSL certificate has indeed been decrypted and that it is in the correct location, as you indicated in step 8.
-
I cannot select a microphone and/or webcam in my browser: Usually, this is caused by the fact that your webcam and/or your microphone is not properly supported in your browser. In that case, use a different browser, or check for updates of your browser and install them.
-
Performance issues for multiple users: Systemd comes with fixed limits for the maximum number of processes and open files. With larger numbers of Jitsi users, your Jitsi server may run into these limits. To fix this, open the file /etc/systemd/system.conf and edit the following variables to look like below:
Finally, restart systemd and jitsi video with:
DefaultLimitNOFILE=65000 DefaultLimitNPROC=65000 DefaultTasksMax=65000systemctl daemon-reload service restart jitsi-videobridge2 - In other cases, you can test at https://test.webrtc.org if your camera and microphone are working properly. You can find log files of your server at the following locations on your VPS:
- /var/log/jitsi/jvb.log
- /var/log/jitsi/jicofo.log
- /var/log/prosody/prosody.log
This brings us to the end of this guide for installing a Jitsi server.
Should you have any questions regarding this article, please do not hesitate to contact our support department. You can reach them via the button 'Contact us' at the bottom of this page.
Do you want to discuss this article with other users? Please leave a message under 'Comments'.