


A Kubernetes taint is a feature added to a node. It indicates that certain pods should not be placed (i.e., scheduled) on that node unless the pod has a toleration for that specific taint.
Taints are used to control the scheduling of pods on specific nodes. For example, if a node has a taint named 'transip.nl/demo-node', only pods with a toleration for this taint can be placed on that node.
It is possible to place multiple taints on a node and add multiple tolerations to a single pod.
Creating and using Tolerations
Toleration is the mechanism used to indicate that a pod is compatible with a specific taint on a node. If a pod has a toleration for a specific taint, it can be placed on a node with that taint. Pods without the toleration are rejected and cannot be placed on the node with the corresponding taint.
Structure of tolerations
Tolerations follow the following structure depending on whether you use the 'Equal' or 'Exists' operator:
tolerations:
- key: "key1"
  operator: "Equal"
  value: "value1"
  effect: "NoSchedule"
or
tolerations:
- key: "key1"
  operator: "Exists"
  effect: "NoSchedule"
- key: You are free to choose the value to specify after 'key'. It can be a single word or even a domain name like transip.nl/demo-app.
- operator: Available options are 'Equal' and 'Exists'. When using 'Equal', you must also provide a 'value'. For 'Exists', only an 'effect' is required.
- value: Any arbitrary value. There is little reason not to choose 'Exists' and not use a value (to keep things simple).
-
effect: The way the taint is handled. There are three available options (case-sensitive):
- "NoSchedule": Pods are not allowed to be placed on the node unless they have a toleration for this taint.
- "PreferNoSchedule": The cluster tries not to place the pod on the node unless there is no other option.
- "NoExecute": Existing pods are immediately removed from the node to which a taint with the NoExecute effect is added. This is not the case for 'NoSchedule' and 'PreferNoSchedule'.
Creating taints
There are two places where you can create a taint: the TransIP control panel or using Kubectl. The TransIP control panel is used to assign a taint to an entire node pool at once. Kubectl is more suitable for assigning a taint to specific nodes.
We recommend applying taints to your entire node pool. Let's say you have three nodes, apply a taint to just one of them and than resize your node pool to two nodes then this is almost guaranteed to give undesired results.
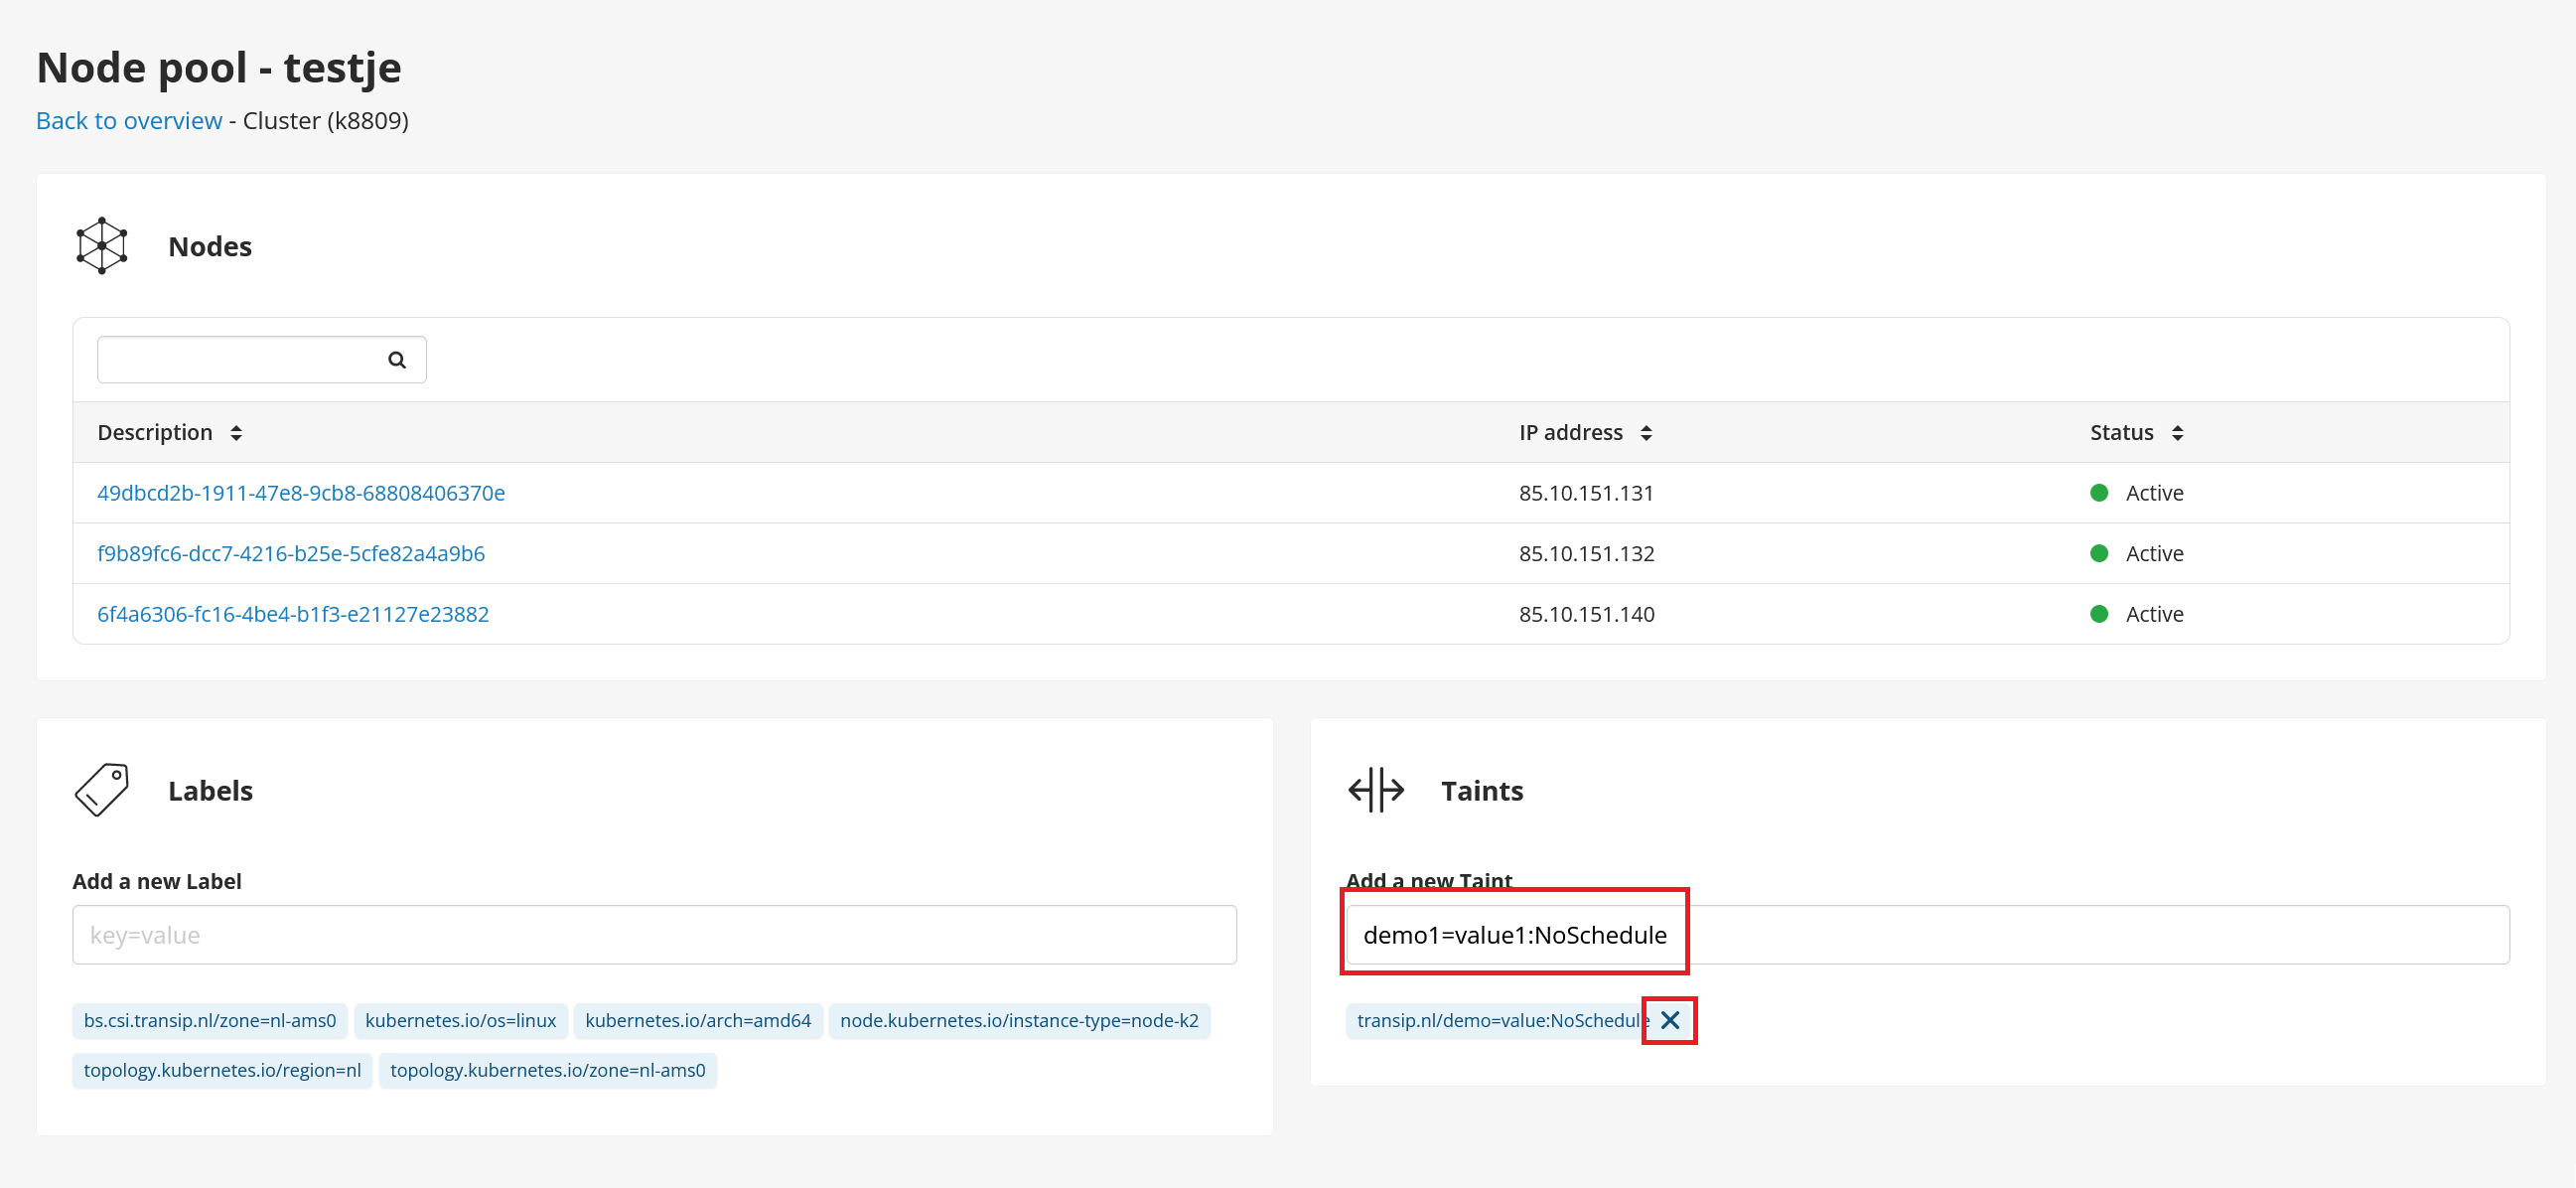
Creating Taints in the TransIP Control Panel
In the TransIP Control Panel, you add a taint by specifying a key, value (optional), and effect using the syntax: key=value:effect (or key=effect without value).
You can easily remove a taint created in the control panel by clicking the cross (x) next to the taint.
Please note: The effect is case-sensitive, and taints added here apply to the entire node pool.
Creating and removing taints with Kubectl
Kubectl follows a similar syntax to the TransIP Control Panel but only applies to individual nodes:
kubectl taint nodes nodename key=value:effect
A value is also optional here. If you omit the value, Kubernetes automatically assumes you are using the 'Exists' operator (see the section 'Structure of tolerations').
You can see the names of your nodes in the TransIP Control Panel or retrieve them with the command:
kubectl get nodes
To remove a taint, use one of the following options:
- Remove based on the key name:
kubectl taint nodes nodename key-
- Remove based on key and effect:
kubectl taint nodes nodename key:effect-
In both cases, make sure to add a hyphen (-) at the end of the command. This indicates that you want to remove the taint.
Adding tolerations to a pod
To add a toleration for a taint to a pod, you need to define the tolerations section in the pod specification. This can be done in the YAML manifest of the respective pod, for example:
apiVersion: v1
kind: Pod
metadata:
  name: my-pod
spec:
  containers:
    - name: my-container
      image: nginx:latest
  tolerations:
    - key: "transip.nl/demo-node"
      operator: "Exists"
      effect: "NoSchedule"
In this example, the pod has added the toleration transip.nl/demo-node. This means that the pod can be placed on nodes that have the taint transip.nl/demo-node and the NoSchedule effect.
- The key simply specifies the name of the taint.
- The operator indicates how the toleration should be evaluated. In this example, it is 'Exists,' which means the pod is compatible if the taint is present. Another option for the operator is 'Equal,' which requires a 'value'.
- The effect specifies the action to be taken when the taint is applicable to the node (see the explanation in the section 'Structure of Tolerations').
To assign multiple tolerations, simply add another block under 'tolerations:' consisting of a key, operator, value (optional) and effect section.