When there is no more RAM available on your Windows Server, it can use 'virtual memory' instead of RAM. We generally advise against this because it can negatively impact the performance of your VPS. A better alternative is to upgrade your VPS, for example, with a (temporary) RAM add-on.

If you still want to (temporarily) use virtual memory, for example, for updating a larger software package, this is possible. Windows automatically manages the size of the virtual memory. However, it can happen that the default amount of virtual memory on your Windows Server is insufficient. In this guide, we will show you how to increase your virtual memory in such a case.
- Prolonged intensive use of virtual memory can negatively impact the hypervisor that hosts your VPS. In such a case, we will set a temporary limit on the capacity of your VPS's hard drive, and you will receive an email from us about it.
- This article focuses on Windows Server 2019 / Windows 10.
Increase Virtual Memory
Step 1
Connect to your Windows Server via Remote Desktop or the VPS console or if you are using Windows 10, proceed to step 2.
Step 2
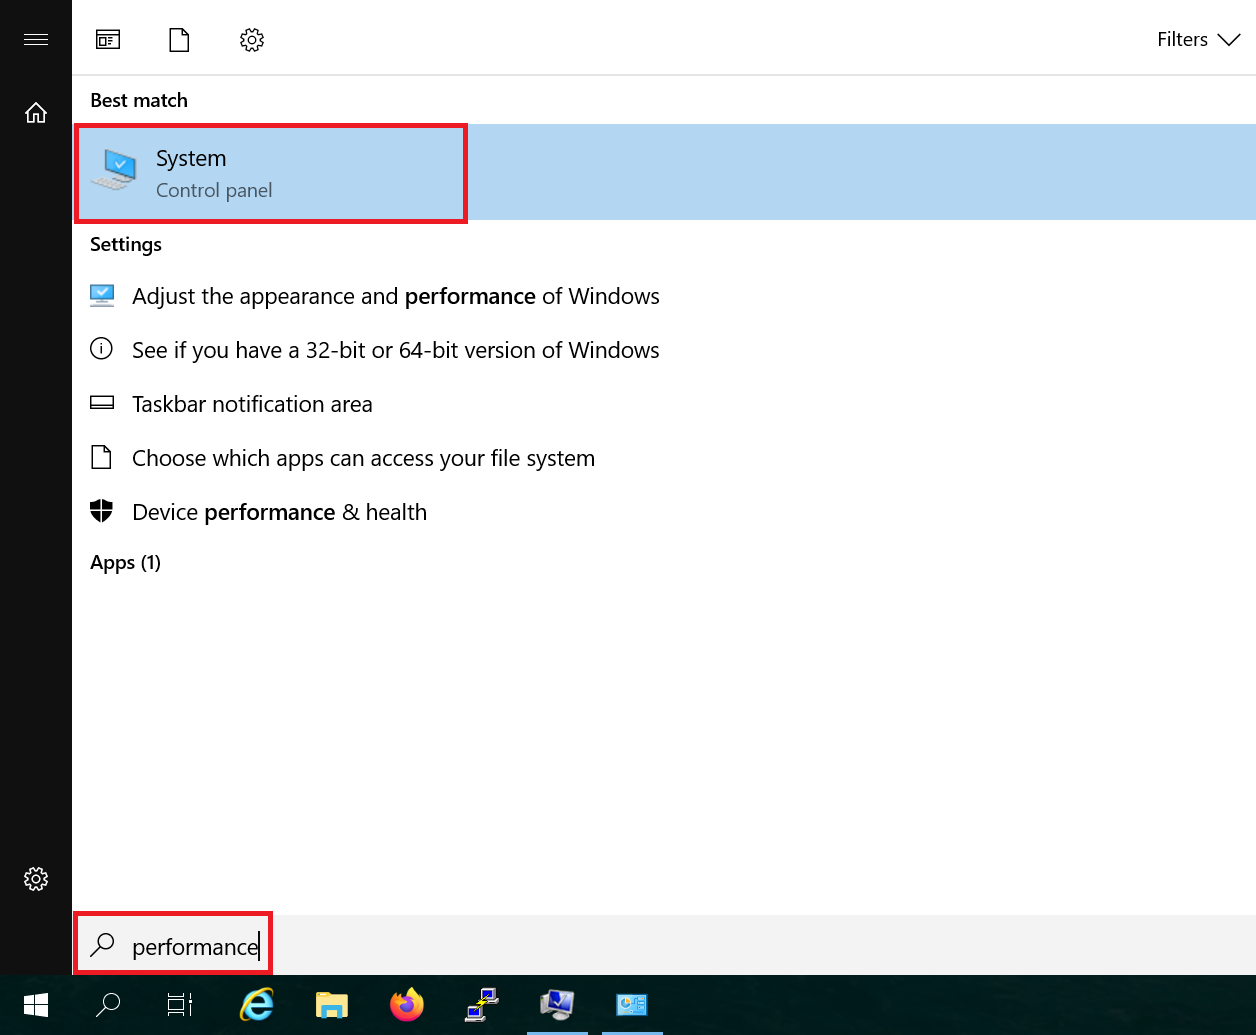
Click on the Windows Start button, type 'performance' and click on 'system' in the search results.
Step 3
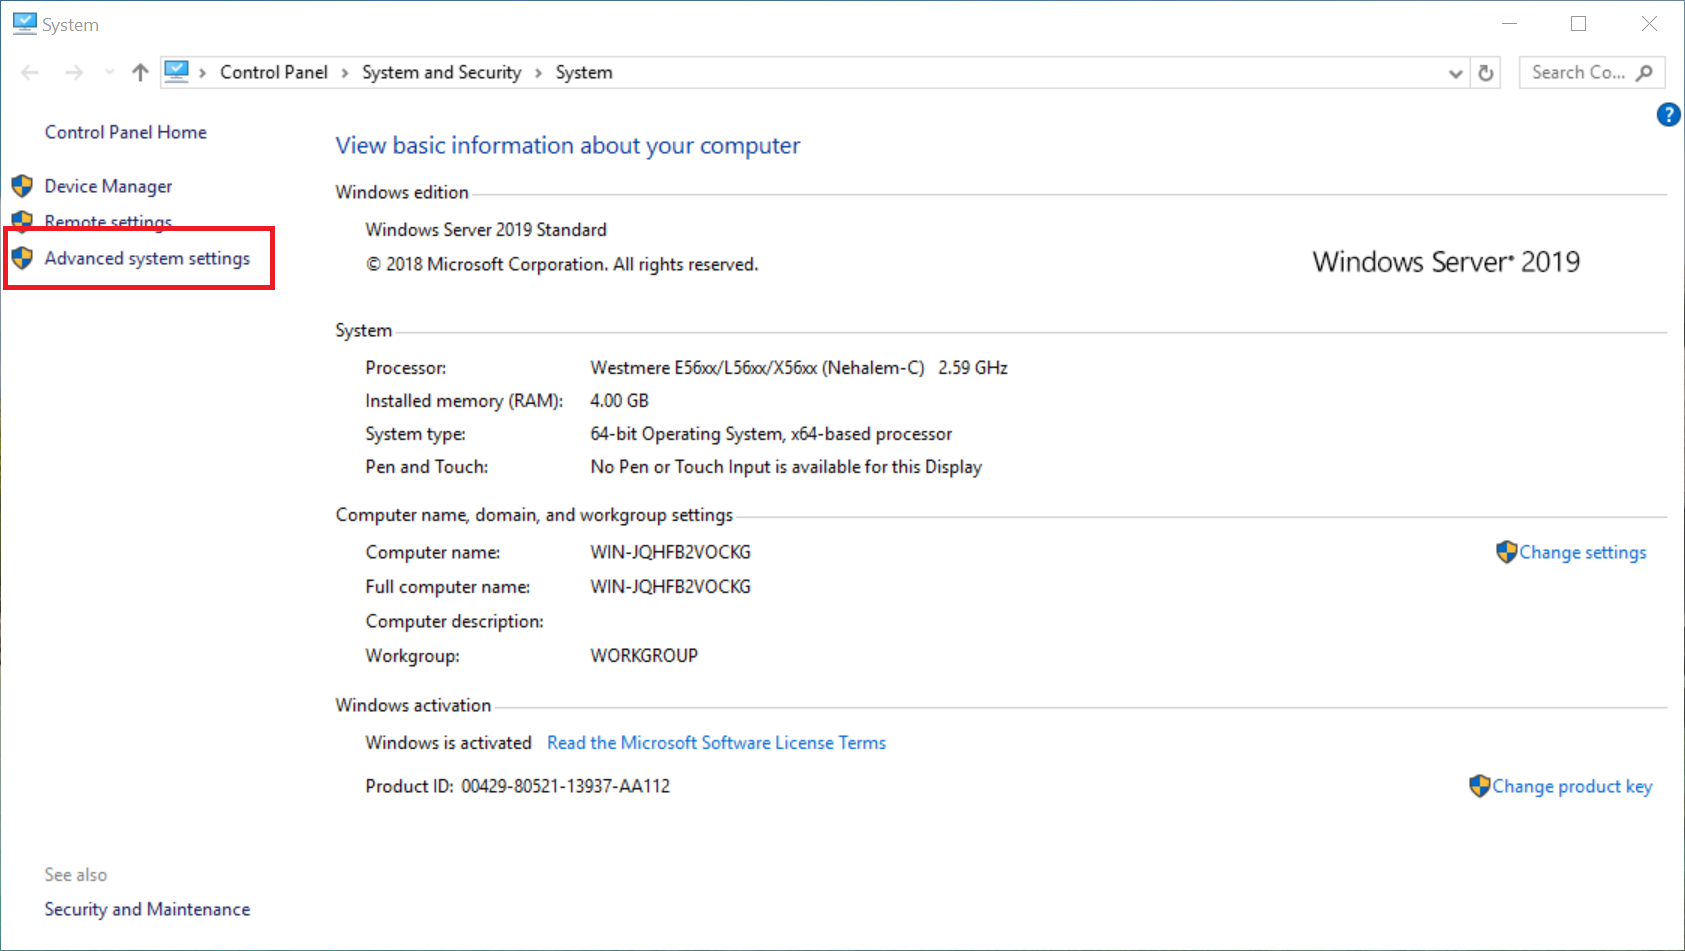
In the window that opens, click on 'Advanced System Settings'.
Step 4
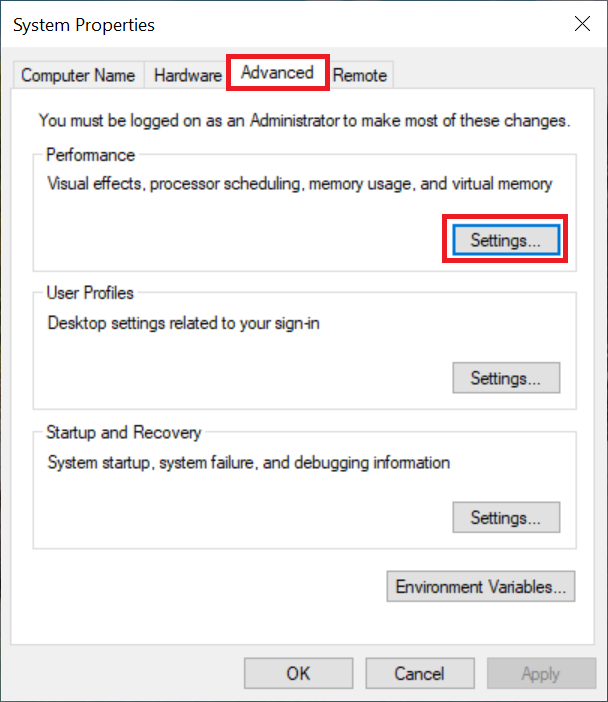
In the 'Advanced' tab under 'Performance', click on 'Settings'.
Step 5
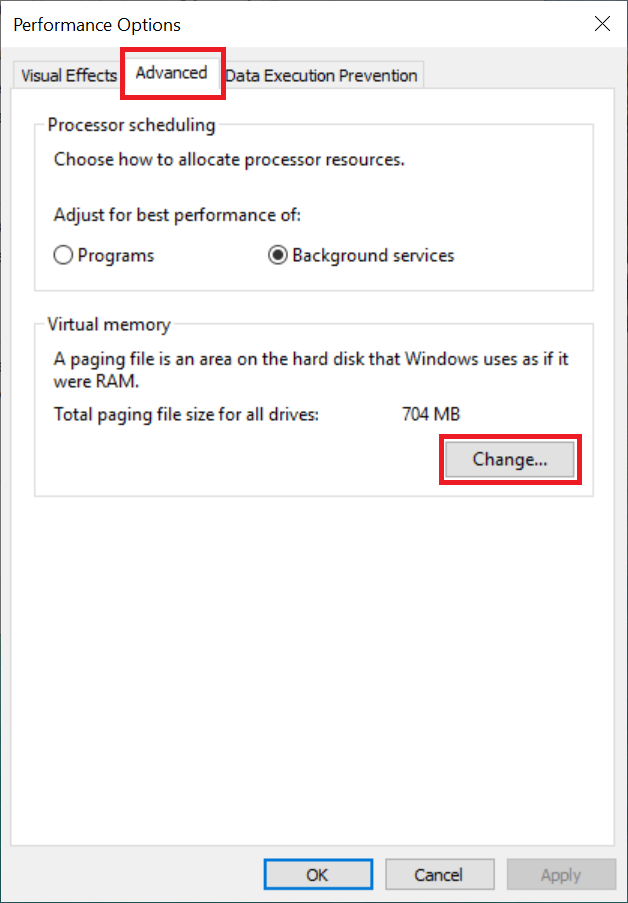
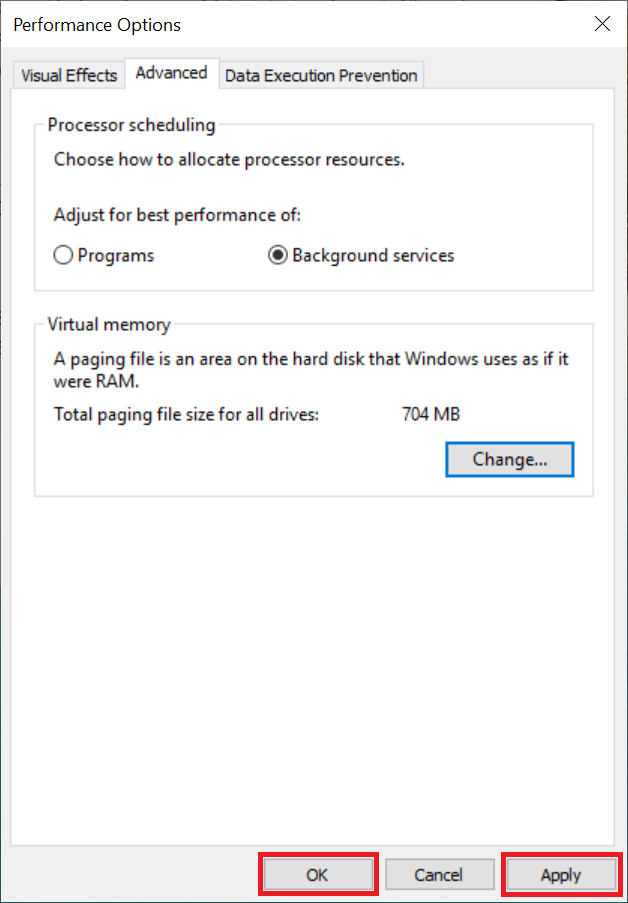
In the 'Performance Options' window, click on the 'Advanced' tab and under 'Virtual memory' click on 'Change'.
Step 6
Uncheck the option 'Automatically manage paging file size for all drives', specify a custom size (in MBs), and click on 'Set' and then 'OK'.
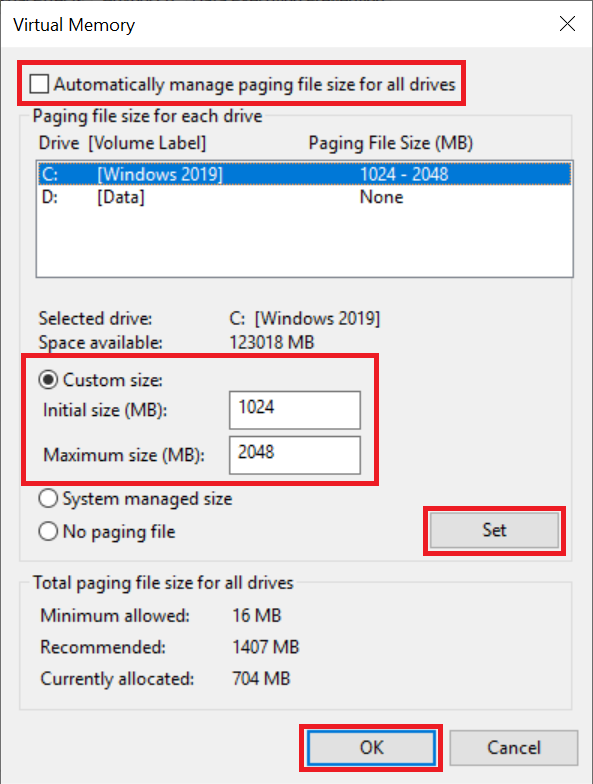
You can also disable virtual memory usage on this page by selecting 'No paging file'.
Step 7
You will now return to the 'Performance Options' window. Click on 'Apply' and then 'OK', and restart your server/computer to apply the changes.
This concludes our article on adjusting virtual memory in Windows Server / Windows desktop.


