


It may happen that you forget your root password over time, but fortunately, there is a solution for this. In this article, we'll show you how to reset your root password in various Linux distributions.
There are two options for resetting your root password: via Linux rescue mode and a more general, OS specific instruction. You are free to choose either, and both will lead to the same result.
If you still have your root password but have lost the password for another user, use the following command as a root user to change the password:
passwd username
Resetting Your Root Password via Linux Rescue Mode
Step 1
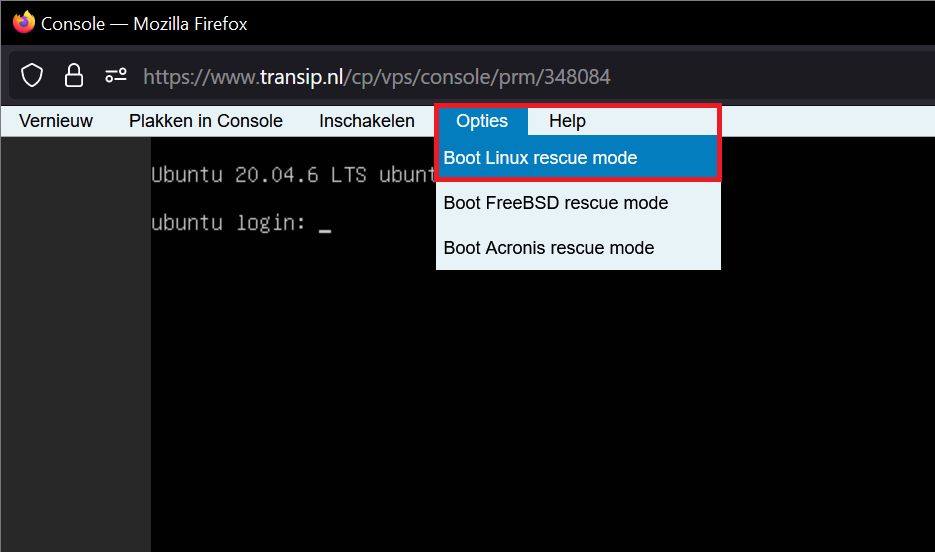
To reset your root password, switch to the 'Linux rescue mode' of your VPS. In the TransIP control panel, go to the VPS for which you want to reset the password, and click the pop-out button at the bottom left of the console.

Step 2
Select 'Options' > 'Boot Linux rescue mode'.
Step 3
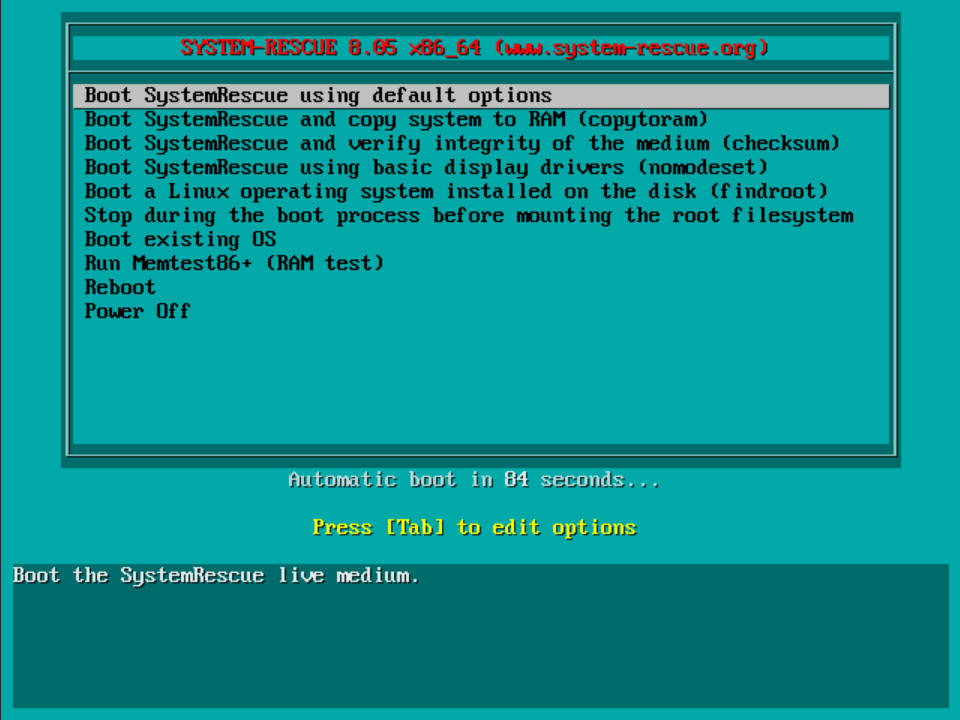
After starting Linux rescue mode, you’ll see a menu where you can choose the SystemRescue option you want to use. Do not change anything, and press ‘Enter’ to proceed (or wait for the timer to expire).
Step 4
You will now enter the rescue menu, which you can recognize by:
sysrecue login: root (automatic login)
[root@sysrecue ~]#
To reset your password, you need to mount the root, dev, proc, and sys filesystems. Normally, your root partition will be found in /dev/vda1, but check to be sure with the command:
lsblk
You’ll see an overview of the block devices on your server, like the one below, where in this example, vda1 (or /dev/vda1) is the name of the root partition.
Do you see multiple devices, for example vda1, vda2, vda3 etc? If so, then in the next steps use the number of the VDA block device which under ‘SIZE’ matches the size of the disk of your VPS as closely as possible.
NAME                MAJ:MIN RM   SIZE RO TYPE MOUNTPOINT
    loop0                 7:0    0 689.3M  1 loop /run/archiso/sfs/airootfs
    mtdblock0            31:0    0   753M  0 disk /run/archiso/bootmnt
    vda                 254:0    0   150G  0 disk
    ├─vda1              254:1    0   150G  0 part
Step 5
Now mount the root, dev, proc, and sys filesystems:
mount /dev/vda1 /mnt
Step 6
Chroot to the mounted file system:
chroot /mnt
Chroot stands for ‘change root’ and allows you to change the root directory for the current process and its child processes.
Step 7
Change your root password and update both the filesystem labels and initramfs to apply the changes:
passwd
CentOS Stream, AlmaLinux, Rocky Linux, Fedora and Red Hat:
Do you use a Red Hat based distribution such as AlmaLinux or Rocky Linux? If so, also use the following command:
touch /.autorelabeltouch /.autorelabel adds a hidden file called autorelabel in the root directory. This file tells SELinux to relabel the entire filesystem. Without this additional step, your password reset won’t work. More information about labeling in SELinux can be found here.
Step 8
Exit the chroot environment and unmount the various filesystems:
exit
umount /mnt
Step 9
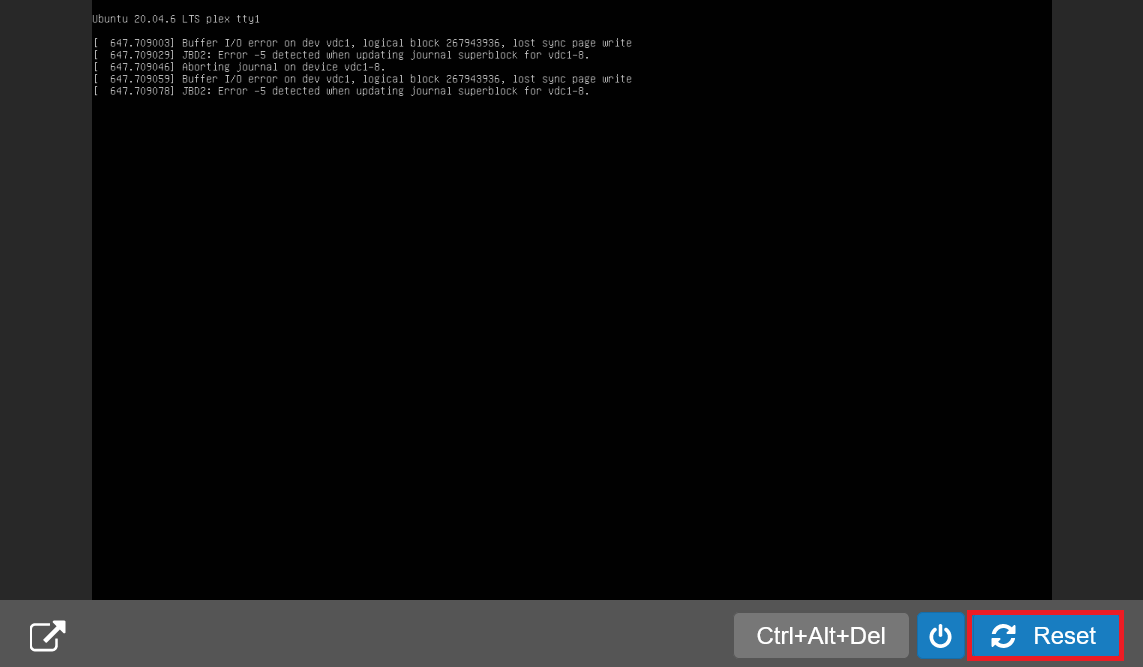
Finally, restart your VPS. Use either the reboot/restart button in the top of the pop-up window with the VPS console, or close it and click ‘reset’ at the bottom of the VPS console in the TransIP control panel to give your VPS a hard reset. You will then be directed to the regular login screen.
Resetting Your Root Password via Grub (Ubuntu/Debian)
Step 1
To reset your root password using this option, first go to the Grub menu of your VPS.
Restart your VPS and quickly press the 'ESC' key repeatedly to interrupt the boot process (the Grub menu appears only briefly).
Note: Use the VPS console in the TransIP control panel and click the ctrl-alt-del button instead of the ‘reset’ or ‘reboot’ button. This keeps the following screen visible for longer.
You’ll see a screen like the one below:

Step 2
Press the ‘e’ key on your keyboard to edit the boot parameters (see the last part of the screenshot above). By default, the kernel boots in ro-mode (read-only):
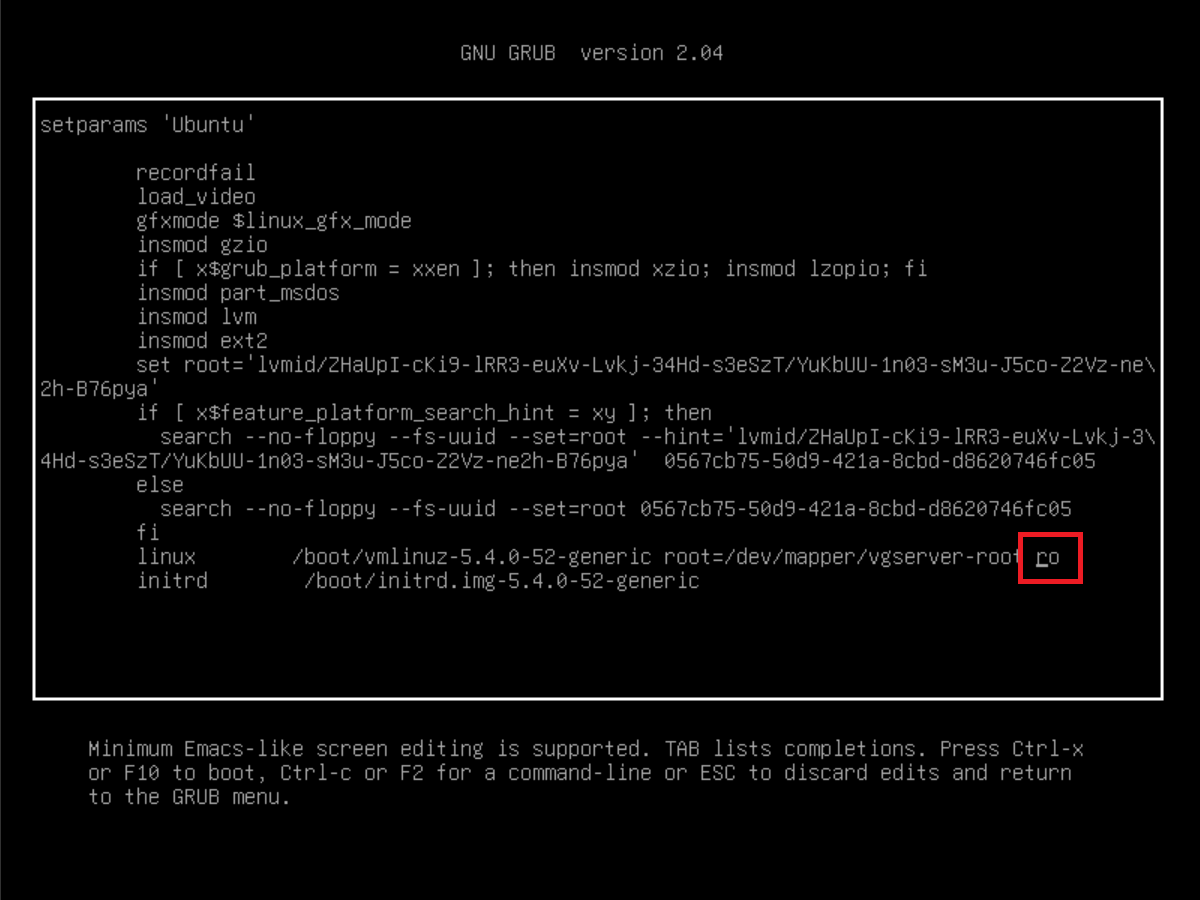
In Debian, it will say 'ro quiet'. Change 'ro' / 'ro quiet' to 'rw init=/bin/bash' (without quotes). The text may not fit on one line, so you’ll see a \ added at the end to indicate it continues on the next line.
The result will look like this:
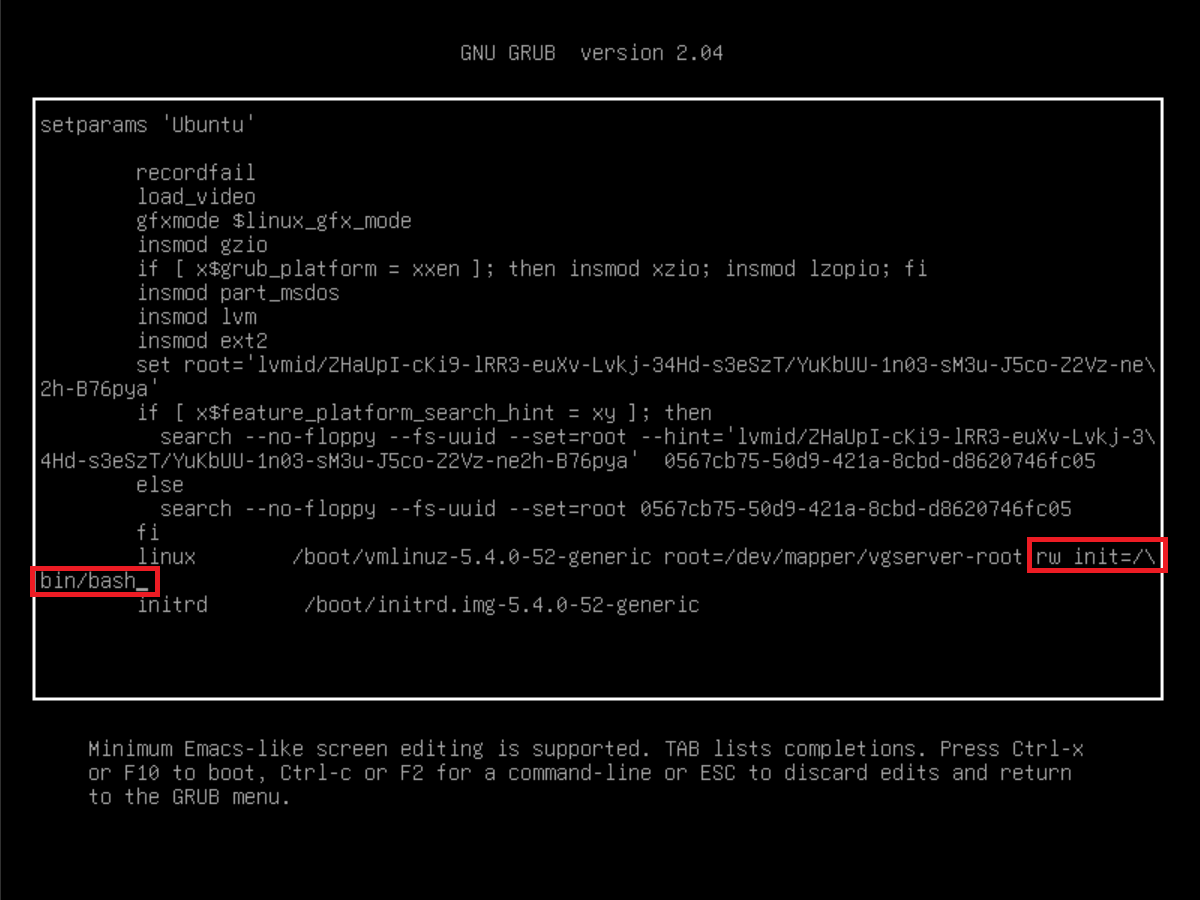
Now press ctrl + x to boot your VPS with the modified boot parameters.
Step 3
After booting, you will enter the bash prompt. You can now reset your root password with the command:
passwd root
Step 4
Finally, reboot your VPS with the command below. The -f (force) option is often necessary to execute the reboot.
reboot -f
Resetting your root password using single user mode (AlmaLinux, Rocky Linux, CentOS Stream, Fedora and other RHEL distributions)
Step 1
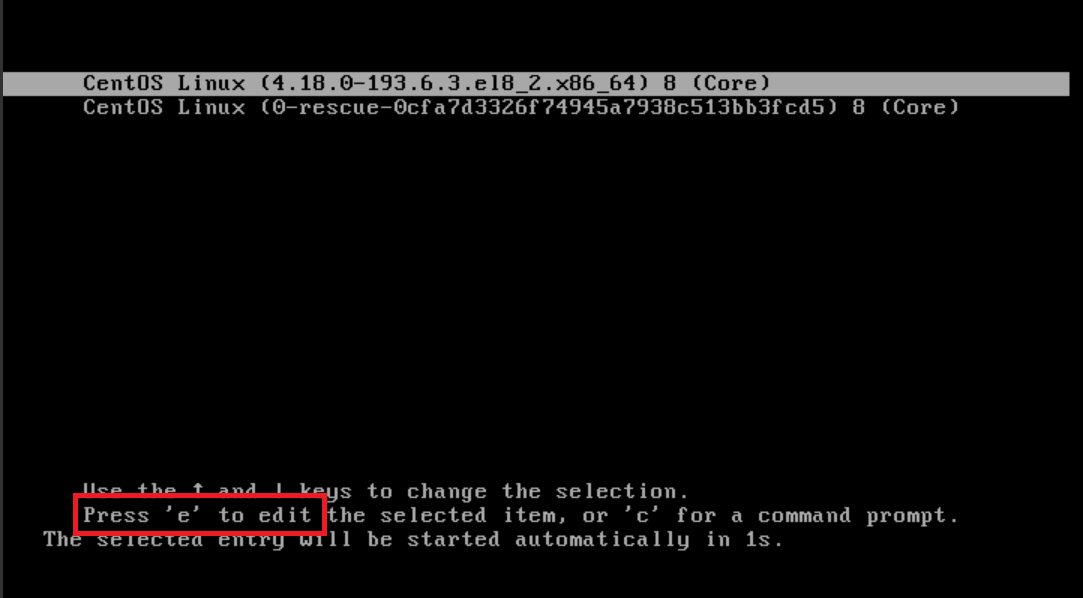
To reset your root password, switch to the 'single user mode' of your VPS. To do this, restart your VPS and press the 'e' key on your keyboard as soon as you see the screen below.
Please note: use the VPS console in the control panel and press ctrl-alt-del and don’t press restart. The screen below will then remain on the screen for a longer period of time.
Step 2
You will now see a lot of text on your screen. These determine the boot parameters of your VPS. Use the arrows on your keyboard to navigate down and search for 'ro'.
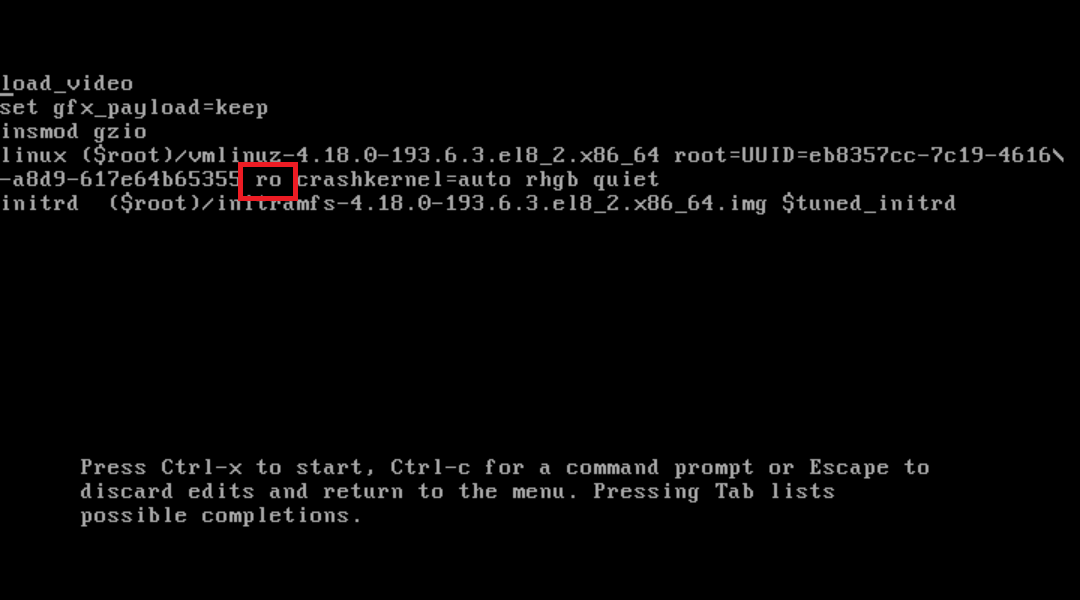
Edit this part to 'rw init=/sysroot/bin/bash' (without parentheses) so that it looks like this:
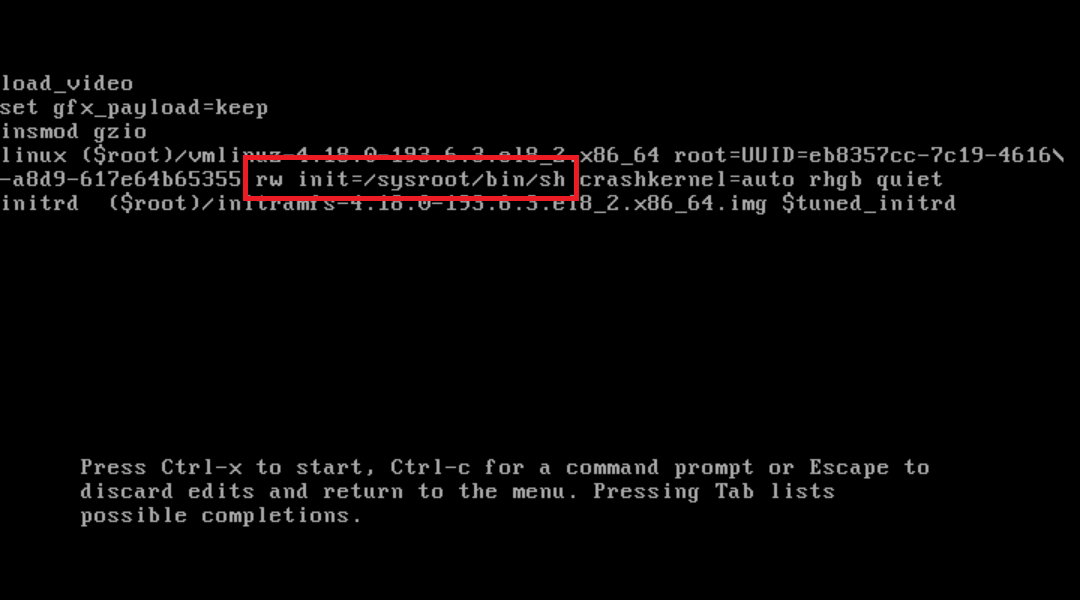
Step 3
Press ctrl + x to start your VPS with the custom boot parameters. You are now in rescue mode.
Then mount your root file system with read write properties via the command:
chroot /sysroot/
Step 4
You can now reset your root password with the command:
passwd root
touch /.autorelabel- passwd root resets the root password
- touch /.autorelabel adds a hidden file called autorelabel in the root directory. This file tells SELinux to relabel the entire filesystem. Without this additional step, your password reset won’t work. More information about labeling in SELinux can be found here.
Step 5
Finally, exit your mounted root file system and reboot your VPS with the commands:
exit
reboot
You can now login with your new root password!
Other Linux distributions
Step 1
Open the VPS console in the TransIP control panel (in the tab 'VPS') and restart your VPS using the 'Ctrl-Alt-Del' button at the bottom right of the console.
Step 2
Immediately after the reboot, a message will appear in the console to press any key (such as ESC) to open the GRUB menu. Please note: This menu is only visible for 2 seconds and you will also have to press a few times to prevent the OS from booting.
Step 3
Select the kernel and press 'a' (the top one is usually selected by default and most likely the one you're using).
Step 4
Now type 'single' after the line (space) and press 'Enter'.
Step 5
The OS will now boot in single-user mode as root. Use the following commands to first reset your root password and then reboot your VPS:
passwd root
reboot
Are you getting an error message? Then, use 'reboot -f'
Should you have any questions left regarding this article, do not hesitate to contact our support department. You can reach them via the ‘Contact Us’ button at the bottom of this page.