


In this article, we show you how to use the different backup options of DirectAdmin and optionally use Big Storage for that (where possible). In this article, we deal with the following backup methods of DirectAdmin:
- System Backup
- Admin Backup / Transfer
- Reseller: Manage User Backups
- User Backups
The backup tools have a layered structure: The Admin Backup tool can back up the data of admins, resellers, and users (or the entire system via the System Backup tool). The Reseller Backup tool of a specific Reseller account and the user accounts that fall under it, and the User Backup top only of a specific user account.
Using Big Storage
Do you want to use Big Storage on your VPS? Then connect it to your VPS first before you start this manual. You can use this manual for this.
System Backup
The System Backup creates a backup of the data of all users (websites, email, ftp, databases) and the configuration of the underlying system (CentOS 7). Consider files such as /etc/exim.conf and directadmin.conf in the latter. You will be given the option to select additional directories and files during the backup.
The System Backup tool has an input box to change the directory in which the backup ends up, but it does not work at the time of writing. Your backups will therefore always end up in /home/backup by default. Do you want to place the System Backup in a different directory, for example on your Big Storage? Then, first adjust the backup directory using the steps below.
Adjusting the backup directory
Step 1
Delete the backup folder in the home directory. Are there any backups in there already? You could then first create the new directory (see Step 2) and then move the backups to the new directory with an mv command (mv /example/folder).
rm -rf /home/backup
Step 2
Do you use Big Storage? Then, create a backup directory on your Big Storage to write your data to first:
mkdir /mnt/bigstorage/backupFinally, create a symbolic link from the user_backups directory to your Big Storage (a symbolic link directs to a different folder). Backups are then automatically saved in the folder created above:
cd /home/
    ln -s /mnt/bigstorage/backup backup
Creating a System Backup
Step 1
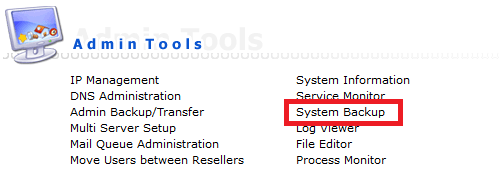
In DirectAdmin, go to the 'Admin Level' and click 'System Backup' under 'Admin Tools'.
Step 2
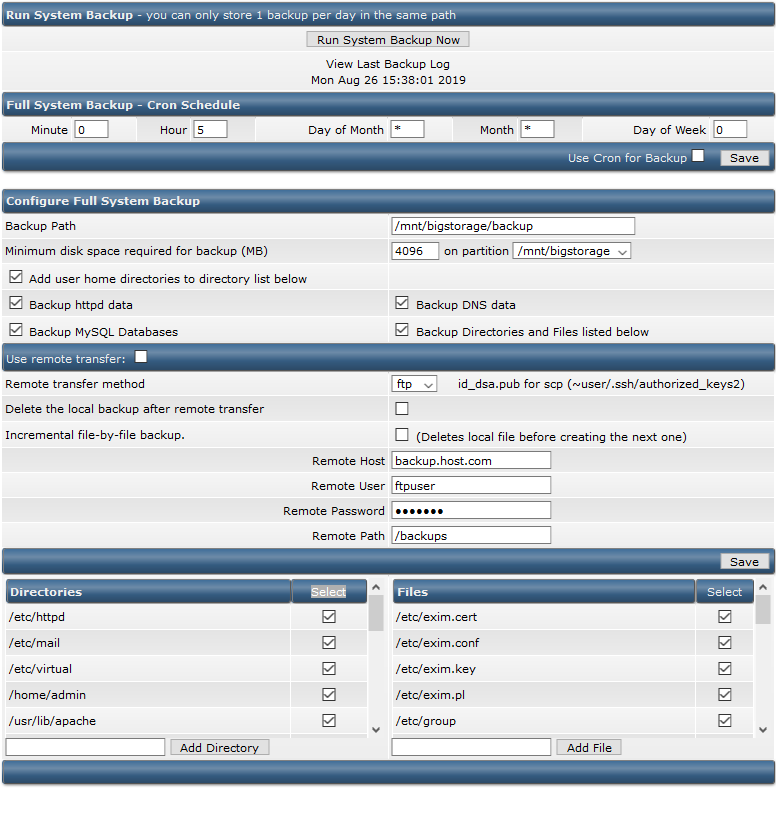
You will see the screen below with the following steps indicated:
- Run System Backup: performs the backup manually. Only do this if you first have adjusted the settings below it to your liking.
- Full System Backup - Cron Schedule: ensures that you can automatically create the backups at a time and day of your choice. This option is set to create a backup at 5:00 AM by default. Suppose you want to set Day or Week to Sunday, then, you would use 0 or 7 (1 to 6 for Monday to Saturday). You can enable the Cron Schedule with the 'Use Cron for Backup'
-
Configure Full System Backup:
- Backup Path: Despite there being an input box, the input you provide here does not change where the backup ends up, namely in /home/backup. Alternatively, you can follow these steps to permanently adjust the directory.
- Minimum disk space required for backup (MB): Select the partition to which you write your backups here, for example, your Big Storage.
- Further adjust which data you want to include in the backup as desired. For as complete a backup as possible, select all options here.
- Use remote transfer: is used for backing up to a remote server. You can choose FTP or SCP here. You then enter the data of your remote FTP server.
- Directories & Files: select the directories and files that you want to back up. Click 'Select' to select all options. You can also manually select your own directory or file in the overview.
If you scroll even further to the bottom of the page, you will see a 'Backup / Restore Settings' header. It is not necessary to adjust it unless you also use your VPS as a name server.
Admin Backup / Transfer
The Admin Backup / Transfer tool is the recommended backup system for DirectAdmin if you want to create an as complete as possible backup of all user accounts. It creates a tar.gz backup of the data of (if selected) any DirectAdmin account.
Please note: Configuration files of the underlying system, such as directadmin.conf are not included with this option.
Using Big Storage
Do you use Big Storage? Then, create one admin_backups directory after linking your Big Storage (required for the steps under 'Admin Backup'):
mkdir /mnt/bigstorage/admin_backups
Creating backups
Step 1
You can back up the data of one or more users by using the Admin Backup / Transfer.
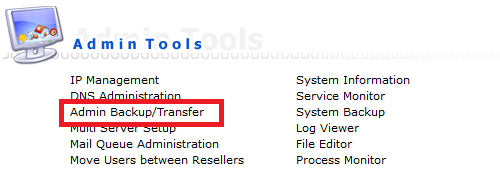
To do this, go to the 'Admin Level' in DirectAdmin and click 'Admin Backup / Transfer’ under ‘Admin Tools'.
Step 2
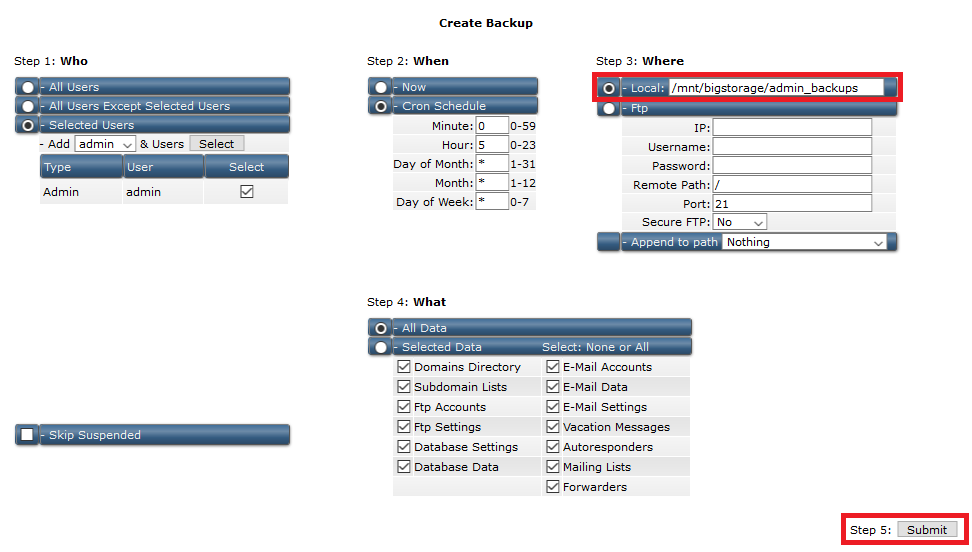
You will see the screen below with the following steps:
- Step 1: Select the users for which you want to create a backup. Click 'Select' to select all accounts.
- Step 2: Choose whether you want to create the backup now or use a Cron Schedule: this will repeat the backup at the moments you choose, for example, every day at 5:00 if you use the default value (see screenshot). Suppose you want to set Day or Week here to Sunday, then, you would use 0 or 7 (1 to 6 for Monday to Saturday).
- Step 3: Adjust the directory to the location of the backup folder on your Big Storage that you have created under 'Setting up Big Storage', in this example, it is /mnt/bigstorage/admin_backups
- Step 4: Select what you want to back up. The default option is to back up all files.
- Step 5: Click 'Submit' to create the backup. How long this takes depends on the amount of data that is being backed up. In the meantime, you can continue working on your VPS while this process is running.
Restoring backups
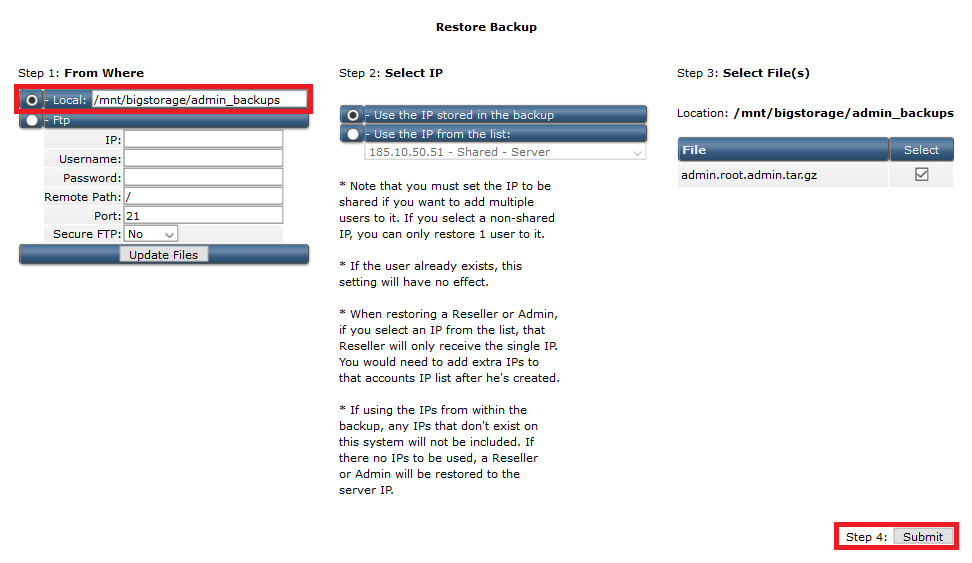
Restoring the backup works largely the same as creating a backup: go back to 'Admin Backup / Transfer' and then select:
- Whether you want to restore the backup via FTP or on your VPS. If you follow the steps above, you do not adjust anything and use the default 'Local'
- We recommend using the IP address of the backup under 'Select IP' (the option selected by default). This prevents any configuration problems after restoring the backup.
- Select the name of the desired user and then click 'Submit'. The name of the file indicates the role and name of the relevant account.
Reseller backups
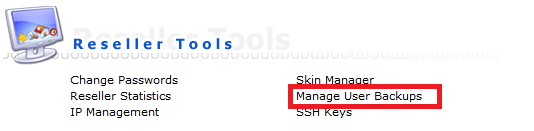
At the Reseller Level, you will find the 'Manage User Backups' option. By default, the backups are created in /home/resellername/user_backups (where resellername is the account name of the reseller). Do you want to adjust it, for example to your Big Storage? Then, first follow the steps below.
- The steps below delete all existing backups in the reseller's account.
- DirectAdmin does not offer an out-of-the-box option to automatically adjust the backup directory for future new reseller accounts to another directory.
Adjusting the backup directory
Step 1
Delete the user_backups folder in the reseller's home directory. Has the reseller already created backups? You could then first create the new directory (see Step 2) and then move the backups to the new directory with an mv command.
rm -rf /home/resellername/user_backupsReplace 'resellername' with the name of the reseller account. Are you the only administrator and do you use the admin account? Then, replace 'resellername' with 'admin', e.g. /home/admin/user_backups
Step 2
Do you use Big Storage? First, create a user_backups directory on your Big Storage to be able to write your data to it:
mkdir /mnt/bigstorage/resellername/user_backupsFinally, create a symbolic link from the user_backups directory to your Big Storage (a symbolic link directs to a different folder). Back-ups are then automatically saved in the folder created above:
cd /home/resellername/
    ln -s /mnt/bigstorage/resellername/user_backups user_backups
Replace 'resellername' with the name of the reseller account.
Creating a backup
Step 1
Go to the Reseller Level in DirectAdmin and click 'Manage User Backups'.
Step 2
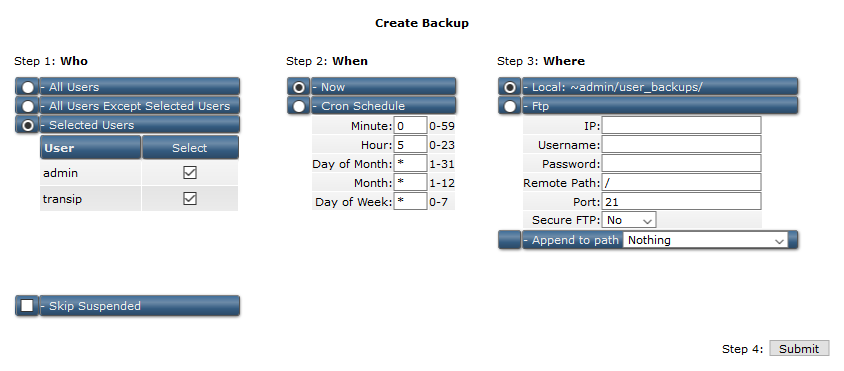
You will see the screen below with the following steps indicated:
- Step 1: Select the users for which you want to create a backup. Click 'Select' to select all accounts.
- Step 2: Choose whether you want to create the backup now or use a Cron Schedule: this repeats the backup at the selected times, for example, every day at 5:00 if you use the default value (see screenshot). Suppose you want to set Day or Week here to Sunday, then you would use 0 or 7 (1 to 6 for Monday to Saturday).
- Step 3: You can create a backup via FTP, but for this tutorial, we assume that you want to do this on your VPS or Big Storage. The backup will be written to the /home/resellername/user_backups directory by default unless you have used the instruction under 'customize the backup directory'.
- Step 4: Click 'Submit' to create the backup. How long this takes depends on the amount of data that is being backed up. In the meantime, you can continue working on your VPS while this process is running.
Restoring backups
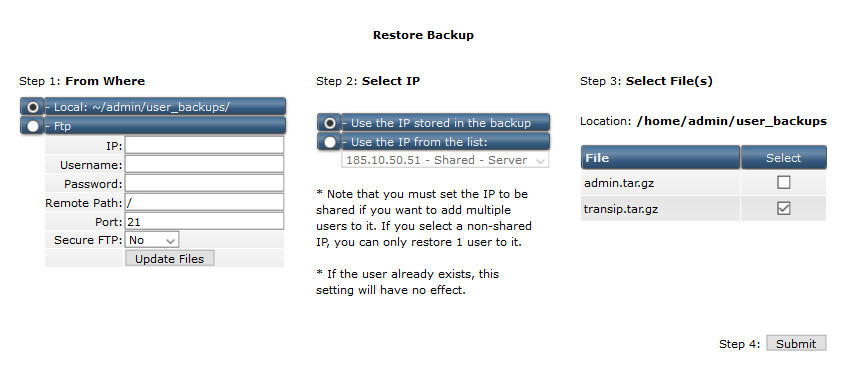
Putting back the backup works almost the same as creating a backup: you go back to 'Manage User Backups' and then select:
- Whether you want to restore the backup via FTP or on your VPS. If you follow the steps above, you do not adjust anything and use the default 'Local'
- We recommend using the IP address of the backup under 'Select IP' (the option selected by default). This prevents any configuration problems after restoring the backup.
- Select the name of the desired user and then click 'Submit'. The name of the file indicates the role and name of the relevant account.
If you scroll even further to the bottom of the page, you will see a 'Backup / Restore Settings' header. It is not necessary to adjust it unless you also use your VPS as a name server.
User Backups
At the User Level, a user can create a backup of all websites, email, ftp, and databases of his / her user account.
The backups are created in /home/username/backups by default (where username is the user's account name). Do you want to change that directory, for example to your Big Storage? First, go through the steps under 'adjust the backup directory' below.
- The steps below delete all existing backups in the user's account.
- DirectAdmin does not offer an out-of-the-box option to automatically adjust the backup directory for future new user accounts to another directory.
Adjusting the backup directory
Step 1
Delete the backups folder in the user's home directory. Has the user already created backups? You could then first create the new directory (see Step 2) and then move the backups to the new directory with an mv command.
rm -rf /home/gebruikersnaam/backupsReplace 'username' with the name of the user. Are you the only user and do you use the admin account? Then, replace 'username' with 'admin', e.g. /home/admin/backups
Step 2
Do you use Big Storage? Then, first create a backup directory on your Big Storage for the specific user to be able to write your data to it:
mkdir /mnt/bigstorage/gebruikersnaam/backupsFinally, create a symbolic link from the backups directory to your Big Storage (a symbolic link refers to another folder). Backups are then automatically saved in the folder created above:
sudo cd /home/gebruikersnaam/
    sudo ln -s /mnt/bigstorage/gebruikersnaam/backups backups
Replace 'username' with the name of the user.
Creating a backup
Step 1
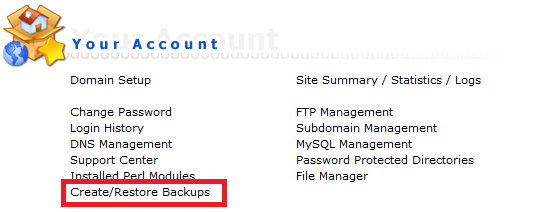
Go to the User Level in DirectAdmin and click 'Create / Restore Backups'.
Step 2
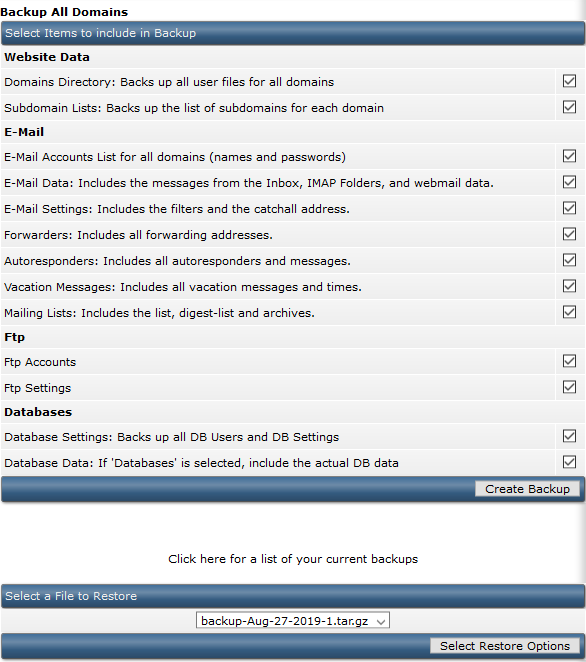
You will see the screen below. You are completely free to choose exactly what you want to back up from your websites, email, ftp, and databases. Keep in mind that this option applies to all domains of the user and you cannot choose a specific domain.
Restoring backups
Step 1
Restoring the backup is done on the same page as creating a backup. You probably saw the option in the screenshot above; you can choose one of your backups under the 'Select a File to Restore' option at the bottom of the 'Create / Restore Backups' page.
Step 2
After choosing a backup, click 'Select Restore Options'. Just like when creating the backup, you will receive an overview of the specific data that you want to restore.
Options that you cannot select are not yet present in your account. For example, in the screenshot below the relevant account has not yet created any databases.
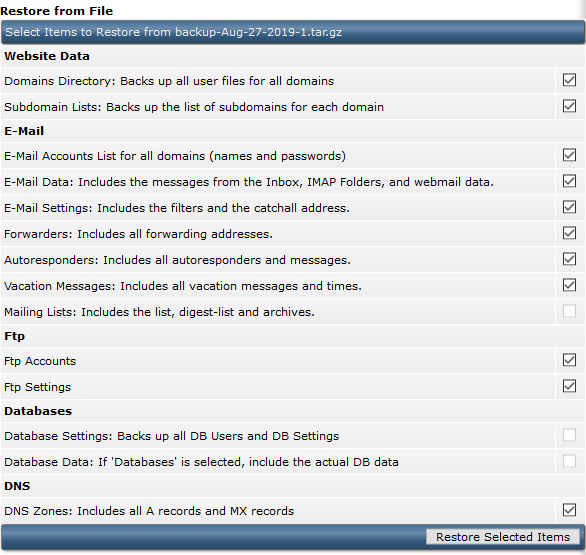
After optionally changing the selection, click 'Restore Selected Items' to restore your backup.
This brings us to the end of this article about the backup options of DirectAdmin.
Should you have any questions left regarding this article, do not hesitate to contact our support department. You can reach them via the ‘Contact Us’ button at the bottom of this page.