


When you order an extra IPv4 address or add an extra IPv6 address to your IP addresses via the control panel, they are not automatically added to your VPS via DHCP. You must manually add extra IP addresses to the network interfaces.
In this article, we explain how to add or set a static IPv4 and IPv6 address on your Debian 11 VPS. For this, you need an extra IPv4 and/or IPv6 address (depending on what you want to configure/add). If you do not have them yet, first consult one of the following articles:
See here for an overview of all our guides to add an extra or static IPv4 and IPv6 addresses to different Linux distros, or here for Windows.
- Follow the steps in this guide as a root user (or install sudo).
- This guide is about public IP addresses. In this guide you can find more information about setting up internal addresses (for your private network).
- A VPS includes one IPv4 address by default, but you can expand this to a maximum of 20 IPv4 addresses via the control panel.
- Each VPS has a /64 IPv6 range by default, from which IP addresses can be added as desired. A /64 IPv6 range contains a total of 18,446,744,073,709,551,616 IP addresses, so the chance of not having enough is quite small! The gateway falls outside this range, so you always set the netmask to 48.
Adding an IPv4 address in Debian 11
Step 1
Connect to your VPS via the VPS console or via SSH.
Step 2
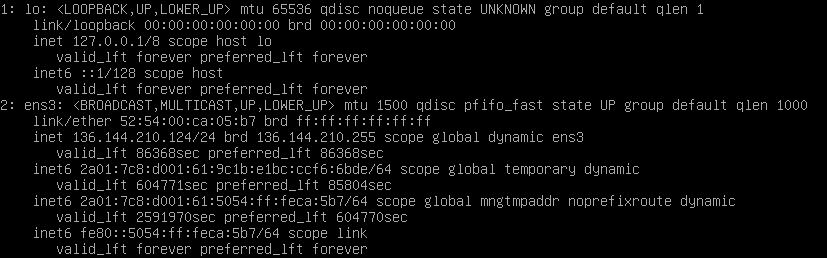
Once logged in, you can see the current network interfaces and the configured IPs with the command:
ip aFor the following steps, it is especially important that you are aware of the correct adapter name. In this example, it is ens3.

Step 3
Now you add the extra IPv4 address to the network interfaces. First, open the configuration of your network interface:
sudo nano /etc/network/interfaces- Did you choose an installation via a one-time password, SSH keys, or Cloud-config file? Then first disable Cloud Init and move the existing configuration with:
sudo touch /etc/cloud/cloud-init.disabled
sudo mv /etc/network/interfaces.d/50-cloud-init /etc/network/interfaces.d/ens3.cfg- Note that if you have already set an extra IP address on ens3:0, then take the next interface (i.e., ens3:1).
A configuration file will open where only the loopback interface is configured. You add a static new IP address with the following code syntax:
auto ens3
iface ens3 inet static
    address 136.144.210.124
    netmask 255.255.255.0
    gateway 136.144.210.1
auto ens3:0
allow-hotplug ens3:0
iface ens3:0 inet static
    address 136.144.210.181
    netmask 255.255.255.0
- Here address is the IP address you want to configure and can find in the control panel. Leave the (sub)netmask at 255.255.255.0.
- Optionally, you can let your primary IP be obtained via DHCP by only using iface ens3 inet dhcp for ens3.
- For your extra IP addresses, do not configure a gateway unless the IP address falls outside the /24 range of the primary IP address.
Save the changes and exit nano (ctrl + x > y > enter). For extra IPv4 addresses, add ens3:1, ens3:2, and so on below.
Step 4
To apply the new IP address, restart your network and bring the new interface down and up again (note that this will break your SSH connection).
sudo systemctl restart networking
Step 5
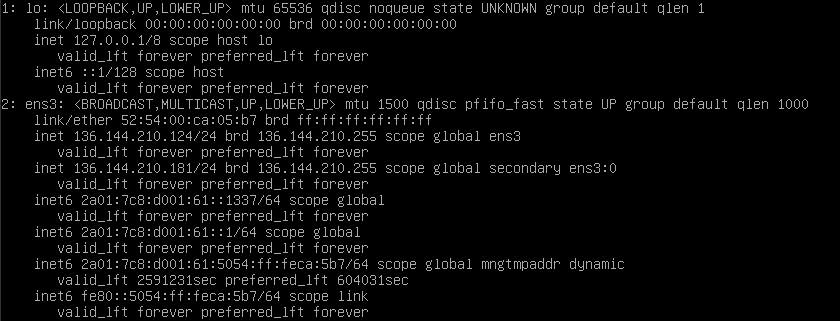
When you run ip a again, you will see the newly added IPv4 address. You can test this IP address by performing a ping test from another computer/IP.
Adding an IPv6 address in Debian 11
Step 1
Connect to your VPS via the VPS console or via SSH.
Step 2
Once logged in, you can see the current network interfaces and the configured IPs with the command:
ip aFor the following steps, it is especially important that you are aware of the correct adapter name. In this example, it is ens3.
Step 3
Now you add the extra IPv6 address to the network interfaces. First, open the configuration of your network interface:
sudo nano /etc/network/interfaces- Did you choose an installation via a one-time password, SSH keys, or Cloud-config file? Then first disable Cloud Init and move the existing configuration with:
sudo touch /etc/cloud/cloud-init.disabled
sudo mv /etc/network/interfaces.d/50-cloud-init /etc/network/interfaces.d/ens3.cfg- Note that if you have already set an extra IP address on ens3:0, then take the next interface (i.e., ens3:1).
In the opened configuration file, you add your IPv6 addresses statically (in this example, a primary IPv6 address is listed first, followed by a secondary IPv6 address without a gateway):
iface ens3 inet6 static
    address 2a01:7c8:d001:61::1
    gateway 2a01:7c8:d001::1
    netmask 48
iface ens3 inet6 static
    address 2a01:7c8:d001:61::1337
    netmask 48
Save the changes and exit nano (ctrl + x > y > enter).
- If you experience issues, add an extra iface for each IPv6 address, for example, iface ens3:0, iface ens3:1, etc.
Are you using the fast installs feature for VPS and did you choose installation via SSH keys, a one-time password, or cloud-config user data? Then Cloud Init overwrites your network configuration. To prevent this, comment out the last line in the file so that it looks like this:
#source /etc/network/interfaces.d/*
Step 4
To apply the new IP address, restart your network and bring the new interface down and up again (note that the first command will break your SSH connection).
sudo systemctl restart networking
Step 5
When you run ip a again, you will see the newly added IPv6 address. You can test this IP address by performing a ping test from another computer/IP.
If you want to add more IP addresses, add the section below again, replacing the IPv6 address in the example with your new IPv6 address:
iface ens3 inet6 static
address 2a01:7c8:d001:61::1337 netmask 48
This concludes our tutorial on adding (static) IPv4 and IPv6 addresses in Debian 11.