Once you have ordered and validated an external SSL certificate for your website, you can install the certificate on your website.
To do this, you need to download the certificate files so that you can add them to your web hosting package via your control panel. In this article we explain the steps required.
- You can always use Let's Encrypt SSL-certificates free of charge on your web hosting package. You can read all about it in the article 'Let's Encrypt for Webhosting'.
Installing the SSL certificate
Before you start, download the SSL certificate. The files are ususally downloaded in .zip format. You will need the following files for this:
- certificate.crt
- certificate.key
- cabundle.crt
Step 1
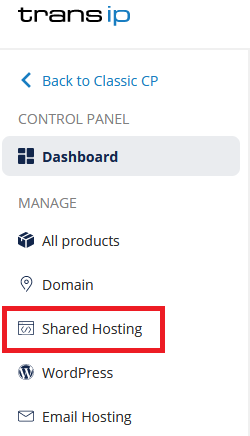
Log in to the control panel and click 'Shared Hosting' in the menu. Next, select your domain below 'Products'.

Click the 'Site' tab at the top, followed by 'Domains & SSL'. Select your website by clicking ‘Manage’ to the right of it.

Step 2
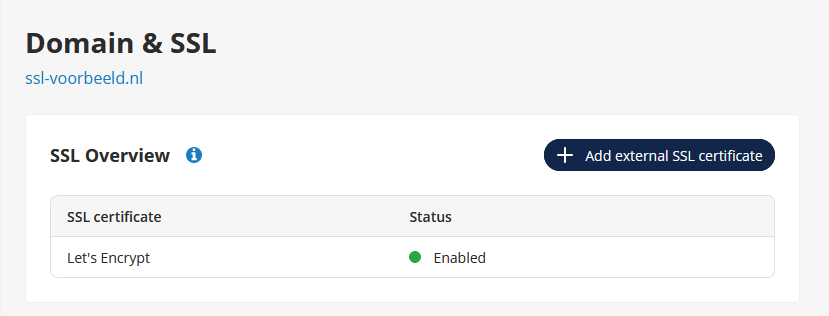
In the SSL Overview, click '+ Add external SSL certificate'.

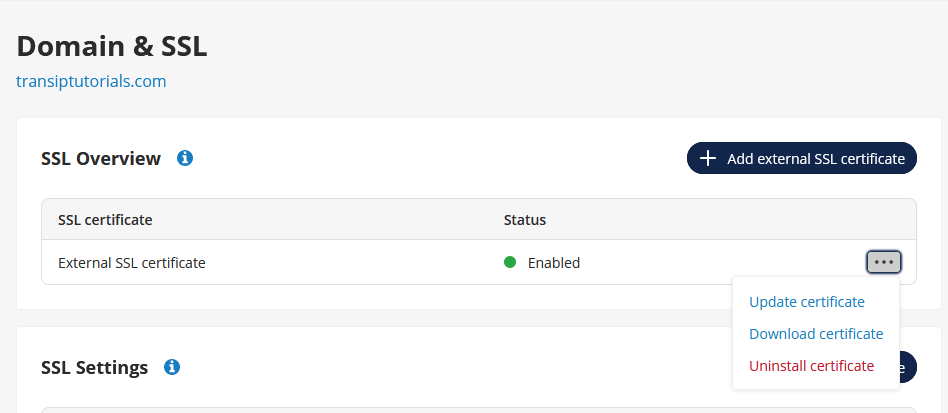
If there is already an external certificate installed, you can instead update your installed certificate by clicking the three dots and selecting 'Update certificate'.

Step 3
Open your certificate's files in a text editor such as Notepad and paste the entire contents of the files into the control panel. This means that both the texts'-----BEGIN CERTIFICATE-----', and '-----END CERTIFICATE-----' need to be included.
- Paste the content of certificate.crt into the first field below 'SSL-certificaat'.
- Paste the content of certificate.key into the second field below 'Privésleutel'.
- Paste te content of cabundle.crt into the third field below 'CA-bundel'.

Click 'Save' to install the certificate. Installing the certificate usually takes 15 to 30 minutes.
Uninstalling the SSL certificate
Log in to the control panel and click 'Shared Hosting' in the menu. Next, select your domain below 'Products'.

Click the 'Site' tab at the top, followed by 'Domains & SSL'. Select your website by clicking ‘Manage’ to the right of it.

Click the three dots next to the SSL certificate you wish to uninstall -> 'Uninstall certificate'. Click 'Confirm' to remove the SSL certificate.

Let's Encrypt will now become active whenever 'HTTPS' is enabled in the control panel.


