


With our Web Hosting packages you have the option to use different caching options. To use Redis on your WordPress website, a few simple steps are required. In this article we explain these steps.
Enabling Redis on a WordPress website
Step 1
Follow the steps via this link to enable Redis via your control panel. Write down/remember the following information, you will need it for the next step:
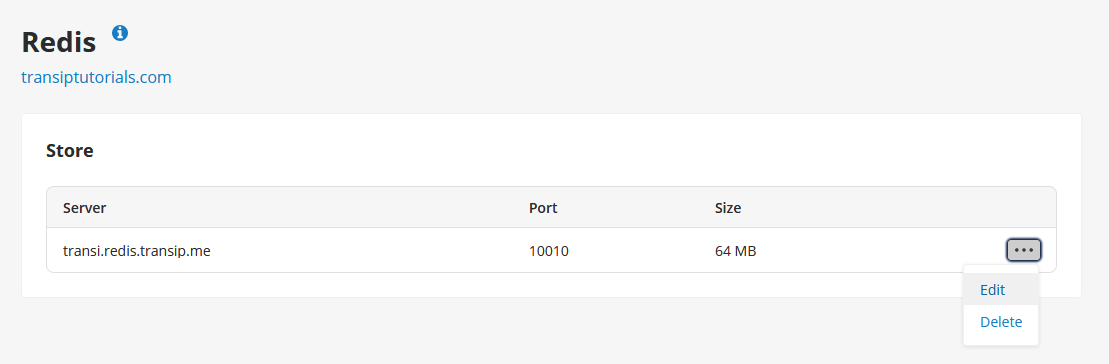
- The Host/Server. This is always a short code based on your domain name followed by '.redis.transip.me'.
- The Port number.
- The Password you entered.
You can always change your password by clicking the three dots on the right, followed by 'Edit'.
Step 2
The plugin you install in step 3 needs a few settings from your wp-config in order to work properly. So to make thep 3 go smoothly, edit your wp-config.php file first.
Open your File Manager via the control panel and click on the 'wp-config.php' file in your 'www' folder. Click 'Edit' and paste these lines just above the line '/* That's all, stop editing! Happy blogging. */':
/**
* REDIS config
*/

define('WP_REDIS_HOST', '<Host>');
define('WP_REDIS_PORT', '<Port');
define('WP_REDIS_PASSWORD', '<Password>');
define('WP_REDIS_MAXTTL', '86400');
Replace <Host>, <Port>, and <Password> with your own Redis data from step 1.
Step 3
Log in to your WordPress dashboard via '<yourdomainname.com>/wp-admin' and install the plugin called 'Redis Object Cache'. Activate the plugin and then click 'Enable object cache'.
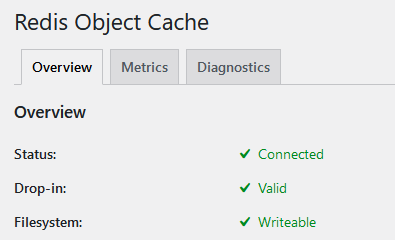
You will now see a green check mark and 'Connected' next to 'Status'. Redis is now enabled on your WordPress website!