


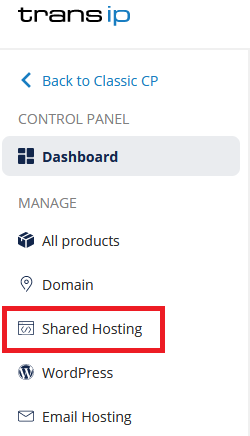
Our new webhosting packages allow for different caching options. You can find these options by logging in to the control panel and clicking 'Shared Hosting' in the menu. Next, select your domain below 'Products'.
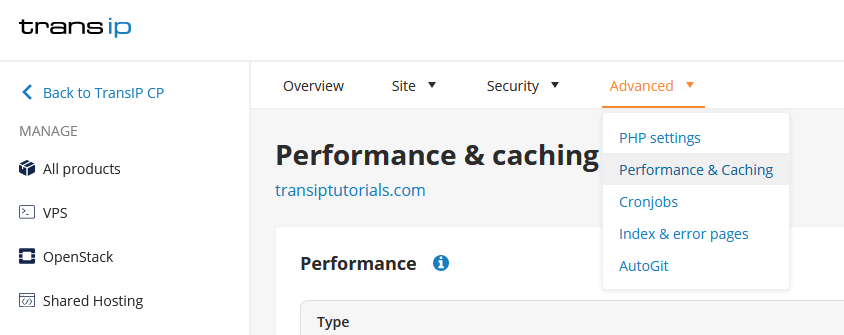
Next, click 'Advanced' at the top, followed by 'Performance & caching'.
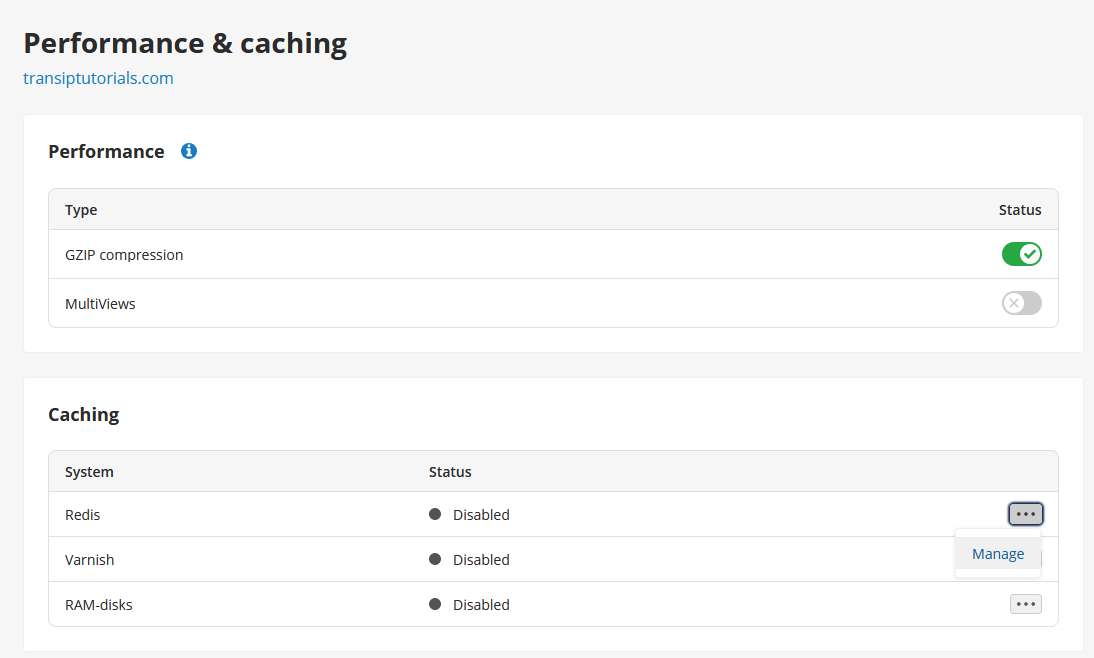
In the overview you can see the different cachingoptions available on your webhosting package. Redis and Ram-disk are available on all web hosting packages. Varnish is only available on webhosting 'Pro' and 'Max'.
In this article we explain how to enable the caching options via the control panel.
Redis
Redis can be used to cache data that is retrieved, such as data from a MySQL database. The data in Redis will be deleted when Redis is restared.
Important: Due to the fact that the data in Redis is irrevocably deleted with every restart, it is necessary that oyu only use temporary data in Redis.
To enable Redis in the control panel, procees as follows:
Step 1
In the 'Performance & caching' overview, click the three dots next to 'Redis', followed by 'Manage'.
Step 2
To activate Redis, click 'Activate'. Set a password and click 'Save'.
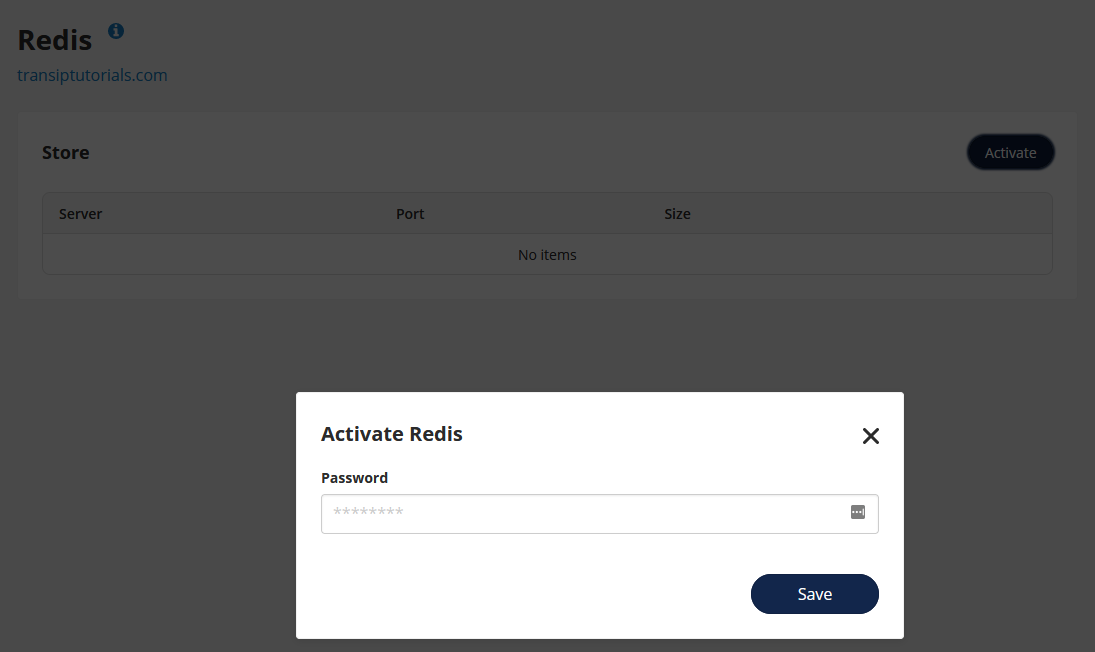
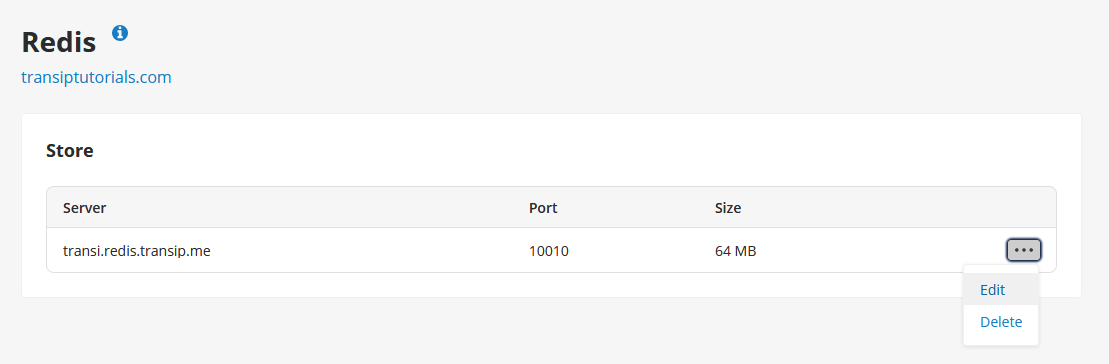
You will see that Redis is enabled right away. The overview shows the Server, Port and the maximum Size of your Redis data.
You can always change the password you set for Redis by clicking 'Edit' via the three dots.
Ram-disk
RAM disk is a virtual disk that allows your website to read and write files much faster. Because the data on your RAM disk can be deleted at any time, this is only used for caching.
Note: Due to the fact that the data in RAM disk can be deleted at any time, it is necessary that you only use temporary data with RAM disk..
Follow these steps to enable RAM disk in your control panel:
Step 1
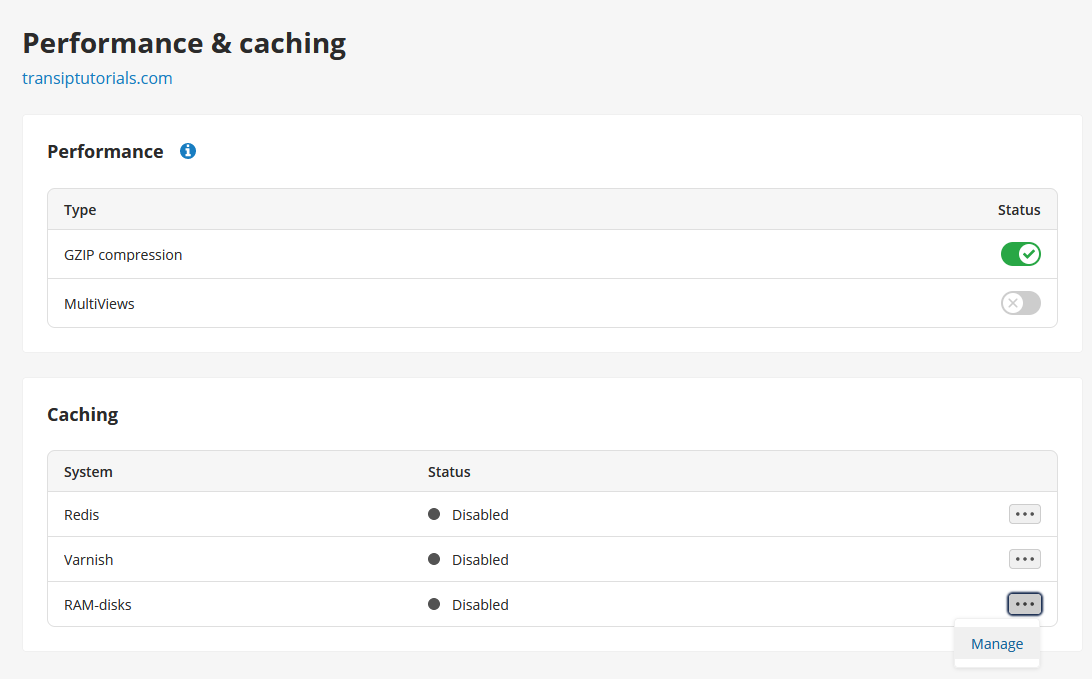
In the 'Performance & caching' overview, click the three dots next to 'RAM-disks', followed by 'Manage'.
Step 2
To activate RAM-disk, click 'Activate'.
Enter a Name for the disk, set a Size and enter the Folder on the server you wish to assign to the RAM-disk. Click 'Save' once you are ready.

Varnish
Varnish can cache your web pages so that they are loaded faster. The cached pages take a shortcut to the visitor, which significantly improves speed.
You can activate Varnish on a webhosting 'Pro' or 'Max'. You can do so by following these steps:
Step 1
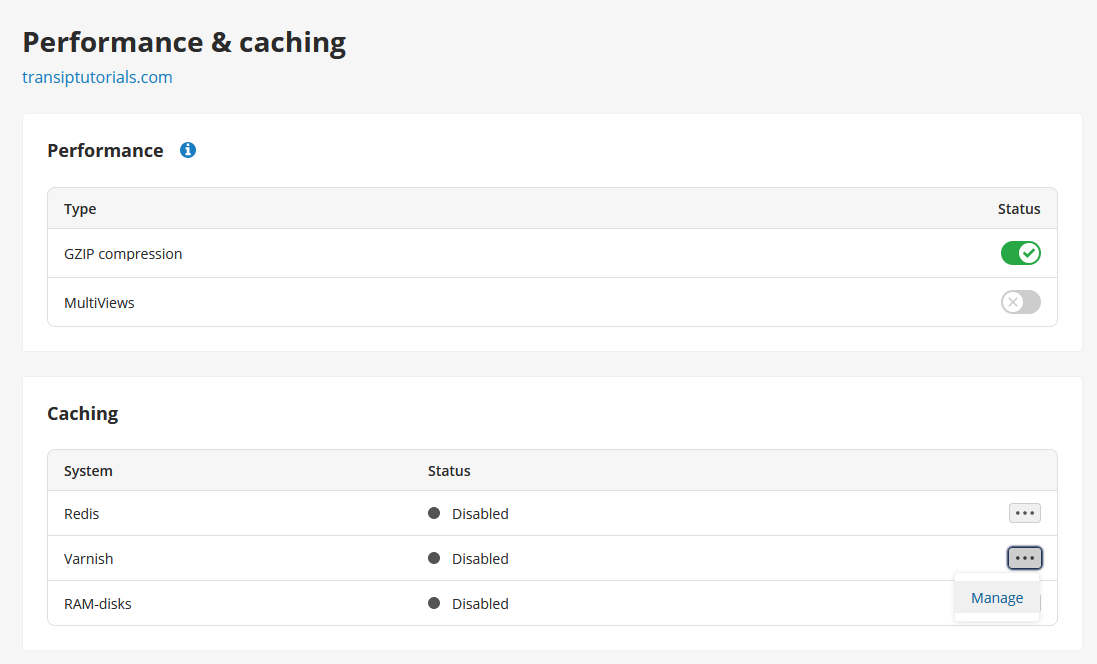
In the 'Performance & caching' overview, click the three dots next to 'Varnish', followed by 'Manage'.
Step 2
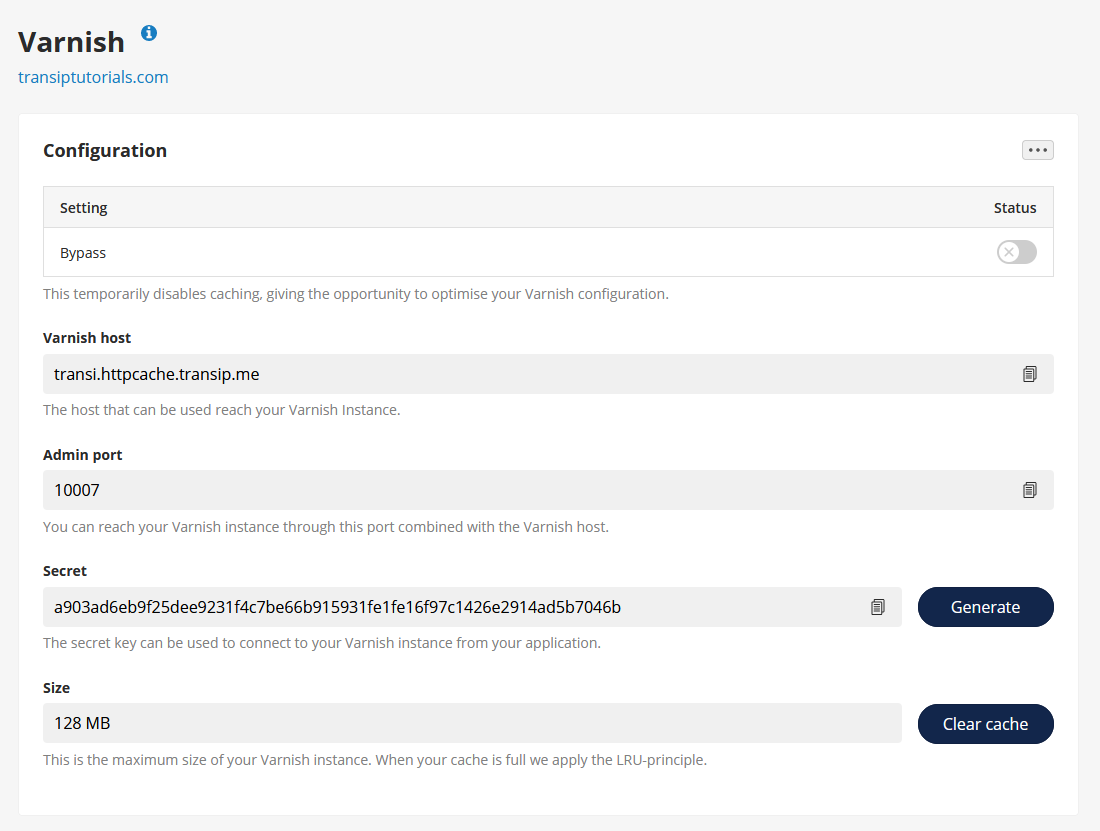
To activate Varnish, click 'Activate'. A pop-up will appear asking to activate the temporary cache bypass. By enabling the bypass, the caching is not yet active which allows you to configure varnish first. Click 'Save'.
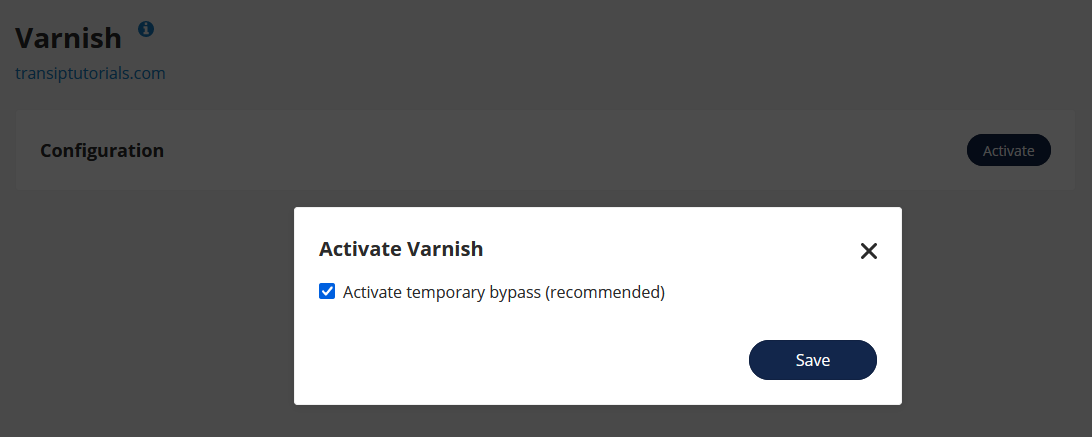
Make sure to disable the bypass after configuration. Varnish is only active when the bypass is disabled.
As soon as Varnish is activated you will find the configuration settings in the overview.
In this article we have explained how to enable the different caching options for webhosting packages via the control panel.