


When using a Windows network with a pfSense firewall, you may want to authenticate pfSense admins and VPN users via an Active Directory (via the LDAP protocol). In order to do this, a number of steps are required on both your Domain Controller and pfSense server. In this tutorial we outline those steps.
This tutorial requires at least a private network that includes a Windows Server configured as an Active Directory Domain Controller and a pfSense firewall.
Step 1
Connect to your DC via Remote Desktop or the VPS console.
Windows uses the LDAP protocol to communicate with a Domain Controller (DC). This protocol can be abused in (D)DoS attacks. We therefore monitor our network for publicly accessible LDAP servers and block the LDAP port if necessary.
If you have already secured the LDAP port (UDP) on your DC so that only servers on your private network can connect to it, skip to step 5.
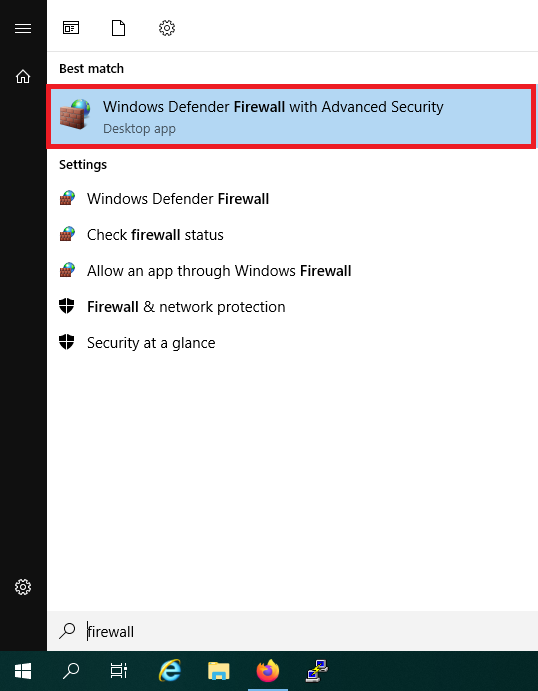
Step 2
Click the start button and use the search term 'Firewall'. Alternatively, you can also find the firewall in the Server Manager under 'Tools'. In the search results, click 'Windows Firewall with Advanced Security'.
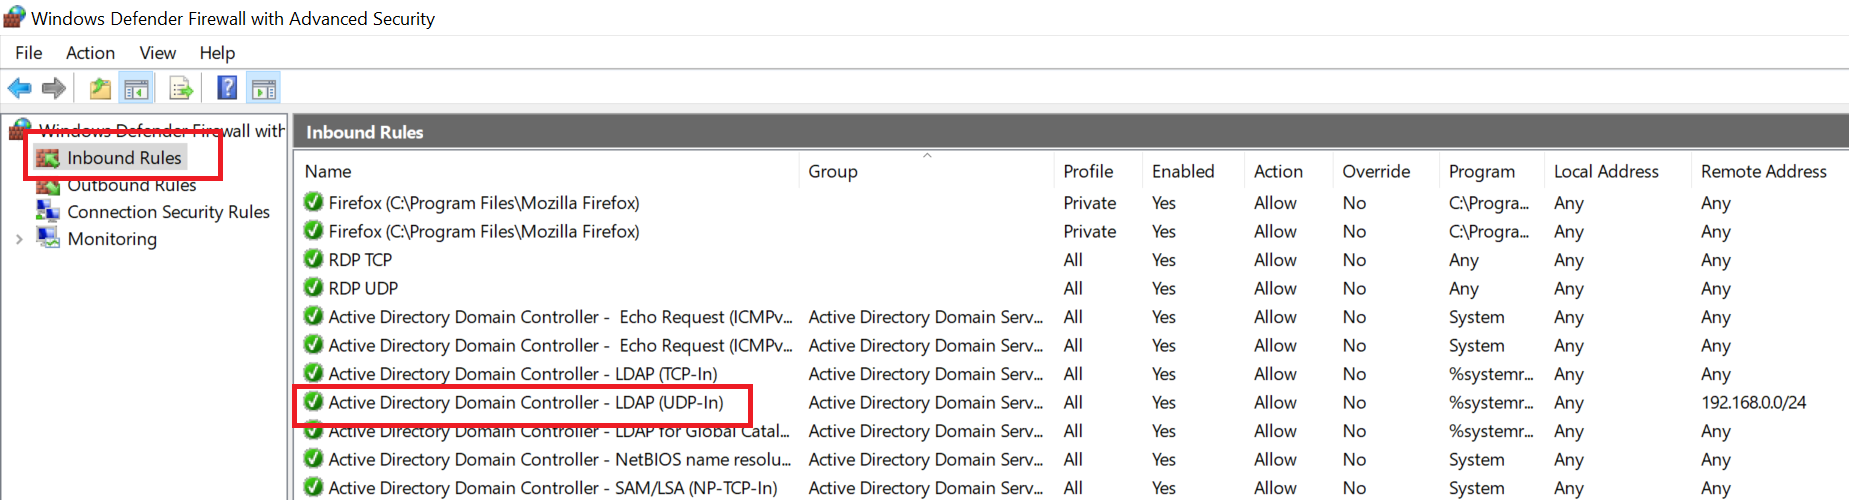
Step 3
Click 'Inbound Rules'. Most likely you already have two LDAP rules in this overview called 'Active Directory Domain Controller - LDAP' for TCP-In and UDP-In, or you have already created your own LDAP rule.
Now double click the LDAP rule for UDP traffic.
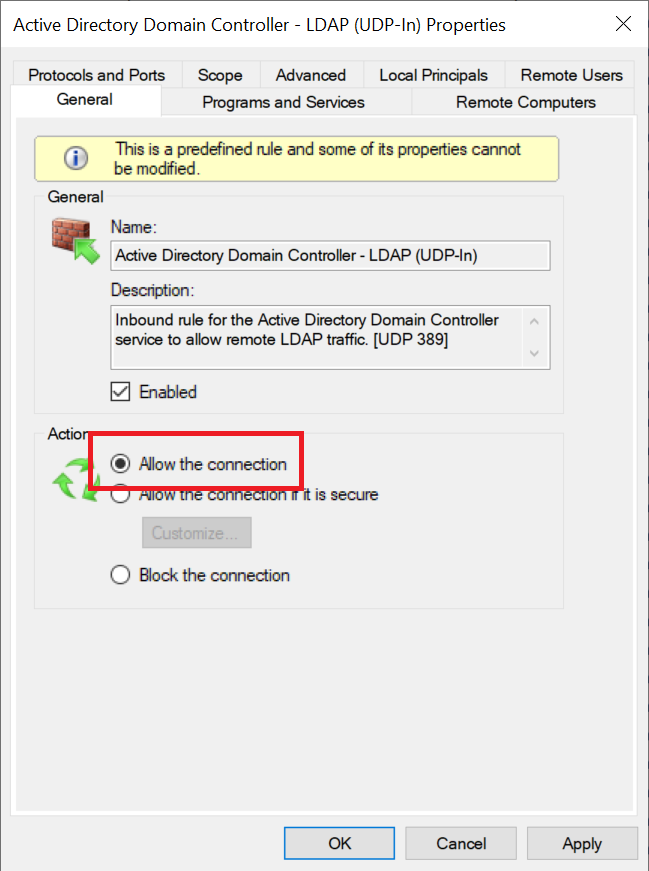
Step 4
First check in the 'General' tab that the option 'Allow the connection' is selected.
Then click the 'Scope' tab and then under 'Remote IP address' click 'Add'.
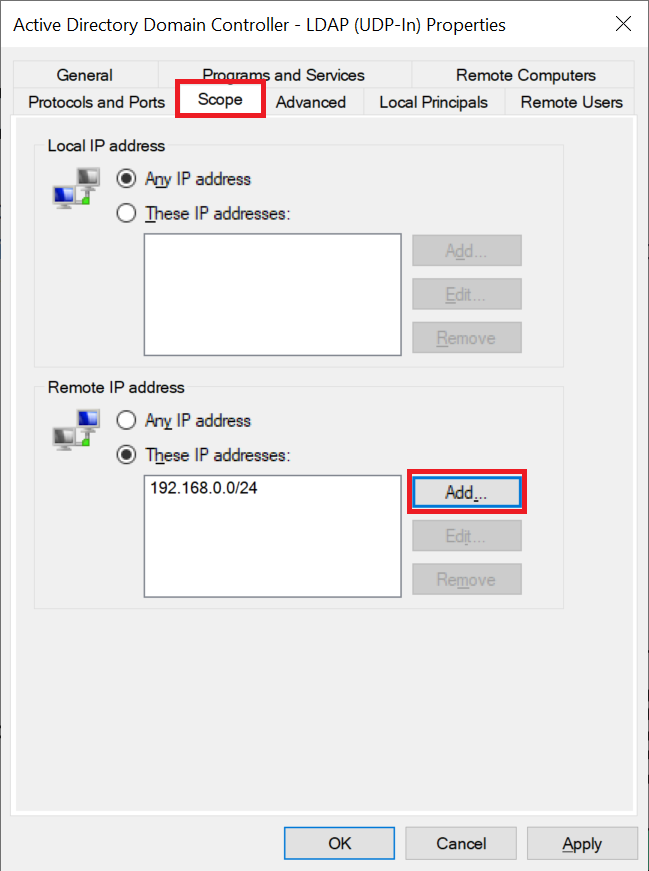
Enter the subnet (your IP range) that you use for your private network (see this manual), for example 192.169.0.0/24 and click 'OK'.
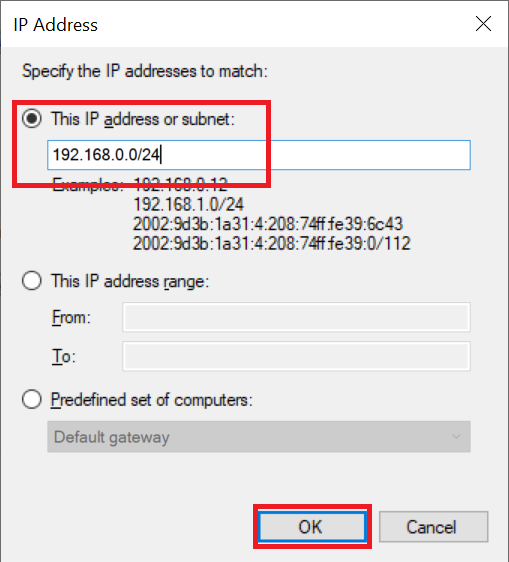
Click 'Apply' and 'OK' to apply the changes and close the window.
Next we create the necessary group in the Active Directory.
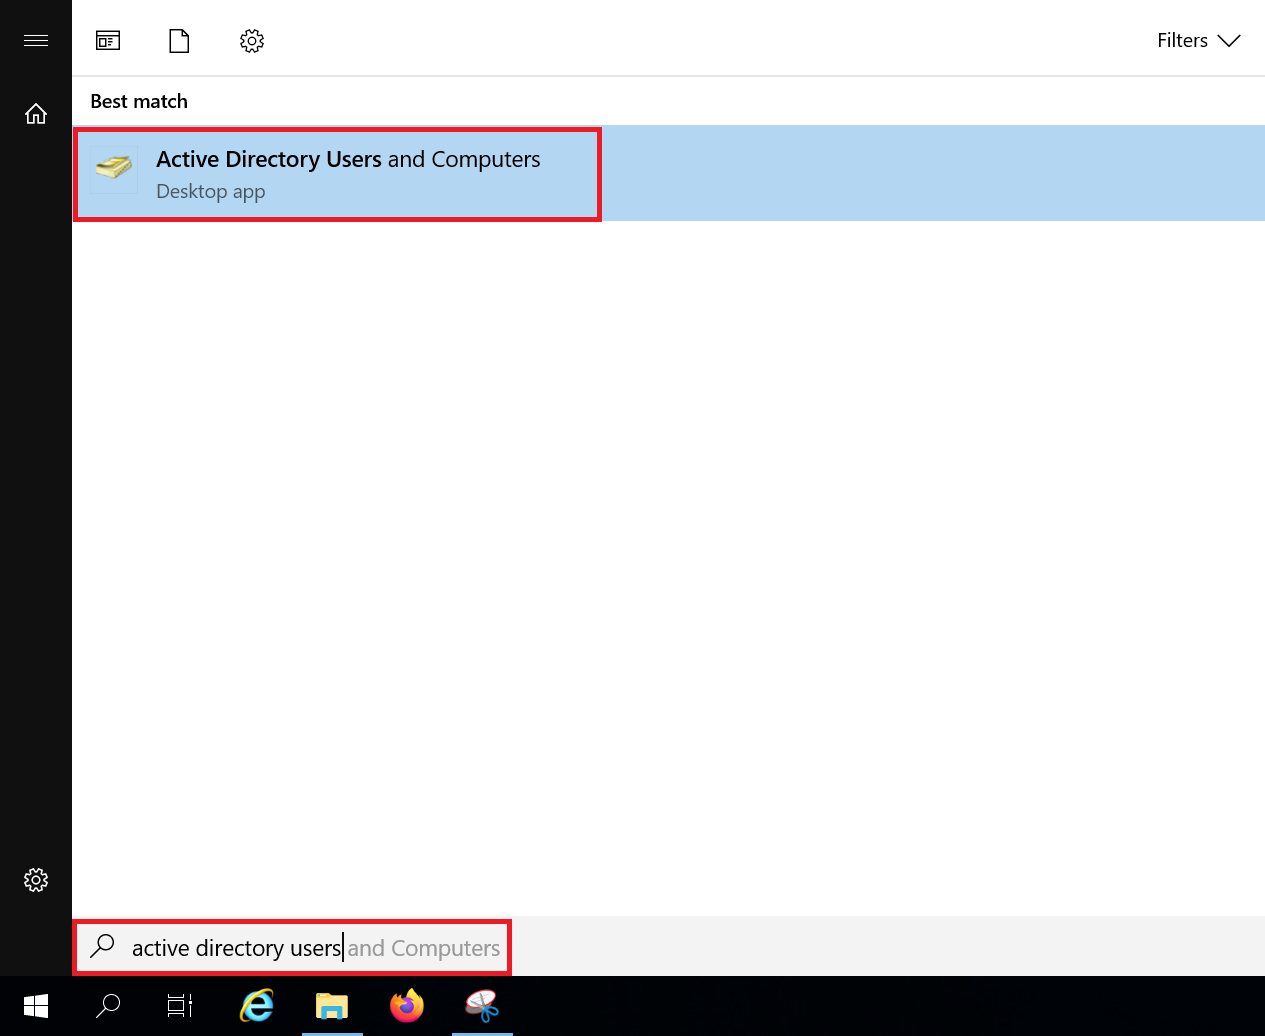
Click the Windows Start button, type 'Active Directory Users and Computers' and click the result.
Step 6
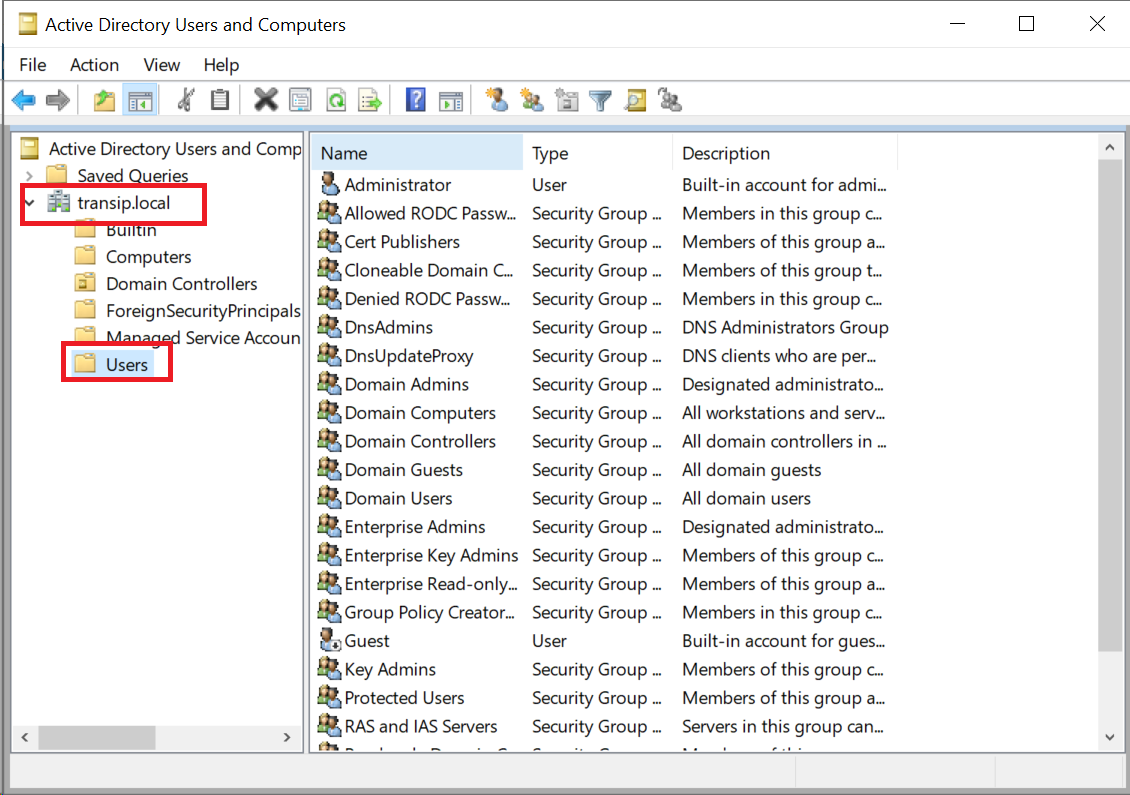
Click the name of your domain and then click 'Users'.
Step 7
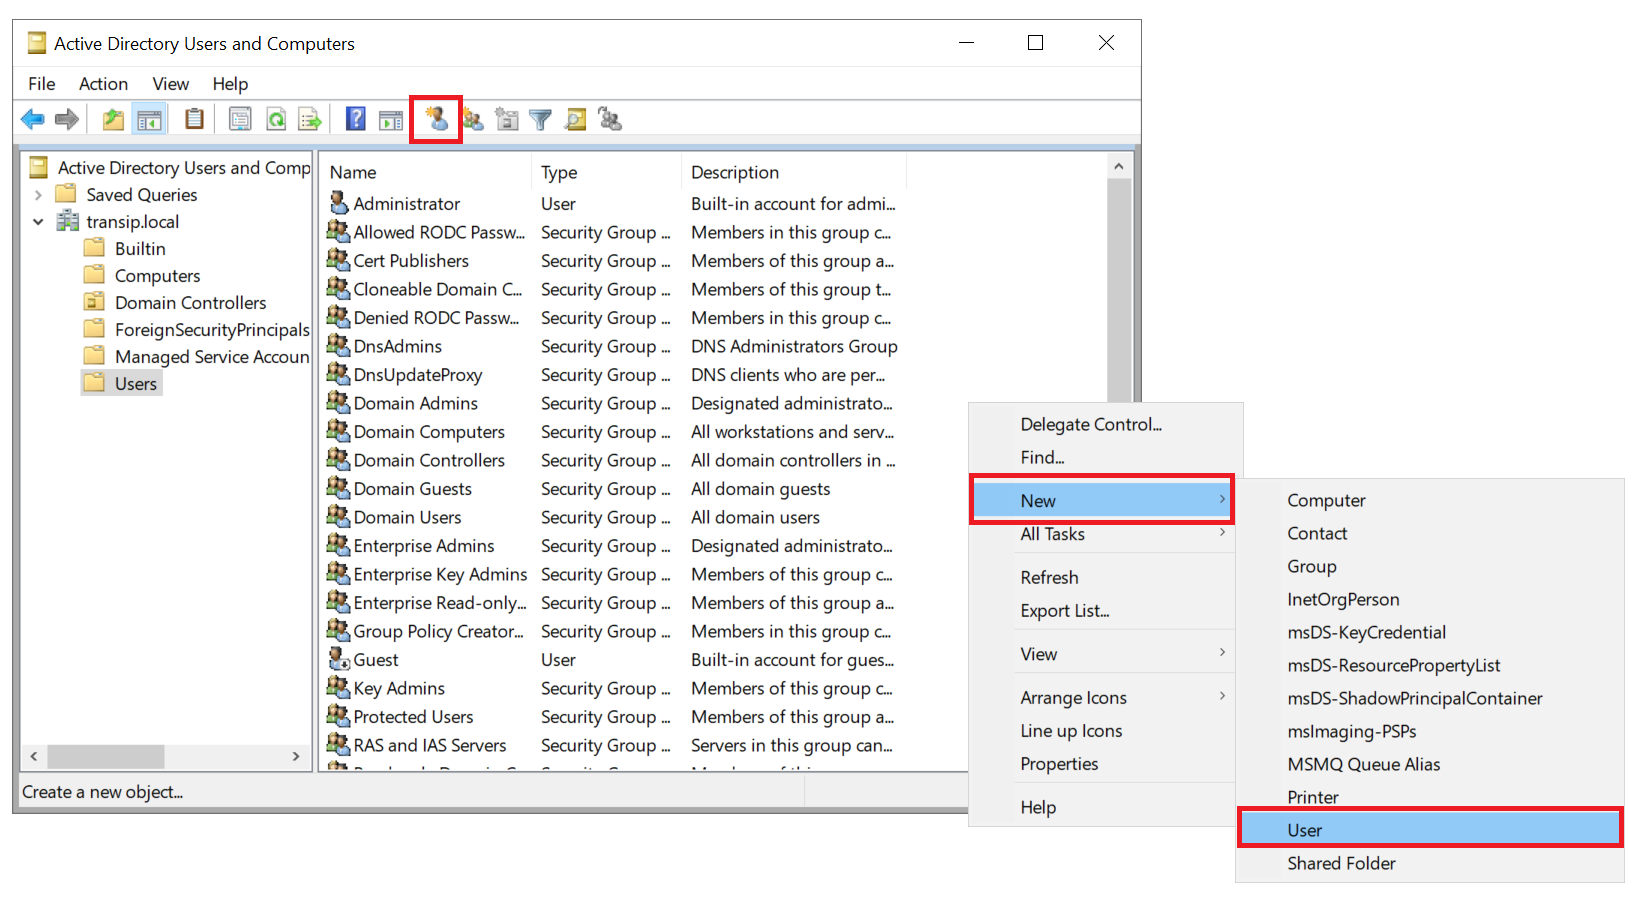
In the list of users, right-click an empty space and select 'New' > 'User', or use the shortcut icon at the top of the window.
Step 8
Give the new user a recognizable name such as pfbind or pfldap. We use this account for communication with the Active Directory database (in pfSense this is the Bind user).
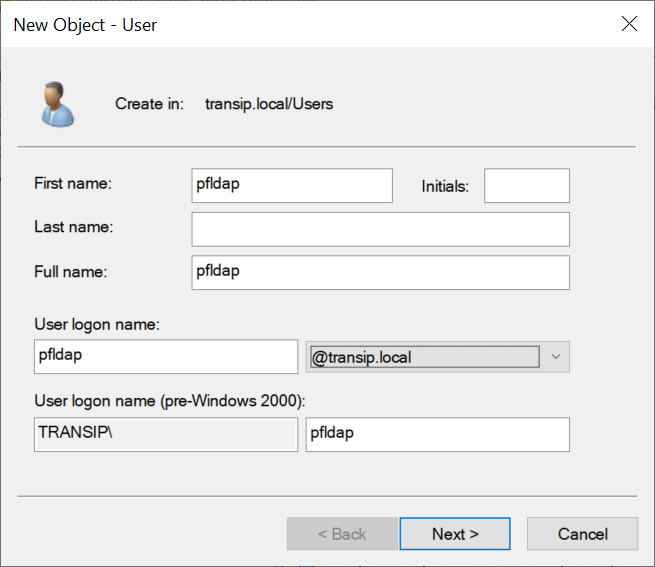
Step 9
Enter a password and click 'Next'.

Step 10
Click 'Finish' to close the wizard.

Step 11
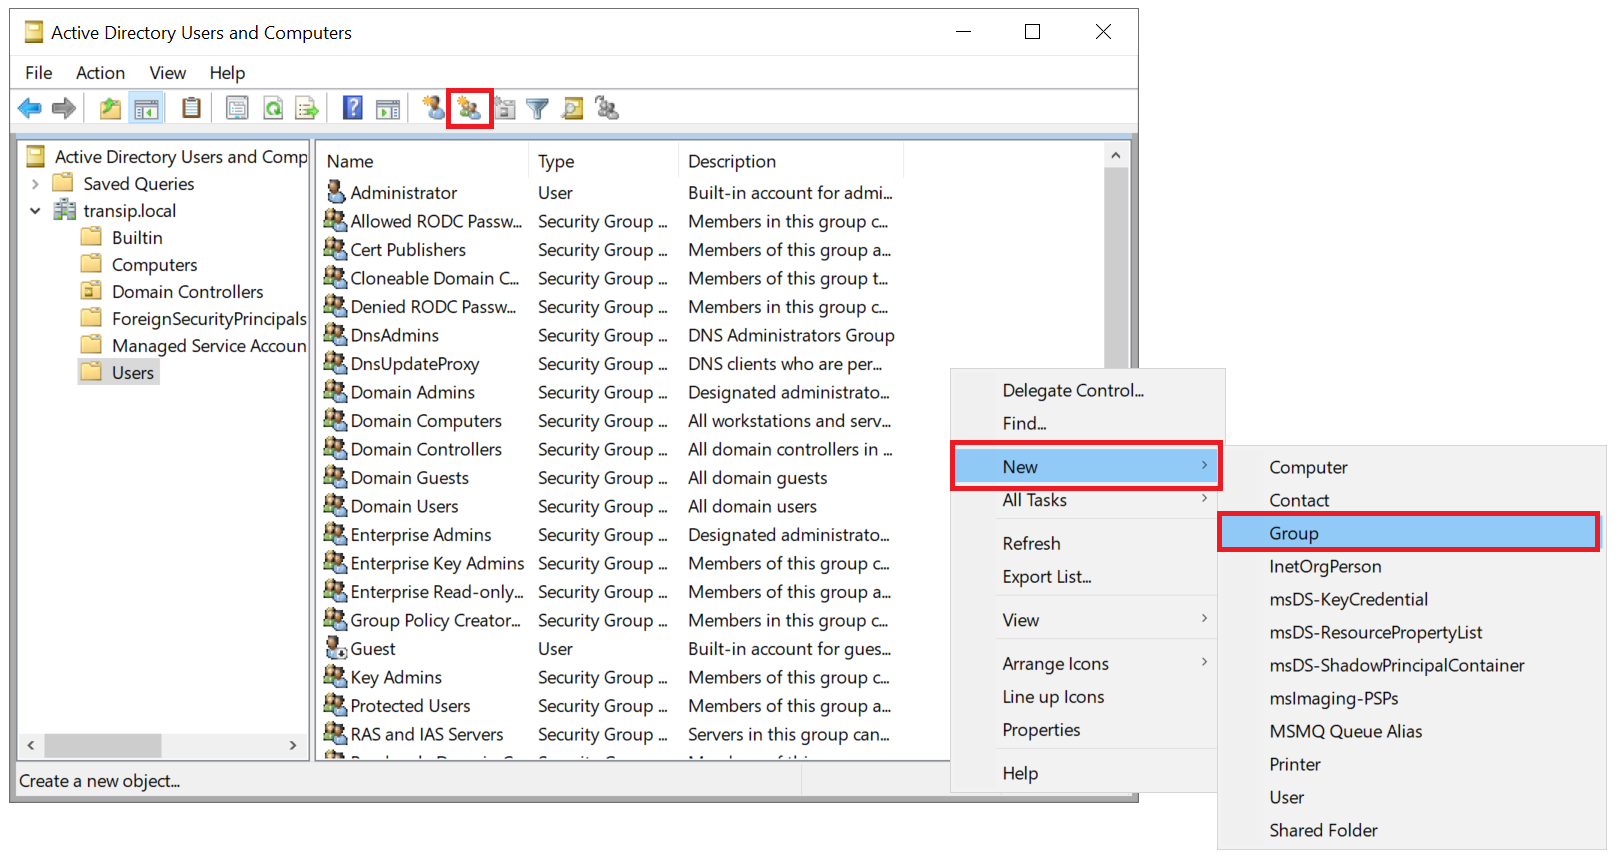
In the list of users, right-click an empty spot and select 'New' > 'Group', or use the shortcut icon at the top of the window to create a new group.
Step 12
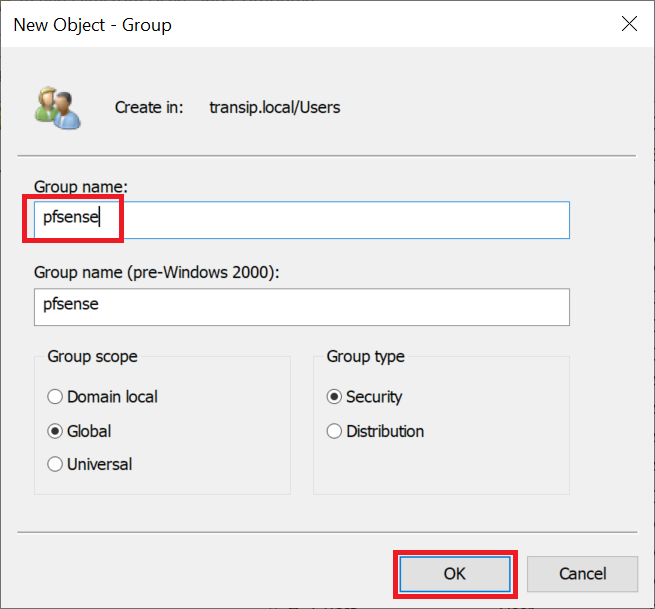
Give the group a name, for example 'pfsense' or 'pfsense admin' for a group that includes pfSense admins, or 'pfsense vpn' for a group of OpenVPN users.
Step 13
In the ADUC tool, double click the name of the newly created group and click the 'Members' tab and then click 'Add'.
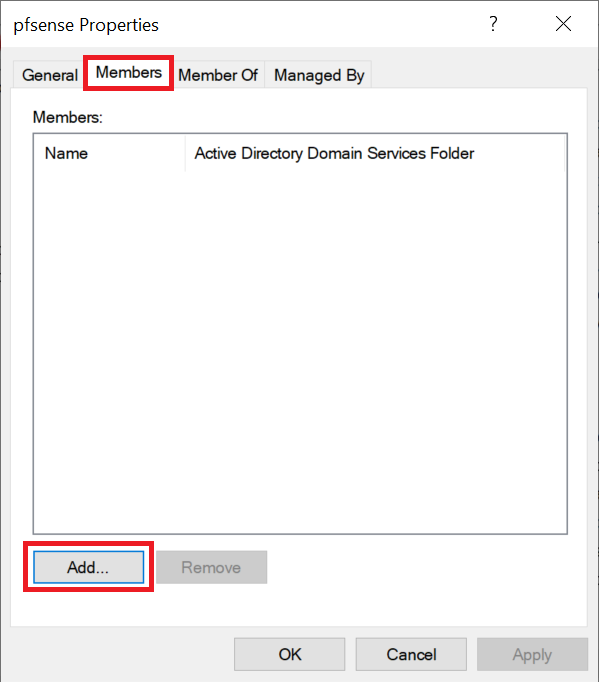
Now search for the name of a user you want to add to this group and repeat this step until all desired users have been added to the group.
Step 14
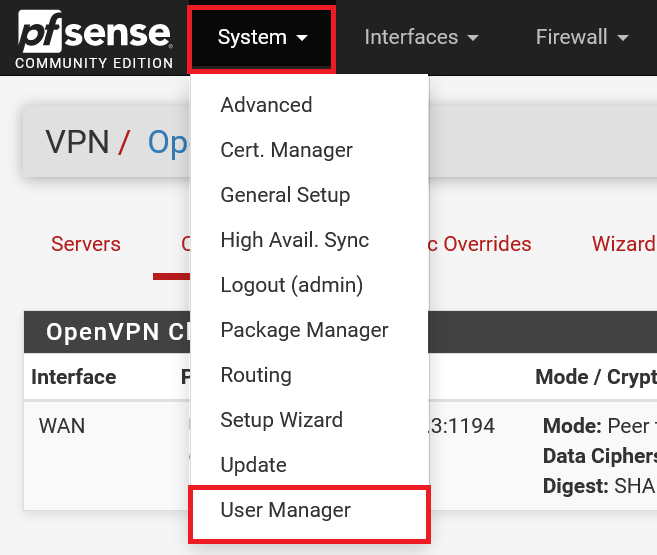
Now log in to the pfSense web interface as admin and in the top menu click 'System' > 'User Mamager'.
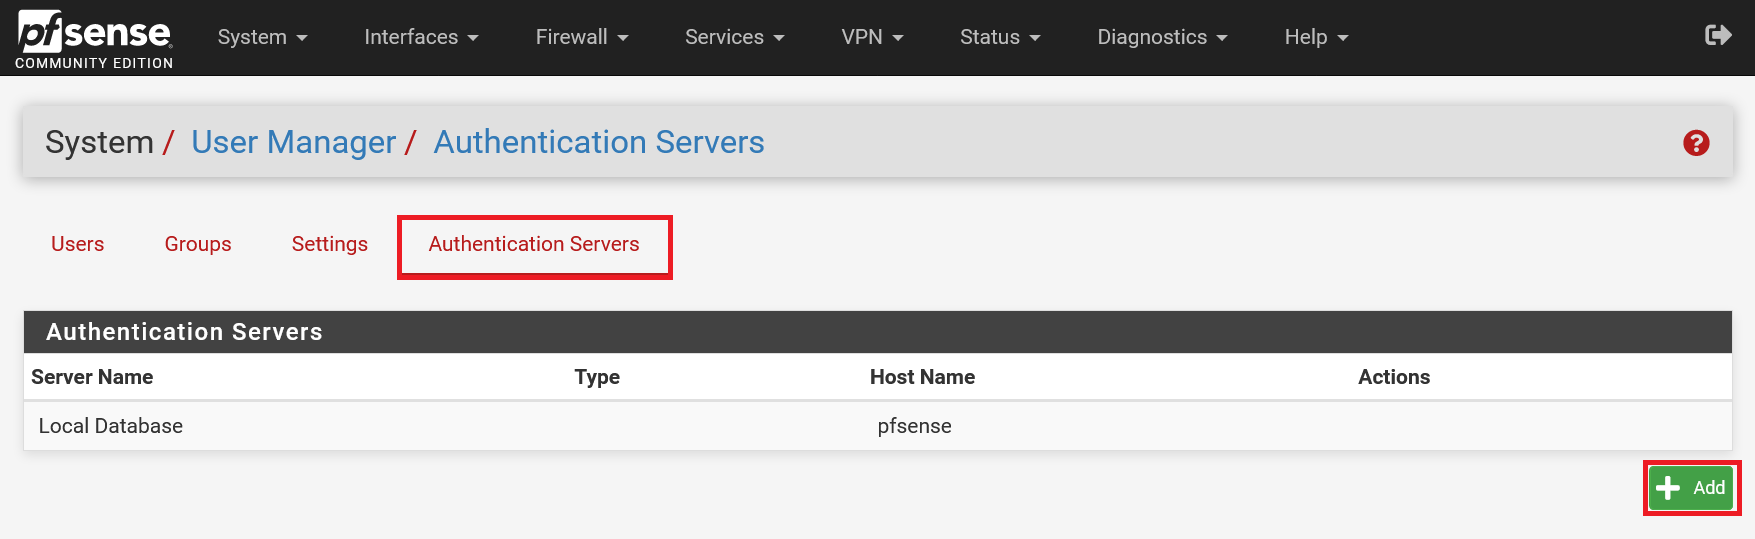
Step 15
Click the 'Authentication Servers' tab and then 'Add'.
Step 16
Fill in the form as in the example below and use your own details for the following points:
-
Hostname or IP address: The IP address or subdomain name of your Domain Controller.
-
Base DN: The domain name of your Windows domain, as you set it up in step 13 of our Active Directory tutorial. You divide the domain name by placing DC= in front of each part. For example, for the domain transip.local, this becomes DC=transip,DC=local (no spaces!).
-
Authentication Containers: The name of the folder in your active directory where you add users and groups with the addition CN= (always 'CN=Users') in combination with your Base DN (see previous point), for example CN=Users,DC =transip,DC=local
- Bind credentials: The suffix CN= with the name of the Bind user from step 7 onwards of this guide, along with the Authentication Containers, for example CN=pfldap,CN=Users,DC=transip,DC=local

This brings us to the end of this tutorial on how to configure an LDAP server in pfSense.