


Once you have added your VPSs to a Private Network, you will first have to set up internal IP addresses before you can make full use of them.
In the examples, the 192.168.0.0/16 range is used. However, you can choose one of the IP ranges defined in the RFC for use within private networks: 10.0.0.0/8, 172.16.0.0/12 and 192.168.0.0/16.
This article covers various Windows OS's. For Linux, please see this article.
- If the internally configured IP cannot be seen by other VPS's on your private network, add a rule on these VPS's in the Windows Firewall with Advanced Features, adding the internal IP as Remote IP address under 'Scope'.
- In case of incorrect adjustments, you can make your VPS unreachable. Make sure you also have access via the console in the control panel (if you do this via RDS). In addition, it is strongly recommended to create a Snapshot in advance which you can fall back on.
- Do you use an Active Directory which is also a DNS Server? Don't forget to add it in the 'Internet Protocol Version 4 (TCP / IPv4)'-configuration.
Windows Server 2016
Step 1
Connect to your Window Server as an Administrator using the VPS console or Remote Desktop.
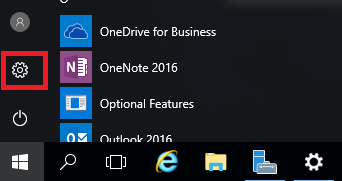
Step 2
Click on start, followed by the settings icon to go to the control panel.
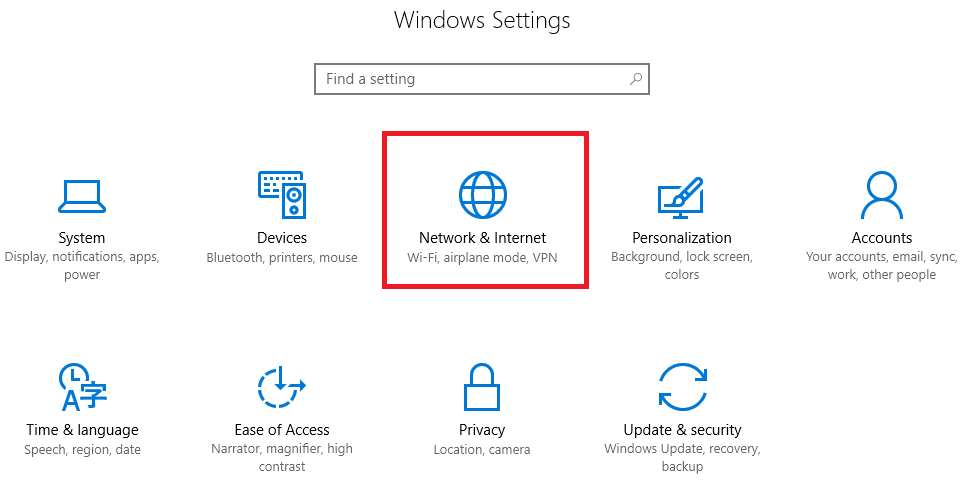
Step 3
Click 'Network & Internet'.
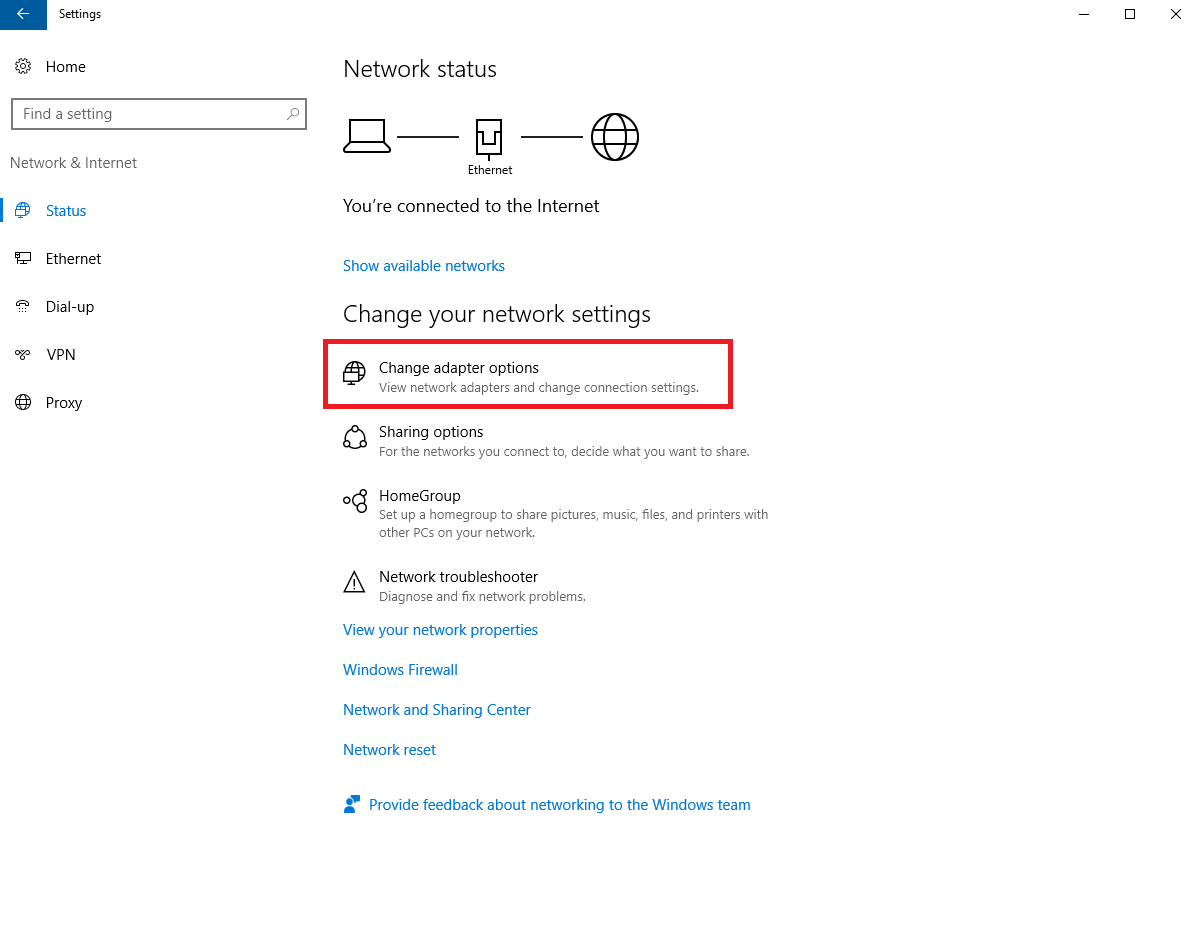
Step 4
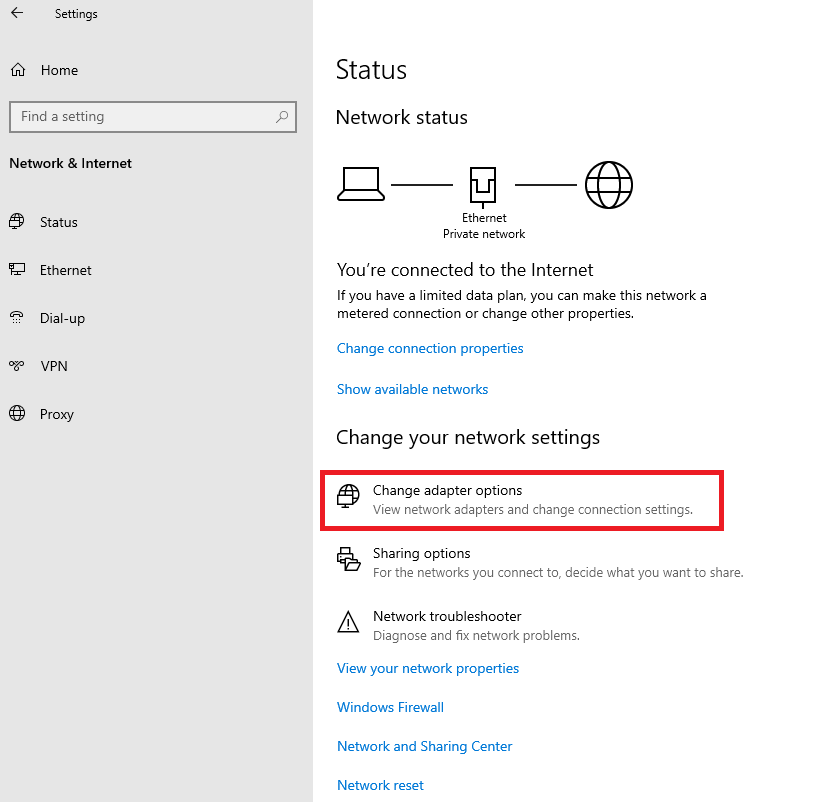
Click 'Change adapter options'.
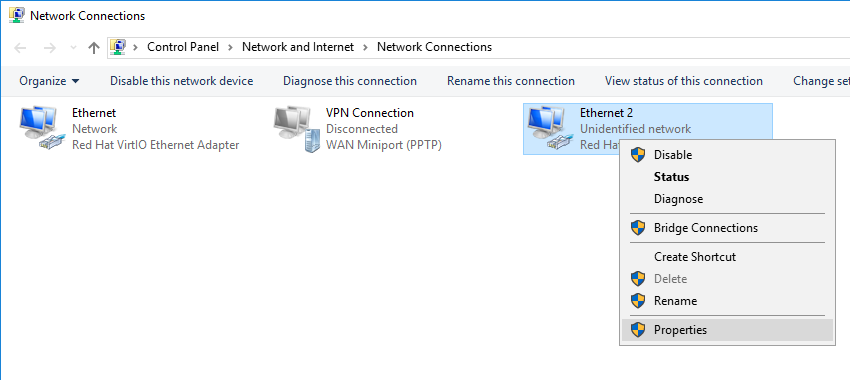
Step 5
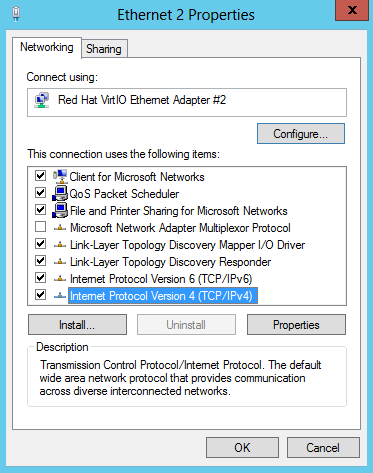
Richt click your network adapter called and click 'properties'.
Step 6
Click 'Internet Protocol Version 4 (TCP / IPv4)' and then 'Properties'.
Step 7
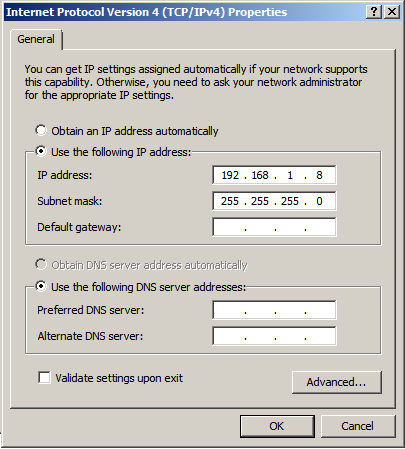
Under 'Use the following IP address', enter your internal IP and fill in the subnet mask. Click 'Ok' to save it.
Windows Server 2019 / 2022
Step 1
Connect to your Window Server as an Administrator using the VPS console or Remote Desktop.
Step 2
Click on start, followed by the settings icon to go to the control panel.

Step 3
Click 'Network & Internet'.

Step 4
Click 'Change adapter options'.
Step 5
Richt click your network adapter called and click 'properties'.

Step 6
Click 'Internet Protocol Version 4 (TCP / IPv4)' and then 'Properties'.
Step 7
Under 'Use the following IP address', enter your internal IP and fill in the subnet mask. Click 'Ok' to save it.
Windows Server 2025
Step 1
Connect to your Window Server as an Administrator using the VPS console or Remote Desktop.
Step 2
Click on the Start button and then on the cogwheel/settings icon.

Step 3
Click on ‘Network & Internet’ > ‘Ethernet’.

Step 4
- Click on the arrow next to ‘Network’ to collapse the options for your public internet adapter.
- Click on the arrow next to ‘Unidentified network’ to expand the options for your private network adapter.
- Click on ‘Edit’ next to ‘IP assignment’.

Step 5
An ‘Edit IP settings’ window will now appear. Adjust the following settings:
- Change ‘Automatic (DHCP)’ to ‘Manual’
- IPv4: on
- IP address: a private network IP address of your choice within the 10.0.0.0/8, 172.16.0.0/12, or 192.168.0.0/16 ranges.
- Subnet mask: 255.255.255.0
- Gateway: The gateway address within the range of your chosen IP address usually ends in 0 (for example, 192.168.1.0 for the IP address 192.168.1.1 or 10.0.3.0 for the IP address 10.0.3.1)
- Preferred DNS: 195.8.195.8 (found in the TransIP control panel under ‘Network Information’)
- DNS over HTTPS: You are free to adjust this as desired. Note that even with DNS over HTTPS an administrator can still see which websites you browse. A common misconception is that DNS over HTTPS also secures DNS queries. This is not the case; DNSSEC is required for that (this is beyond the scope of this guide).
- Alternate DNS: 195.135.195.135
Finally, click on ‘Save’ to store your changes. You can now immediately use your VPS via the private network.

This concludes our tutorial on configuring your private network IP address on Windows Server. Remember, if you want to test it via a ping command, to enable in the Windows Firewall the Core Networking Diagnostics - ICMP Echo Request (ICMPv4-In) with a ‘Private’ profile (for your private network) and a ‘Domain’ profile (for Windows AD environments).
Should you have any questions regarding this article, please do not hesitate to contact our support department. You can reach us via the ‘Contact Us’ button at the bottom of this page.