All versions of Windows, both for servers and desktop PCs, come with a built-in firewall. This allows you to control incoming and outgoing network traffic based on rules set in the firewall. The Windows Firewall is very comprehensive and offers many options to control in-and outgoing network traffic.
In this guide, we will show you how to open ports for incoming traffic in the Windows Firewall and then restrict access to those open ports to specific IP addresses only.
Opening Ports in Windows Firewall
Step 1
Start your computer, or connect to your Windows Server via Remote Desktop or the VPS console.
Step 2
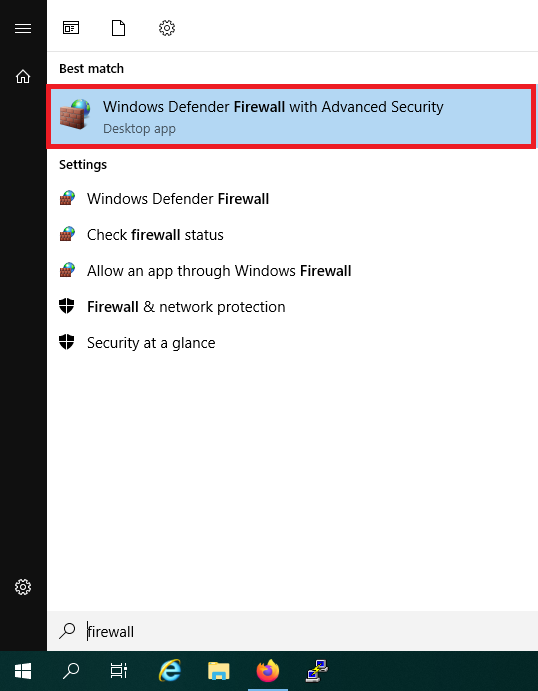
Click the Windows Start button, type 'firewall' and select 'Windows Defender Firewall with Advanced Security' from the search results.
Step 3
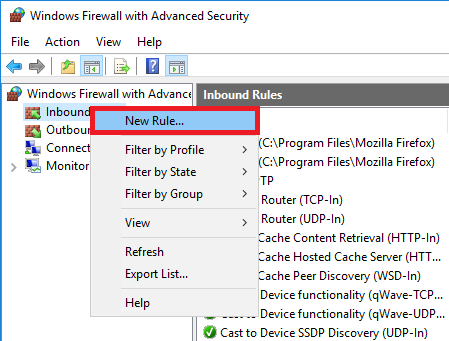
Right-click on 'Inbound Rules' and select 'New Rule'.
Step 4
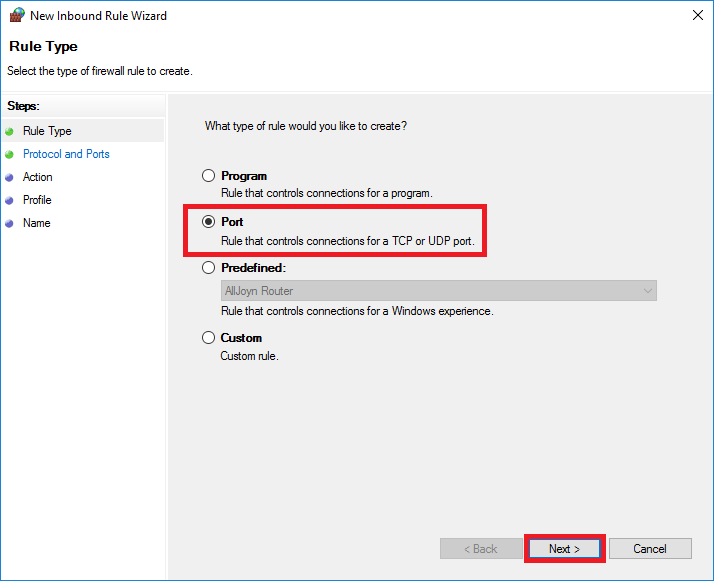
Select 'Port' as the rule type and click 'Next'.
Step 5
Select 'TCP' or 'UDP' depending on the protocol you want to allow (if unsure, select TCP) and enter the desired port number or range (e.g., 3000-3010) under 'Specific local ports'. Then click 'Next'.

Step 6
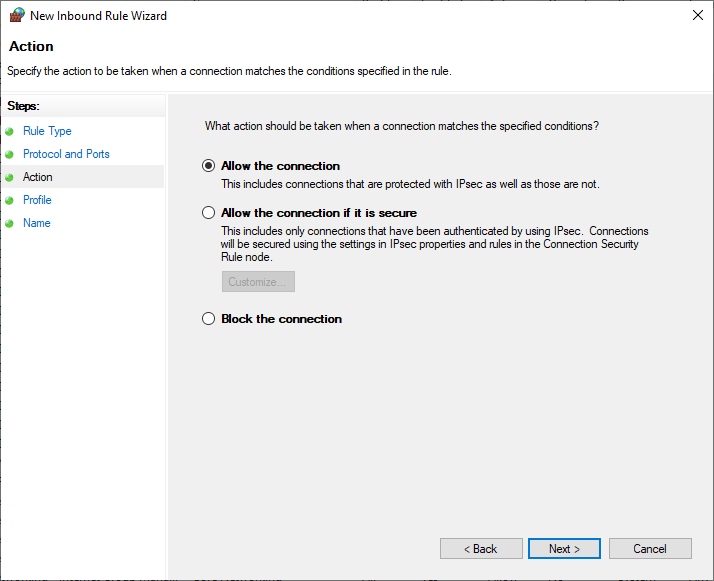
Select 'Allow the connection' to allow connections over the selected port and click 'Next'.
Step 7
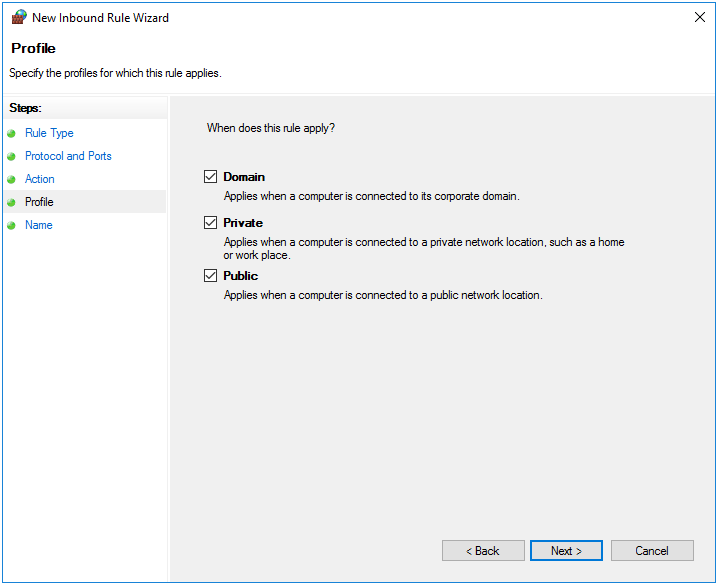
Optionally, adjust the domain(s) where the rule applies. Generally, no changes are needed unless you're using a private network with a private profile. For more details, see Microsoft's documentation.
Step 8
Give the rule a recognizable name, such as 'MyApplication' and click 'Finish'.

You have now created a new rule and opened the network port. If you want to restrict access to specific IP addresses, proceed to the next section.
Opening Ports for Specific IP Addresses
The Windows Firewall uses whitelisting: If you want to allow only specific IP addresses access to ports in a Windows environment, first you'll open the port(s) as described in the previous section. Then you'll add the IP addresses to the 'scope' of the firewall rule. This ensures that only the specified IP addresses have access to the opened port(s).
Step 1
In Windows Defender Firewall with Advanced Security, click 'Inbound Rules' and double-click the name of the rule you want to restrict, or right-click the name and select 'Properties'.

Step 2
A pop-up window with the rule's properties will appear. Click the 'Scope' tab, select 'These IP addresses' under 'Remote IP Address', and click 'Add'.

In this screen, you can specify which IP addresses have access to the opened port for both private networks (Local IP address) and public internet (Remote IP address). The former is useful for business environments where you might want to limit access to certain servers to specific colleagues and/or applications.
Step 3
Specify the IP address, IP subnet, or IP range the rule applies to, and click 'OK'. Repeat this process for each IP address/subnet/range you want to grant access to the port(s).
Handy examples are provided. For instance, with a /24 subnet like 123.123.123.0/24, you grant access to all IP addresses from 123.123.123.0 to 123.123.123.255. If you select 'This IP address range:', specify the lowest and highest IP addresses in the range, e.g., 'From: 123.123.123.1 To: 123.123.123.10'.

The firewall rule is now configured so that only specific IP addresses have access to the opened port.


