


A Kubernetes Ingress handles routing of HTTP and HTTPS traffic from outside your Kubernetes cluster to services within your cluster. To use an Ingress, you need an 'Ingress Controller', which is typically a reverse proxy web server.
In this tutorial, we will demonstrate how to use an Ingress within your Kubernetes cluster using an Nginx Ingress Controller. Optionally, we will also show you how to configure it to display the original IP address of website visitors in your logs.
For the steps in this tutorial, you'll need a domain name in the same TransIP account as the account in which your Kubernetes cluster is included.
Step 1
Optional: In this tutorial, we focus on using a .yaml object to create the Nginx Ingress Controller. However, it is also possible to deploy the official Helm Chart (beyond the scope of this tutorial):
helm upgrade --install ingress-nginx ingress-nginx --repo https://kubernetes.github.io/ingress-nginx --namespace ingress-nginx --create-namespaceThe changes discussed in step 3 of this article are not automatically applied to this Helm Chart. If you want to make those changes, update the Helm Chart first as explained in this tutorial.
Check in the TransIP control panel which version of Kubernetes your cluster is using.
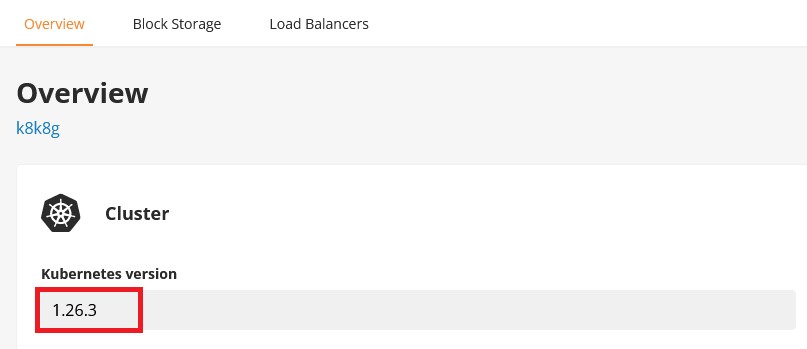
Next, check the Nginx Ingress Github page for the most up-to-date version of the Nginx Ingress Controller that supports the Kubernetes version in the control panel, and make a note of the version number.
Step 2
Download the Nginx Ingress Controller .yaml object from https://raw.githubusercontent.com/kubernetes/ingress-nginx/controller-v1.8.0/deploy/static/provider/cloud/deploy.yaml and replace 1.8.0 with the version number from step 1, for example, in Linux using the command:
wget https://raw.githubusercontent.com/kubernetes/ingress-nginx/controller-v1.8.0/deploy/static/provider/cloud/deploy.yaml
Step 3 - optional
By default, your log files show the IP address of the TransIP load balancer rather than that of the visitor/user. To see the IP address of the visitor/user, use the proxy protocol for your load balancer. The method varies depending on the type of Ingress Controller you are using. For an Nginx Ingress Controller, you can do this by adding a few lines to the downloaded object.
If you make use of the proxy protocol then your application (e.g. Apache) should also support it. Consult the application's documentation to verify if the proxy protocol is supported and how to enable it in the application.
Open the object, for example:
nano deploy.yamlLook for the section of code containing 'kind: ConfigMap' and add two lines to it (shown in bold in the code below):
- use-proxy-protocol: "true"
-
proxy-real-ip-cidr: "89.41.168.0/26"
The proxy-real-ip-cidr option is a security measure that protects your setup against IP spoofing.
The result should look like this:
---
apiVersion: v1
data:
  allow-snippet-annotations: "true"
  use-proxy-protocol: "true"
  proxy-real-ip-cidr: "89.41.168.0/26"
kind: ConfigMap
metadata:
  labels:
    app.kubernetes.io/component: controller
    app.kubernetes.io/instance: ingress-nginx
    app.kubernetes.io/name: ingress-nginx
    app.kubernetes.io/part-of: ingress-nginx
    app.kubernetes.io/version: 1.8.0
  name: ingress-nginx-controller
  namespace: ingress-nginx
---
In the same file, you will also find a service of type LoadBalancer. In version 1.8.0, you will find it directly below the code above. Add an annotation under 'metadata:' to use the proxy protocol (shown in bold in the code below).
To keep the code slightly more organized, we have abbreviated most of the code under 'spec:' to ...
---
apiVersion: v1
kind: Service
metadata:
  annotations:
    service.beta.kubernetes.io/transip-loadbalancer-protocol: "proxy"
  labels:
    app.kubernetes.io/component: controller
    app.kubernetes.io/instance: ingress-nginx
    app.kubernetes.io/name: ingress-nginx
    app.kubernetes.io/part-of: ingress-nginx
    app.kubernetes.io/version: 1.8.0
  name: ingress-nginx-controller
  namespace: ingress-nginx
spec:
  externalTrafficPolicy: Local
  ...
  type: LoadBalancer
---
Save your changes and close the file (ctrl + x > y > enter).
Step 4
Now apply the object to your cluster to install the Nginx Ingress Controller. This will automatically create a namespace named ingress-nginx if it doesn't already exist.
kubectl apply -f deploy.yamlYou will see a confirmation of all the components being created:
namespace/ingress-nginx created
serviceaccount/ingress-nginx created
serviceaccount/ingress-nginx-admission created
role.rbac.authorization.k8s.io/ingress-nginx created
role.rbac.authorization.k8s.io/ingress-nginx-admission created
clusterrole.rbac.authorization.k8s.io/ingress-nginx created
clusterrolerole.rbac.authorization.k8s.io/ingress-nginx-admission created
rolebinding.rbac.authorization.k8s.io/ingress-nginx created
rolebinding.authorization.k8s.io/ingress-nginx-admission created
clusterrolebinding.rbac.authorization.k8s.io/ingress-nginx created
clusterrolebinding.authorization.k8s.io/ingress-nginx-admission created
configmap/ingress-nginx-controller created
service/ingress-nginx-controller created
service/ingress-nginx-controller-admission created
deployment.apps/ingress-nginx-controller created
job.batch/ingress-nginx-admission-create created
job.batch/ingress-nginx-admission-patch created
ingressclasss.networking.k8s.io/nginx created
validatingwebhookconfiguration.admissionregistration.k8s.io/ingress-nginx-admission created
If you need to update the object in the future, for example, to a new version of the Nginx Controller, use the command kubectl apply -f <filename> to apply the changes. The necessary components will be automatically recreated by Kubernetes as needed. Remember to repeat step 3 if you have gone through it.
Step 5
A service of type LoadBalancer has been created. Retrieve the public IP address using the command:
kubectl get service ingress-nginx-controller --namespace=ingress-nginxThe output will look like this. It may take a few minutes to see the address under 'EXTERNAL-IP'.
NAME                       TYPE           CLUSTER-IP     EXTERNAL-IP                      PORT(S)                      AGE
ingress-nginx-controller   LoadBalancer   10.84.210.96   86-105-246-98.haip.transip.net   80:32643/TCP,443:32118/TCP   24h
In the TransIP control panel, you can find the IPv4 and IPv6 addresses of your load balancer under the 'Load Balancers' tab for your cluster.
Now, create a DNS record for the load balancer address for a domain in your TransIP account. You can create an A record and AAAA record (optional), or a CNAME record as follows:
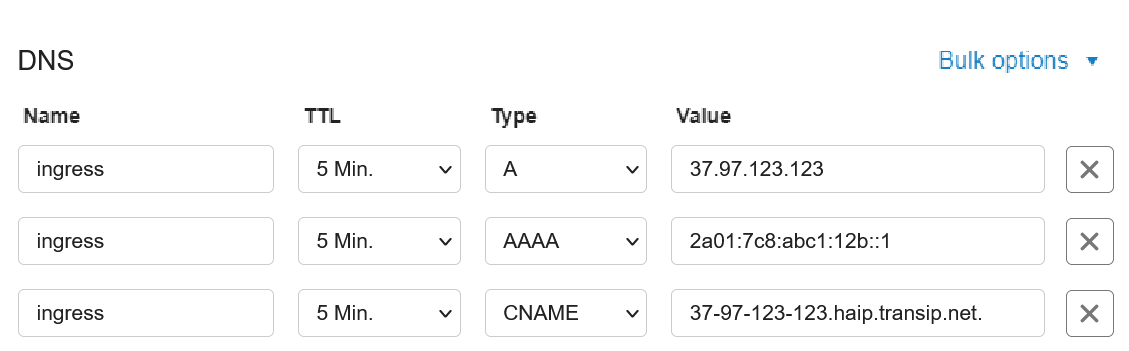
In this example, we use the subdomain 'ingress,' but feel free to adjust it as desired. However, it is important to point a (sub)domain to the load balancer because this is a requirement for creating an Ingress resource (the routing rule), and using an IP address will not work.
Step 6
Create a simple demo web server and its corresponding service:
kubectl create deployment demo --image=httpd --port=80
kubectl expose deployment demo
Alternatively, you can use your own use case instead of this demo by using your own .yaml object with the definition of your deployment and any necessary services, etc.
Step 7
Now create an Ingress Resource, replacing '<your(sub)domain>' with the domain you used in step 5, for example, ingress.example.com/=demo:80.
kubectl create ingress demo --class=nginx --rule <your(sub)domain>/=demo:80Now, in an internet browser, go to the corresponding subdomain, such as ingress.example.com. You will see the message 'It works!'
Optional: If you followed step 3, you probably want to check if you can indeed see your IP address in your logs. You can do this by first finding the name of your Nginx Controller pod using the command:
The output will look like this:
NAME                                        READY   STATUS      RESTARTS   AGE
ingress-nginx-admission-create-82557        0/1     Completed   0          2h
ingress-nginx-admission-patch-mflqc         0/1     Completed   0          2h
ingress-nginx-controller-7d98bbddbd-svc5j   1/1     Running     0          2h
Copy the name of the ingress-nginx-controller (e.g., ingress-nginx-controller-7d98bbddbd-svc5j) and now run the following command, replacing ingress-nginx-controller-7d98bbddbd-svc5j with the name of your controller:
kubectl logs ingress-nginx-controller-7d98bbddbd-svc5j -n ingress-nginx --tail=10The addition of --tail=10 ensures that you see the last 10 lines of the logs. If you want to see the entire log file, simply omit this addition.
This concludes our tutorial on configuring an Nginx Ingress Controller in Kubernetes. In a future update/new article, we will delve deeper into routing traffic to different services using an Nginx Ingress Controller.