


Labels are used in Kubernetes to categorize and identify objects. A label is a key-value pair that can be added to objects in Kubernetes, such as pods, nodes, or services.
Labels enable users for example to select and group pods based on specific criteria. If a pod has the label 'app=demo', other objects such as services or replica sets can refer to this pod by searching for the label 'app=demo'.
Labels can be used for applying filters, controlling network access to pods, and enabling flexible service discovery. You can use a label by referencing it in an object through a (node) selector.
Creating and Using Labels
There are several options to create a label. If you want to assign labels in bulk to all nodes in a node pool, we recommend creating labels via the TransIP Control Panel. You can do this by opening the overview of a node pool and adding the label as shown in the screenshot below.
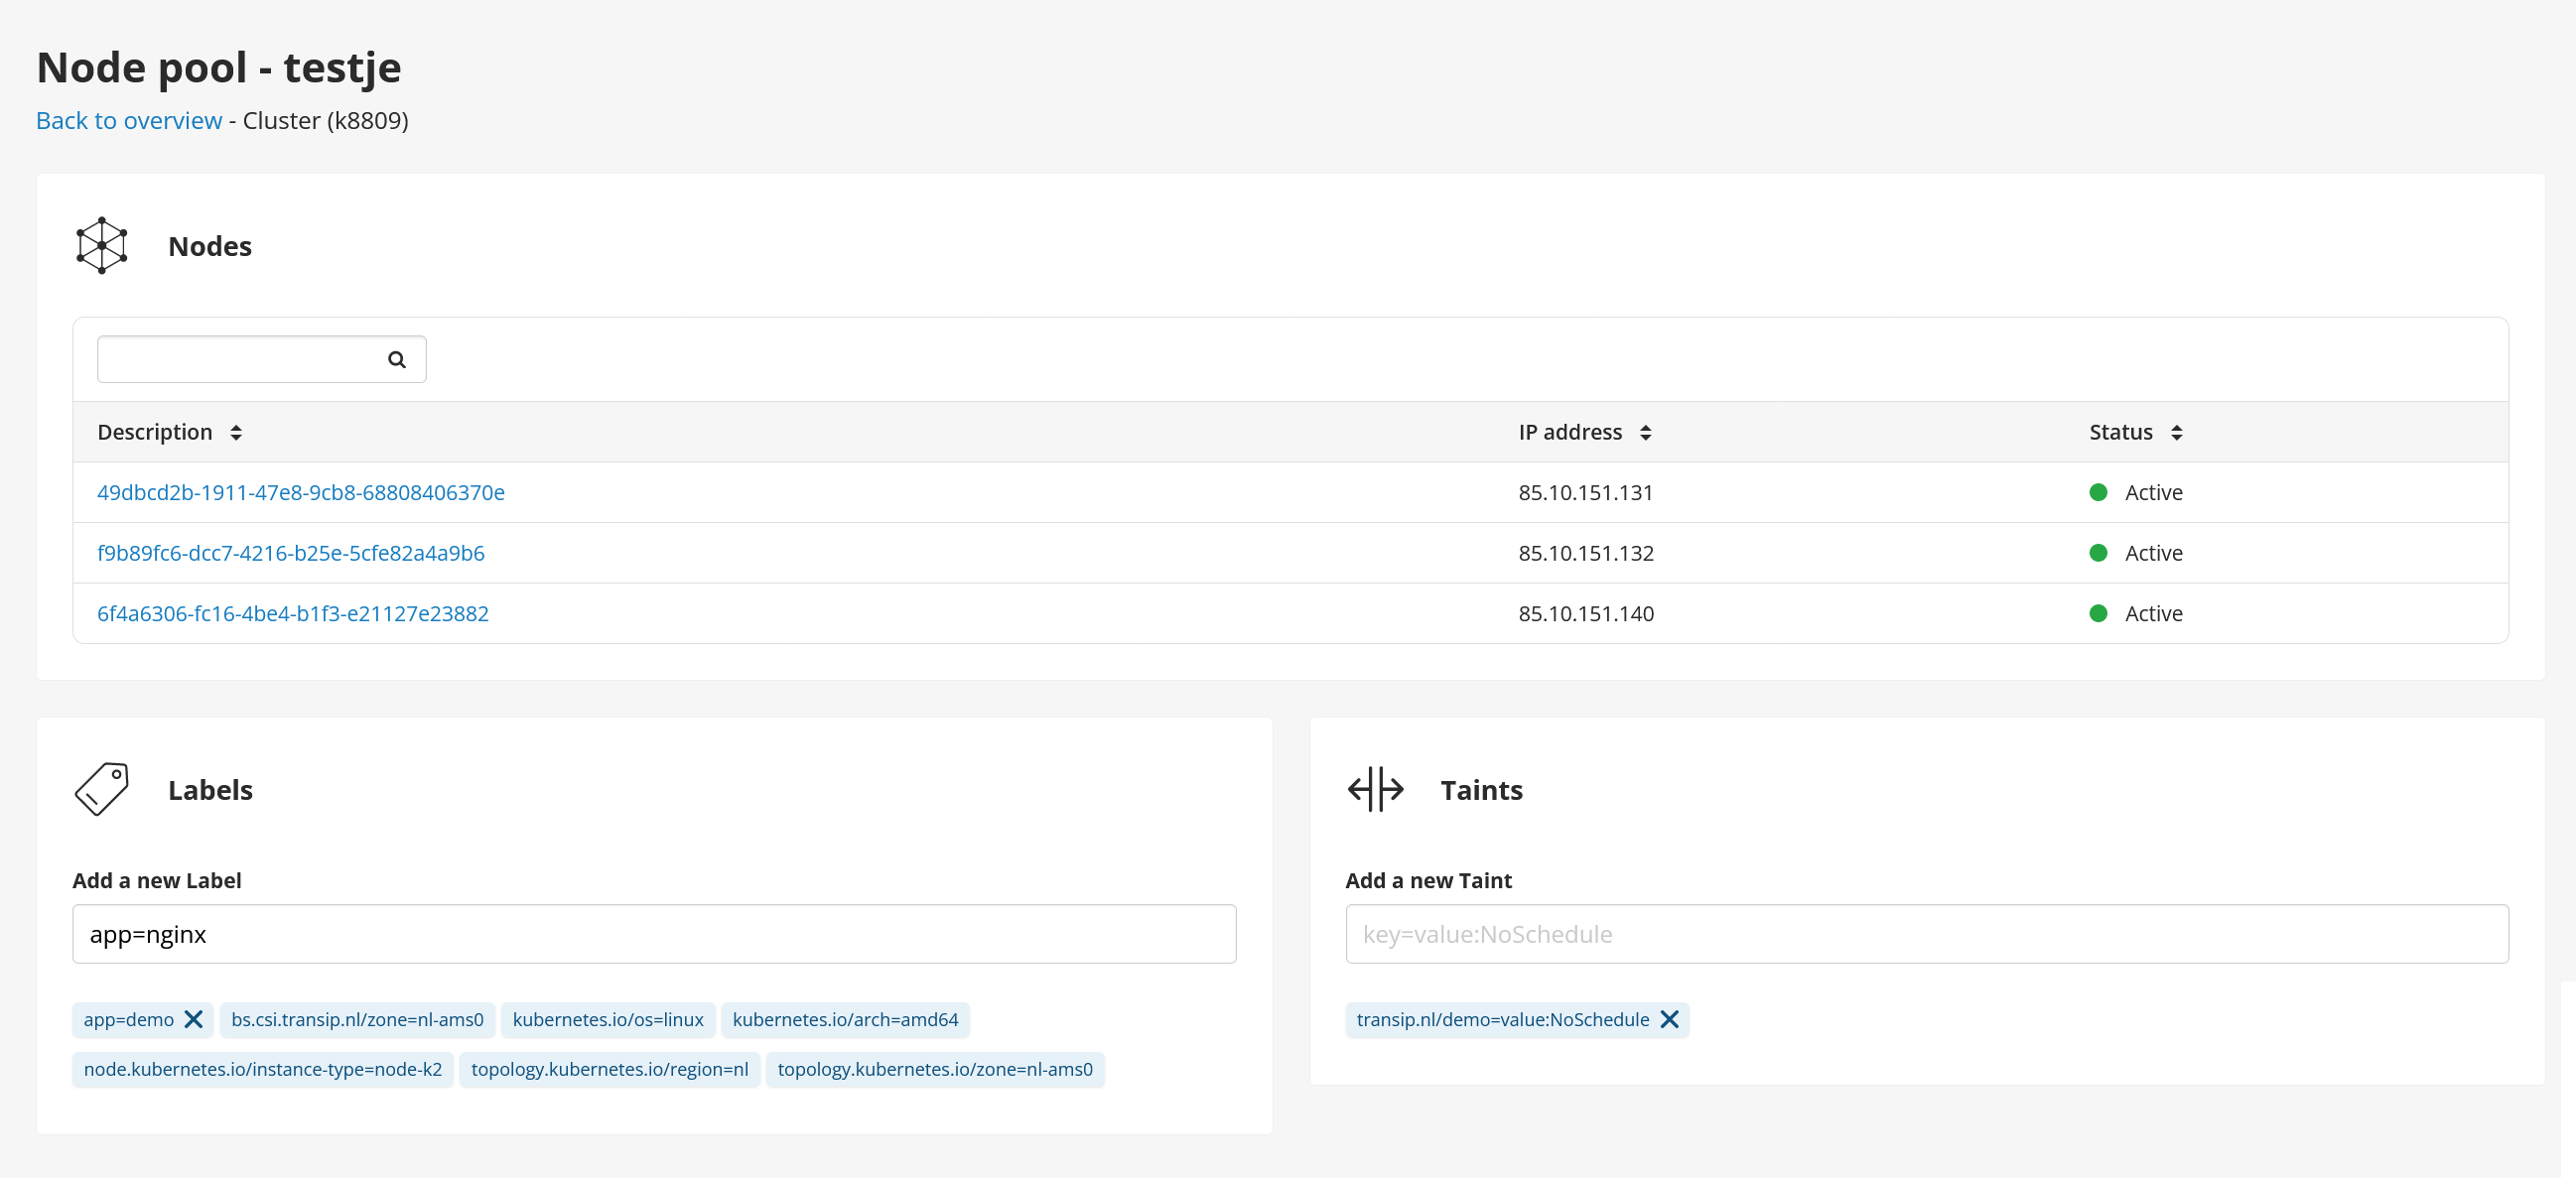
- You are free to choose the syntax of the label. It is not mandatory to add a domain name, but be aware that if you, for example, use the label 'app' with a name, you should use an = sign instead of a : as you would in a YAML object, for example 'app=nginx'.
- An overview of commonly used labels can be found in this article under 'labels'.
- The default existing labels ensure the proper functioning of your cluster.
To make use of the label(s) you have assigned to your node pool via the TransIP Control Panel, you use a 'nodeSelector', see the relevant section further in this article.
If you want to create a label for a more specific scenario, such as an individual node, one or more pods or services, etc., we recommend using an object. Please refer to our documentation on using YAML objects or the example in the paragraph below.
Selectors
To use a label that you have assigned, for example, to a Kubernetes deployment, you use a selector. A selector is a name for the mechanism by which a client/user can select objects based on labels. This is useful, for example, when Kubernetes establishes relationships between resources. Let's say you want to establish a relationship between a deployment and a service; you do that based on a selector. Suppose you have created the following Nginx deployment:
apiVersion: apps/v1
kind: Deployment
metadata:
  namespace: nginx-demo
  name: nginx-deployment
  labels:
    app: nginx
spec:
  replicas: 3
  template:
    metadata:
      labels:
        app: nginx
    spec:
      containers:
      - name: nginx
        image: nginx:1.22.1
        ports:
        - containerPort: 80
Now, if you create an Nginx service and want to reference it to this deployment using a selector, you use the following syntax:
apiVersion: v1
kind: Service
metadata:
  name: nginx-service
  namespace: nginx-demo
spec:
  selector:
    app: nginx
  ports:
  - protocol: TCP
    port: 80
    targetPort: nginx
Node Selectors
If you have assigned a label to one or more nodes and want to place a pod on that node based on the label, you use a 'nodeSelector'.
In Kubernetes, a nodeSelector is a mechanism that allows you to specify on which nodes a pod should be placed (i.e. scheduled). By setting a nodeSelector with a specific label value, you ensure that the pod is only placed on nodes that have the specific label value.
In other words, a nodeSelector is used to enforce scheduling based on specific labels on nodes. For example, suppose you have assigned the label 'app=nginx' to nodes either in the TransIP Control Panel or via a YAML object. In that case, you can use this label for a pod by referring to the label 'app=nginx' in the pod's YAML object using a nodeSelector as follows:
apiVersion: v1
kind: Pod
....
spec:
The .... indicates that you can place any additional options like metadata in this section, refer to our guide on creating objects in Kubernetes. Additionally, under spec:, you can add more options such as replicas, container specs, etc."