If your OpenStack instance stops functioning due to unforeseen circumstances and you have enabled automatic snapshots, you can restore it using a previously created snapshot. In this tutorial, we'll show you how to restore your OpenStack instance using snapshots.
In this guide, we explain how to set up automatic snapshots.
Stap 1
Log into the Horizon webinterface.
Step 2
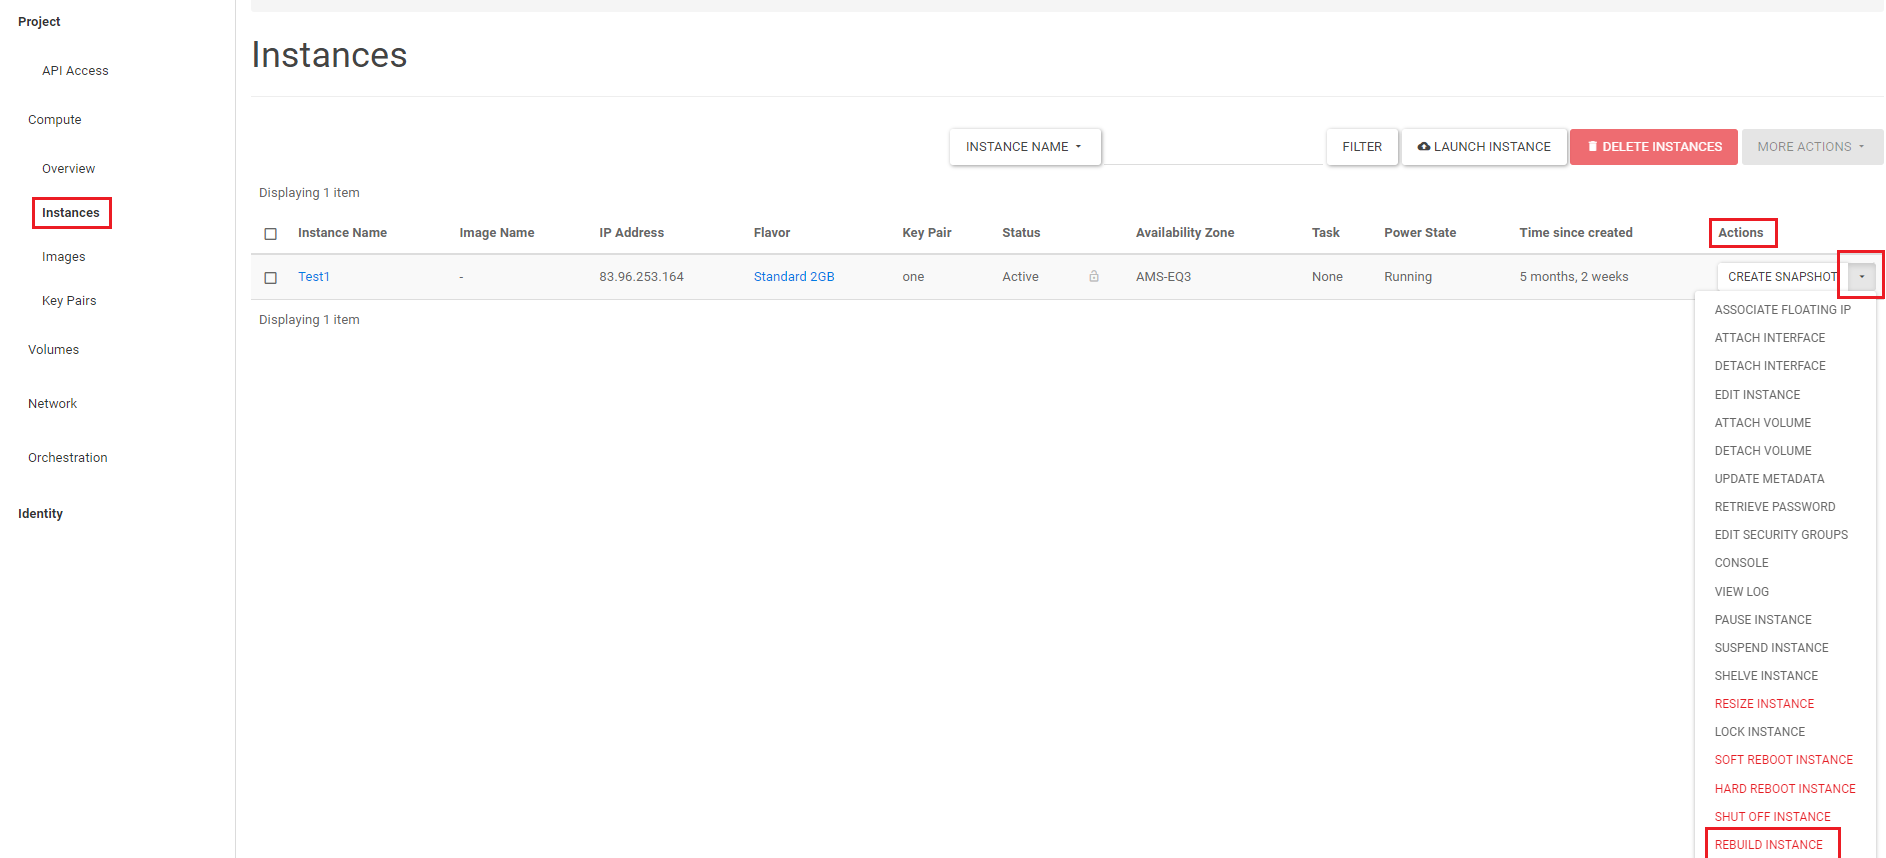
Select the instance you want to restore. Then, under 'Actions', click the drop-down menu and select 'Rebuild instance'.

Step 3
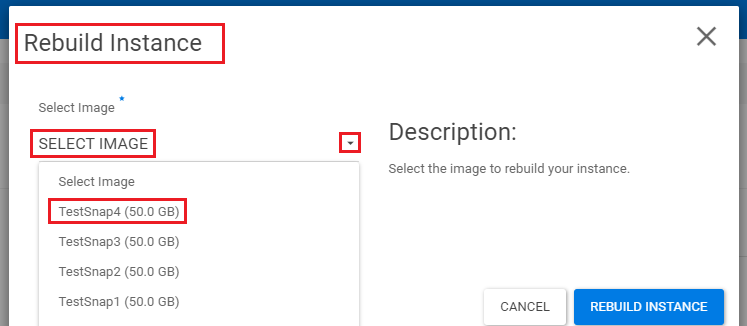
In the pop-up window, click and select the snapshot you want to restore from the drop-down menu under 'Select Image'. In our example, this is 'TestSnap4'.
When you create a Snapshot in OpenStack, it is stored as an image. An image is a one-to-one copy of your Instance.

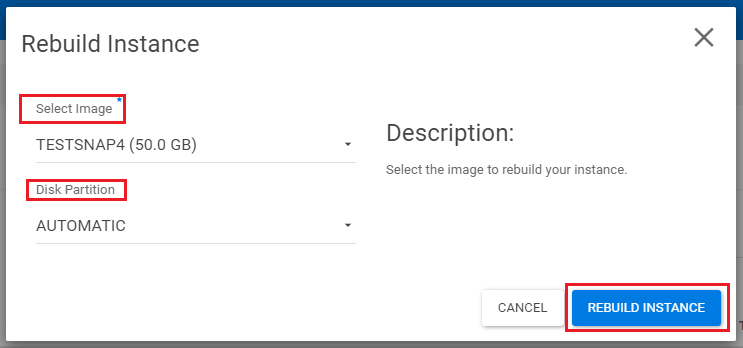
Under 'Disk Partition', you don't need to make any changes. Click 'Rebuild Instance' to restore the snapshot to the instance.

You will now see a blue bar 'Rebuild Spawning' under 'Task'. The image/snapshot is being installed.

When the bar stops, you will see the image/snapshot you selected under 'Image Name', and the status will return to active. Your snapshot is now restored, and the instance is recovered.


