A snapshot in OpenStack is a one-to-one copy of your instance. It captures a momentary image of your instance. You can use it, for instance, to restore the instance to a previous state (when, for any reason, an instance is no longer functioning) or to create a new instance that is a duplicate of the instance from which the snapshot was taken.
The main difference from backups is that you restore a Snapshot as a whole. With a backup, you can choose individual parts to restore.
In this tutorial, we will show you how to set up automatic snapshots for your OpenStack instance.
When you enable automatic snapshots, one snapshot will be created every week, up to a maximum of four. Older snapshots will be automatically removed. It's not possible to configure a different frequency.
Setting Up Automatic Snapshots
Step 1
Log in to the Horizon web interface.
Step 2
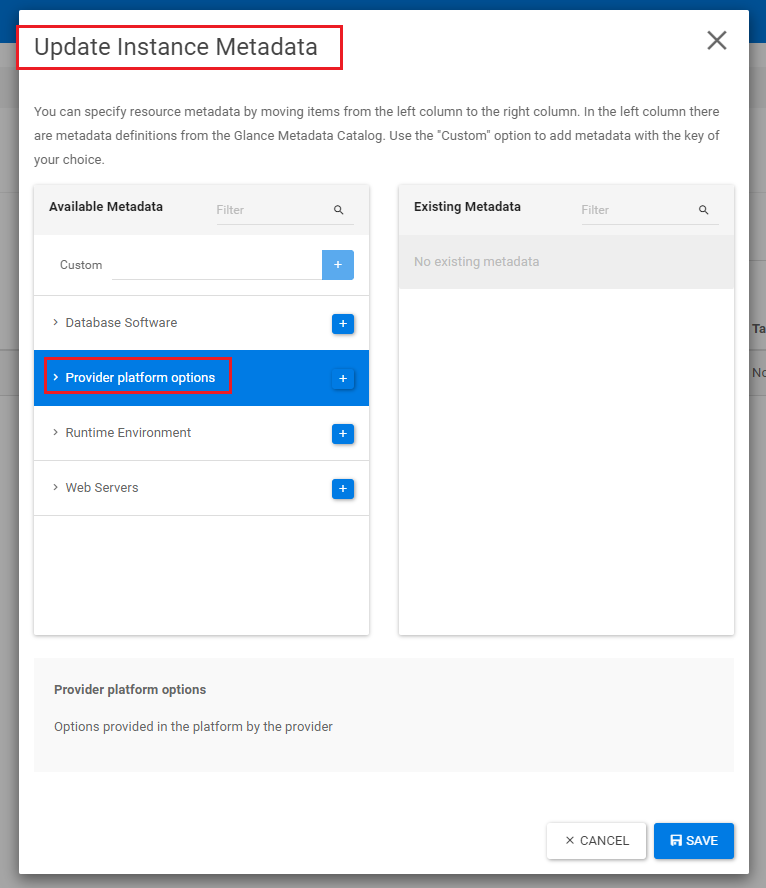
Select the instance for which you want to set up automatic snapshots. Then, under 'Actions', click the drop-down menu and select 'Update Metadata'.

Click on 'Provider platform options' to display the underlying items.

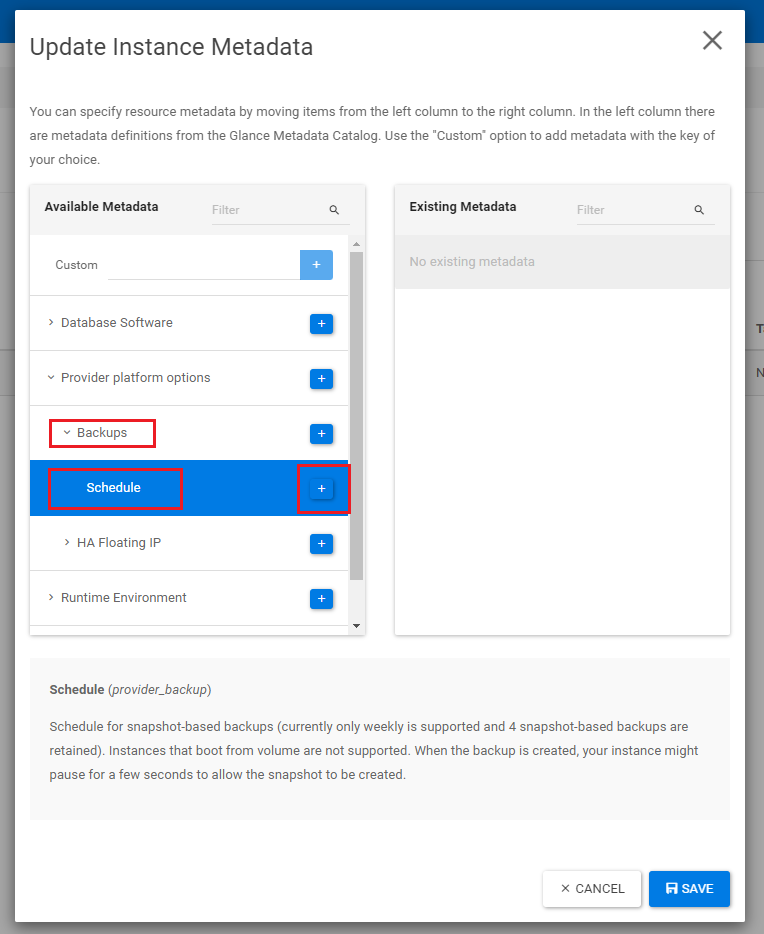
Next, click on 'Backups'. Now, add the metadata definition 'Schedule' to the instance by clicking the plus sign next to it. Somewhat confusingly, within OpenStack, the term 'Backups' is used instead of snapshots.

Step 4
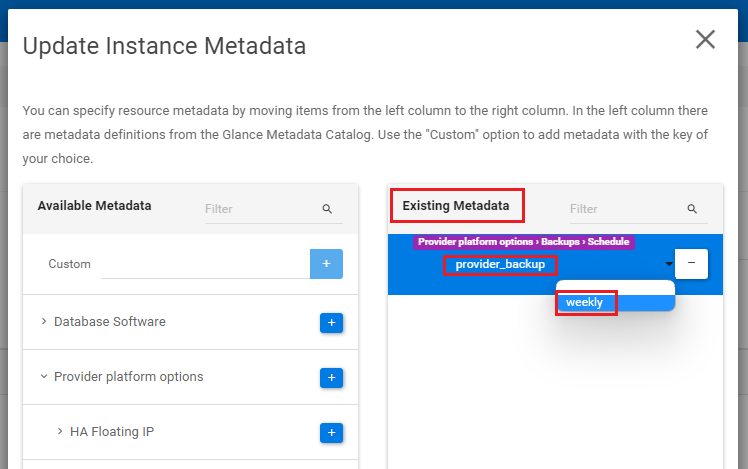
Under 'Existing Metadata', you will see the 'provider_backup' that you added in step 3. Click the empty field to reveal a drop-down menu. In the drop-down menu, select 'weekly' to automatically create a snapshot every week.

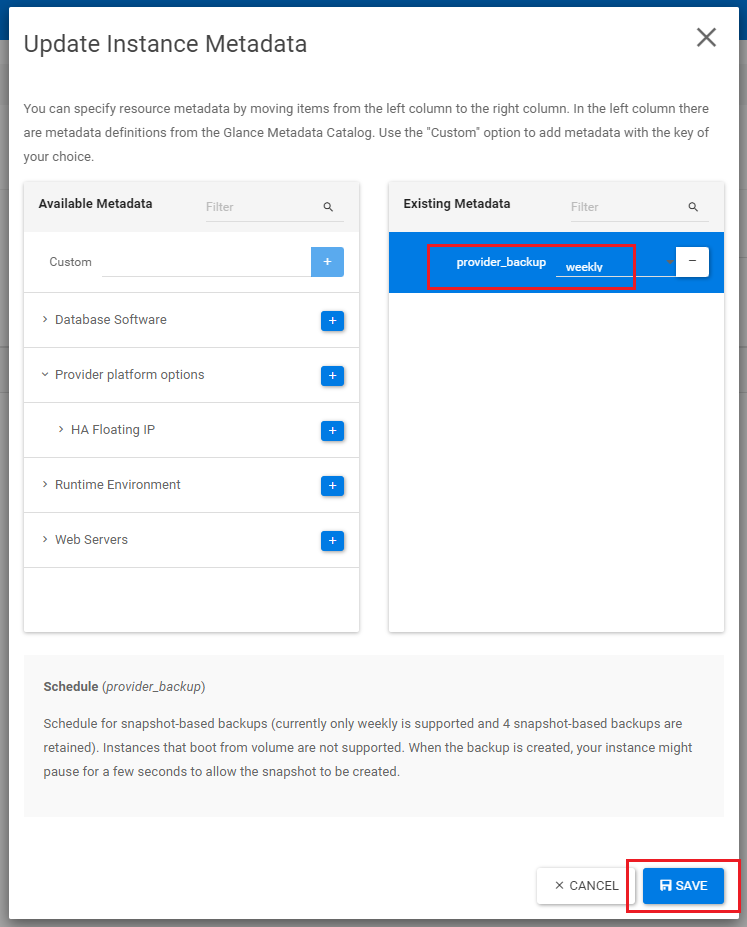
'provider_backup' now shows 'weekly'. Click 'Save' to save the settings. Congratulations! An automatic snapshot of the instance will now be created every week.


