In your Public Cloud, the OpenStack implementation by TransIP, you can create virtual servers as OpenStack 'Instances'. When you use multiple instances for your project, it's useful if they can communicate with each other through a private network, especially for security reasons.
In this tutorial, we will show you how to set up a 'private network' within OpenStack. A private network is a network that connects two or more instances without the network traffic going over the public internet.
It is (currently) not possible to link VPSes from our VPS platforms to your OpenStack private network, or OpenStack Instances to the private network solution of our VPS platform.
Creating a Private Network on OpenStack
Step 1
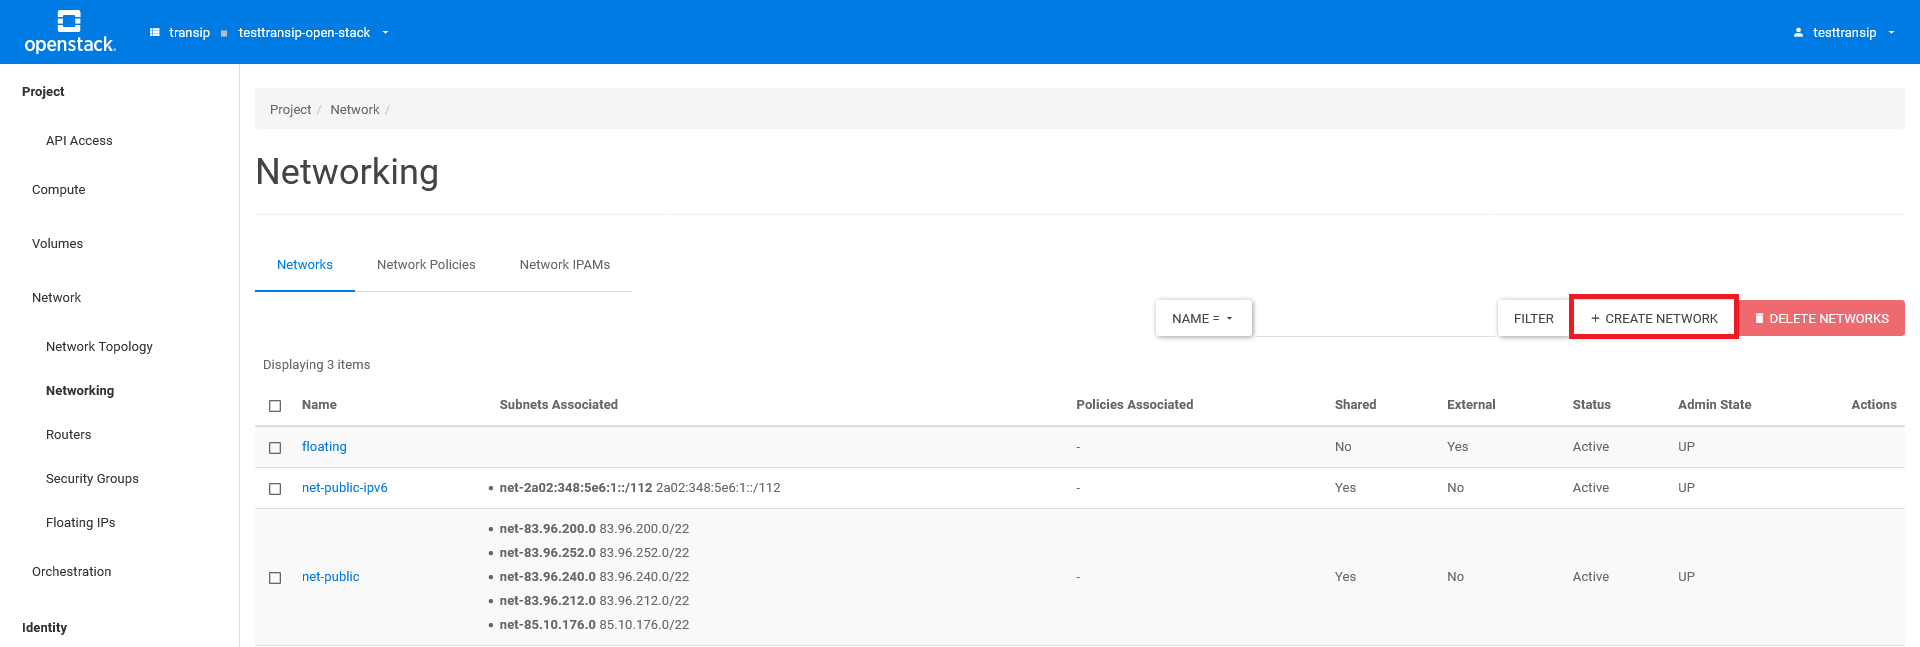
Log in to the Horizon web interface of OpenStack and click on 'Network' > 'Networking', then on the right, click on 'Create Network'.
Step 2
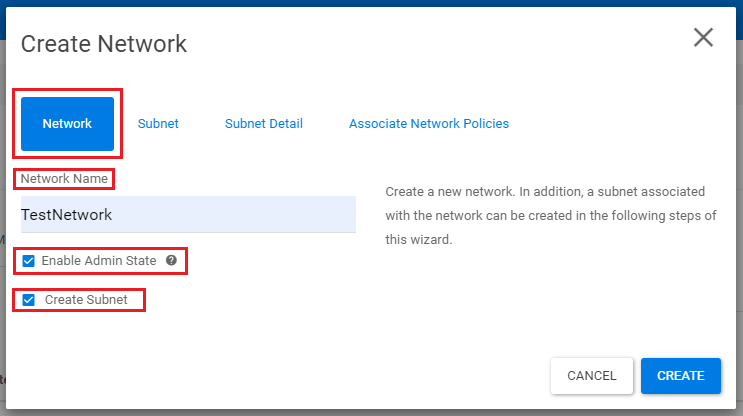
A 'Create Network' pop-up window appears. Enter the desired name for the network under 'Network Name'. For this guide, we'll use 'TestNetwork'. 'Enable Admin State' and 'Create Subnet' are already checked.
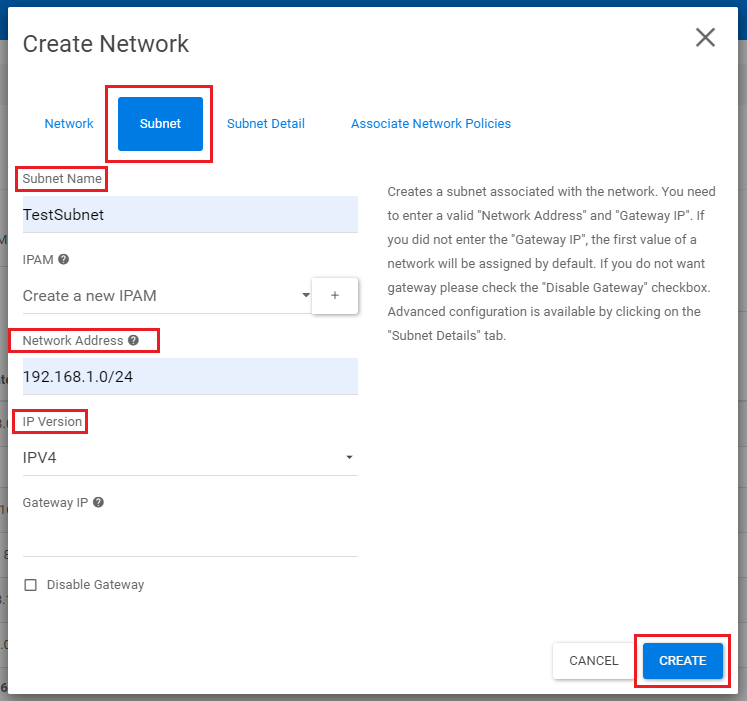
Click on the 'Subnet' tab to add a subnet and enter the following information:
- Subnet Name: the name for the subnet, for example, TestSubnet
- Network Address: the IP range, for example, 192.168.1.0/24
- IP Version: the desired IP protocol for the private network, typically using IPv4.
Click on 'Create' at the bottom right to create the network.
A pop-up will appear with a spinning arrow and the text 'Working'.

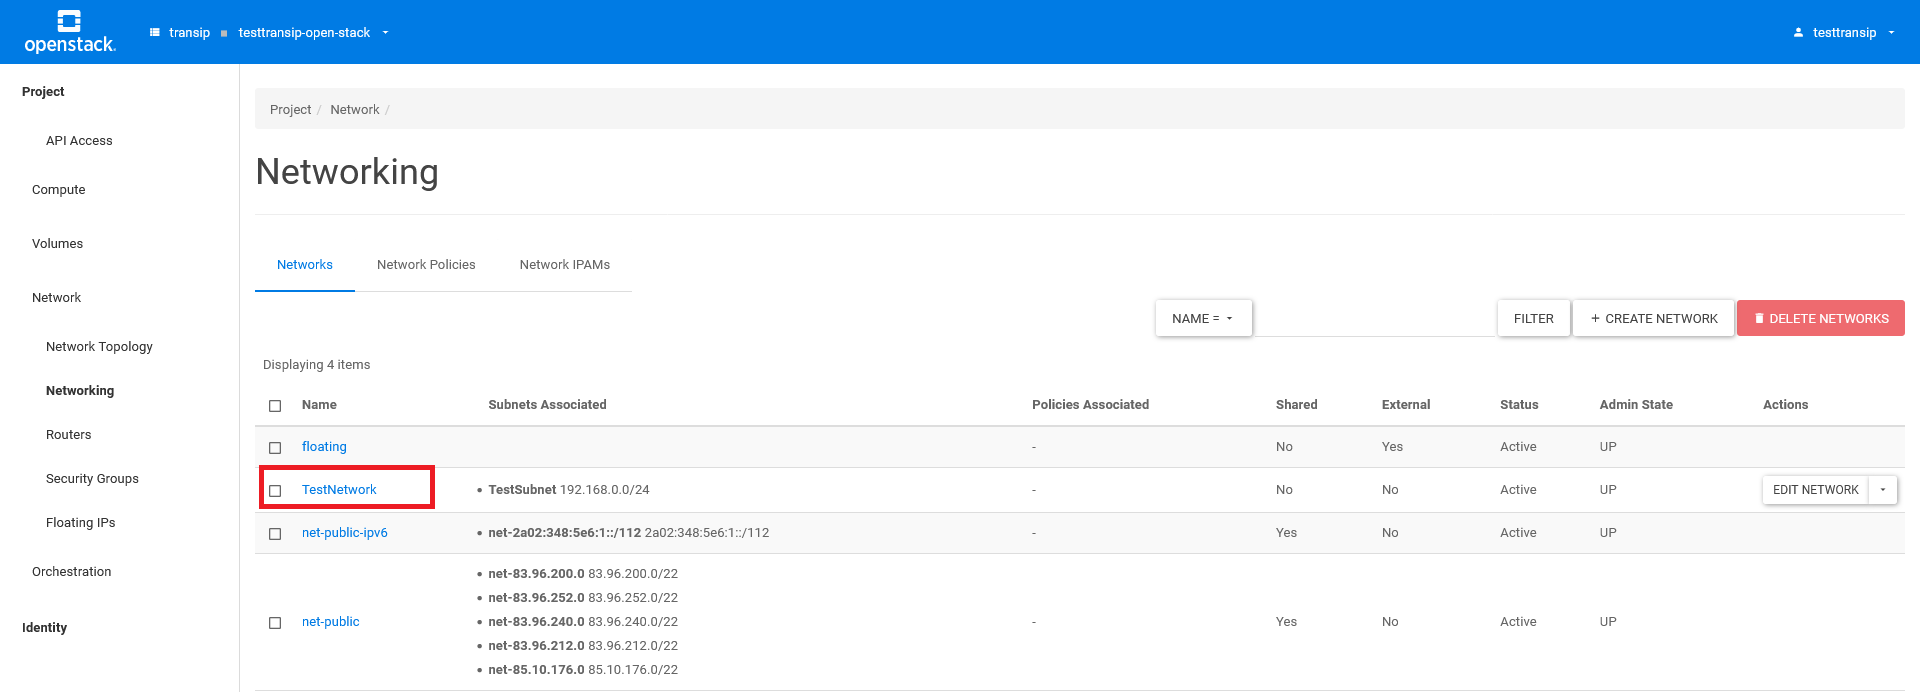
Once the arrow has stopped spinning, your network will appear under 'Networks'. Under 'Name', you'll see the name of your network.
Attaching Instances to a Private Network
In the left menu, click on 'instances'. Click the downward arrow under 'Actions' and then click 'Attach Interface'.

Step 2
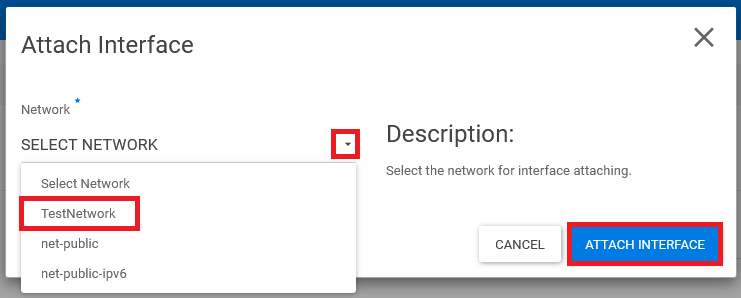
Click the downward arrow and select your private network from the dropdown menu (in our example, it's 'TestNetwork'). The chosen network will appear under 'Network'. Click 'Attach Interface' to connect the interface to the instance for the private network.
A pop-up will appear with a spinning arrow and the text 'Working'.

Once the arrow has stopped spinning, you will see the chosen network and IP address under 'IP Address' in the overview of your instances (under 'Computer' > 'Instances'). The instance is now connected to your private network.
To attach another instance, repeat the steps from Step 1 of this section.

With this, we've come to the end of this guide. If you want to only connect your instances to the private network while allowing access to the public internet or routing public internet to the instances, you can use a router or a pfSense firewall, respectively.


