


It is relatively easy to assign or remove Remote Desktop Services (RDS) roles to new servers, with one exception: the RD Connection Broker.
When you try to add a server as RD Connection Broker to replace the existing one, you will see that you can select 'Configure High Availability', but other options are greyed out. High Availability is certainly useful, but smaller deployments are also conceivable with one RD Connection broker.
Fortunately, it is still possible to adjust the RD Connection Broker, but this does involve a few things: You first set up a new RD Connection Broker and then 'redeploy' your RDS environment, which is quite extensive. A plus is that this way it is also possible to set up multiple RD Deployments and to switch between different deployments using one central managing server. Microsoft refers to this as 'Connecting to another deployment'.
In the steps below, we'll show you how to select a new RD Connection Broker and then perform a new RDS deployment with that new RD Connection Broker.
- TL;DR: On your DC, go to 'Add roles & features' and go through the Remote Desktop Services steps.
- For the steps in this manual, use a server on which you use a server pool containing at least all the servers where you want to distribute the RDS roles.
- Use an account that gives you administrator rights on all servers in your server pool.
Step 1
First, go through the 'role-based or feature-based installation' section of our 'Remote Desktop Services Installation Guide'. In step 9, select only 'RD Connection Broker' as 'Role Services'. We recommend installing this role on a separate VPS (at least not on your Session Host), or on your Domain Controller.
After installing the RD Connection Broker role, continue with the following steps in this guide.
Step 2
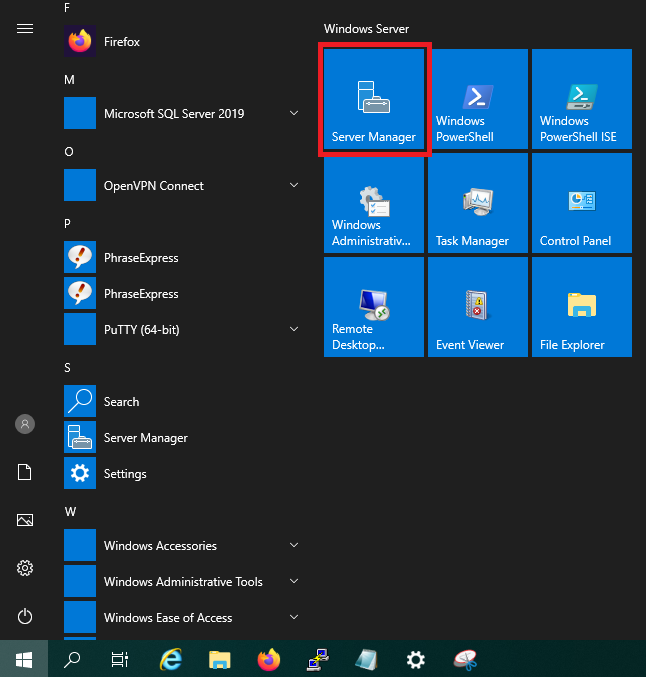
If you're not already on it, connect to the server that manages your server pool and open the 'Server Manager'.
Step 3
If you now click 'Connect to another deployment' under 'Remote Desktop Services' you would eventually see an 'A Remote Desktop Services deployment does not exist' error message like the one below. As this error message indicates, it is important to perform a 'new' RDS installation first.
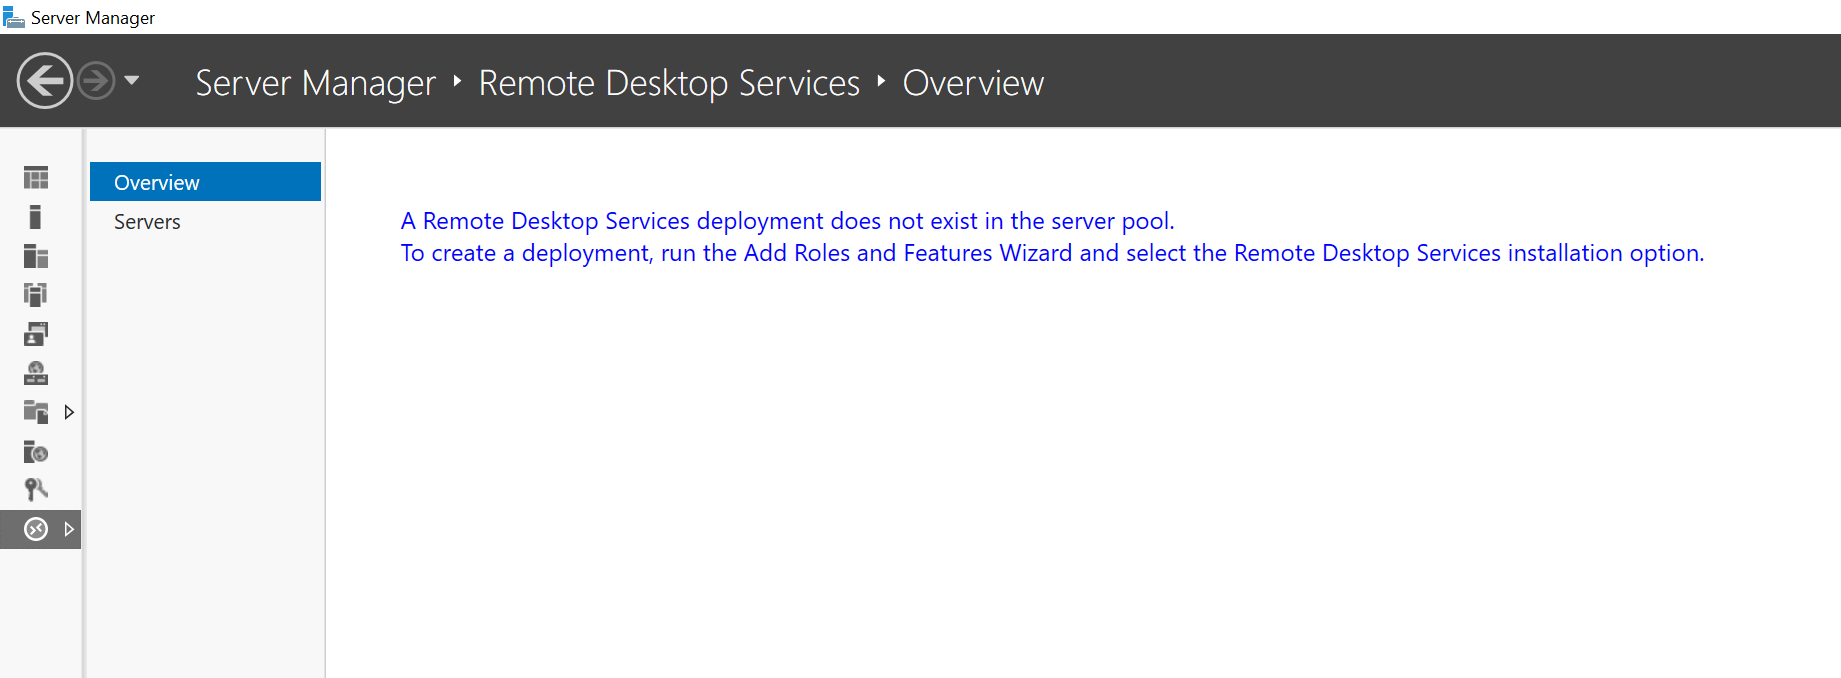
Click 'Dashboard' in the left menu > 'Add roles and features'.

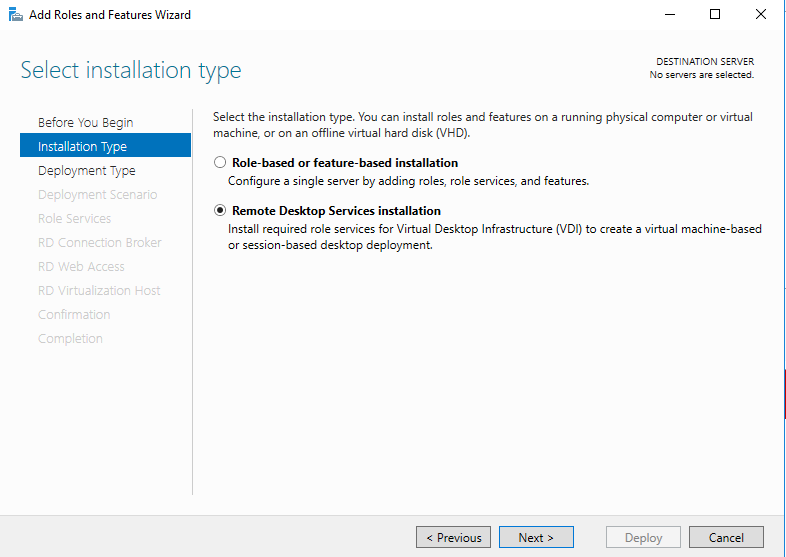
Step 4
Under 'Installation Type', select 'Remote Desktop Services installation' and click 'Next'.
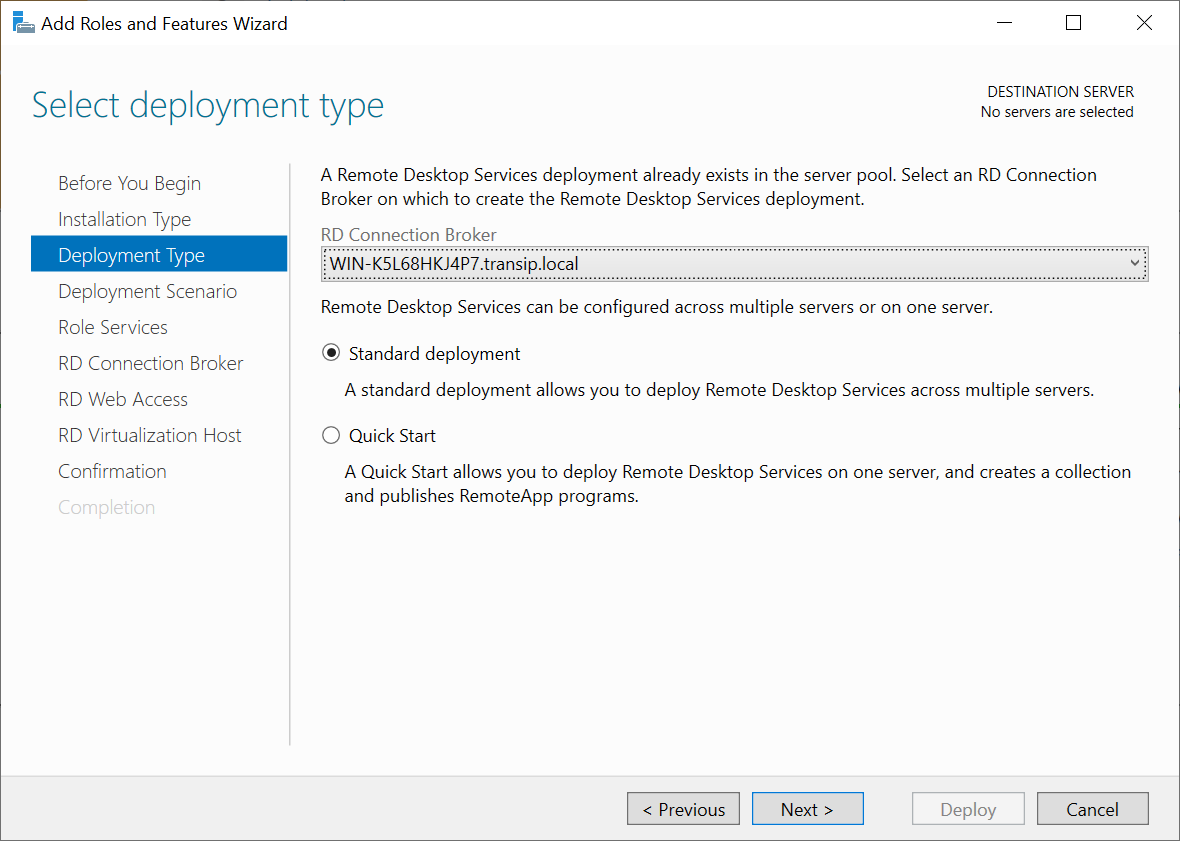
Step 5
The wizard automatically detects that RD Connection Brokers are already present. Select the new broker and click 'Next'.
Step 6
Select 'Session-based desktop deployment' and click 'Next'.
Please note: Can't select 'Session-based desktop deployment'? Then first remove the RD Connection Broker role.
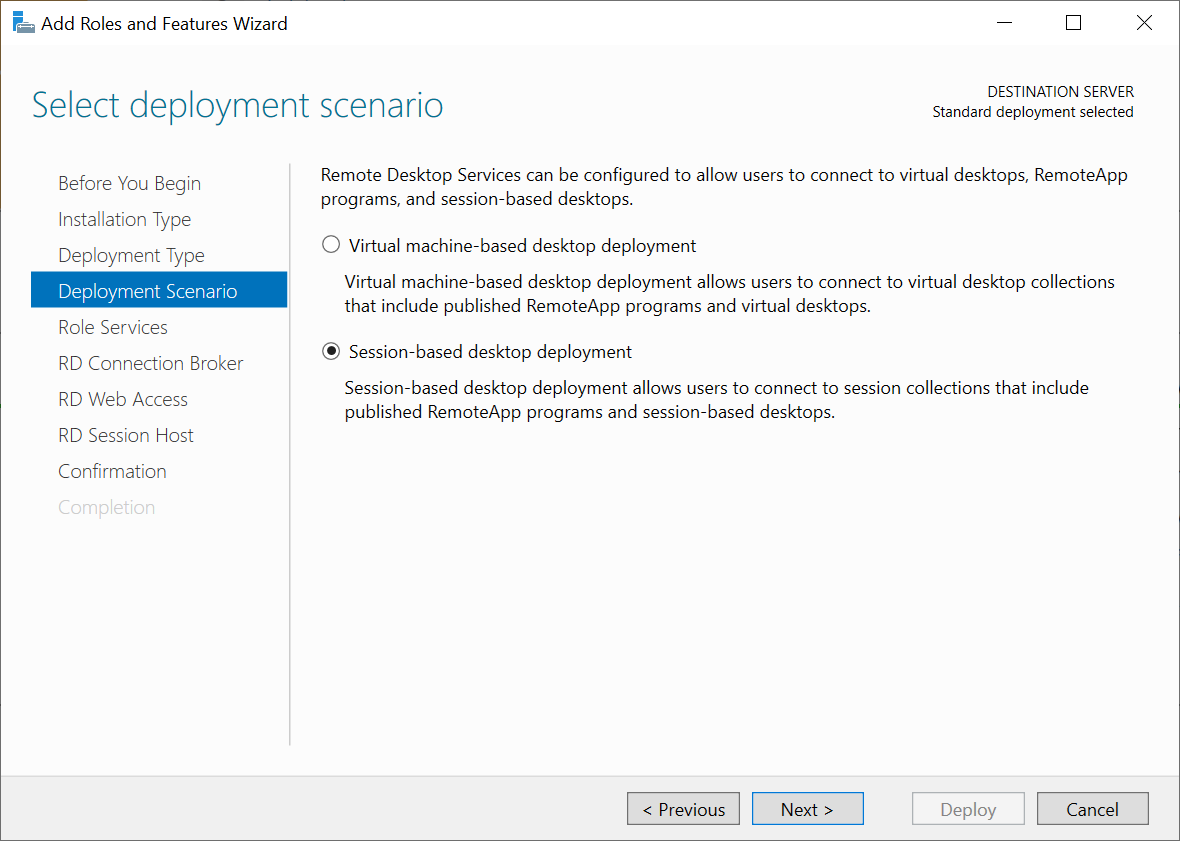
The option 'Virtual machine-based desktop' is an option to create virtual machines or VPSs via Remote Desktop. This requires Hyper-V, which is not supported on our VPS platform.
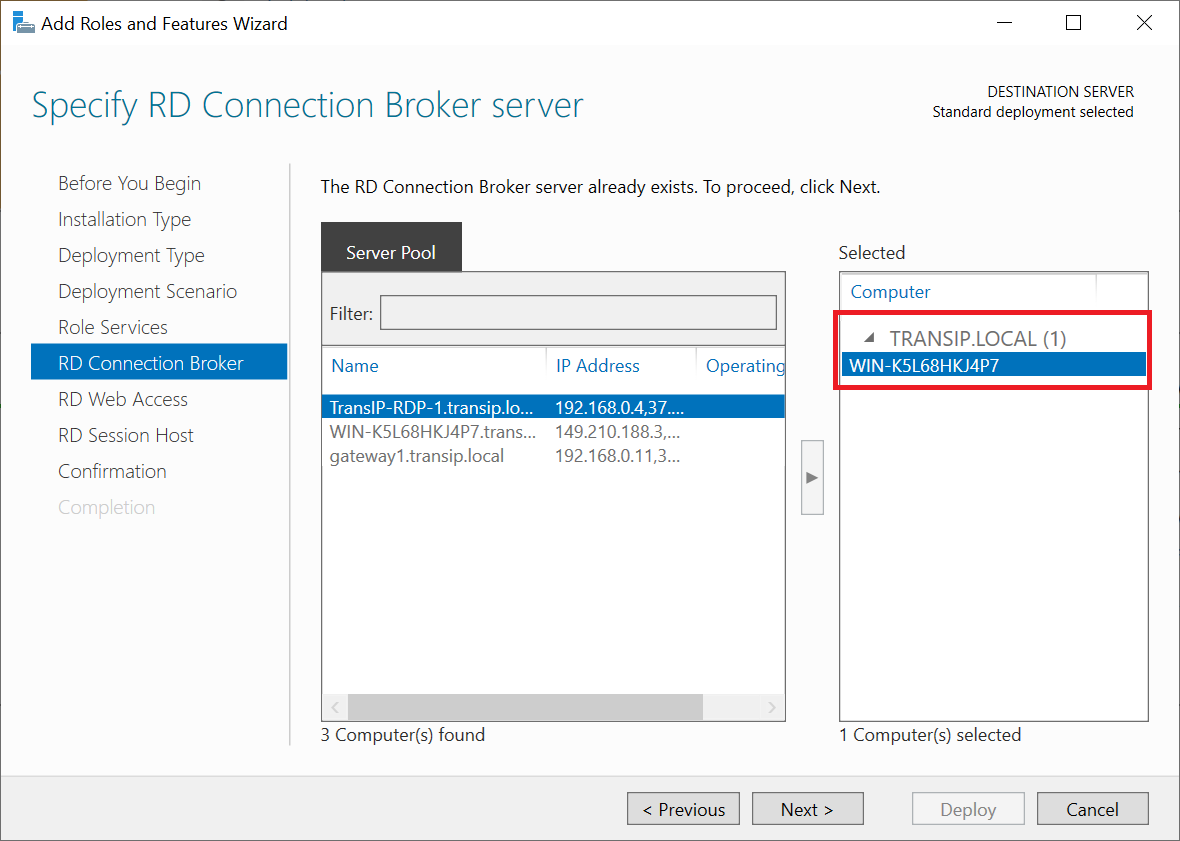
Step 7
Click through to the 'RD Connection Broker' screen. Check that the wizard automatically indicates that the broker from step 7 is already recognized and selected. Click 'Next' to continue.
Step 8
Select a server on which the RD Web Access role is present, or should be newly installed. In our test environment we choose the gateway1 server on which the RD Gateway, Web Access and Licensing roles are already installed (we will set the RD Gateway and RD Licensing role at the end).
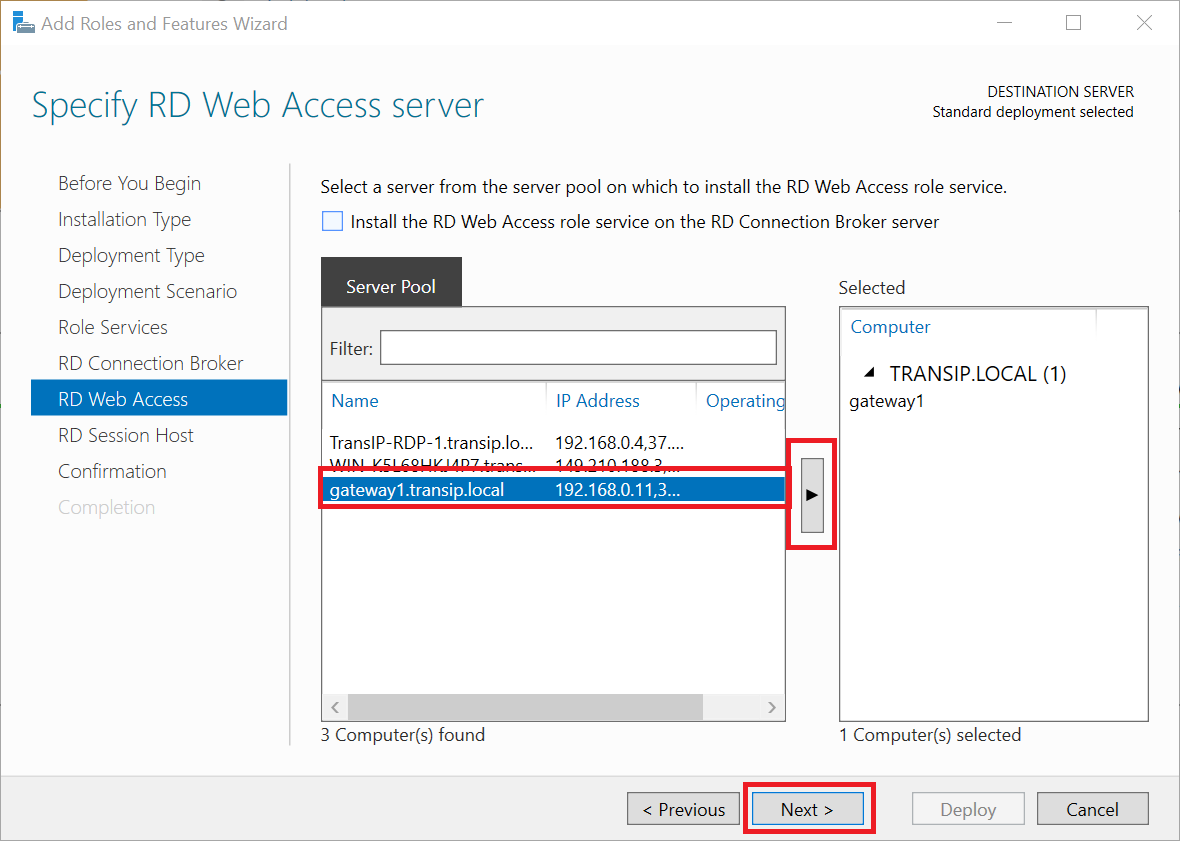
Tip: If you want to set up several RDS Deployments next to each other (instead of transferring the existing servers to a new RD Connection Broker), choose a server that is not yet used in another RDS deployment.
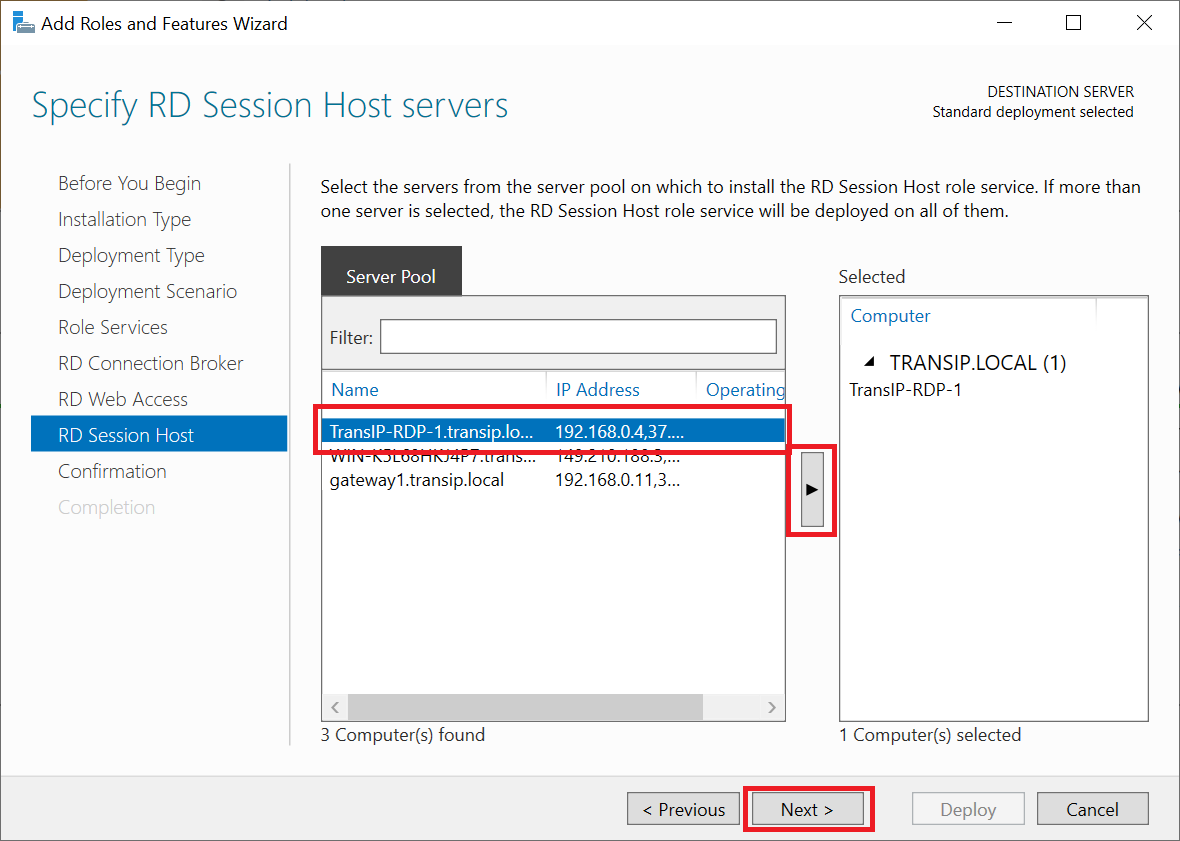
Step 9
Then select an RD Session Host. Use a server on which no other roles are installed so that you maintain optimal Remote Desktop performance.
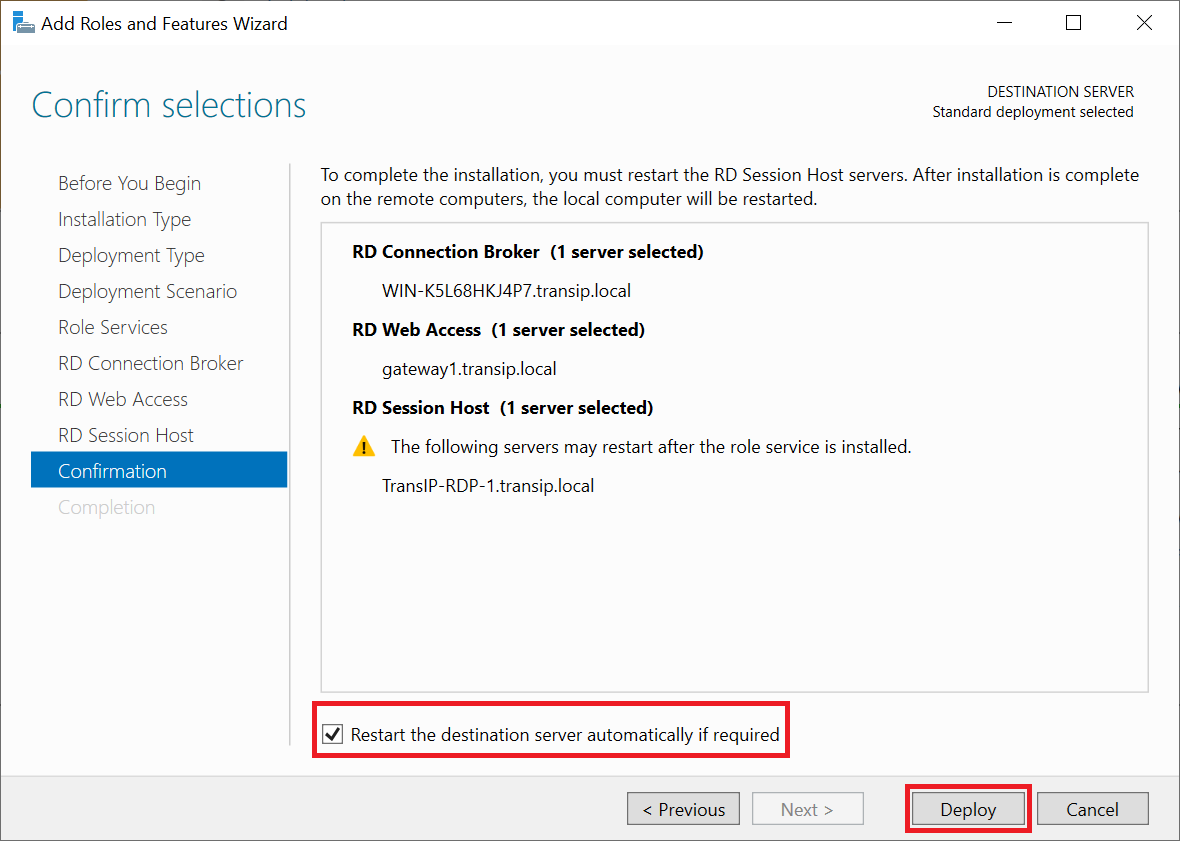
Step 10
You will see a confirmation of your choices where the wizard indicates whether a server needs to be restarted and if so which one. This will always apply to the RD Session Host. Therefore, tick the option 'Restart the destination server automatically if required' and click 'Deploy'.
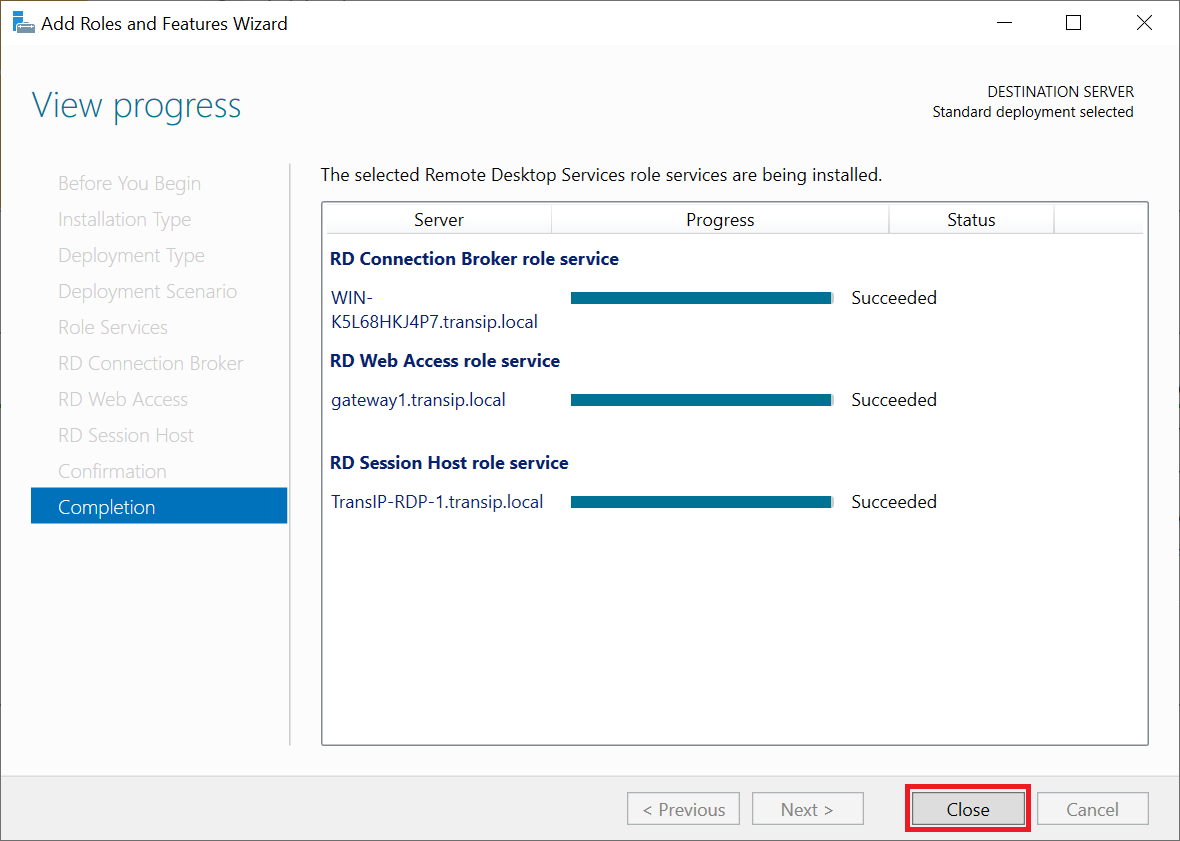
Step 11
Close the wizard when the installation is complete.
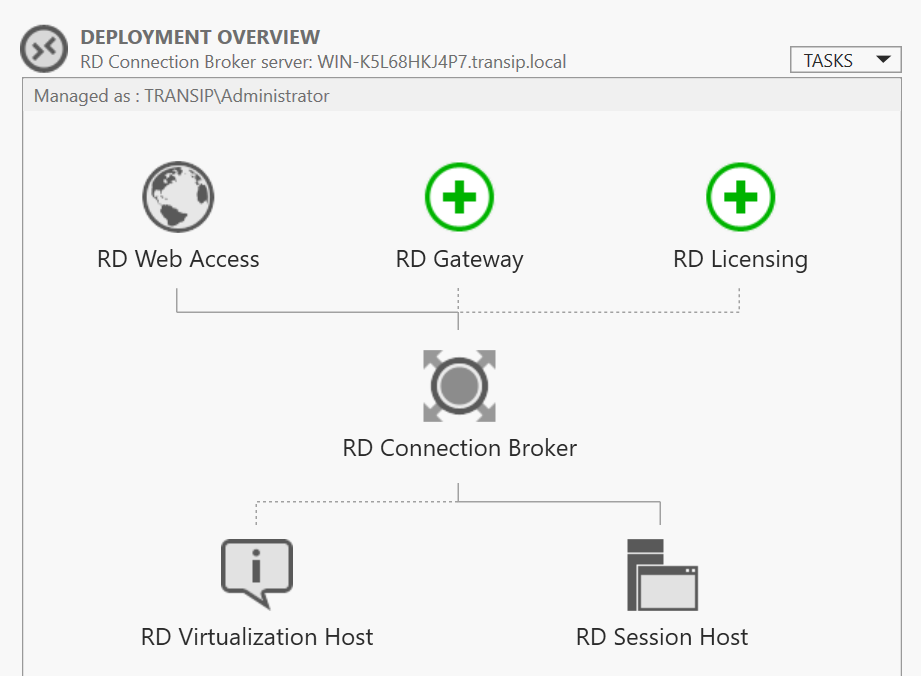
When you now click 'Remote Desktop Services' in the left menu in the Server Manager, you will see a green plus next to the RD Gateway and Licensing roles because they have not yet been added automatically.
Unfortunately, this is 'as intended' and it is necessary to go through the full steps for adding the RD Gateway and RD Licensing roles as described in our RD Gateway and RD Licensing guides for both. Note that the RD Gateway role is optional and only RD Licensing is required for an RDS Deployment.
When you have finished adding the RD Licensing server (and optionally the RD Gateway server), your RDS deployment is completely over on the new RD Connection Broker.
This brings us to the end of this guide on moving an RDS Deployment to a new RD Connection Broker.