While installing a 'role' or 'feature' on a Windows Server, you will be given the option to choose a server from a 'server pool', see screenshot below.
This means that you have the possibility to manage multiple Windows Servers from one central server via a server pool. You can install or remove roles and features on the Windows Servers within a server pool. You can also manage installed roles and features from the same central server.
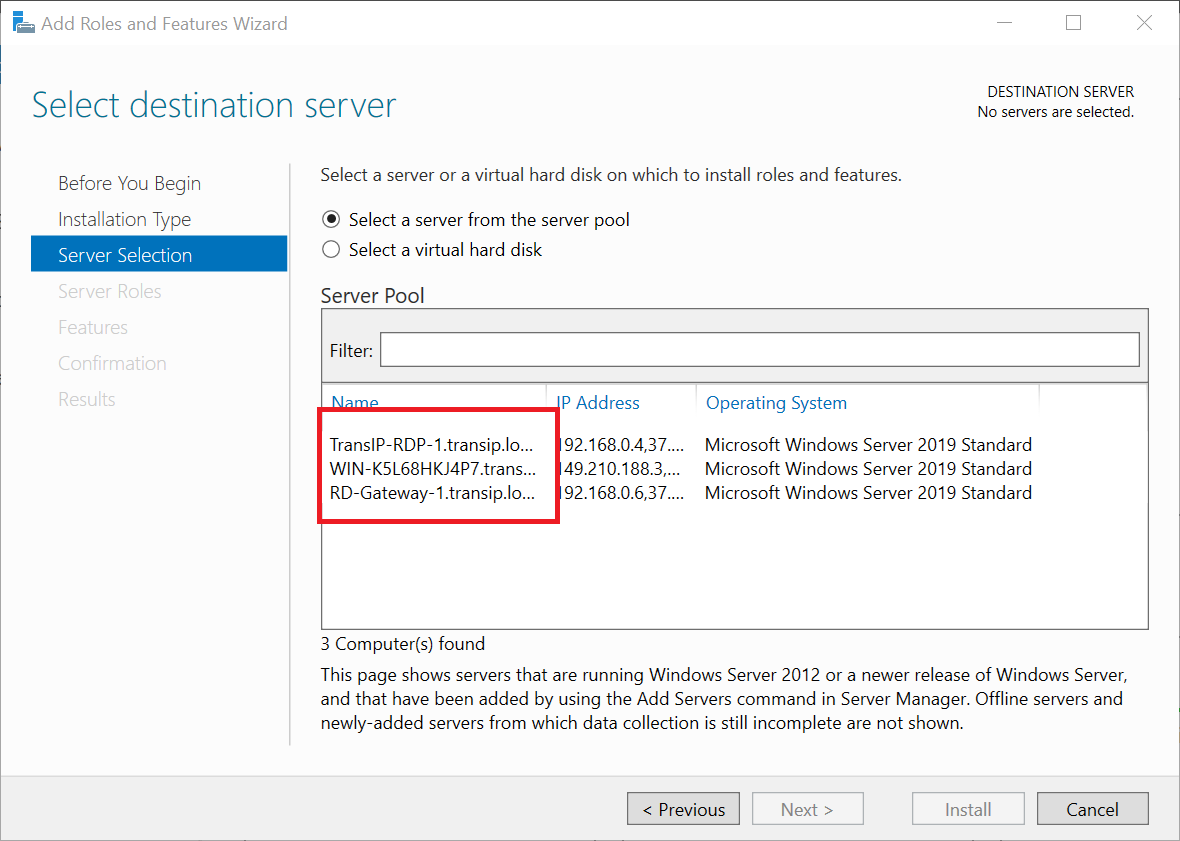
An advantage is that in this way you no longer have to connect to each individual server via remote desktop to manage it. This is easier to do and can simplify the security of the servers in the pool (for example, less access to a server is required).
In this tutorial we will show you how to add servers to a server pool.
Step 1
Connect to your Windows Server via Remote Desktop or the VPS console.
Step 2
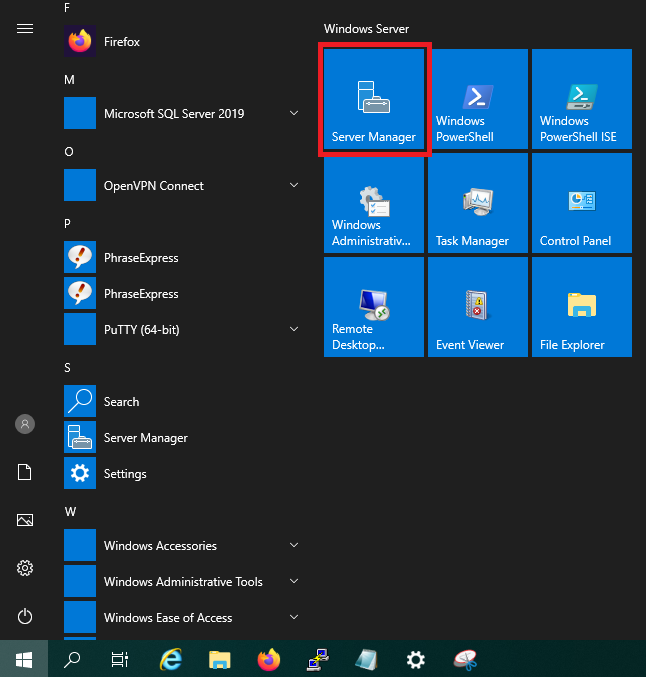
Click the Windows Start button and then click 'Server Manager'.
Step 3
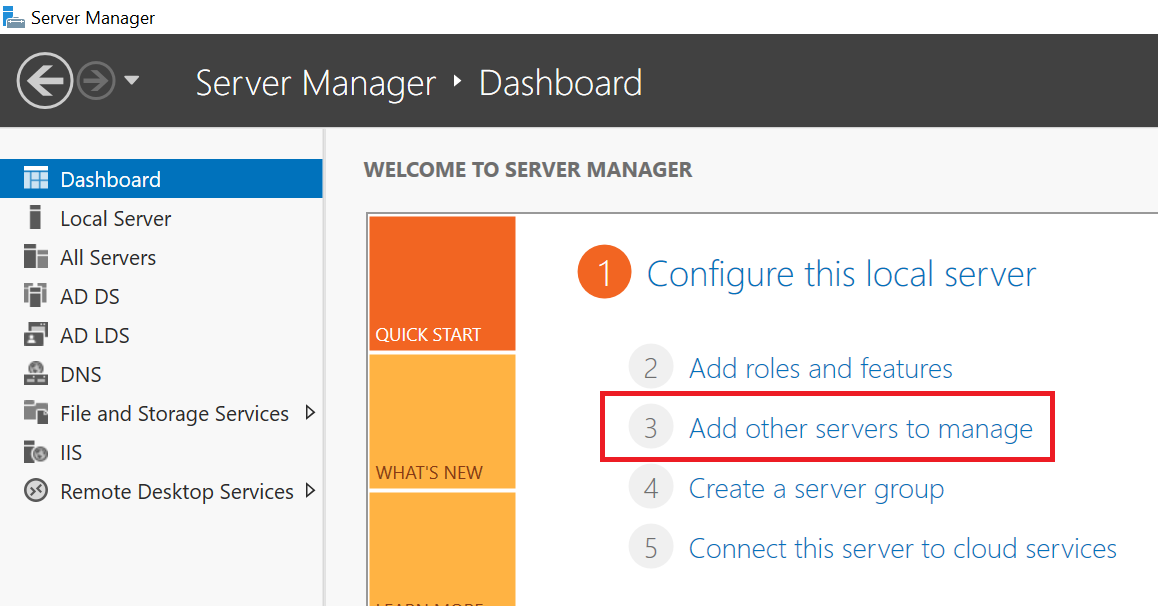
Click 'Add other servers to manage'.
Step 4
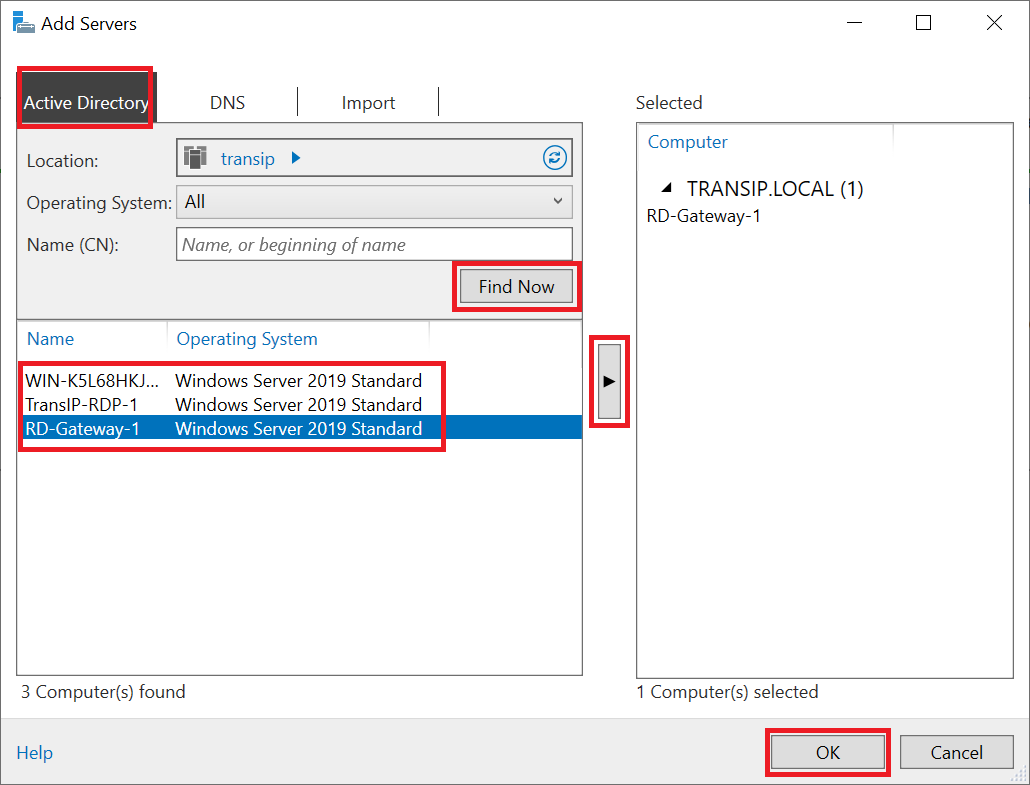
You will now see the 'Add Servers' screen with three options to add servers:
-
Active Directory: Search your Windows domain via the 'Find Now' button on all available servers and add it via the arrow.
The servers you add via this option must be added to your Windows Domain.
-
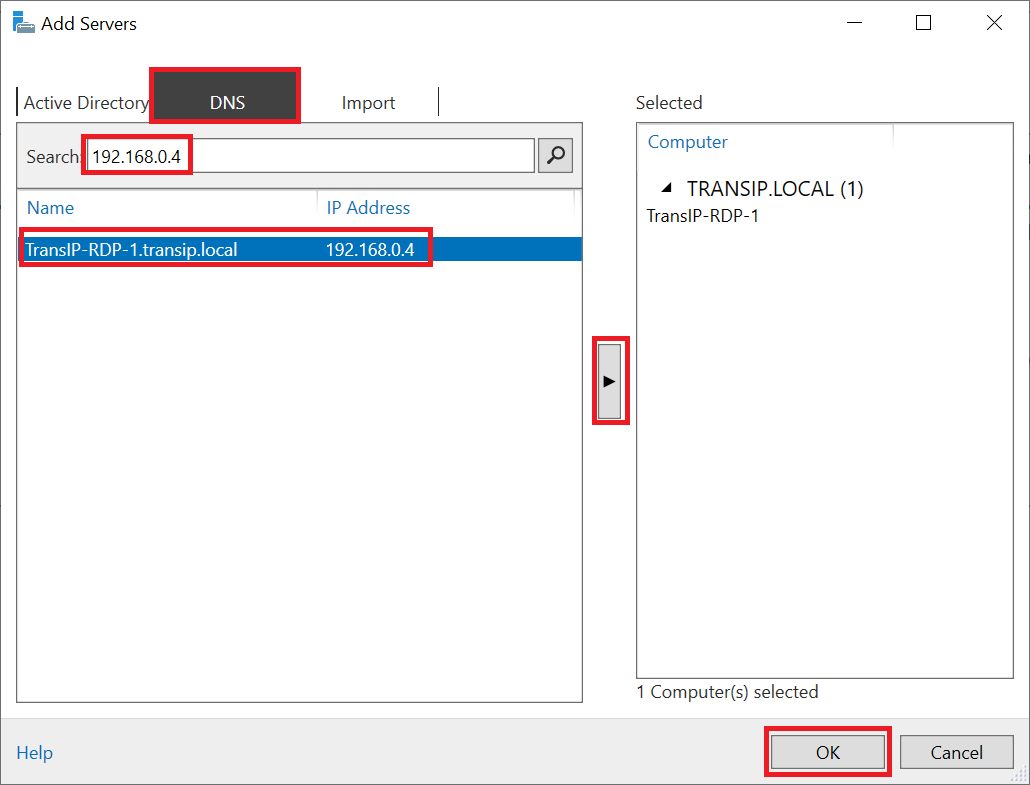
DNS: Enter the IP address of the server you want to add and add the found server via the arrow. For example, you can also add servers within a VPN network.
-
Import: A bulk tool that allows you to select a .txt file that contains servers (see screenshot below).
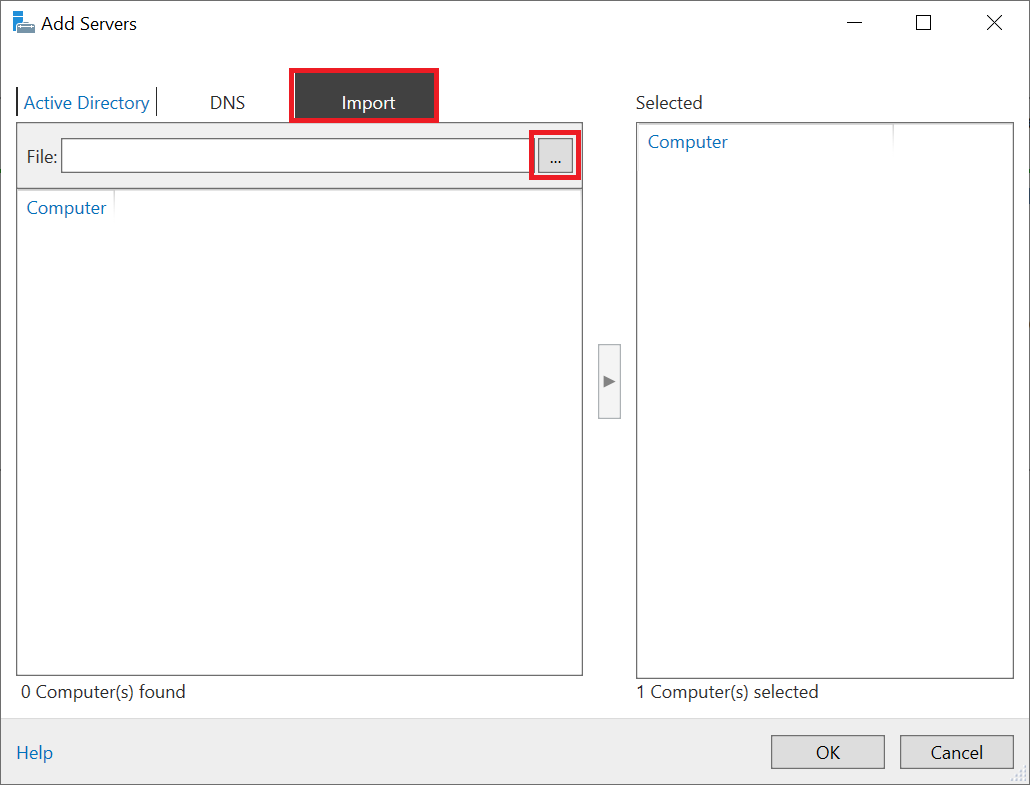
In the txt file, the IP address or DNS name of each server must be added on a new line, for example:Please note that the DNS names must be discoverable by the server on which you follow these steps. For example, if you search for a DNS name of a server in a Windows domain that you do not have access to, the server will not be found.192.168.0.4 192.168.0.5 rds1.transip.local rds2.transip.local
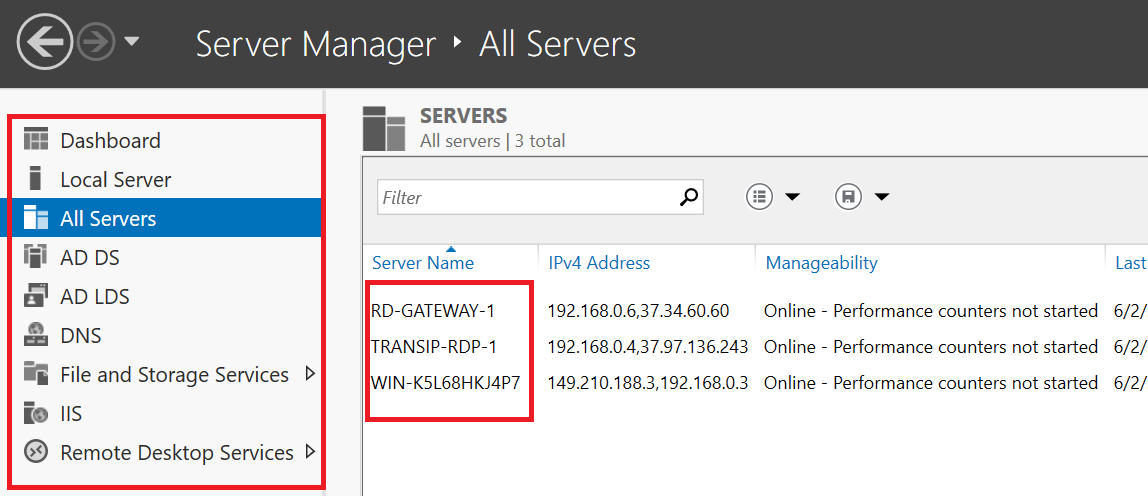
You can now find your servers under 'All Servers' in the Server Manager. In the left menu you can manage all roles installed on the available servers.
This brings us to the end of this tutorial about adding servers to a server pool.


