


During the installation and configuration of Windows Active Directory Domain Services (AD DS), you specify a domain when promoting a Domain Controller (DC). You can see this domain as the name for the network to which you add users, groups and computers.
In this tutorial, we will show you how to add computers or servers to an (AD) domain. The procedure for this differs slightly depending on whether the computer/server is on the same LAN network (here your private network) as your DC or not. Both options are discussed in this tutorial.
Windows Servers using IPv6 on their primary network adapter may lose their connection to the Domain Controller. You can prevent/solve this by disabling IPv6 on your primary network adapter.
Adding a server on the DC's LAN to a Windows Domain
Step 1
Connect to the VPS you want to add to the domain via Remote Desktop or the VPS console.
In this and the next steps you set up your DC on the VPS that you want to connect to your Windows Domain as a DNS server. This step is necessary for your server to find the DC. Are you using a public domain (e.g. transip.nl) and not a local domain (e.g. transip.local)? Then proceed directly to step 8.
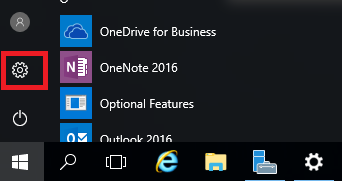
Click the Windows Start button and then the settings icon to open your control panel.
Step 3
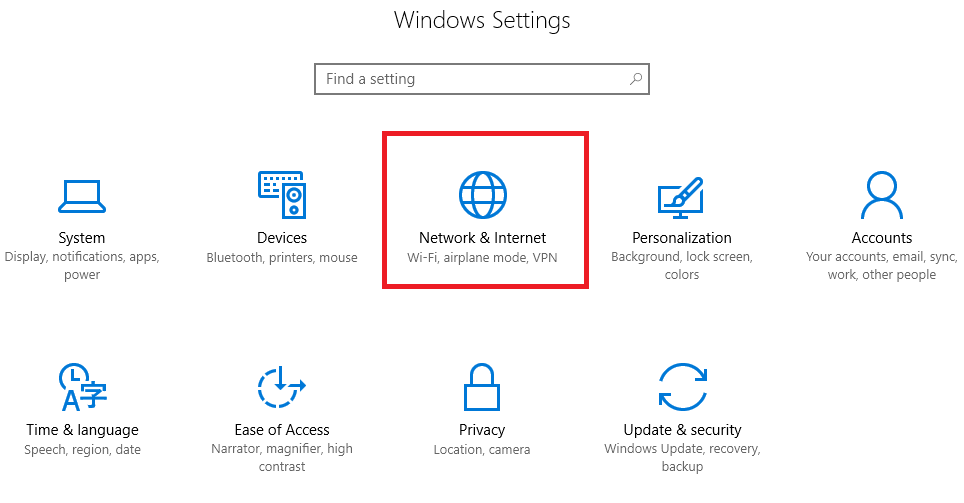
Click 'Network & Internet'.
Step 4
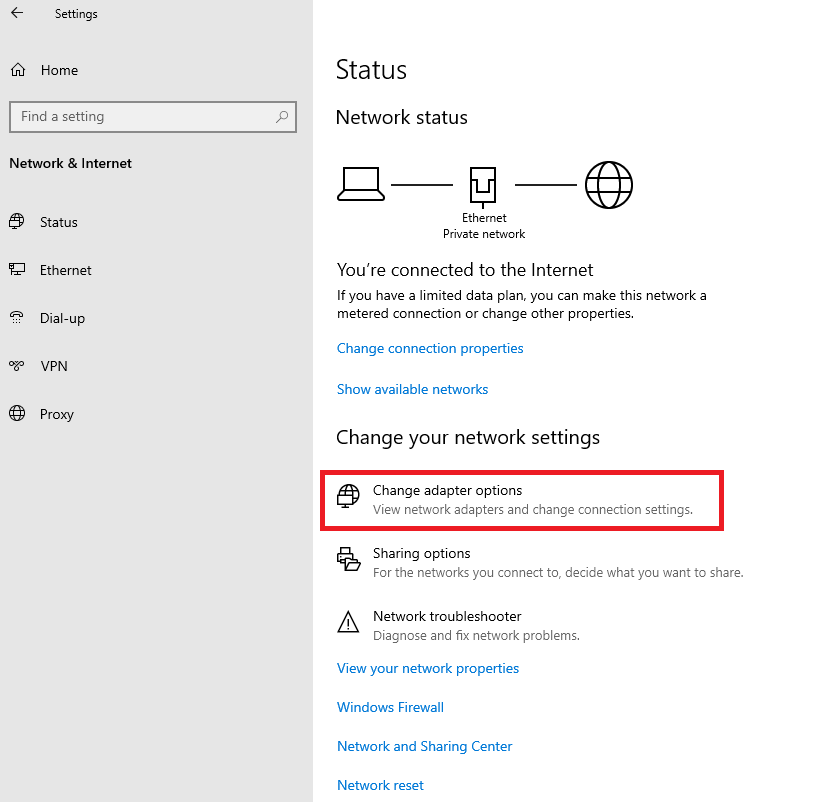
Click 'Change adapter options' in the middle.
Step 5
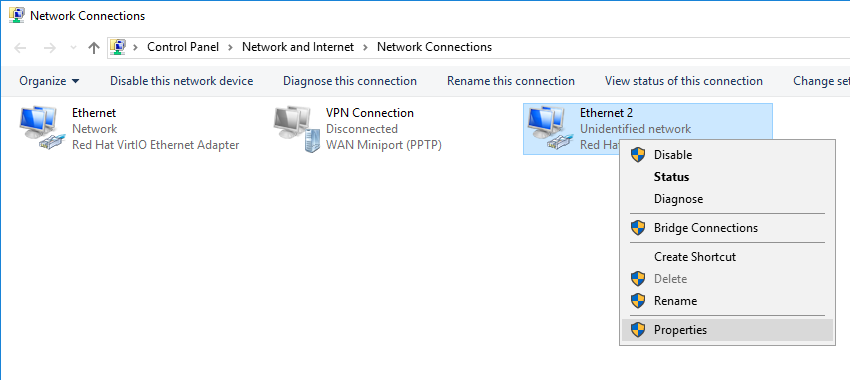
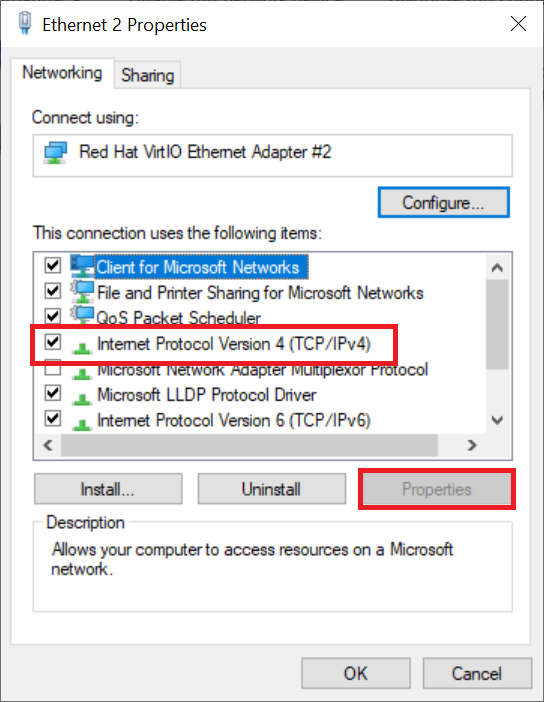
You will now see an overview of your network adapters. Right-click the network adapter of your private network (Ethernet 2) and click 'Properties'.
Step 6
Click 'Internet Protocol Version 4 (TCP / IPv4)' followed by 'Properties'.
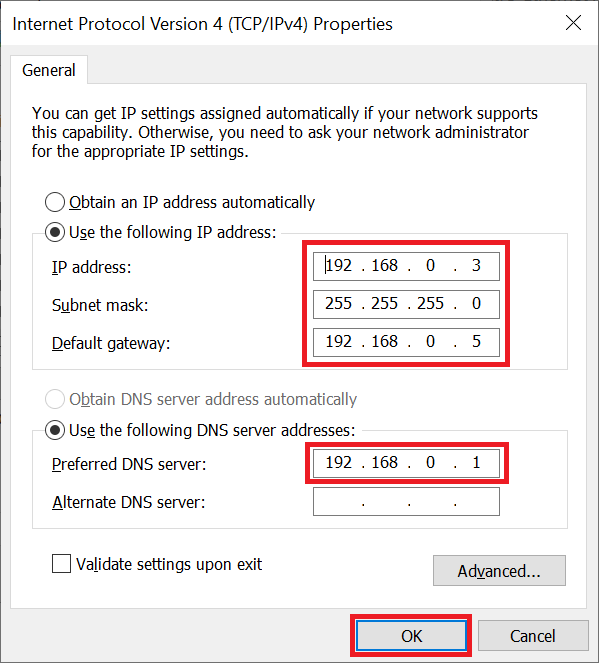
Step 7
- Set the IP address of your private network statically.
- If you are using a pfSense firewall, point the default gateway to the LAN address of the pfSense firewall. Do you not (yet) use a pfSense firewall? Then leave the default gateway option empty.
- Enter the private network IP address of your Domain Controller / DNS server under 'Use the following DNS server address'.
- Finally click 'OK' to process the changes.
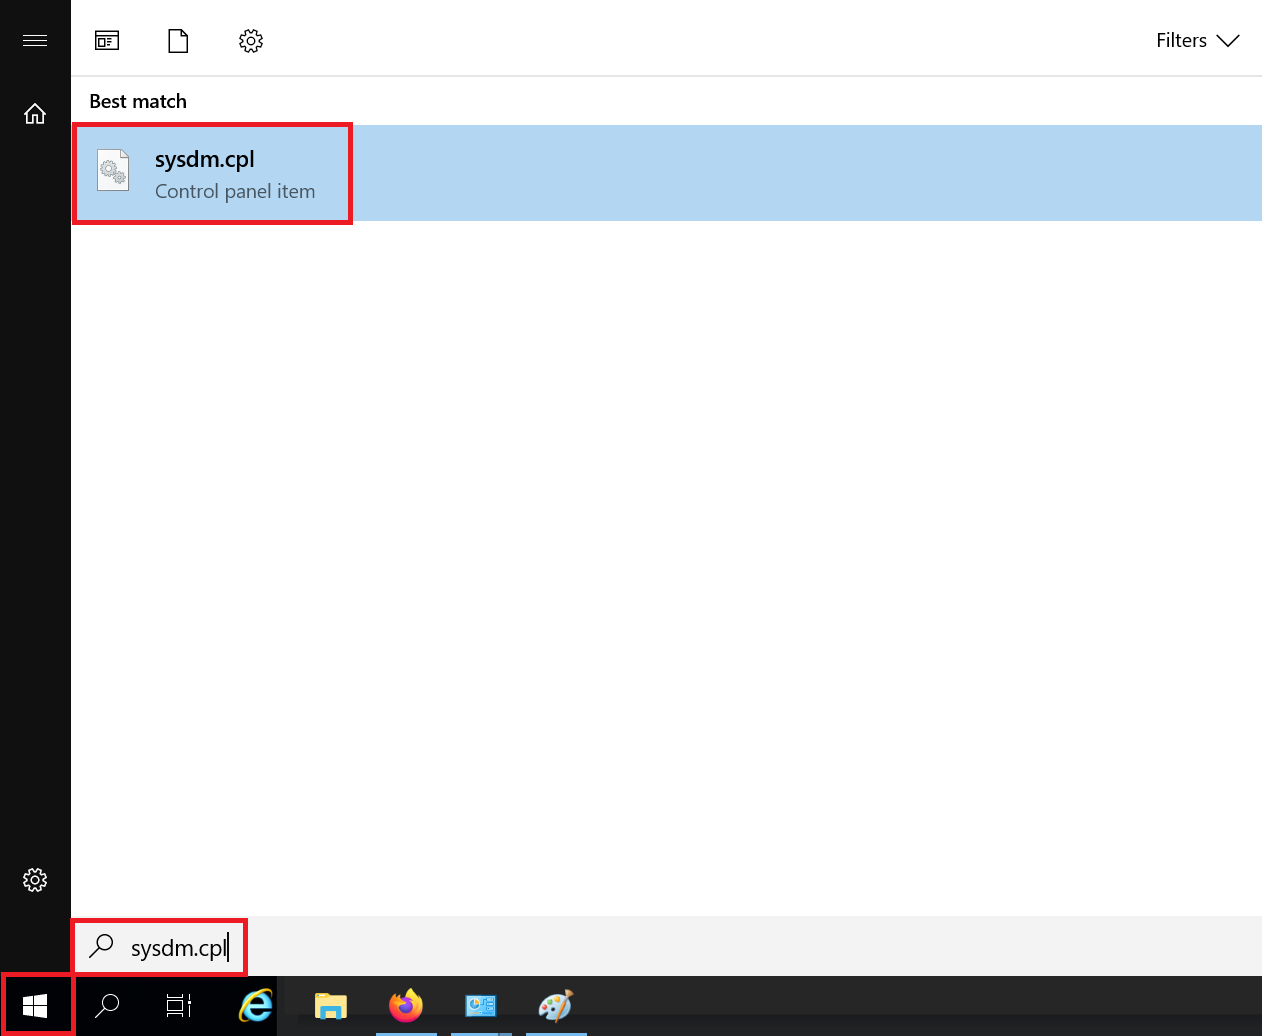
Click the Windows Start button, search for 'sysdm.cpl' and click the result. This takes you directly to the system properties.
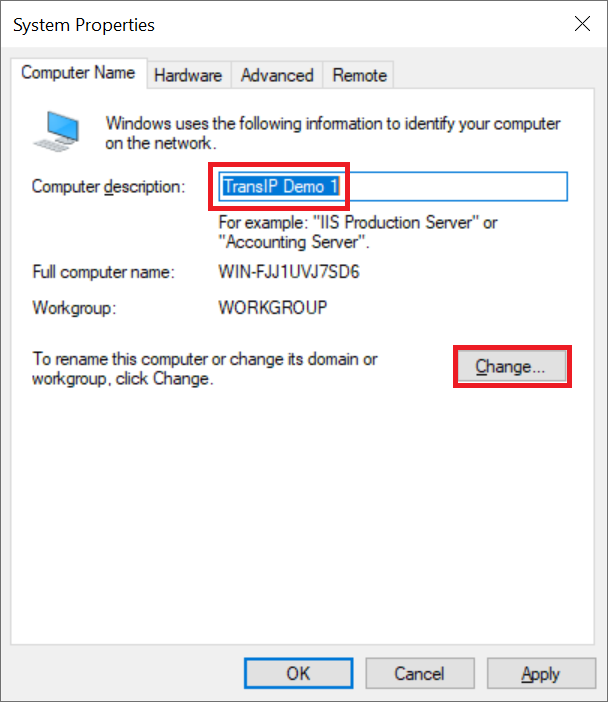
Step 9
Give your server a clear description (for example, refer to the role in the name, e.g. RDP host 01) and click 'Change'.
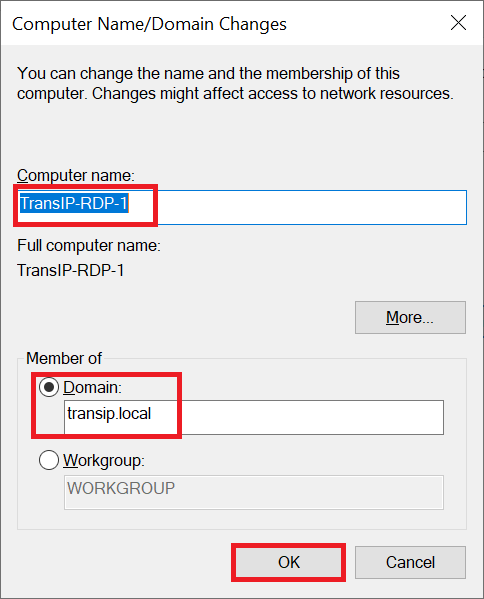
Step 10
- Change the name of your server so that it is easy to recognize. Certainly with larger numbers of servers/computers within an AD, a clear name helps to keep your AD orderly.
- Under 'Member of', select 'Domain' and enter the name of your AD domain (the same domain you set up when promoting a Domain Controller).
Step 11
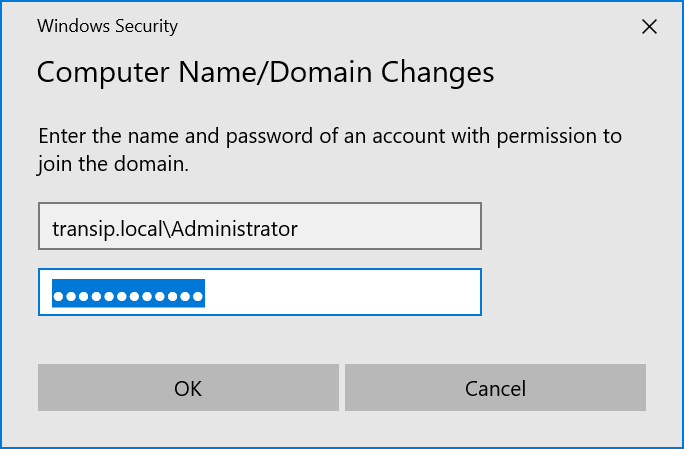
You will now see a pop-up. Enter the name and password of an Active Directory user who has sufficient rights to add this server to the domain.
Are you getting an error message here? This is most likely not your fault, but caused by the priority given to your local DNS server over your public internet connection. To solve this problem, take a look at the 'Troubleshooting' section.
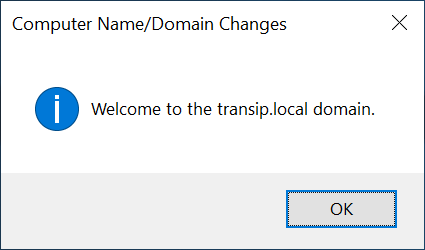
In this tutorial, we use the domain transip.local. The full username then becomes transip.local\Administrator. After adding, your server will be kindly welcomed within the domain with the message below.
From now on, you connect to this server/computer with a username that exists within the AD, for example transip.local\Username.
Adding a server outside the DC's LAN to a Windows Domain
If you've followed our tutorial for configuring an Active Directory, you're using a local Windows Domain (eg transip.local). The DNS records of a local domain can only be retrieved via the (local/private) network where the Domain Controller (DC) is located.
A consequence of this is that if, for example, you want to add a laptop that you have at home or at the office to your Windows Domain, then that laptop has to be able to connect to the private network on which your DC is also located. Otherwise it will not be possible for your laptop to reach your DC.
To connect to your DC from outside your private network, you can use a VPN server. In this manual we use a VPS with pfSense and configure it as an OpenVPN server.
Have you already set up a pfSense firewall in the same private network as your DC and set up pfSense as an OpenVPN server using our tutorials? Then go straight to step 5.
Step 1
Order a VPS with pfSense, add it to your private network and go through the initial configuration of pfSense.
Step 2
Set up your pfSense firewall as an OpenVPN server using this tutorial.
Step 3
Create two OpenVPN users (use the LDAP instruction), one for the laptop user and one for the DC.
Step 4
If you have not already done so, set the default gateway to the LAN IP address of your pfSense firewall on all servers in the private network where your pfSense firewall is included on the LAN adapter. You can see an example of this in step 7 of the first paragraph.
Connect the laptop to your VPN server by using a VPN client (for example, the client that offers your OpenVPN server). From this point on, proceed to Step 2 of the first paragraph with two minor differences:
- In step 5, select your VPN adapter (e.g. 'OpenVPN TAP-Windows').
- In step 7, leave the option on 'Obtain an IP address automatically' in the upper part (be sure to specify a DNS server).
Troubleshooting
Adding a server/computer to a domain, especially remotely, is not always the most stable of processes. You can therefore run into a range of problems that are not your fault. Fortunately, such issues can usually be resolved by following a number of steps:
Step 1
Being able to ping your Domain Controller (DC) is useful for troubleshooting. In the Windows Defender Firewall with Advanced Security, enable the 'File and Printer Sharing (Echo Request - ICMPv4-In)' options.
To prevent the entire internet from pinging your DC, it is advisable to limit the scope (double click the rules > scope) of these rules to the IP ranges of your private network and VPN connection.
Step 2
Run the command prompt as administrator (cmd in Windows) on the server/computer that cannot add the domain and ping the LAN IP address of the Domain Controller, for example:
ping 192.168.0.1
Do you get a timeout? Then check the following:
- On the DC, check your firewall settings and on all involved servers the private network settings.
- Disable IPv6 on your network adapters.
- Are you using an OpenVPN server, for example on a pfSense firewall? Then check whether the 'Interclient Communication' option is enabled on the VPN server.
Step 3
Check (in CMD) if you can request DNS records for your Windows domain (e.g. transip.local) and the associated LDAP record, for example:
nslookup transip.local
nslookup _ldap._tcp.dc._msdcs.transip.local
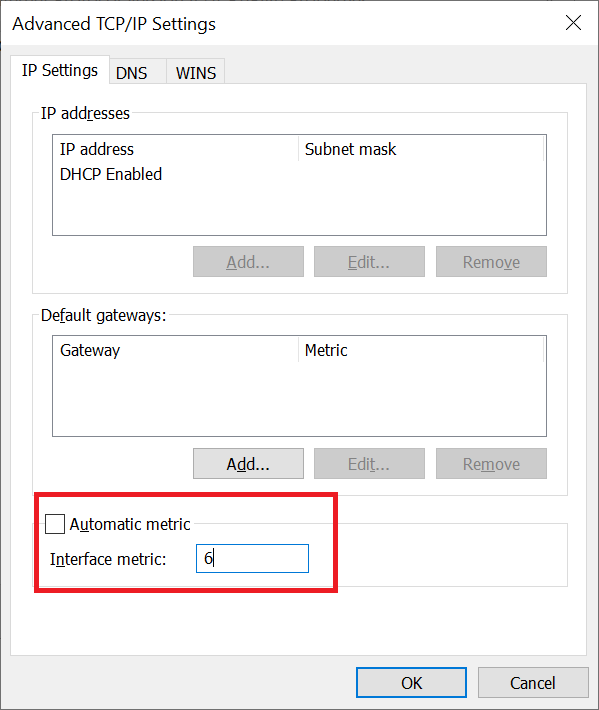
Not getting any results? This is usually because the DNS server your public internet connection uses takes precedence over your LAN/VPN adapter. You can solve this by clicking 'Advanced' in step 7 of the first paragraph for your LAN/VPN adapter. Uncheck the 'Automatic metric' option and give the metric a low value, for example 6. The lower the value, the higher the priority. Your public connection is automatically assigned a value of +- 10-15.
Step 4
At this point you can probably reach your DC. Do you still get an error when you try to add your server/computer to the domain? Then (just for the troubleshoot) connect the DC via the VPN client.
Ping your DC and try an nslookup command (steps 2 and 3) from the server/computer which you are trying to add to the domain. Does that work and do you see the IP address of the VPN, public and LAN connection with the nslookup command? (as below)? Then disconnect the VPN connection on your DC and add the server/computer to your Windows domain.
c:\Users\Administrator>nslookup transip.local
Server: Unknown
Address: 192.168.0.1

Name: transip.local
Addresses:  10.0.0.2
          149.xxx.xxx.xxx
          192.168.0.1
With that, we've reached the end of this tutorial on how to add servers and computers to a Windows Domain.