


When using a VPS with Windows Server, the most efficient way to work on it is to use the Remote Desktop Protocol (RDP).
Since most Windows Servers worldwide use Remote Desktop, it is a favored target for hacker / automated bots attacks: It is not uncommon for bots to attack the RDP port of a Windows Server within minutes of a Windows Server coming online for the first time.
One way you can protect your Windows Server from such attacks is by changing the Remote Desktop Port. In this tutorial we explain how to do this.
Step 1
Connect to your Windows Server via Remote Desktop or the VPS console.
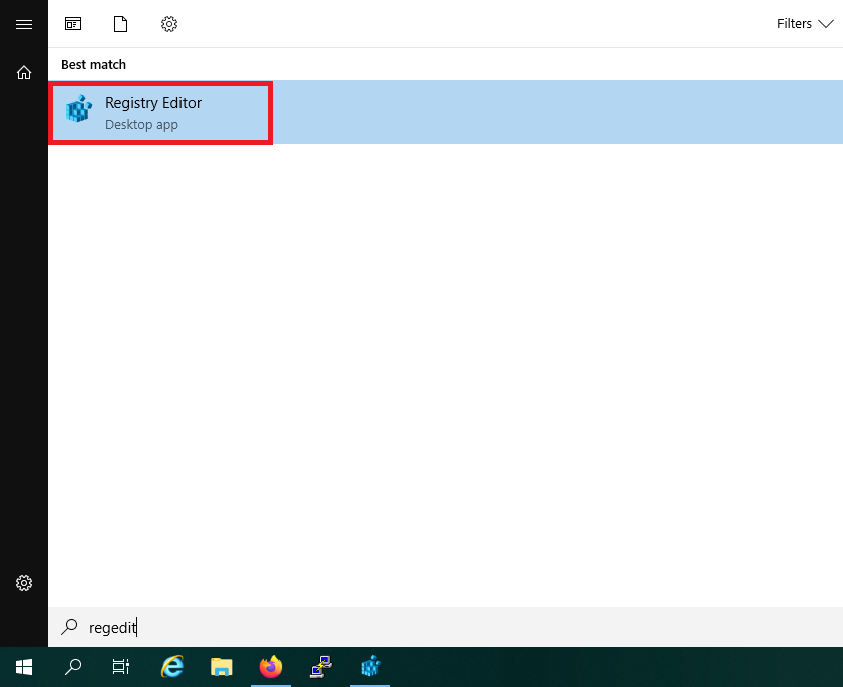
Step 2
Click the Windows Start button, type 'regedit' and click 'Registry Editor' in the search results.
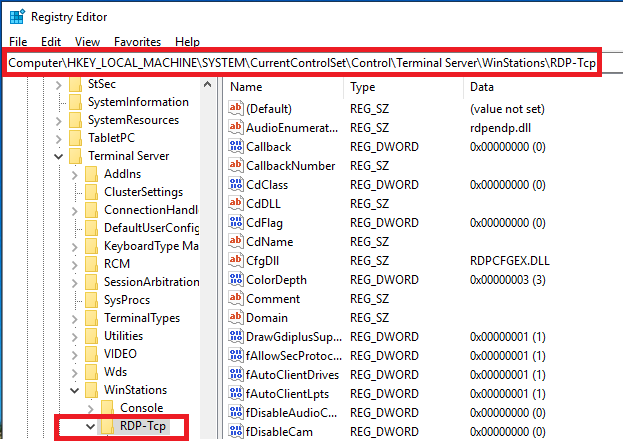
Step 3
At the top of the Registry Editor, enter the address 'Computer \ HKEY_LOCAL_MACHINE \ SYSTEM \ CurrentControlSet \ Control \ Terminal Server \ WinStations \ RDP-Tcp', or click in the folder tree on the left until you reach this folder.
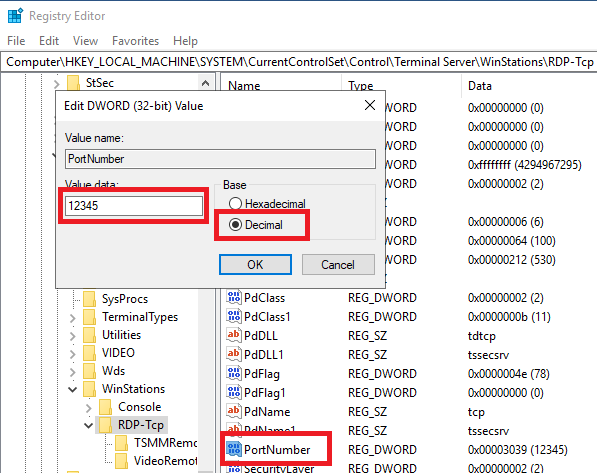
Step 4
Then scroll down and double click on the REG_DWORD key 'PortNumber'. Then adjust 'Base' to 'Decimal', change the number to another (free) port number and then close Regedit.
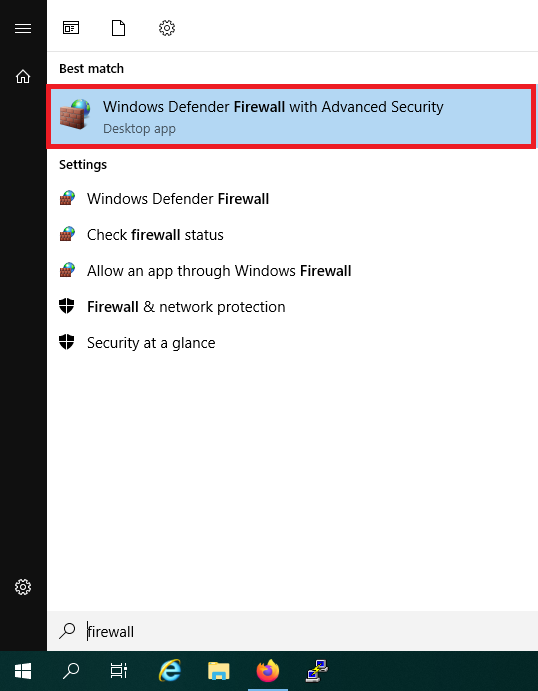
Step 5
Now that you have adjusted the RDP port, it is important to also open the port in your firewall. Click the Windows Start button, type 'firewall' and click 'Windows Defender Firewall with Advanced Security' in the search results.
Step 6
Click left on 'Inbound Rules' and scroll down to 'Remote Desktop'. Right-click one by one on 'Remote Desktop - User Mode (TCP-In)' and 'Remote Desktop - User Mode (UDP-In)' and select 'Disable Rule'.
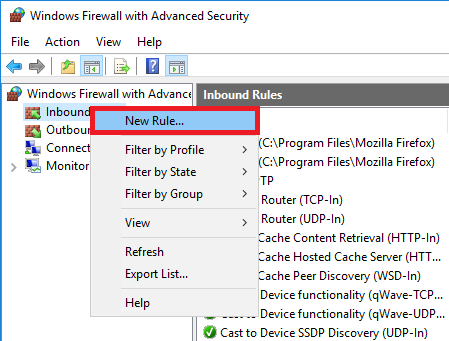
Right click on 'Inbound rules' and choose 'New Rule'.
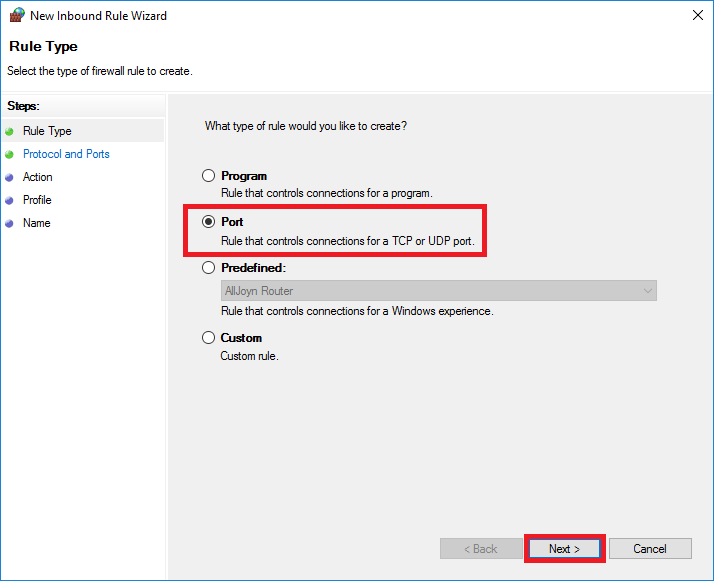
Step 8
Select as rule type 'Port' and click on 'Next'.
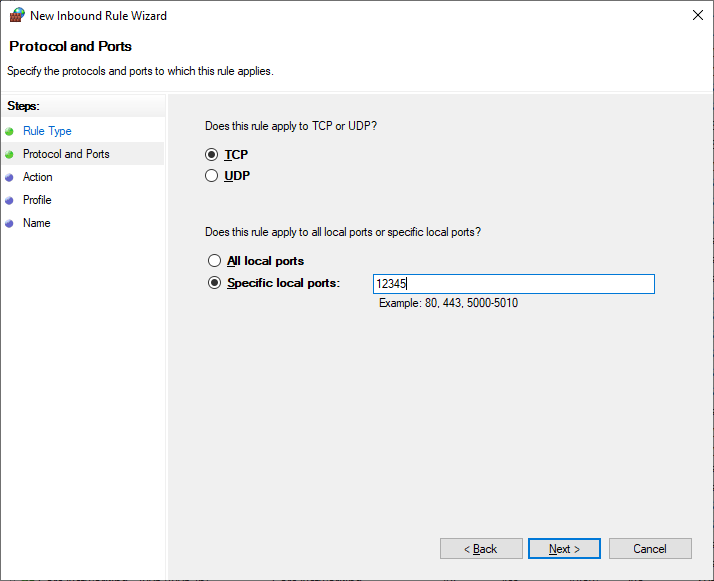
Step 9
Select 'TCP' and under 'Specific local ports' enter the port number you set in step 4.
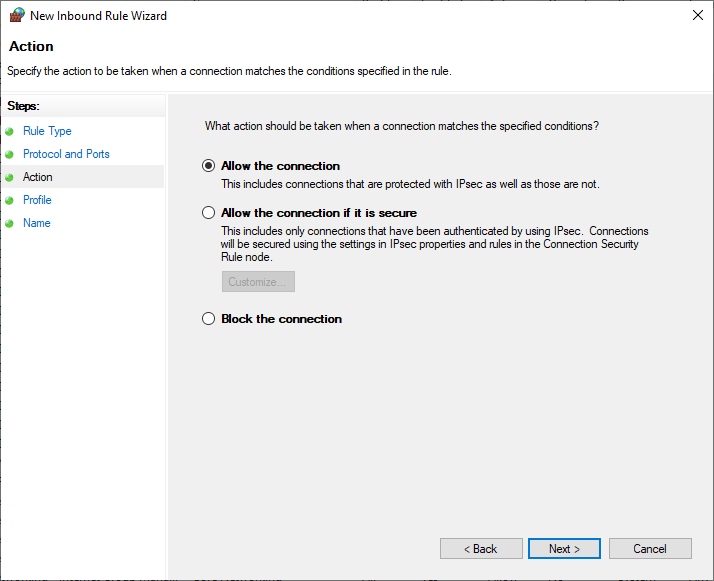
Step 10
Select 'Allow the connection' to allow connections over the selected port and click 'Next'.
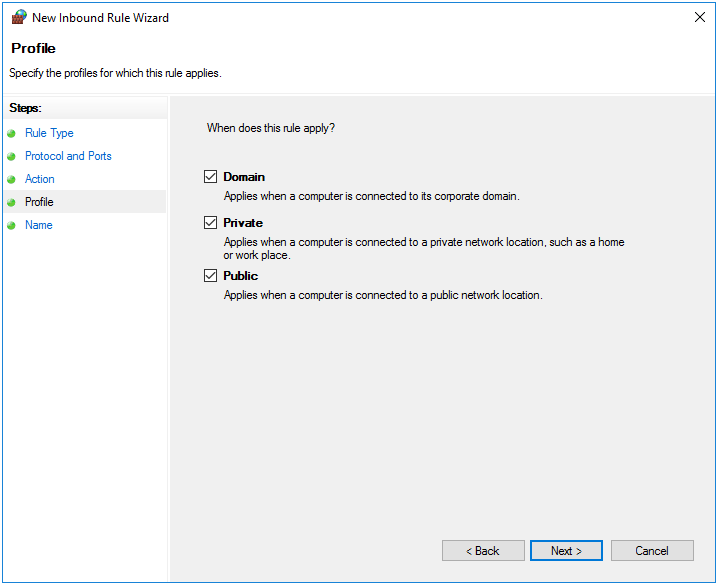
Optionally you can adjust to which domain the rule applies. Usually you do not need to change anything here, unless you use a private network and have created a private profile for it, see Microsoft's documentation for more information.
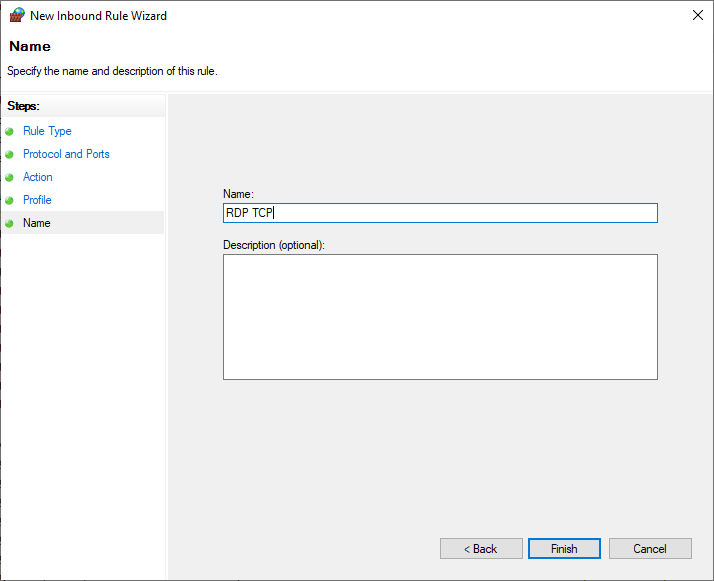
Step 12
Give the rule a name, for example 'RDP TCP' and click 'Finish'.
Now repeat steps 7 to 12, but then select 'UDP' in step 9 and give another name in step 12, for example 'RDP UDP'.
Are you using the VPS firewall in the TransIP control panel? Do not forget to open the chosen gate there as well.
Your RDP port has now changed and your firewall configuration has been adapted to it. If you now set up a Remote Desktop connection with mstsc, use the new port by: behind your IP address, for example: 123.123.123.123:12345
This brings us to the end of this guide for changing the remote desktop port on a Windows Server.
If you have any further questions on the basis of this manual, do not hesitate to contact our support department. You can reach them via the button 'Contact us' at the bottom of this page.