


This is the second part of our Plesk Tutorial Series. If you're configuring a new VPS we recommend starting with part 1.
Automated bots continuously scan IPs for vulnerabilities. To prevent security issues on your VPS, configuring the security of your VPS is the first thing we do after the installation.
Given the large number of IPs used by bots, we cannot include all attacking IPs in our own firewall, nor do we receive reports of attempts to penetrate your VPS. As such, it's important to have solid security on your VPS.
Security measures
To secure your VPS we go through the following steps:
- Change your SSH Port.
- Fail2Ban brute force security.
- Limit access to Plesk to specific IPs.
- Anti-virus / malware security with ClamAV
- Plesk Security Policy
- Prevent access to DNS zones belonging to other users
- Securing localhost & mail with SSL.
This is relatively complex material. If you use the steps below to secure an existing (instead of new) VPS, then always create a snapshot of your VPS first before you follow the steps below.That way you always have a snapshot to fall back on if it turns out that a change creates a problem.
Change your SSH port
The root user does not have SSH access to your VPS by default. Additionally, we recommend changing your SSH port. This is a form of 'security through obscurity'; by changing your SSH port, you make your VPS invisible to most of the attacking bots (if not all bots). An additional advantage is that your log files remain organized and you get a clearer picture when your VPS is actually attacked directly, instead of randomly by a bot.
Step 1
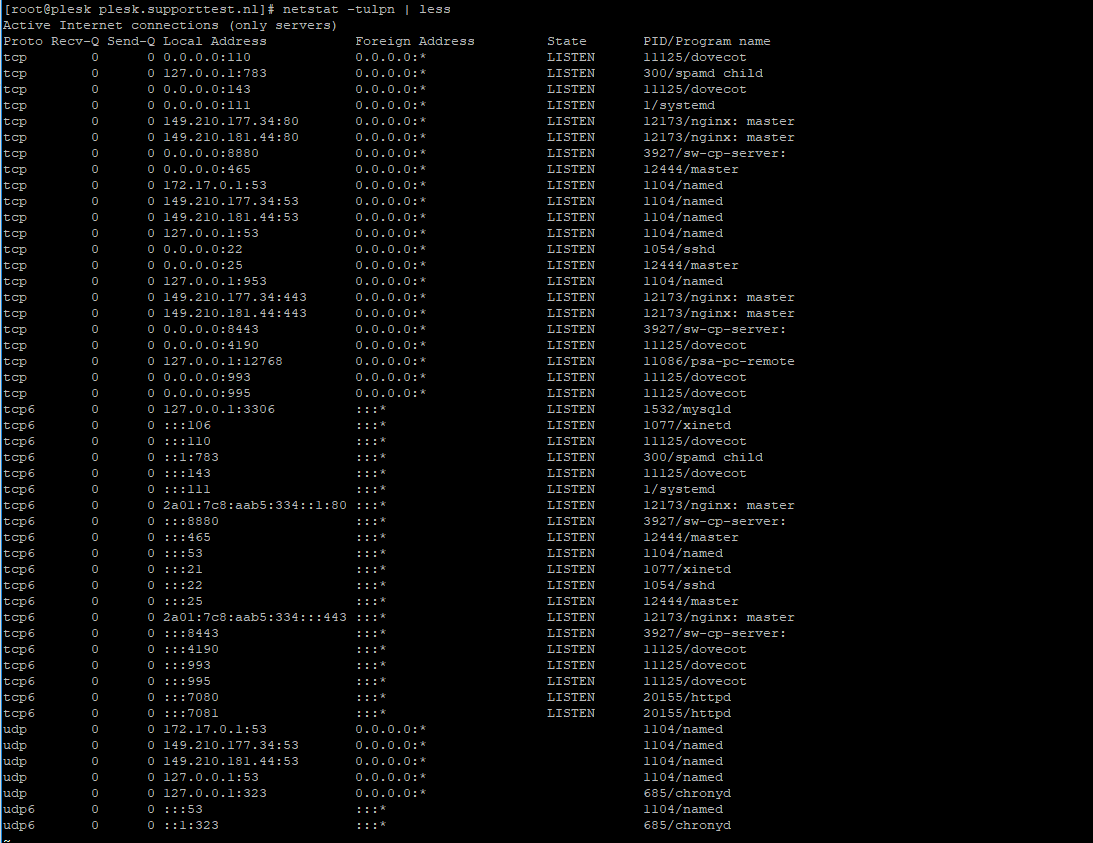
Connect to your VPS via the VPS console in your control panel or via SSH. Check your used ports with the command below (you may first have to install net-tools with dnf -y install net-tools).
netstat -tulpn | lessAn overview as shown in the screenshot below appears. In this overview, the port numbers are the numbers in the row 'Local Address' behind the colon.
Step 2
Choose a random port number between 0 and 65535 that is not shown in the overview (for example 47592) and press 'q' to stop netstat.
Step 3
Open the SSH configuration file with the command below. You can also use vim for this.
nano /etc/ssh/sshd_config
Step 4
The configuration file opens, and you will see the code below, among other things.
# If you want to change the port on a SELinux system, you have to tell
# SELinux about this change.
# semanage port -a -t ssh_port_t -p tcp
#PORTNUMBER
#
#Port 22
#AddressFamily any
#ListenAddress 0.0.0.0
#ListenAddress ::
Uncomment or delete the # in front of '#Port 22' and change the number to the number you chose under step 2, for example:
port 47592Save the file and close the file by pressing ctrl + x > y > enter in succession.
Step 5
Add the chosen port to your firewall with the command below. Replace 47592 with the port number you selected in step 2.
In older versions of Plesk (17.5 and earlier) the public firewall zone is used: --zone=public
firewall-cmd --permanent --zone=plesk --add-port=47592/tcpDo you use our VPS-firewall in the TransIP control panel? If so, don't forget to add a custom rule in the firewall in which you open your new SSH port, and to close port 22 there as well.
Step 6
AlmaLinux comes with SELinux, an extra Linux security feature to protect against misconfigurations. By default, SELinux doesn't accept SSH connections on the port you just configured. You add this port to SELinux using the command:
semanage port -a -t ssh_port_t -p tcp 47592Replace 47592 by your chosen port number.
Stap 7
Restart your firewall configuration and SSH with the following commands:
firewall-cmd --reload
systemctl restart sshd
You can then check that SSH uses the new port with the command:
ss -tnlp | grep sshd
Fail2Ban bruteforce security
Bots try to enter automatically by performing brute force attacks on your VPS in different areas, such as SSH, Postfix (outgoing mail server), and Plesk. Fail2Ban offers good protection against this.
Fail2Ban protects your VPS by banning IPs that try to abuse your VPS, for example in too many wrong password attempts, searching for exploits, etc. We therefore recommend Fail2Ban wholeheartedly.
In Plesk Obsidian (18.0 and newer) Fail2Ban is installed by default. You can as such skip this part if you're using Obsidian.
Step 1
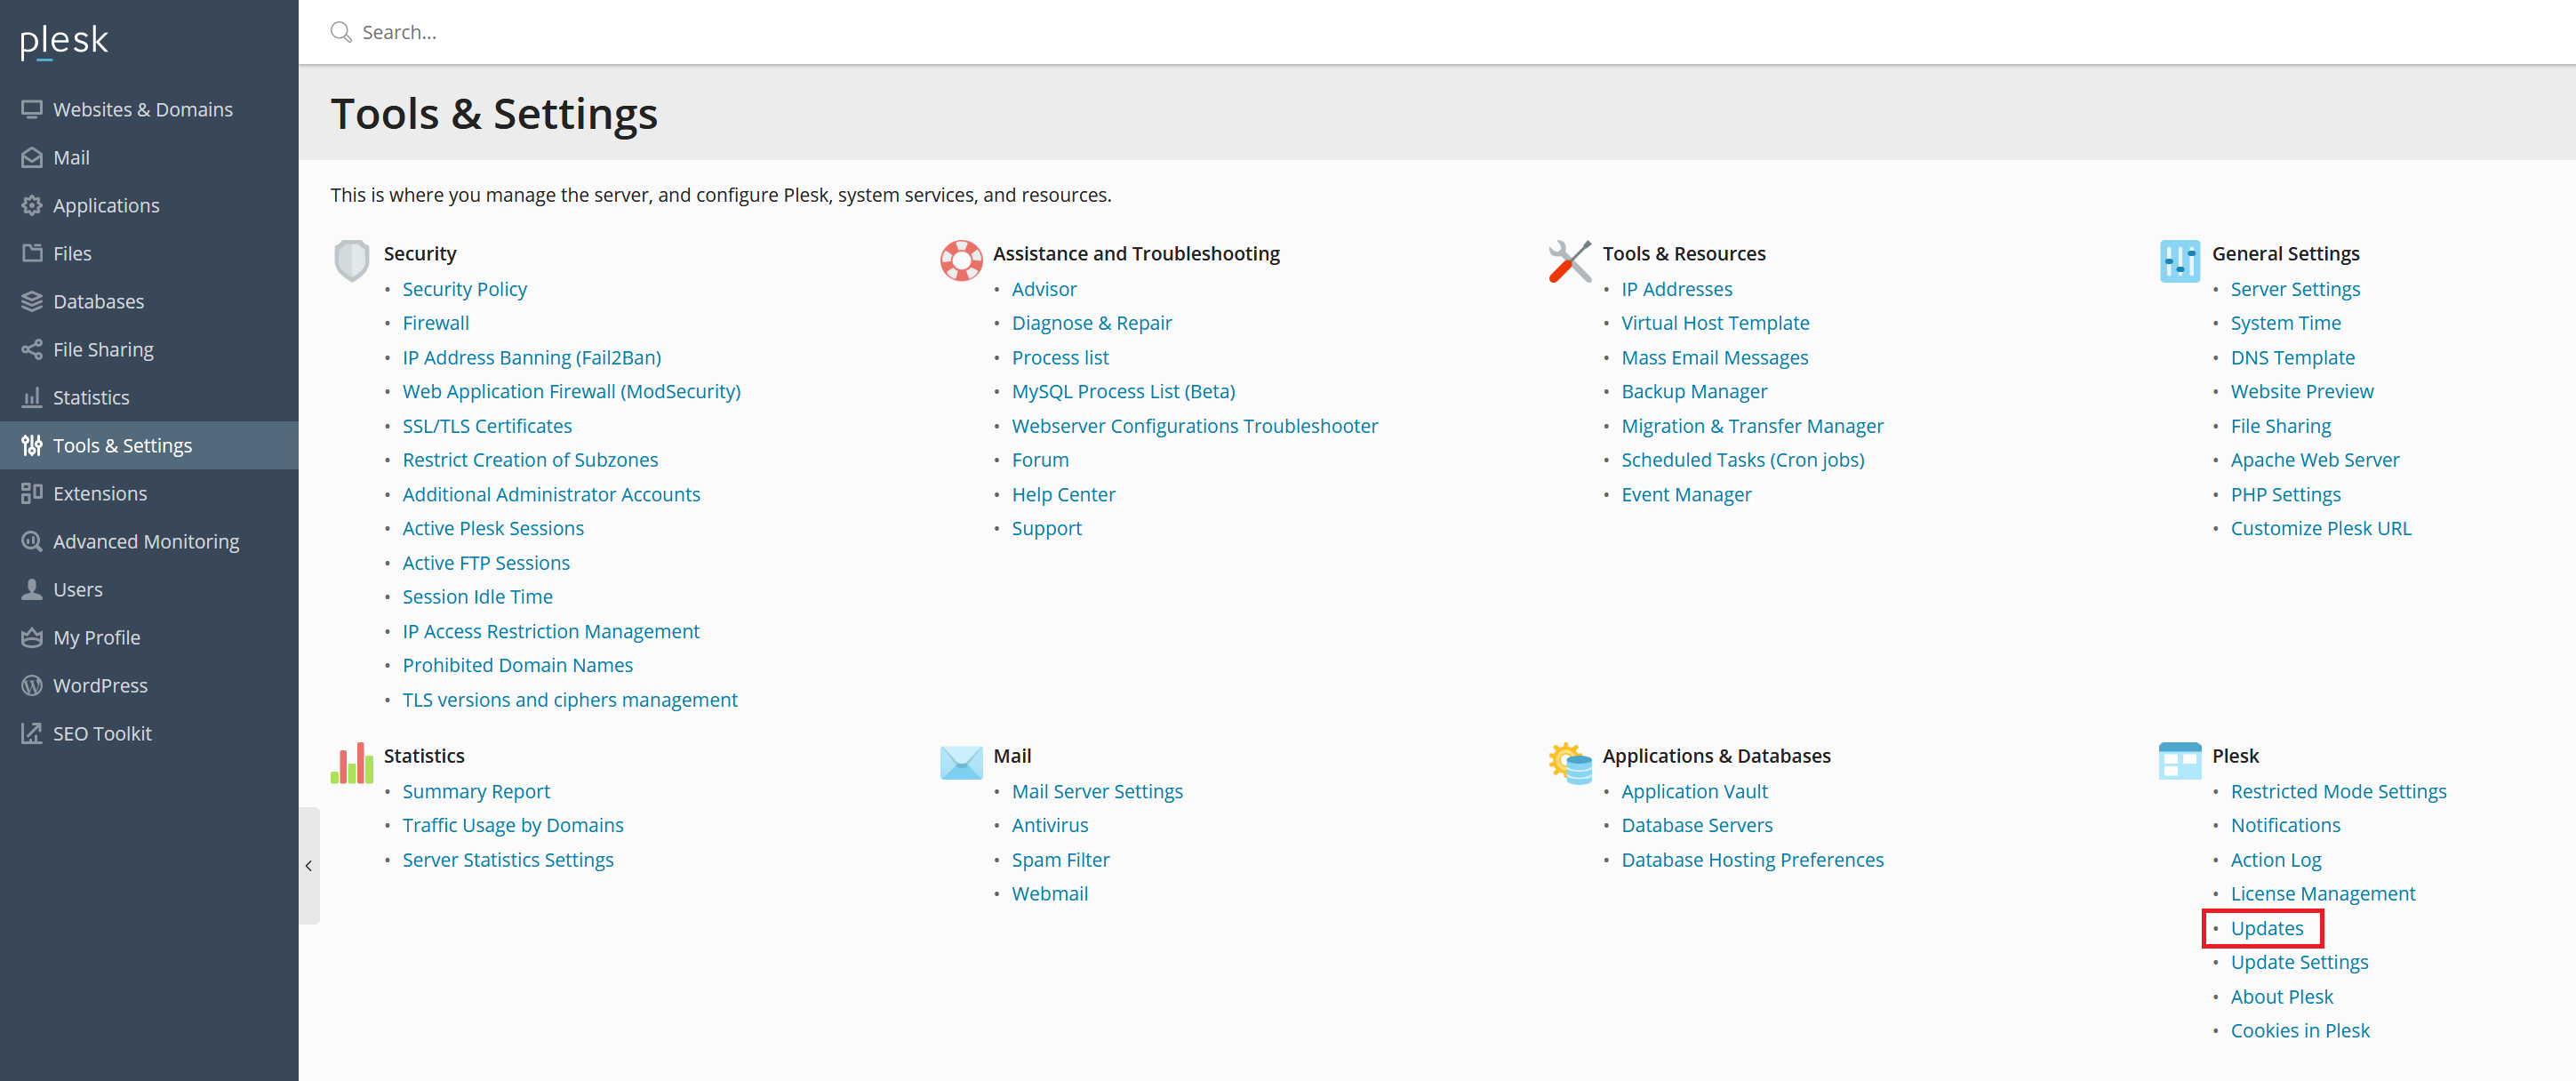
Log in to Plesk and navigate to 'Tools & Settings'> 'Updates'.
Step 2
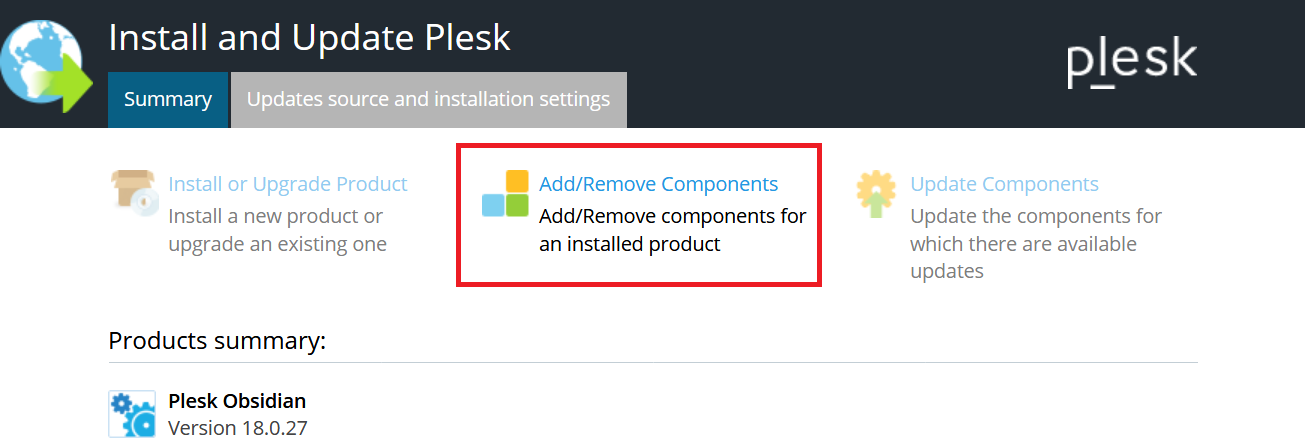
Click on ‘Add/Remove Components’.
Step 3
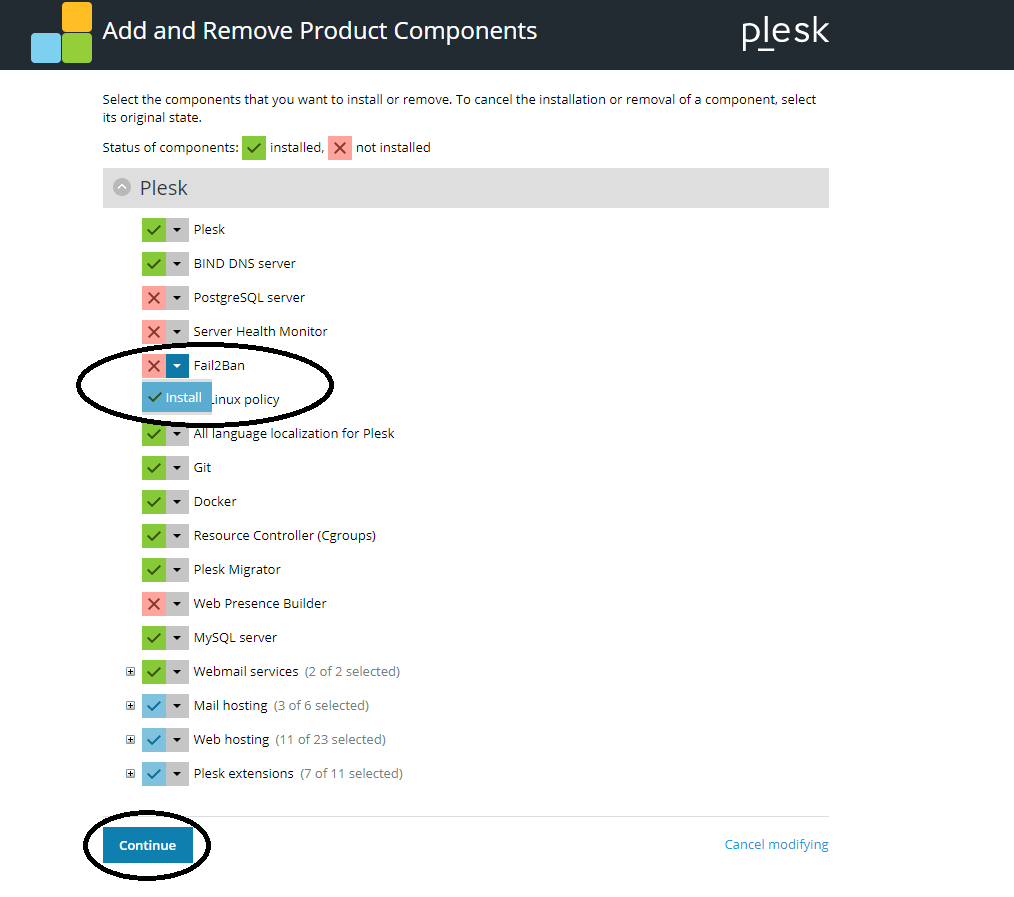
Select the dropdown icon for Fail2Ban and select 'Install'. Click on 'Continue' to install Fail2Ban.
Step 4
You will see a confirmation of the installation.
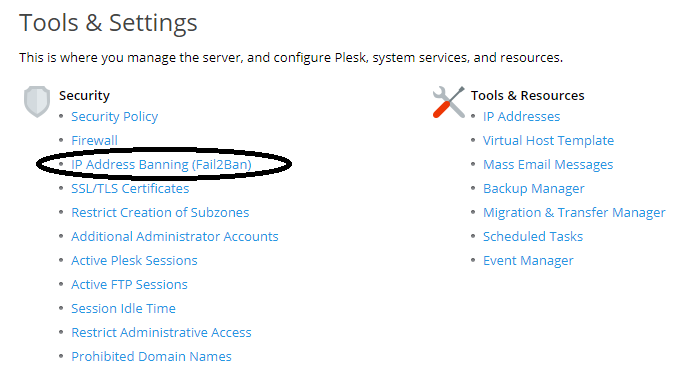
Now return to 'Tools & Settings'> 'Updates and Upgrades'. You will see that a new option has been added under 'Security' called 'IP Address Banning (Fail2Ban)'. Click here to configure Fail2Ban.
Step 5
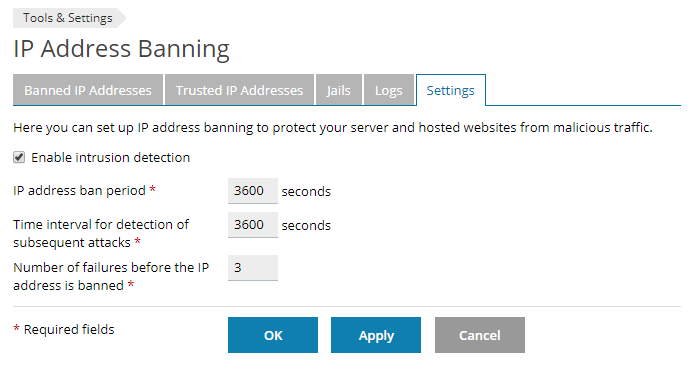
You enable Fail2Ban by ticking 'Enable intrusion detection'. By default, attacking IPs are banned from your VPS for ten minutes. We recommend setting this to one hour as in the screenshot below, but you are free to adjust this as you wish.
Step 6
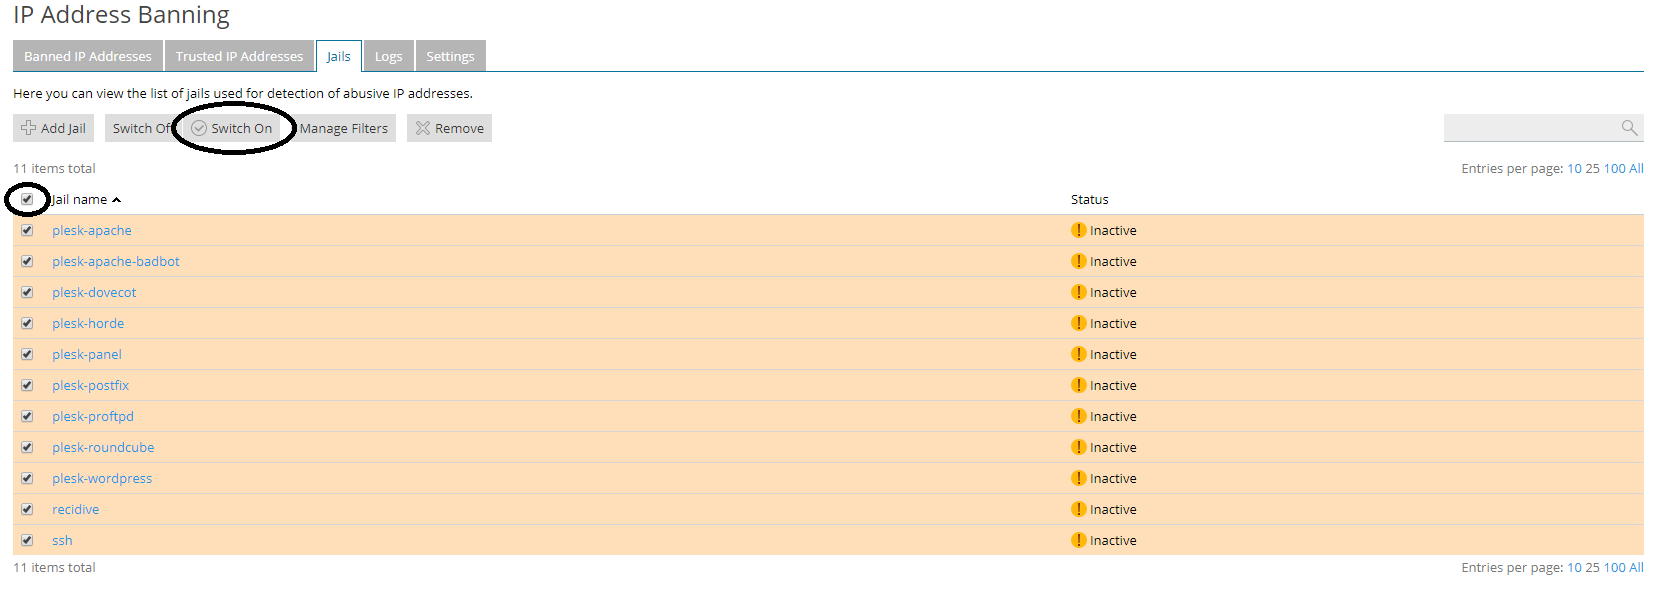
Switch to the 'Jails' tab. A jail can be viewed as a piece of additional configuration within the general configuration of Fail2Ban, in which the security of a service is specified. Select all jails and click on 'Switch On'.
Step 7
Finally, click on 'Trusted IP Addresses'> 'Add Trusted IP' to protect your IP address from which you connect to your VPS. This way you prevent that if you make a mistake in your password, you accidentally ban yourself.
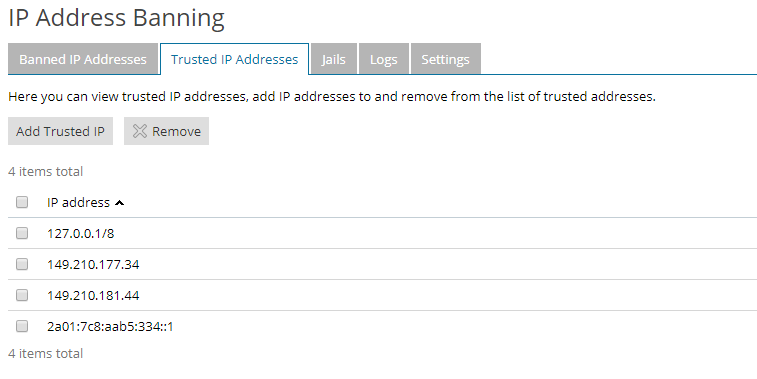
Enter your IP address and click on ‘OK’.
Allow only specific IP adresses access to Plesk
Our VPSs with Plesk standardly use 'iptables' as a firewall and are managed using 'firewalld' (an easier to use tool to manage your firewall). In Firewalld, you can choose to allow specific IPs only to connect to port 8443. Port 8443 is the port you connect to when you use Plesk.
Step 1
Connect with your VPS via the VPS console in your control panel or via SSH. To start, close port 8443 with the command below (i.e. delete port 8443 from the list of open ports):
firewall-cmd --zone=plesk --remove-port=8443/tcp
Step 2
With the commands below, you create an exception for your own IP address so that only your own IP can connect to port 8443.
sudo firewall-cmd --permanent --zone=plesk --add-rich-rule='Replace 1.2.3.4 with your actual IP address. You can repeat these steps to give more IPs access.
Step 3
Reload firewalld to process the changes.
sudo firwall-cmd --reload
Additional tips:
- To modify or verify your configuration directly, you can use the following command:
nano /etc/firewalld/zones/plesk.xml- You will see the overview below.

You can undo the above rules by removing the part from <rule till </rule> and adding the following line:
<port protocol="tcp" port="8443"/>You can also use the steps in this section to close other ports. Do this only when you are very certain, for example if an IP attacks a specific port.
Anti-vius / Malware protection with ClamAV
ClamAV is a free, open source anti-virus program for the detection of trojans, viruses and malware on your VPS.
In our ClamAV tutorial for CentOS 7, 8 and AlmaLinux 8 we show you how to install ClamAV, ensure that ClamAV starts automatically, and ClamAV scans your VPS daily
Plesk security policy
Plesk offers the possibility to set how strict the FTP(S) and password protection is. We recommend being strict in this and not to allow unsafe connections. You adjust this as follows:
Step 1
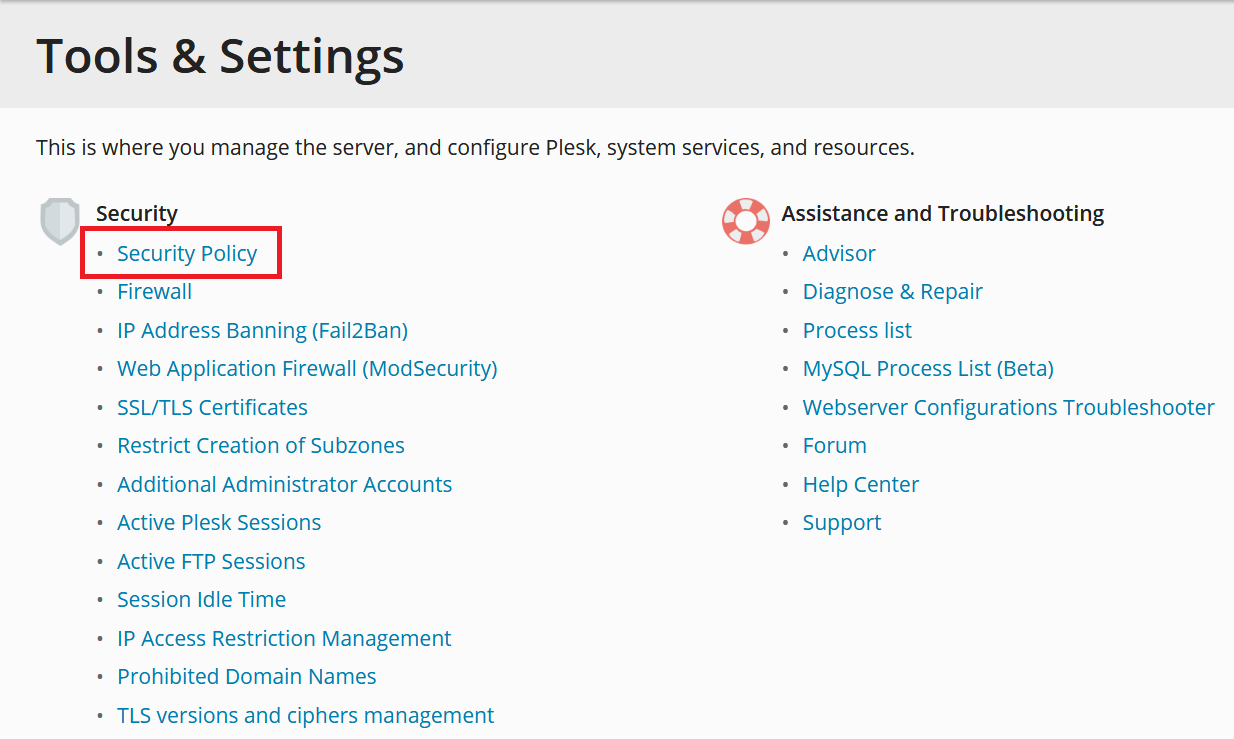
Log in to Plesk and navigate to 'Tools & Settings'> 'Security Policy'.
Step 2
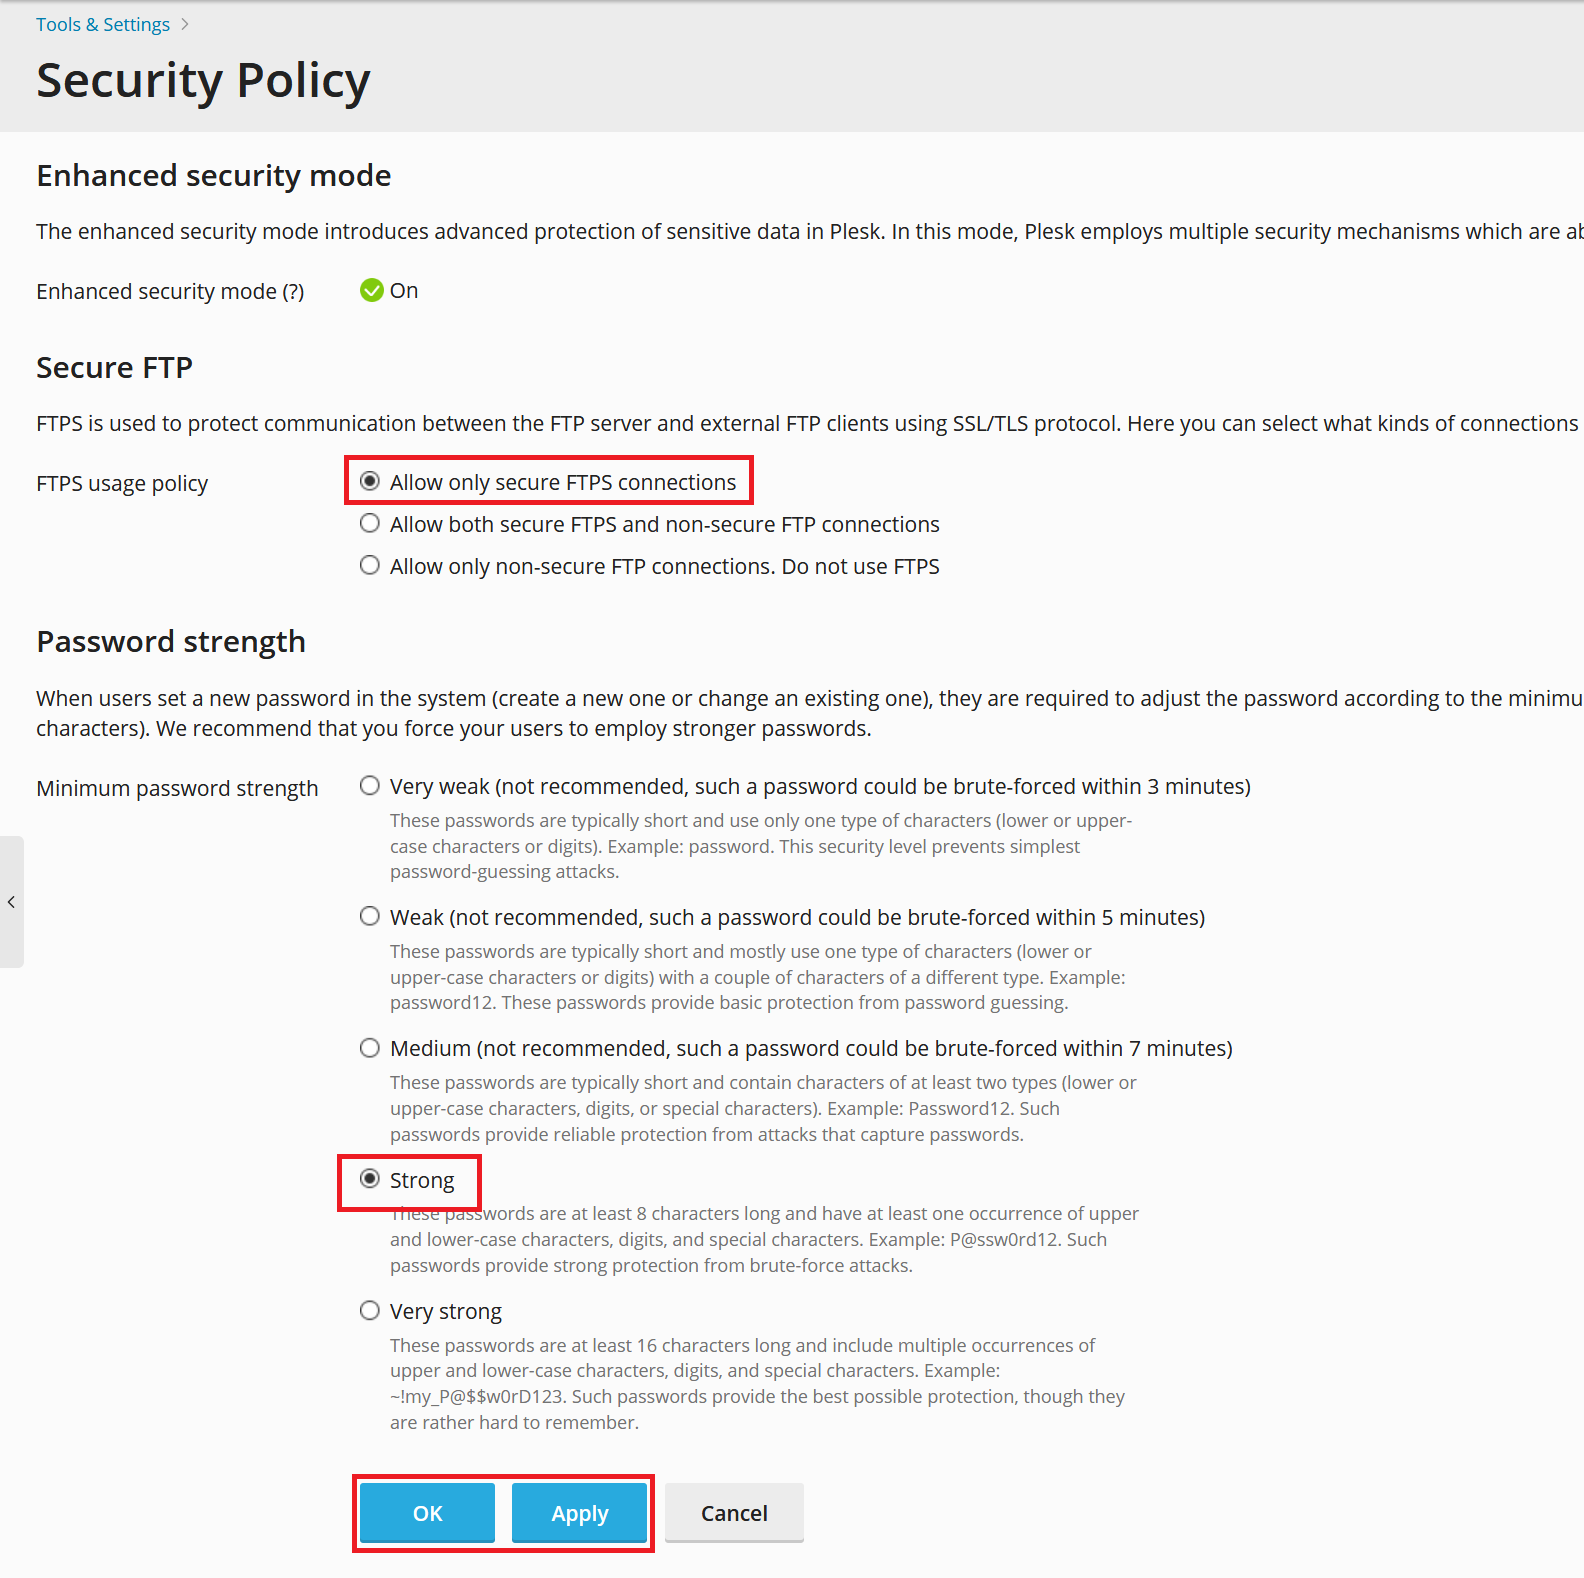
Enhanced security mode must be enabled (green checkmark) to use this functionality. We recommend using the following settings for optimal security:
Prevent access to DNS zones belonging to other users
By default, all users in Plesk can create subdomains and domain aliases in the DNS zones (i.e. the DNS settings of others) of other users, even without access to the relevant account.
This means that users can create websites and email addresses on subdomains and domain aliases of other users. We strongly recommend that you disable this option to prevent, for example, a user from sending phishing on behalf of another user. You disable this option as follows:
Step 1
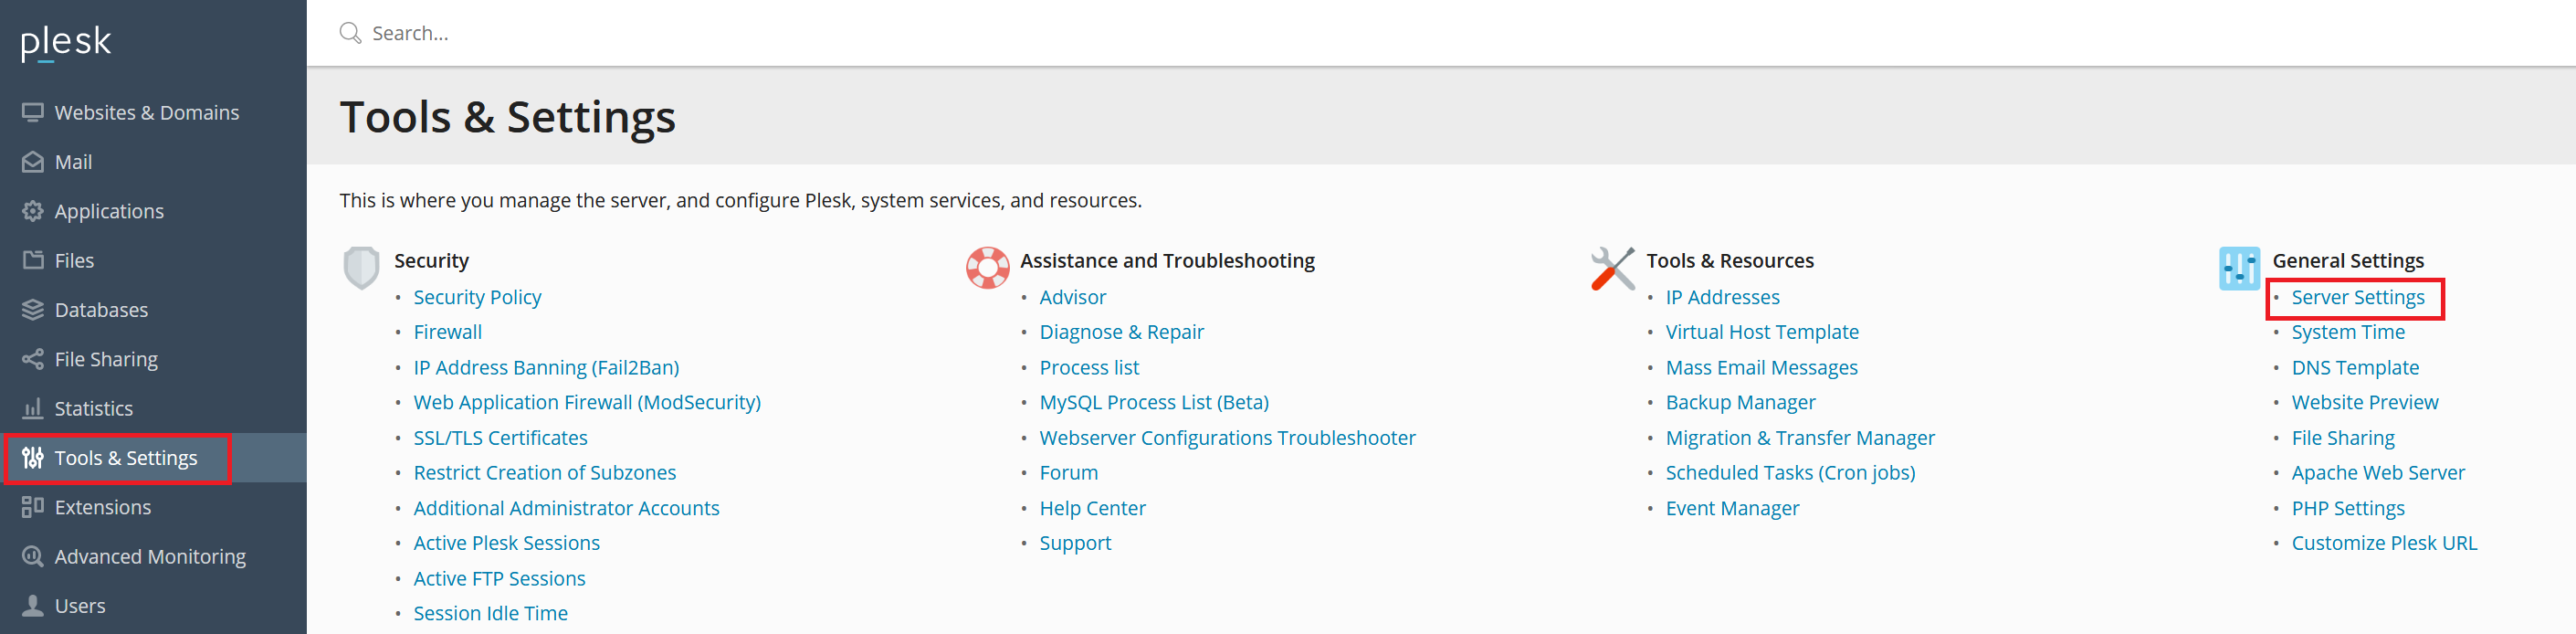
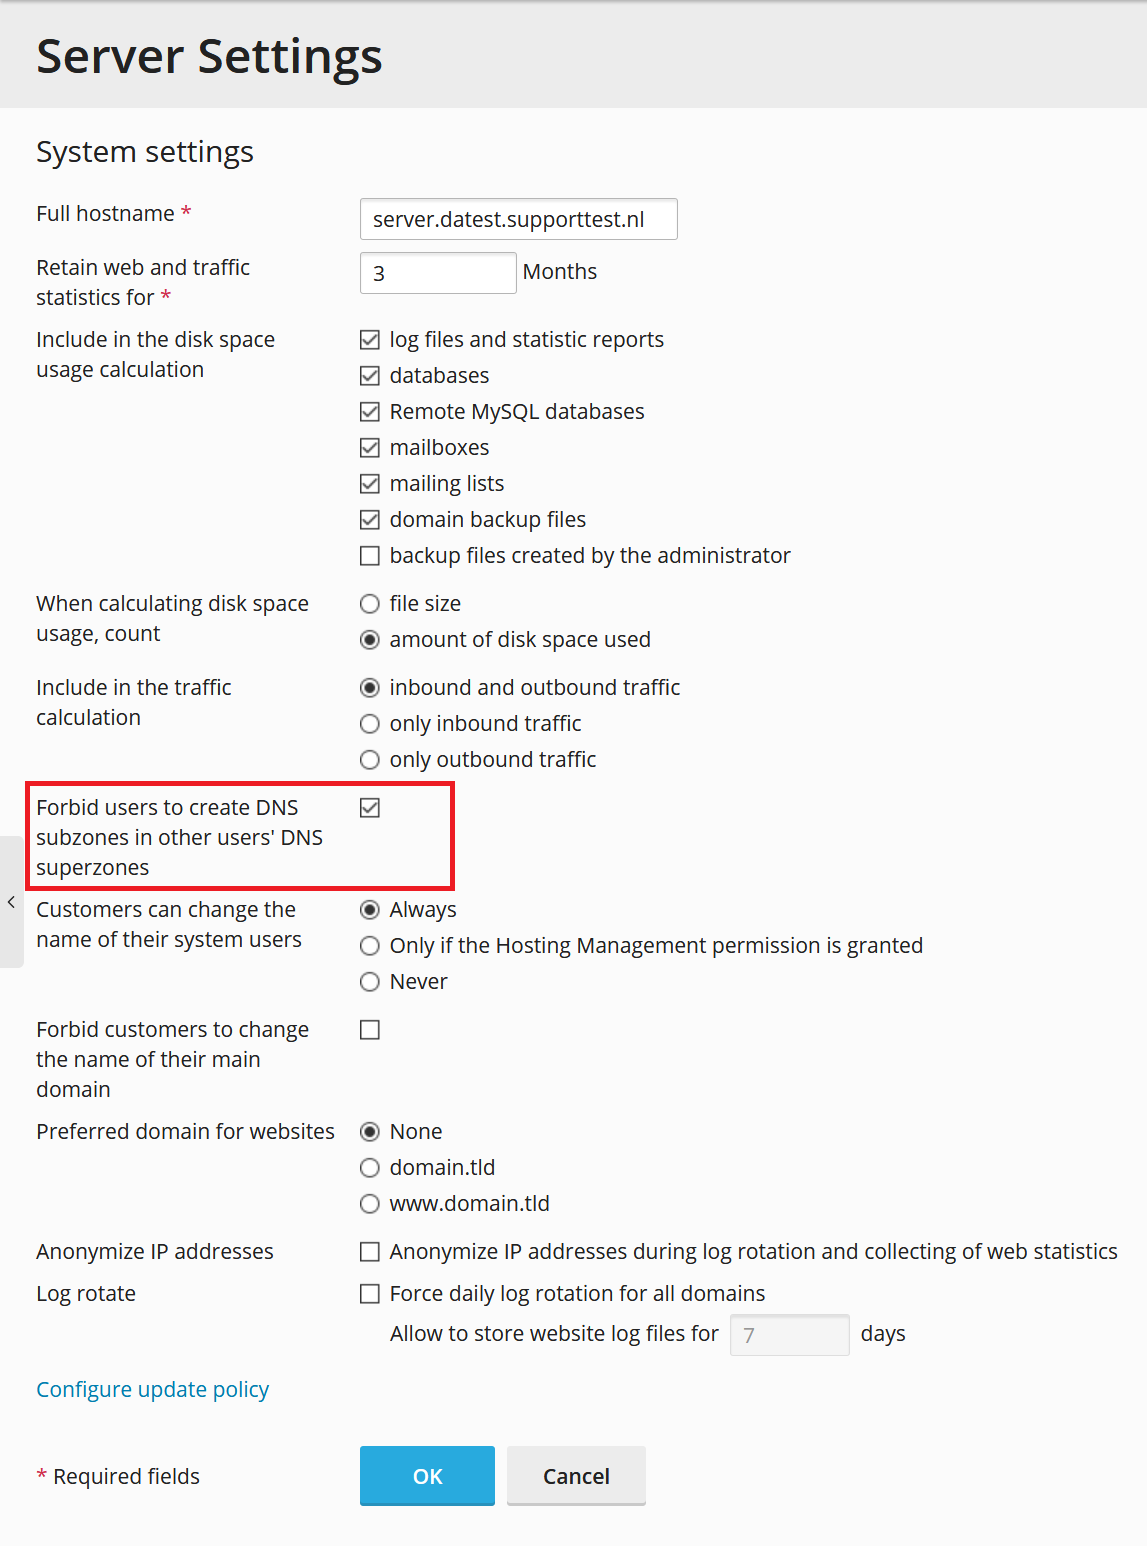
Log in to Plesk as administrator and go to 'Tools & Settings'> 'Server Settings'.
Stap 2
Select the option 'Forbid users to create DNS subzones in other users' DNS superzones' and click on 'OK'.
Securing localhost / e-mail with Let's Encrypt or your own certificate
Your localhost and mail are automatically protected with a self-signed SSL certificate that uses TLS v1.2.
SSL is based on trust. Self-signed certificates are less suitable than Let's Encrypt, or your own SSL certificate, since there is no CA authority issuing the certificate. In the SSL system trust in a self-signed certificate is therefore more limited.
As such, we recommend using Let's Encrypt or your own SSL certificate. How you do this is explained in our article ‘Installing an SSL certificate in Plesk’. In this article we also explain how you secure your website. We get back to this in part 5 of this tutorial series, in which you upload your website and database.
You have set up solid security for your VPS to keep out pesky bots with the above steps! Click here to continue to Part 3: Updating your VPS.