


A pfSense firewall is a good and inexpensive solution to secure your network. One of the tools you can use for this is to route traffic to a specific port of a VPS through your pfSense firewall via port forwarding. We'll show you how that works in this guide. Here, we explain how you can run all the traffic from your VPSs through a pfSense firewall using a VPN connection.
TL;DR: route specific traffic from your VPSs through your pfSense firewall by configuring port forwarding rules in pfSense under 'NAT' and on the VPSs on your private network the public IP of the pfSense firewall as the default gateway configure.
- The steps in this tutorial require at least: one X1-VPS with pfSense, a second VPS, and a private network to which both are added.
- For this tutorial, we assume that you've gone through our pfSense installation guide.
Step 1
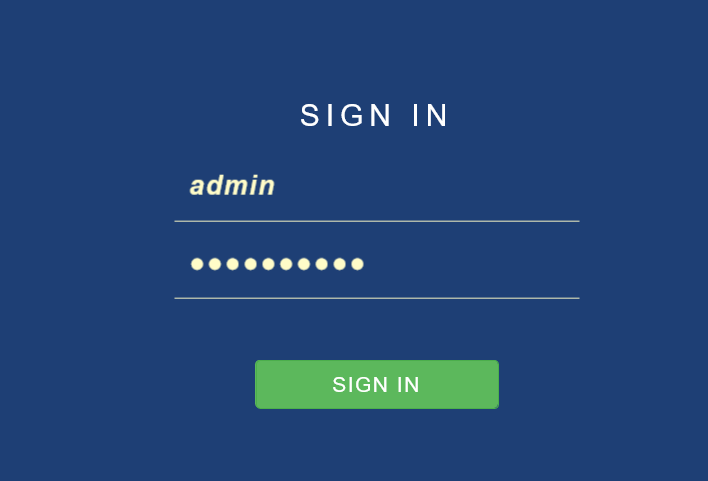
Log in to the pfSense web interface.
Step 2
Click 'Firewall' > 'NAT' in the menu at the top. You will automatically be taken to the 'Port Forward' tab. Click the left 'Add' button (the Add buttons only determine the placement of the rule in the 'Port Forward' overview).

Step 3
Adjust the following values on this page and click 'Save':
-
Destination port range: Specify the port or port range from which you want to forward traffic to your VPS. Instead of 'Other' you can also select a protocol for which the ports have already been determined. In this example we choose 'Other' for a custom RDP port.
-
Redirect target IP: Enter the IP address of the VPS you want to forward the traffic to.
Please note: You can specify multiple IP addresses, for example of a number of RDS- Session Hosts. Traffic is then forwarded to a VPS in round-robin style. However, pfSense does not recommend this because pfSense is not ideal for such load balancing. For example, if a server is down, traffic is still forwarded to it.
- Redirect target port: Specify the port of the VPS to which the traffic should be forwarded. For a port range you specify the first port, pfSense calculates the range automatically based on the 'Destination port range' (1).
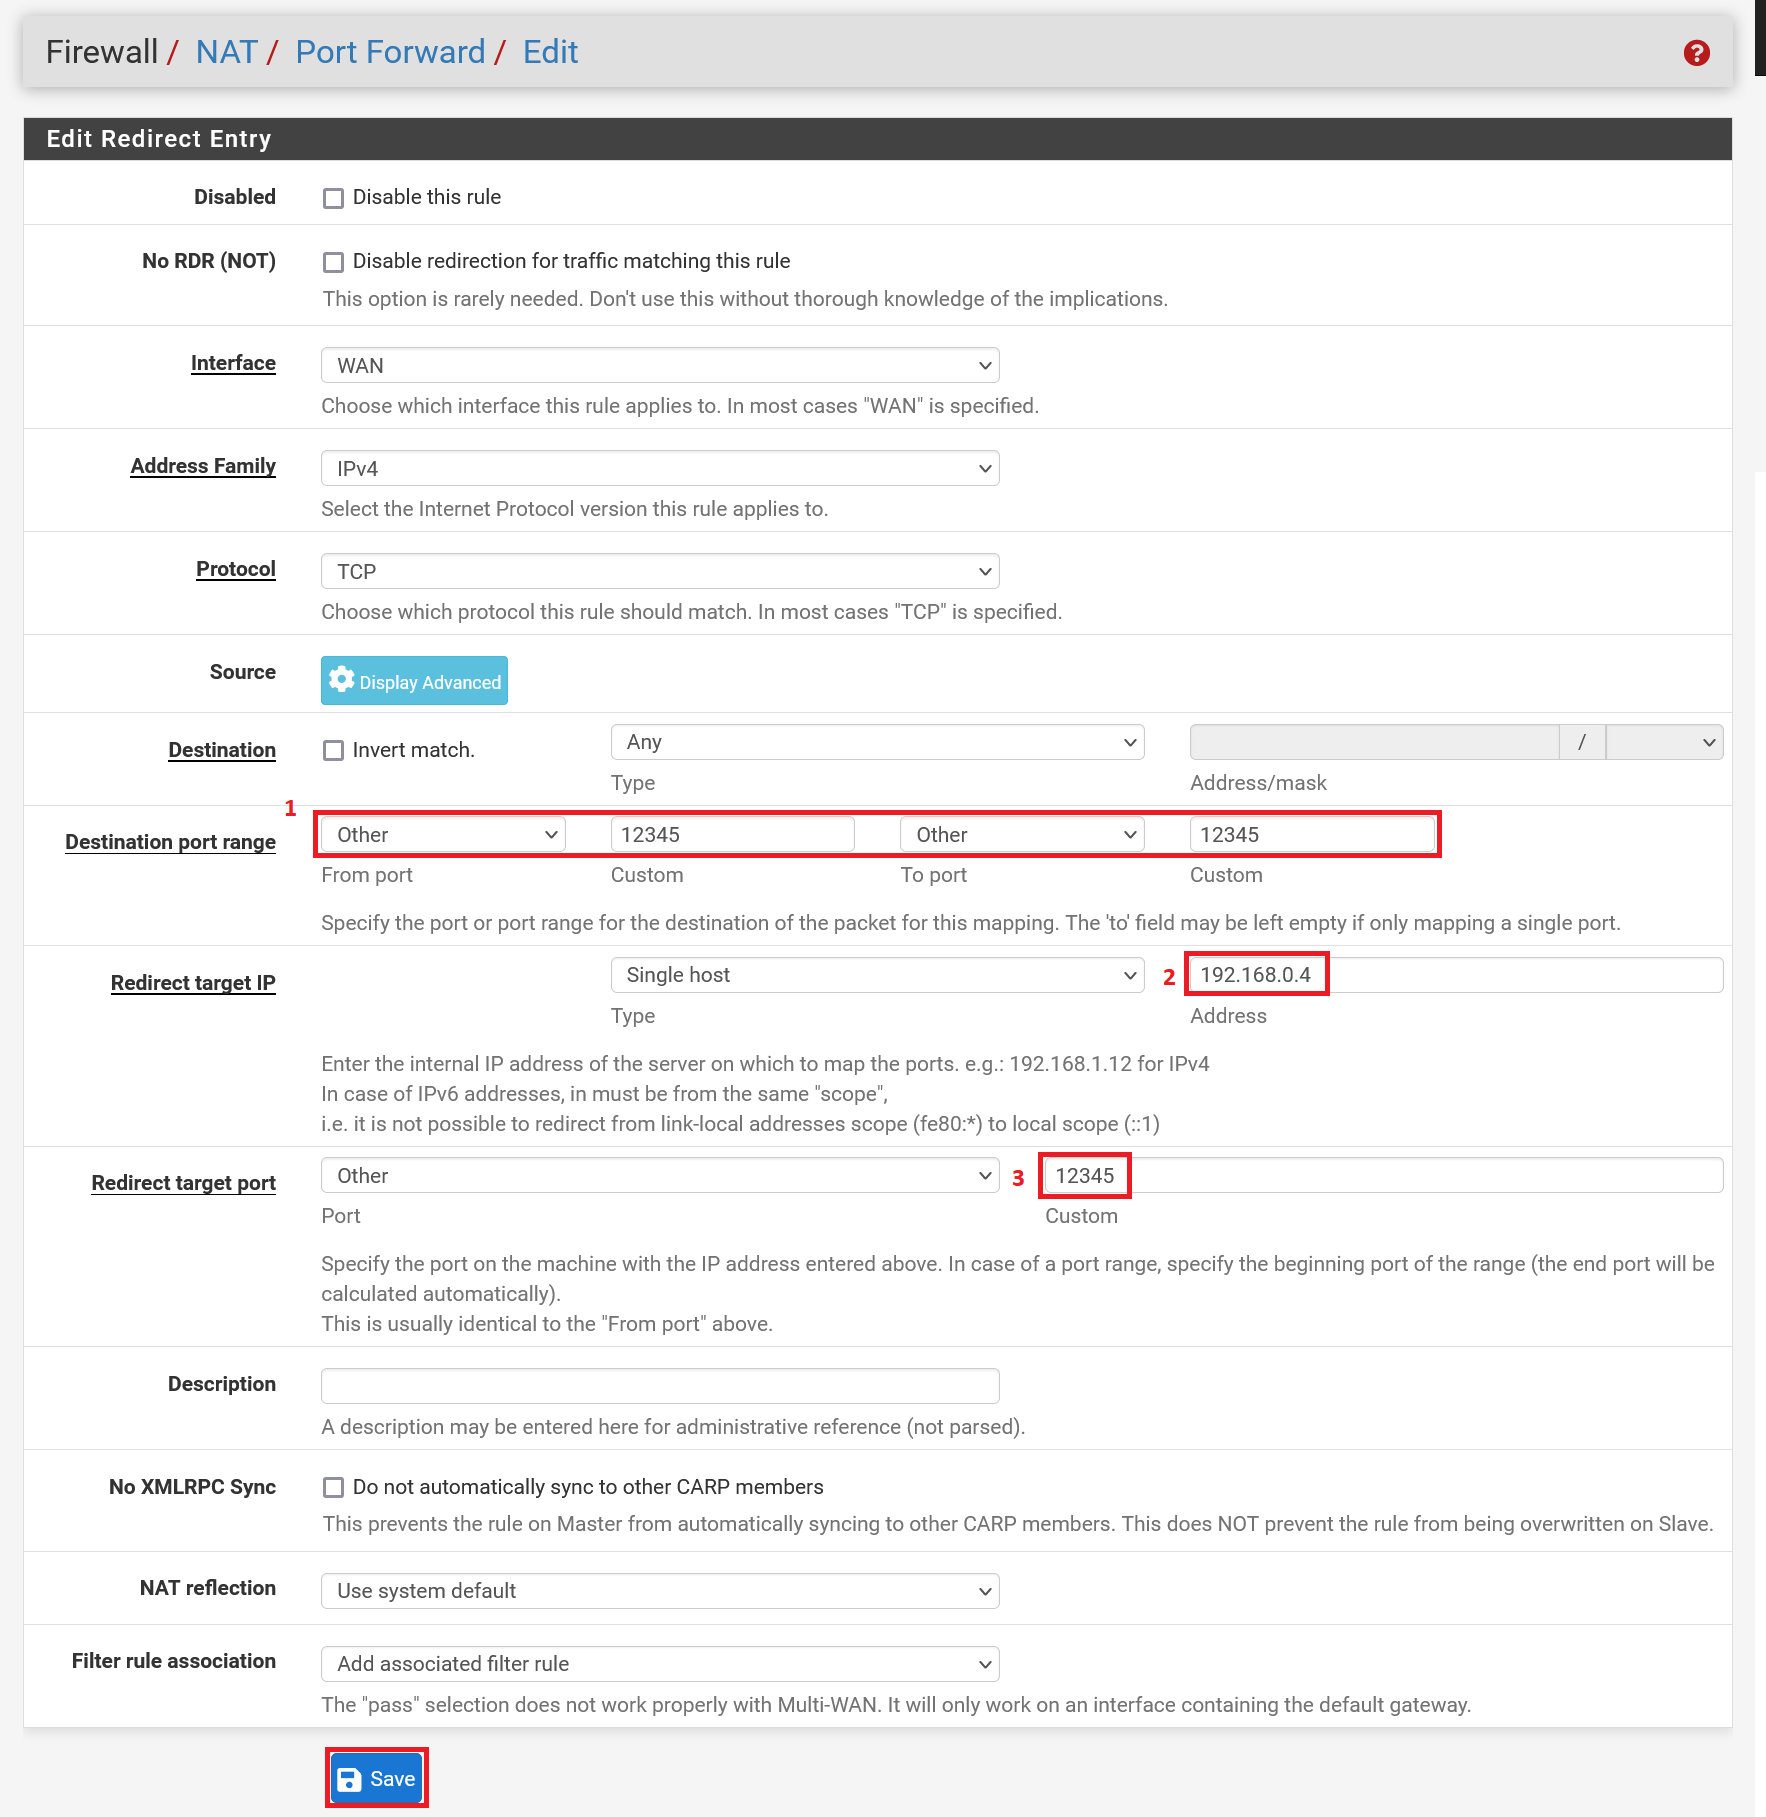
Repeat this step for each VPS for which you want to route traffic from a port through your pfSense Firewall.
Step 4
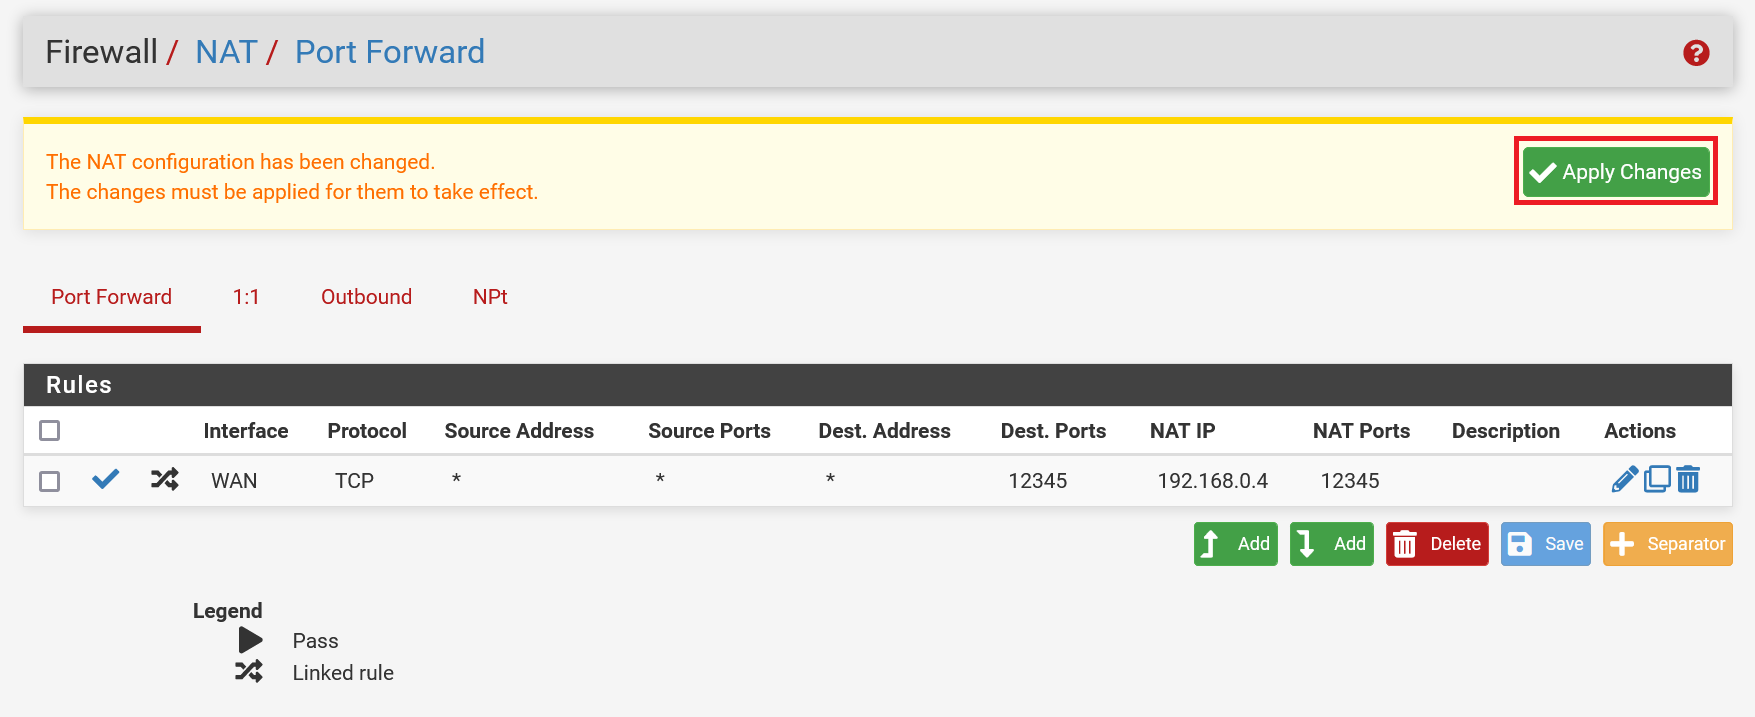
Finally, click 'Apply changes' to apply the changes and continue with the 'Adjust default gateway' section for the operating system you are using.
Customising Default Gateway - Windows
Step 1
Connect to your VPS via Remote Desktop or the VPS console.
Step 2
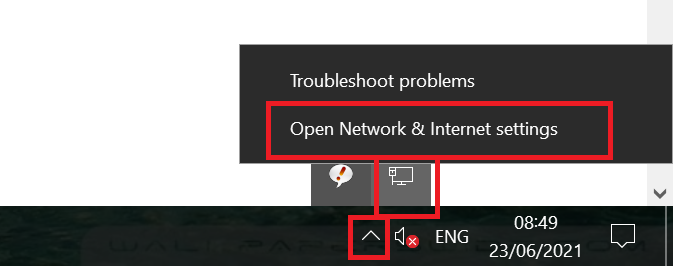
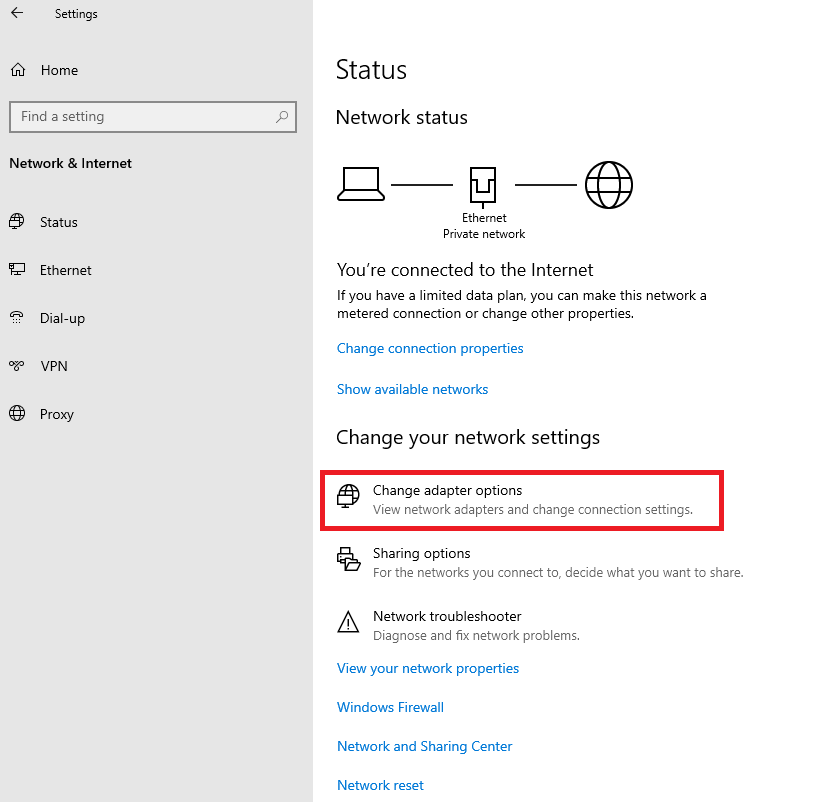
Right-click the network icon at the bottom right of your screen and select 'Open Network & Internet settings'. You may have to click the up arrow (see screenshot) to make the icon visible.
Step 3
Click 'Change Adapter Options'.
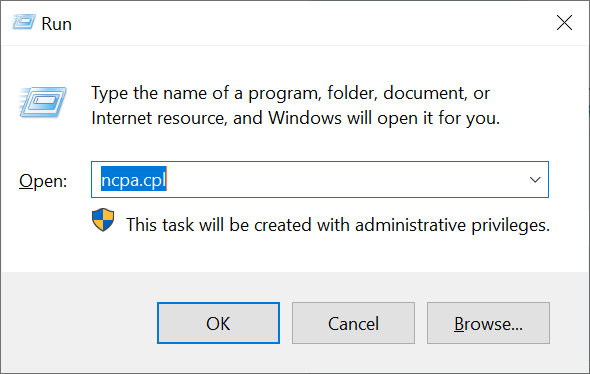
Is this option missing in your version of Windows/Windows Server? Then simultaneously press the Windows start button + R and type 'ncpa.cpl' in the screen that appears and press 'OK'.
Step 4
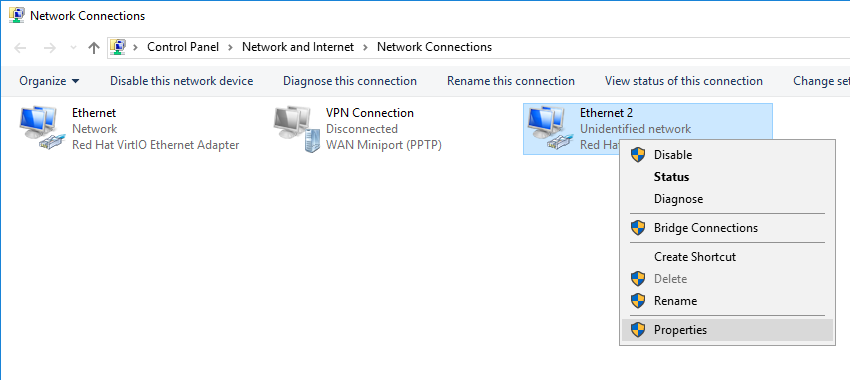
Right click your secondary network adapter (that of your private network) and select 'Properties'.
Step 5
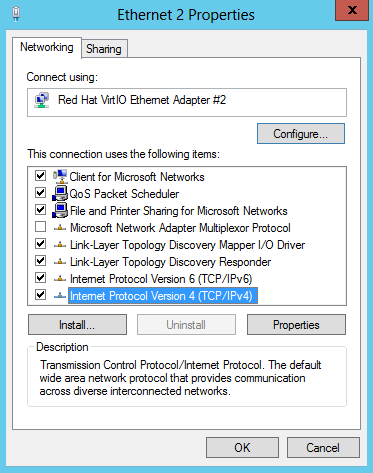
Double click 'Internet Protocol Version 4 (TCP / IPv4)' or select 'Internet Protocol Version 4 (TCP / IPv4)' > 'Properties'.
Step 6
Configure your private network adapter as follows and click 'OK' twice to apply the changes:
- Choose a local IPv4 address within the same subnet as your pfSense firewall (see step 11 of our pfSense installation guide).
- The subnet is automatically set to 255.255.255.0. Do not adjust this.
- Set the local IPv4 address of your pfSense firewall as the default gateway.
- Set up the DNS servers. In this example we are using TransIP's: 195.8.195.8 and 195.135.195.135 but you are free to use another one, for example Google's: 8.8.8.8 and 8.8.4.4.
Please note: When using an Active Directory, you normally use the IP address of your Windows DNS server here.
Step 7 – Optional
You are now back in the 'Network Connections' screen. If you don't need your public network connection (i.e. you only use the ports you've set up port forwarding for via the steps in this article), you can now turn off your public internet connection.
Right click your public network adapter and select 'Disable'. Please note: you will now lose your connection to your VPS and can only access it from the TransIP control panel via the console.
Customising Default Gateway - Ubuntu 18.04+
To adjust the default gateway in Ubuntu 18.04 or newer, you largely follow the same steps as for setting an internal IP address, see our internal IP tutorial. In the static configuration you only add the gateway and possibly a DNS server:
Step 1
Open your network configuration:
nano /etc/netplan/01-netcfg.yaml
Step 2
Adjust the configuration of your private network adapter at the bottom of the opened file, see the explanation below the code. Your private network adapter will probably be named ens7.
ens7:
  dhcp4: no
  addresses:
   - 192.168.0.2/24
  gateway4: 192.168.0.1
- Replace 192.168.0.2 with the private IPv4 address of the VPS. It is important that it fits in the same subnet as your pfSense firewall.
- Replace 192.168.0.1 with the private IPv4 address of your pfSense firewall.
Step 3
Save the changes and exit nano (ctrl + x > y > enter). Process the changes with the command:
sudo netplan apply
Step 4 – Optional
If you don't need your public network connection (i.e. you only use the ports you've set up portforwarding for via the steps in this article), you can block all traffic to your public interface. One method to achieve this is by allowing your firewall to only allow traffic to specific ports on your public interface from the IP address of your pfSense firewall, see our guide to using Ubuntu's UFW firewall.
Customising Default Gateway - CentOS 7
To adjust the default gateway in CentOS 7 or newer, you largely follow the same steps as for setting an internal IP address, see our internal IP tutorial. In the static configuration you only add the gateway and possibly a DNS server:
Step 1
Open your network configuration, for example:
nano /etc/sysconfig/network-scripts/ifcfg-eth1
Step 2
Adjust the configuration of your private network adapter at the bottom of the opened file, see the explanation below the code. Your private network adapter will probably be named ens7.
DEVICE=eth1
ONBOOT=yes
NETBOOT=yes
BOOTPROTO=static
IPADDR=192.168.0.2
NETMASK=255.255.255.0
GATEWAY=192.168.0.1
ZONE=public
- Replace 192.168.0.2 with the private IPv4 address of the VPS. It is important that it fits in the same subnet as your pfSense firewall.
- Replace 192.168.0.1 with the private IPv4 address of your pfSense firewall.
Step 3
Save the changes and exit nano (ctrl + x > y > enter). Process the changes with the command:
systemctl restart network
Step 4
If you don't need your public network connection (i.e. you only use the ports you've set up portforwarding for via the steps in this article), you can block all traffic to your public interface. One method to achieve this is by allowing your firewall to only allow traffic to specific ports on your public interface from the IP address of your pfSense firewall, see our guide to using CentOS's Firewalld firewall.
Customising Default Gateway - Debian 10 +
To adjust the default gateway in Debian 10 or newer, you largely follow the same steps as for setting an internal IP address, see our internal IP tutorial. In the static configuration you only add the gateway and possibly a DNS server:
Step 1
Open your network configuration:
nano /etc/network/interfaces
Step 2
Adjust the configuration of your private network adapter at the bottom of the opened file, see the explanation below the code. Your private network adapter will probably be named ens7.
auto ens7
iface ens7 inet static
  address 192.168.0.2
  netmask 255.255.255.0
  gateway 192.168.0.1
- Replace 192.168.0.2 with the private IPv4 address of the VPS. It is important that it fits in the same subnet as your pfSense firewall.
- Replace 192.168.0.1 with the private IPv4 address of your pfSense firewall.
Step 3
Save the changes and exit nano (ctrl + x > y > enter). Process the changes with the command:
sudo netplan apply
Step 4
If you don't need your public network connection (i.e. you only use the ports you've set up portforwarding for via the steps in this article), you can block all traffic to your public interface. One method to achieve this is by allowing your firewall to only allow traffic to specific ports on your public interface from the IP address of your pfSense firewall, see our guide to using Debian's UFW firewall.
This brings us to the end of this guide to port forwarding in pfSense.