


If you need more space in your web hosting package but are not ready for a larger package, you can choose to take a critical look at the space you are currently using. For example, you can delete unused mailboxes, databases or files if you are sure you no longer want to keep them.
In this article, we explain what options you have to save space on your web hosting package so that you have more free space. You have 3 options:
- You can delete files on the web hosting package
- You can shrink or delete database(s)
- You can reduce or delete mailbox(es)
We will discuss these options one by one in this article. In addition, we will also show you how to delete mail forwards, even if they don't take up web space.
Before you delete anything on your web hosting package, we strongly recommend that you check whether the items you're planning to delete are important or still in use. In addition, it is strongly recommended to create a local backup of your files, databases and emails before deleting anything. If you delete an email address, database or files from your web hosting package, they will be removed immediately and can not easily be recovered.
Our web hosting packages naturally include automatic backups, but you cannot retrieve individual files, databases or emails from such a backup. Restoring a backup in your control panel would overwrite everything in your web hosting package.
Creating a backup of your files
To make sure you do not accidentally lose important files when you start deleting files, you can create a backup of your files before taking any further action.
With the help of a SFTP-program of your choice you can easily create a local backup of your files. In this article we use Filezilla.
If you use another program (like for example Cyberduck), the steps are similar. If you can't quite figure out how to do this with your SFTP-progam, we recommend that you consult the documentation of your SFTP-program.
Step 1
Log in to Filezilla. You can read more about this in the article 'How to use SFTP with Filezilla'.
Step 2
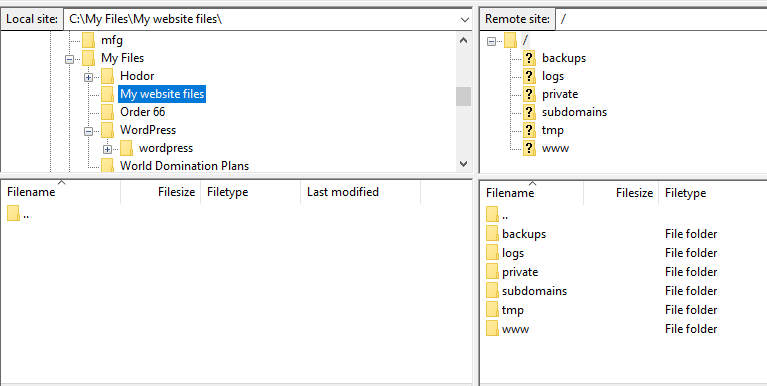
In the left column click on the folder where you want to save your backup. In our example we use the folder named 'My website files'.
Step 3
In the right colum right-click on your 'www'-folder and click on 'Download'.
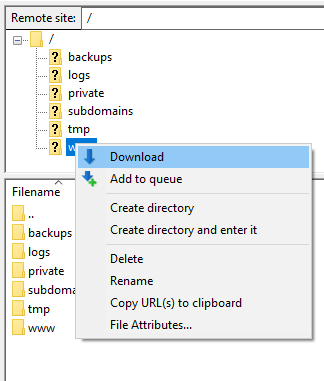
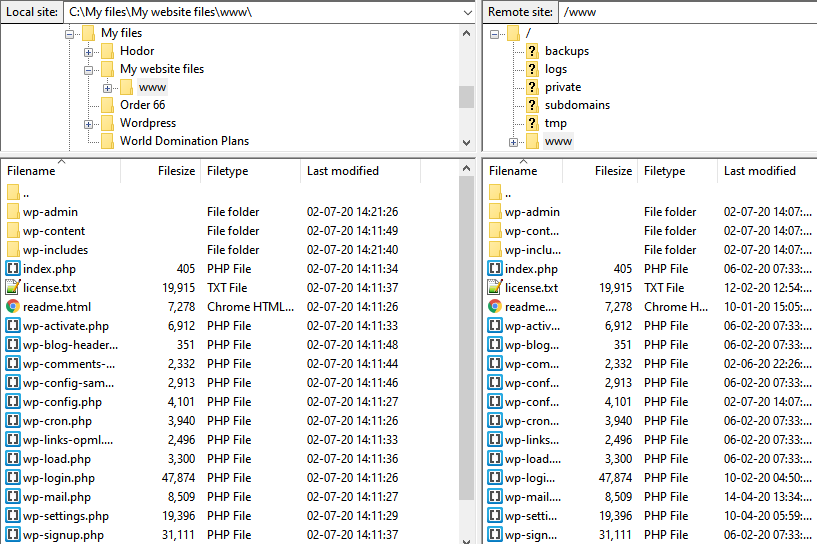
The folder 'www' and the files contained therein will now be downloaded to the folder you selected in the left column. After the download is complete, you have backed up your website files.
If you have files in other folders (such as for example 'subsites' or 'restored-backups') you can download these in the same way. In that case, make sure to save these files in a seperate local folder.
Deleting files
You can now check within the 'www' folder if there are files that you no longer want or no longer need. If you are not sure whether a file is used by your website, do not delete the file and first check this with the creator of the CMS or the plugins / themes you use.
If you wish to completely delete your website, then you can delete all files in the folder 'www'. After that your website will no longer be accessible to visitors.
If you have files in other folders (such as for example 'subsites' or 'restored-backups') you can delete them in the same way if you no longer need them. Therefore make sure to also check these folders.
As mentioned before: Make sure you have created a local backup of your files before you delete files from your web hosting package. This to secure any important files from being lost by accidental deletions, as these cannot easily be recovered.
Checking your database(s)
In your controlpanel you can see which database(s) you currently have in your web hosting package. You can find this overview as follows:
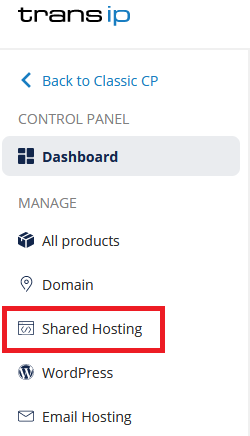
Log in to the control panel and click 'Shared Hosting' in the menu. Next, select your domain below 'Products'.
Click on the 'Site' tab and then 'Databases'.
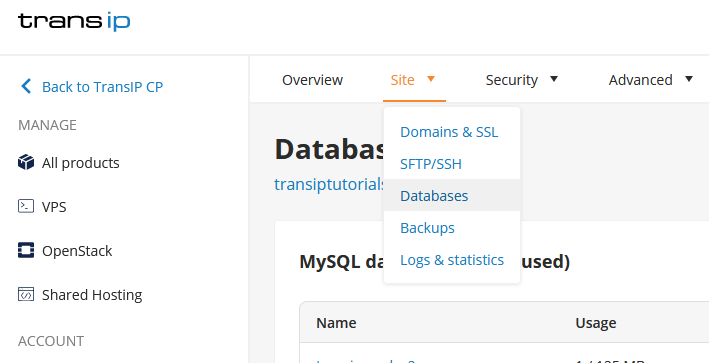
You will find an overview of your databases here. Next to the database name, the data usage and status are shown.

Creating a backup of your database(s)
Your database contains the data of your website. If you have multiple subdomains, it is possible that you have created separate databases for the websites on your subdomains. Then the additional databases will contain the data for the websites of your subdomains. Since a website will not function after deleting its database, it's recommended to make a backup to prevent accidentally deleting an important database.
Step 1
You can make a backup of your database directly via the database overview page in the control panel. To do so, click on the three dots next to the database and click 'View backups'. You will now see an overview of your database backups. Click the 'Download' button to download the preferred backup.
If you want more advanced options when making your backup, follow the steps below.
Click the three dots next to the database and click 'Open phpMyAdmin' to automatically login to phpMyAdmin.
Step 2
When you are logged in to phpMyAdmin, you will see the screen as shown below. In this example we have installed WordPress, therefore the database that was made when installing WordPress is shown.
If you have uploaded a website and database yourself, you will see that data instead. The steps for making a backup are equal in both situations.
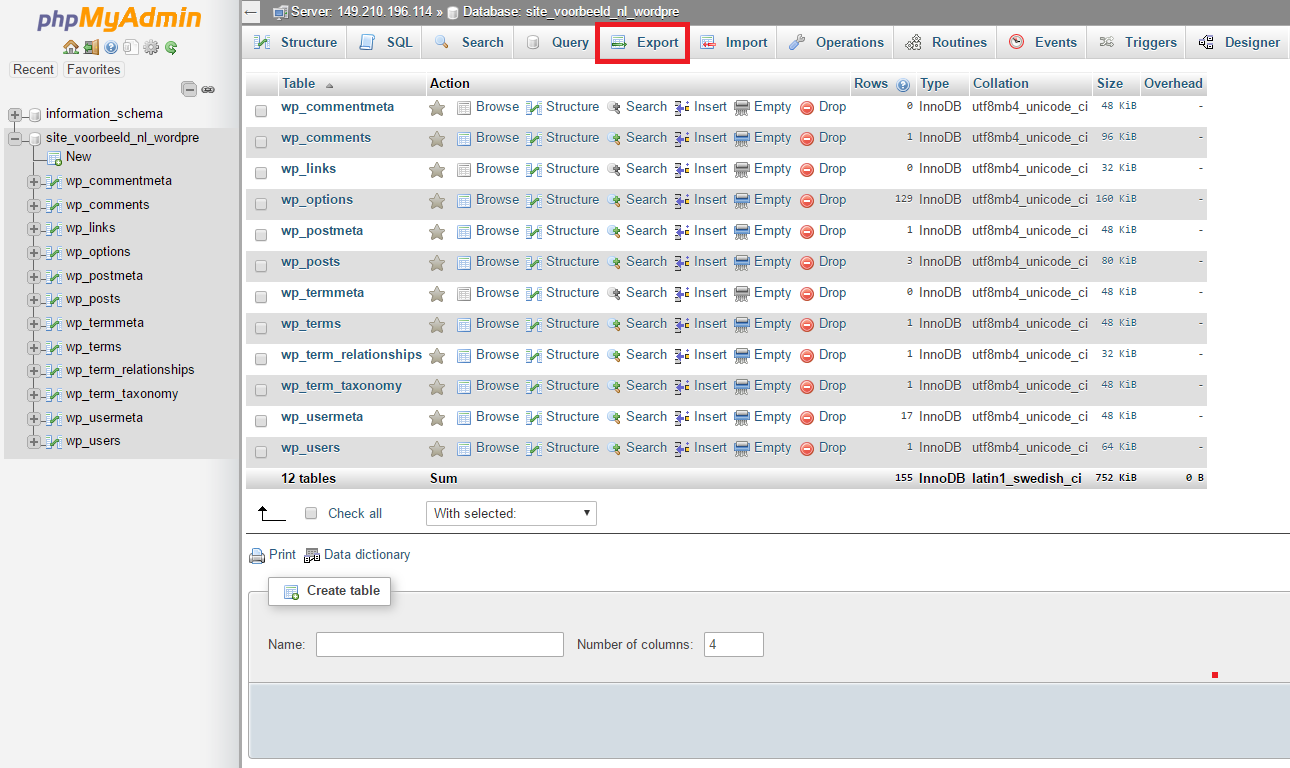
Make sure the database is selected by clicking it in the left column. Our database is called "site_voorbeeld_nl_wordpre". Click the 'Export' button, which is marked red in the image.
Step 3
You can now choose your Export method.
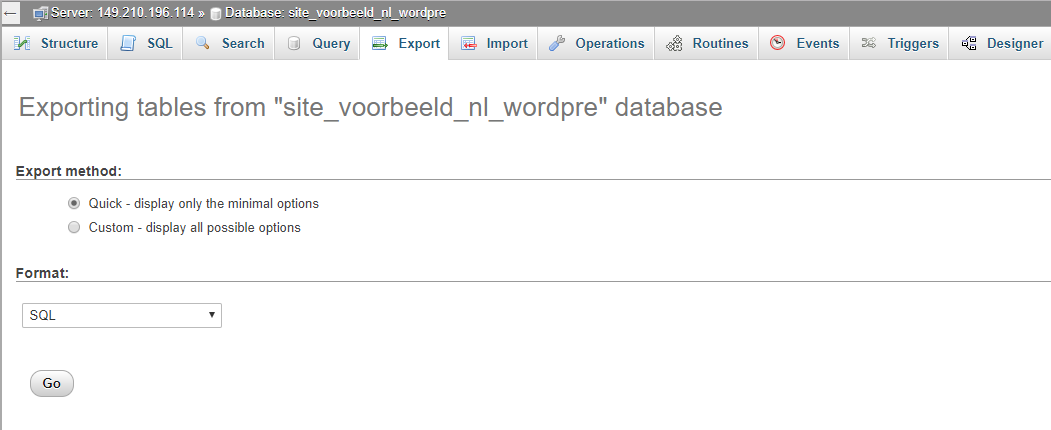
Pick the 'Quick' method and the 'SQL' format and click 'Go'. The backup will now be downloaded. Remember where you saved it, you may need it later.
Shrinking your database(s)
You can choose to shrink your database. Shrinking a database is only possible if the database has not yet filled all of the allocated space for that database. You can not make a database smaller than the sum of all the data it contains.
Warning: if you make a database so small that no new data will fit in the database, this will lead to problems on your website.
Shrinking your database can be done as follows:
Step 1
First check how much space your database is actually using.
Log in to the control panel and click 'Shared Hosting' in the menu. Next, select your domain below 'Products'.
Click on the 'Site' tab and then 'Databases'.
Click the three dots next to the database and click 'Open phpMyAdmin' to automatically login to phpMyAdmin.
After logging in you can click on the name of your database on the left side.
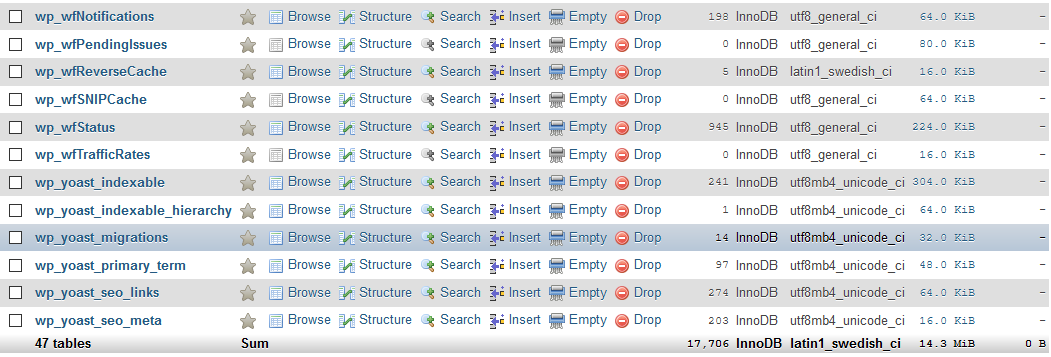
You will now see an overview of the tables within your database. In this overview you will see the total actual size of your database at the bottom-right of the tables. In our example this is 14,3 Mb.
Remember that you cannot shrink your database smaller than this size. It is strongly advised to keep enough extra space for your database to grow when you start shrinking the allocated space in the next steps. Otherwise you risk your website not functioning properly anymore.
Step 2
Log in to the control panel and click 'Shared Hosting' in the menu. Next, select your domain below 'Products'.
Click the 'Site' tab at the top, followed by 'Databases'.
Step 3
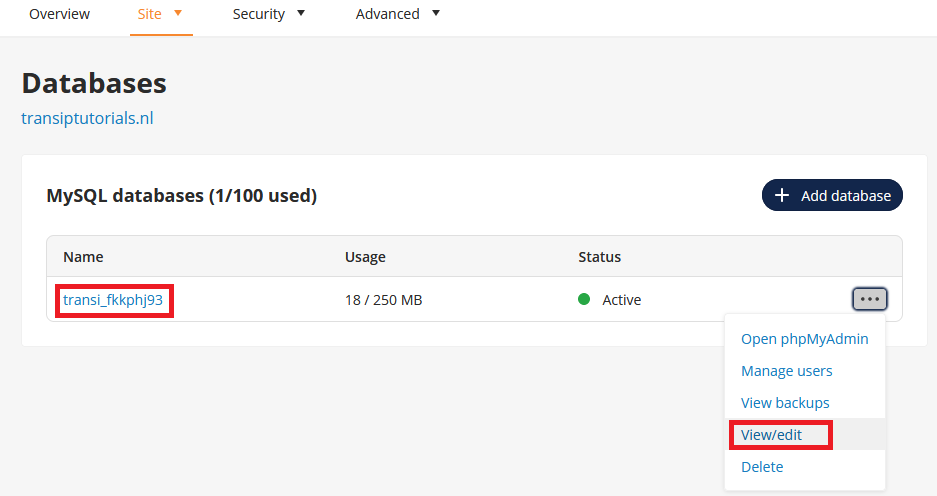
You will now see the overview of your databases. Click on the name of your database or click the three dots -> 'View/edit'.
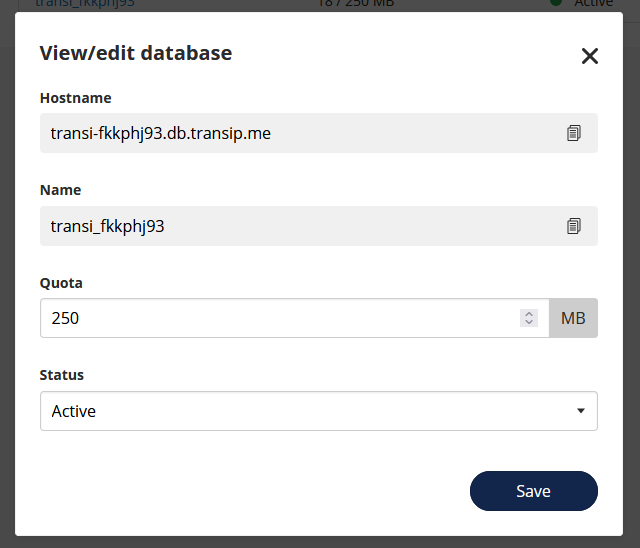
Step 4
Here you can view the details of your database, and edit the size by changing the number below 'Quota'.
When you are done, click 'Save'.
Deleting your database(s)
You can look at the databases in your web hosting package to see if there is a database that you are no longer using and don't want to keep anymore. If you are not sure whether a database is used by your website, do not delete the database and first check the configuration file of your website to see which database is in use. When in doubt it is beter to keep the database and not delete it to avoid your website suddenly becoming inaccessible.
If you wish to completely delete your website, then you can delete the database. After that your website will no longer be accessible to visitors.
Deleting a database can be done by clicking the three dots to the right of the database and selecting 'Delete'.
As mentioned before: Make sure you have created a local backup of your database(s) before you delete your database(s) from the web hosting package. This to secure any important data in a database from being lost by accidental deletions, as this cannot easily be recovered.
Checking your email address(es)
In your controlpanel you can see which email address(es) you currently have in your web hosting package. This applies to both mailboxes as well as mail forwards. With mailboxes you can also see the allocated space for each mailbox. You can find this overview as follows:
Step 1
Visit the control panel and click 'Email Hosting' in the menu on the left. Next, select your domain name below 'Products'.

Step 2
On the overview page you can see all your mailboxes. The amount of used space is visible right next to every mailbox.

Create a backup of your mailbox(es)
To create a backup of your mailboxes, use one of the following tutorials:
Deleting your mailbox(es)
You can delete a mailbox if you no longer want to use or keep the mailbox. When you delete a mailbox this means all emails in that mailbox will be entirely deleted. You can delete a mailbox as follows:
As mentioned before: Make sure you have created a local backup of your email before you delete your mailbox(es). This to secure any important emails from being lost by accidental deletions, as these cannot easily be recovered.
Go back to the overview of your mailboxes and click the three dots to the right of the mailbox you want to delete. Click ‘Delete’ to permanently delete your mailbox and its contents.
