


After adding extra disk space to your Windows VPS, this extra space must first be allocated to a partition before your OS can use it. After upgrading your VPS package or expanding your SSD, this extra space will not be immediately visible within Windows Server.
In this guide, we will show you how to allocate this extra SSD space to a new partition.
- For expanding your existing partition (i.e. the C drive, see this guide).
- The steps in this guide have been tested on Windows Server 2019.
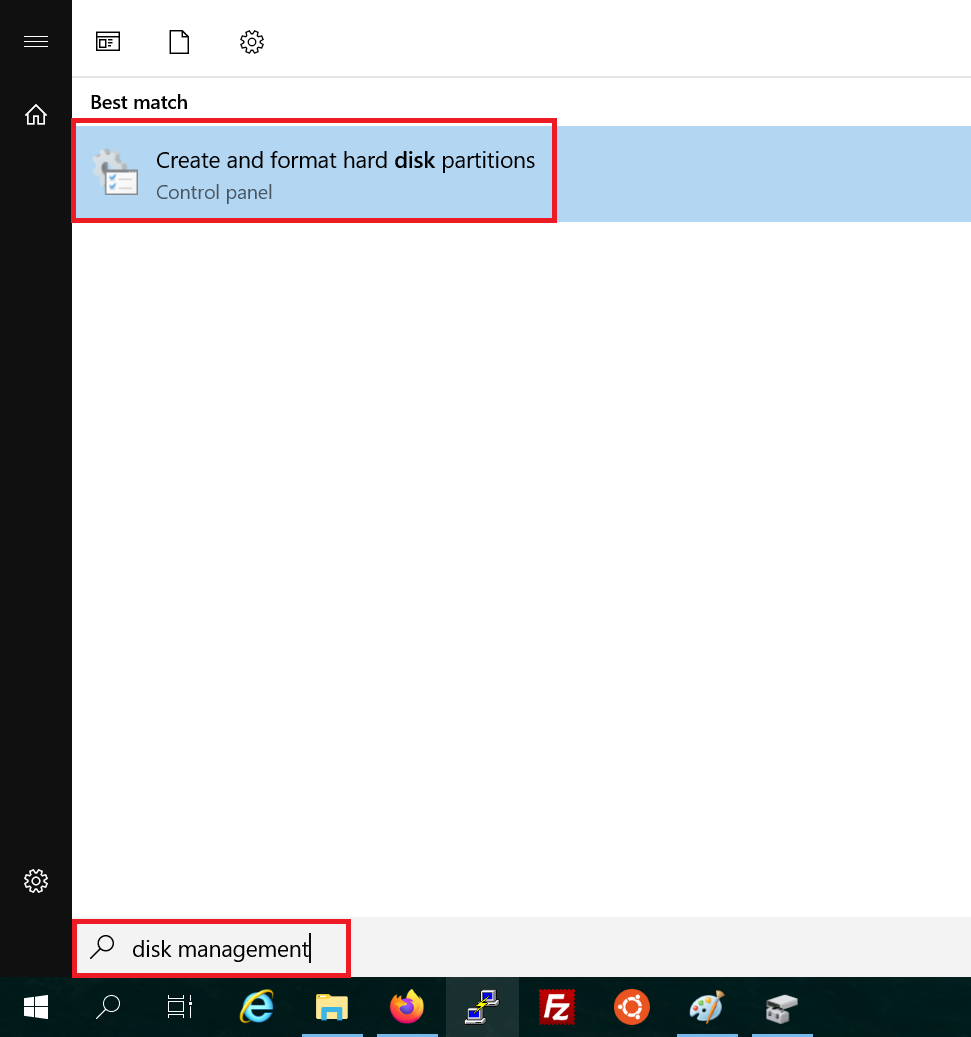
Step 1
Click on the Windows 'Start' button, search for 'Disk Management', and click on the result.
Step 2
Click on 'Action' > 'Rescan disks' in the menu at the top to check how much space is available.
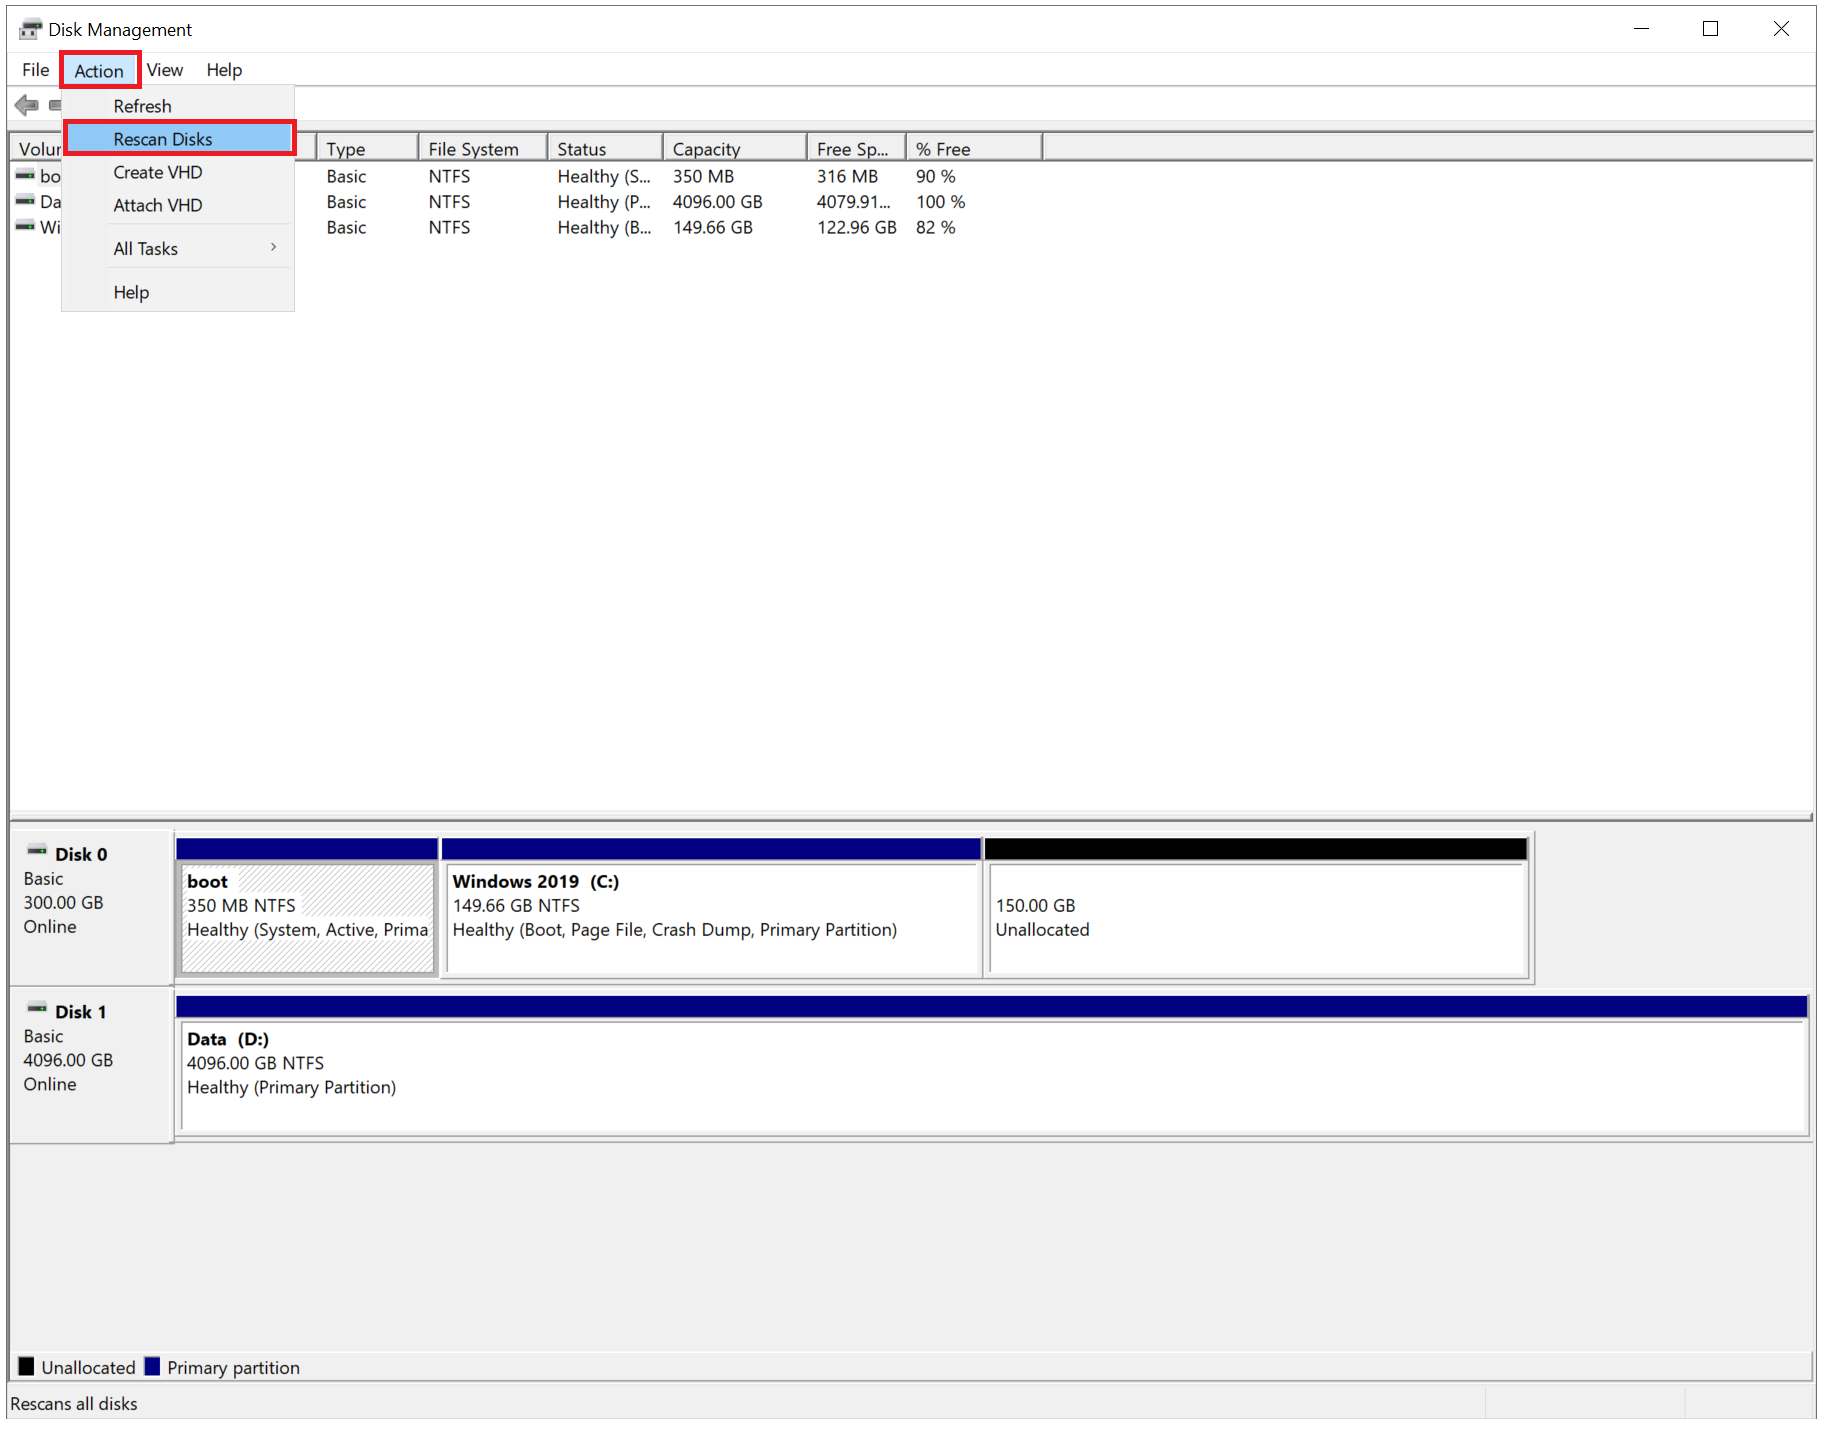
Any free space will be visible as X.00 GB as shown in the screenshot above (disk 1 here is an attached Big Storage).
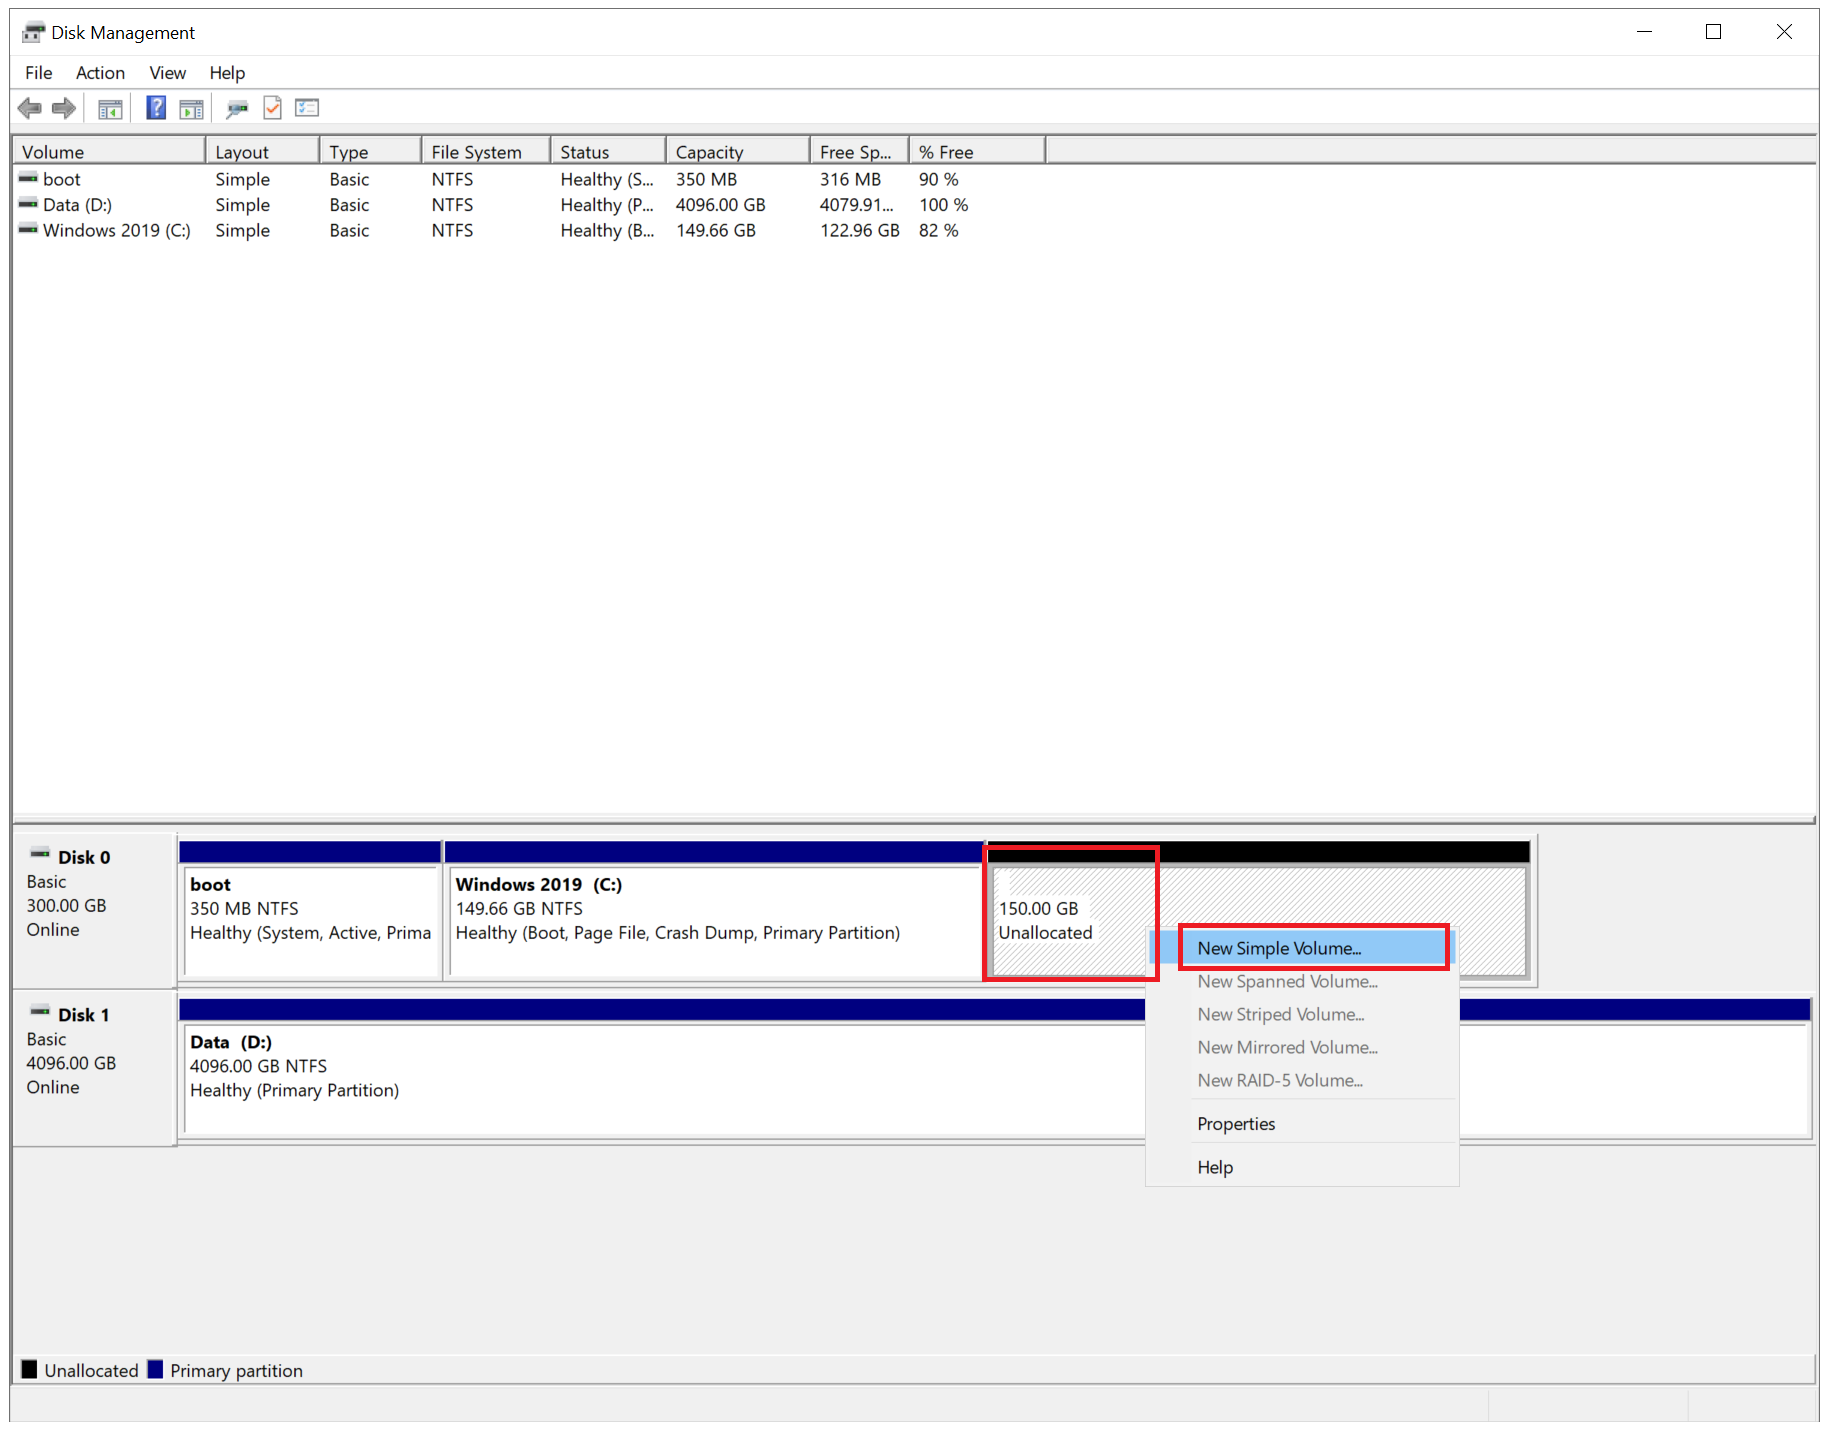
Step 3
Right-click on the free space and then click on 'New Simple Volume'.
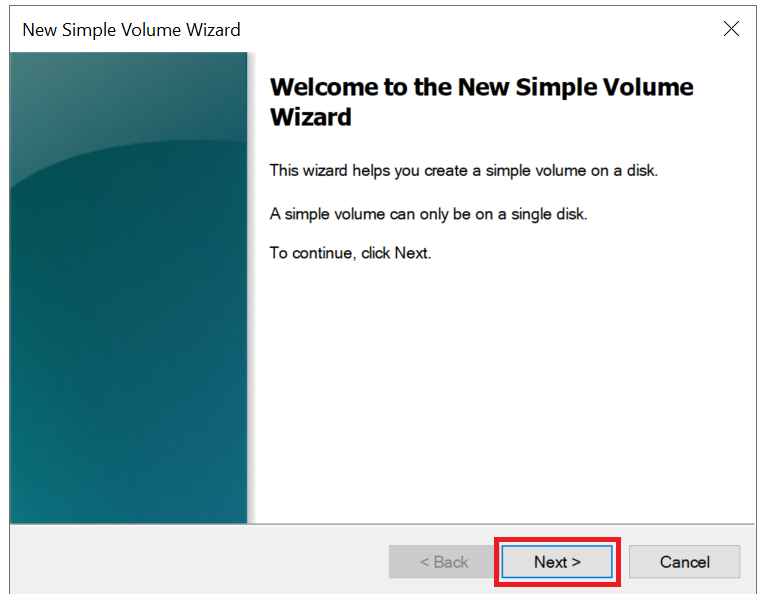
Step 4
The welcome screen of the 'New Simple Volume Wizard' appears. Click 'Next' to start.
Step 5
The New Volume Wizard will, by default, indicate that all available space will be used to expand your existing partition. Click 'Next' to accept this or adjust the amount as desired.
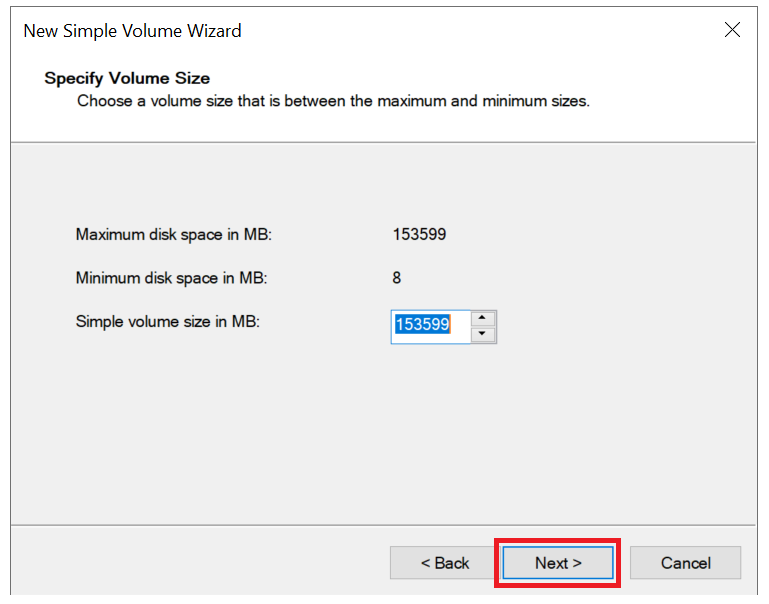
Step 6
Next, assign a drive letter. By default, the next available letter is used.
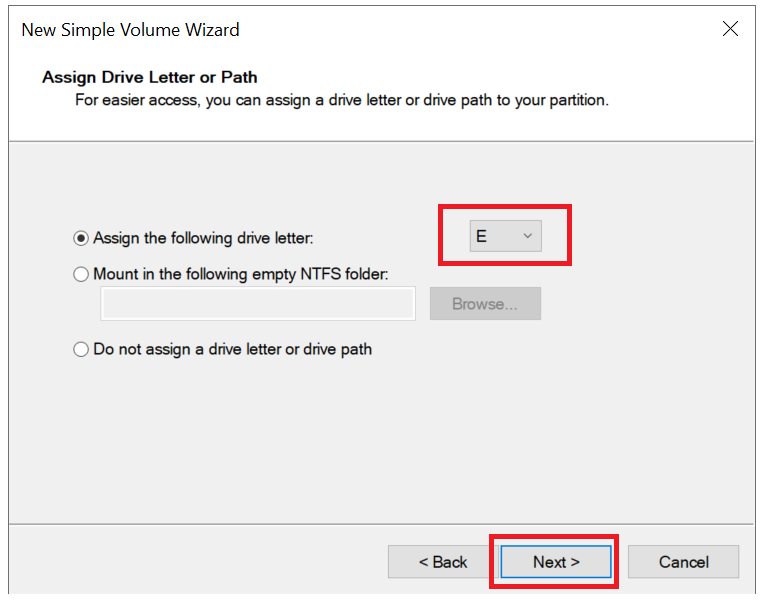
In Windows Explorer, your partitions are visible as drives with a letter designation (e.g., C:\ contains Windows).
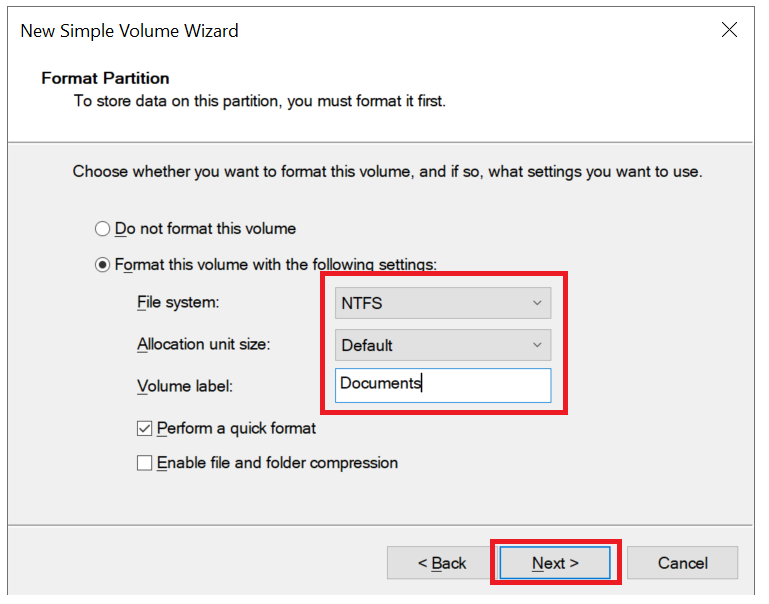
Step 7
The new partition needs to be formatted for use. There are several options available here that you can adjust:
- NTFS is selected as the default file system and we recommend using it for compatibility reasons.
- Allocation unit size: leave this at Default.
- The volume label is the name of the drive and can be adjusted as desired. In Windows Explorer, the description will appear after your drive letter.
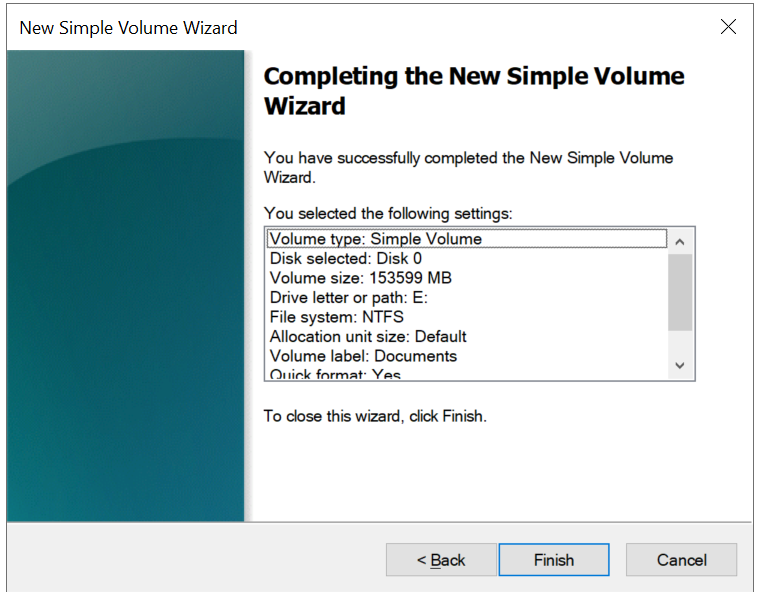
Step 8
Review the information and click 'Finish'.
This concludes our guide on creating a new partition in Windows Server.
If you still have questions after reading this article, do not hesitate to contact our support department. You can reach them via the 'Contact Us' button at the bottom of this page.